If there's one subject that raises questions and sparks passion, it's permaculture. Consider this: in France, on average, that word is typed into Google 49,500 times a month, while the term "Potager" only prompts 14,800 queries.
How to explain that enthusiasm? Is permaculture genuinely revolutionary and going to save the world? Or is it rather because the question “What is permaculture?” has a multitude of answers, more or less precise?
I must admit I'm regretting volunteering to tackle this nebulous topic this morning. But since we're here, let's dive in... 😉
Permaculture: what is it?
Ask Wikipedia and it will answer: “Permaculture is a systemic and holistic method that aims to design systems (for example human habitats and agricultural systems but it can be applied to any system) by drawing inspiration from natural ecology (biomimicry) and tradition ”
That doesn't exactly make things clearer, does it?
To keep things simple, I suggest remembering the definition used by the Ferme du Bec Hellouin, a model of the kind: permaculture, or “permanent agriculture”, is about taking inspiration from nature to meet our needs without degrading the planet.
Ethics and main principles
Ethics have an important place in permaculture and rest on three main principles defined by its founders, Bill Mollison and David Holmgren: care for earth, care for people and fair share.
The method involves viewing the garden as a whole, taking account of what already exists and of the interactions between all its elements: plants, animals, people. It aims towards autonomy by growing edible plants almost anywhere while conserving natural resources and saving time.
In practice, what does permaculture look like?
In permaculture, the range of practices is wide because thinking is in terms of systems where everything is closely linked and techniques must constantly adapt to the garden's evolution. Among the many practices, three seem essential to me:
Design
To make a permaculture system work, the design stage is vital. It organises and connects spaces, takes the dwelling into account and is based on careful observation of what already exists, of nature… It is a starting point that is not intended to freeze the garden; it will evolve as it grows and as experiments are carried out.
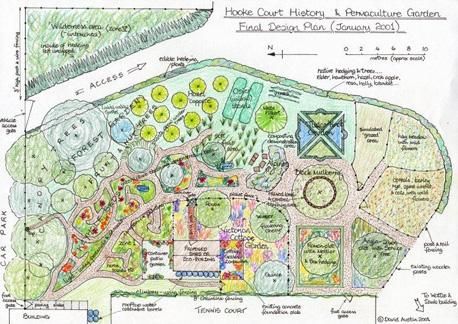
Example of design - source: permaculture.org.uk via Pinterest
Soil care
Traditional deep cultivation is almost absent in permaculture. No deep ploughing with a tractor, but special attention to the living organisms that inhabit the soil, which create humus. As in organic gardening, mulching plays a crucial role in permaculture. It reduces weeding and watering, protects the soil and maintains its fertility. The notion of waste does not really exist: everything is a resource!
Cultivation on mounds
Among the best-known techniques, the mound is emblematic (and there are many recipes: forest-style mound “fourrée”, sandwich mounds and even lasagne beds!). They are appreciated for their ergonomics and allow abundant harvests on a small surface. Reputed to be self-fertile and low-maintenance, they are durable. Once built, they no longer require soil work. Not necessarily useful everywhere, these mounds are nevertheless a godsend in degraded areas and wherever soil depth is insufficient.
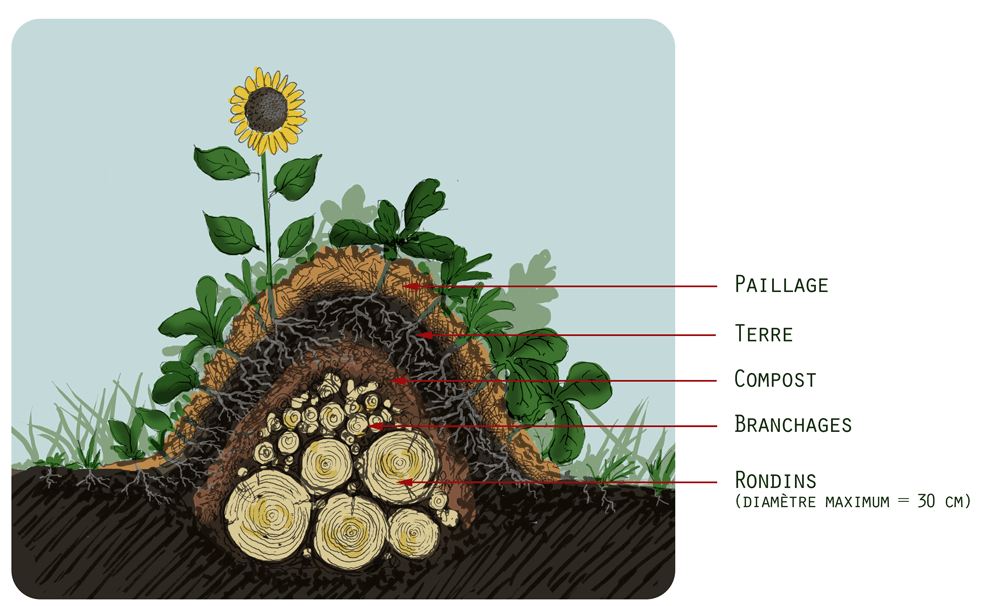
A "hugelkultur" mound model - Source: Fermes d'Avenir
Among the many examples of successful permaculture experiments, I suggest looking up the works of Joseph CHAUFFREY, who harvests nearly 300 kilos of fruit and vegetables per year in Normandy from his 150 m2 garden, of which only 25 m2 are dedicated to the vegetable patch.
Permaculture pitfalls: beware of gurus!
Far more than a gardening or market-gardening method, permaculture is sometimes presented as a philosophy and this is where problems can arise. From philosophy to religion, there is sometimes only a small step… which can be quickly crossed, bringing with it a host of occasionally fanciful, more or less open-minded positions.
Similarly, permaculture does not seem immune to supply-and-demand dynamics. While natural or organic gardening courses are rather rare, the supply of permaculture courses has literally exploded in recent years. Alongside serious centres, numerous e-book offers and online trainings of questionable quality have sprung up. And, as you might expect, this knowledge is not shared for free. Prices can easily reach several hundred euros. Don't be fooled: you don't become a permaculturist in a few hours!
I hope this has given you a brief overview of permaculture… If you have experimented with techniques or are already convinced, please share your experiences!
To find out more :
- "The Permaculture Guide for the Garden" - Carine Mayo - Editions Terre Vivante
- "Essence of Permaculture" - a summary of David Holmgren's concepts and principles (free PDF)
- "Permaculture - Heal the Earth, Feed People" by Perrine and Charles HERVE-GRUYER - Editions Actes Sud
Sites to visit, related to permaculture :
If there’s one subject that raises questions and sparks passion, it’s permaculture. Consider this: in France, on average, that word is typed into Google 49,500 times a month, while the term “Potager” only prompts 14,800 queries. How to explain that enthusiasm? Is permaculture genuinely revolutionary and going to save the world? Or is it rather […]
November is a rather quiet month in the vegetable garden because, unless you live in a very mild region, it's more about "cleaning up" than sowing. As a proponent of moderate effort (both out of conviction and due to lack of time), this is my favourite time to care for the soil and prepare it for a long restorative sleep.
1) Harvest the last vegetables and tidy up the vegetable garden
Wherever sowing green manure was not possible due to plot occupation, I carry out the last harvests. Rather than uprooting the plants, I cut them at their base, leaving the roots in the ground. They will decompose on their own and provide nitrogen to the soil for legumes or Fabaceae like beans. I reserve these precious green waste for later or add them to the compost, then I do a bit of weeding if necessary.
2) Loosen the soil quickly before winter
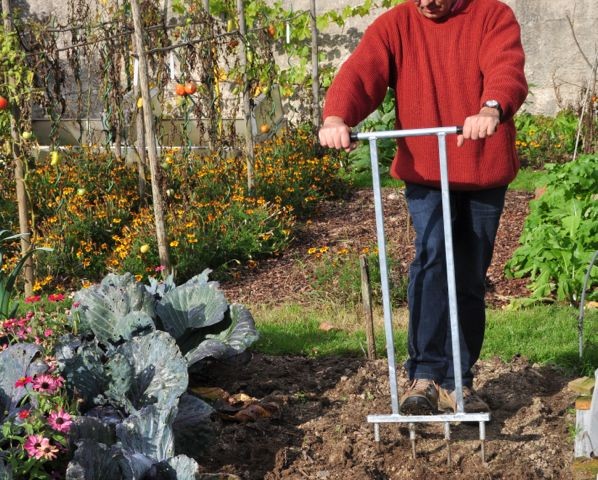
Permanently mulched, the soil in the vegetable garden retains good flexibility. However, the mulches break down like snow in the sun. And I know from experience that my clay-loam soil remains heavy late into spring. That’s why I prefer to loosen it in autumn, even quickly. Firstly because what is done is no longer to be done, but also because I am less likely to disrupt it than if I were to do it hastily and under poor conditions in March or April. For this, I use not a spade, but a "Bio-Spade" or "Grelinette". It’s one of my favourite tools because its long tines loosen deeply without turning the soil, while saving my back.
3) Add organic matter: compost or manure
I try, as much as possible, to respect the crop rotation in the vegetable garden. However, planning the location of each vegetable six months in advance is frankly beyond my capabilities… I reserve the chore of crop rotation for long rainy days when this projection towards spring (as well as my large seed order) comes just in time to lift my spirits!
So I simply determine the plots that should not receive compost (where I will grow broad beans, peas, beans, garlic, and onions next year) and provide a "medium" dose of around 2 - 3 kilos per square metre everywhere else. It will always be possible in spring to add a supplement for greedy crops like squashes. If you lack homemade compost, you can use well-decomposed manure or dehydrated manure, available in pellets.
The compost spread, whether mature or semi-mature, is not buried deeply, but simply spread on the soil and quickly raked in. Indeed, this organic matter is not intended directly for the soil, but to nourish the living beings that inhabit it. And believe me, they know how to find it, and that’s a good thing because if there’s one thing I’ve learned from Denis Pépin’s teachings, it’s that worms work while eating and eat while working. And as long as there’s food on the table, no strikes; they continue to dig their tunnels and bless us with their turicules!
The advantage of this practice, as you will have understood, is to "outsource" the work of the soil while maintaining its fertility, very naturally.
4) Generously mulch the soil
Once the plots are fertilised, mulching can begin. It spreads over several weeks, sometimes until mid-December. The goal is always the same: to protect the soil (from adventive plants, rain compaction, leaching) and, above all, to create a favourable climate for the work of the soil's living beings.
As usual, I use everything that comes to hand: the mowings from my neighbour (I’m a fan of mulching for my lawn), the residues from vegetable crops (free from diseases), straw when I can find it, and especially fallen leaves, a precious material in organic gardening. In case you have none of this, use brown cardboard; it’s not very aesthetic, I admit, but it’s always better than nothing!
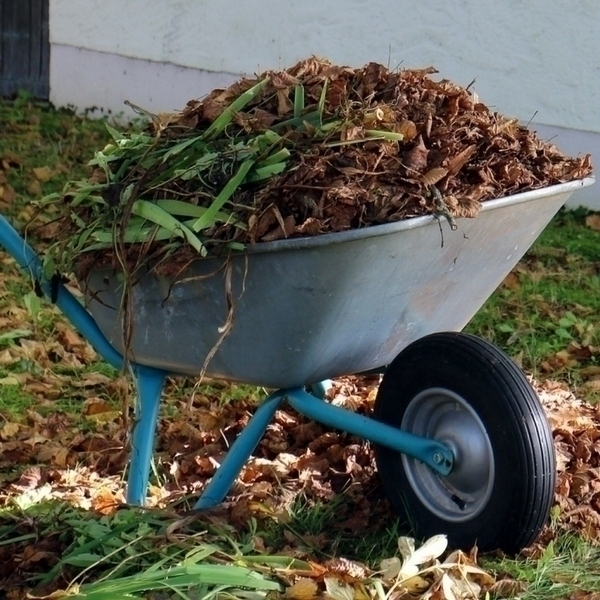
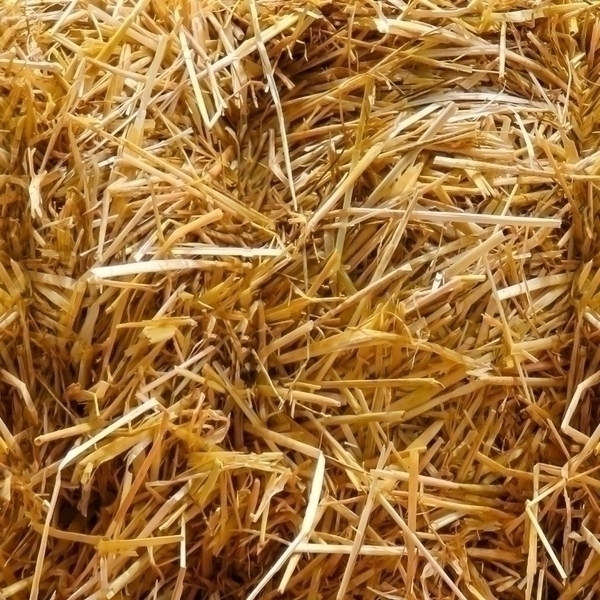
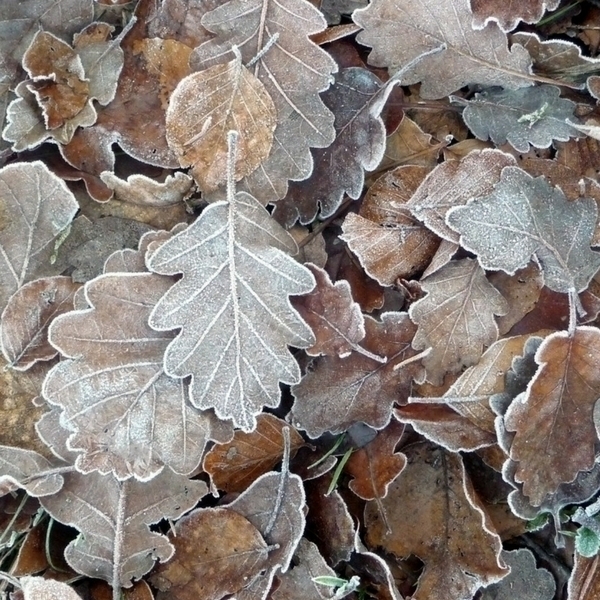
You can simply gather them with a rake or shovel, à la Prévert. It’s a long, tedious technique, but comical in windy weather. For my part, I prefer the mower that sucks them up and chops them (quick and efficient!). However, as our garden is still young, the resource is quickly depleted. So, I’ve taken to calling on the technical services of my village. In autumn, they usually have no idea what to do with them and generally deliver me 3 or 4 cubic metres. I prioritise spreading them in the vegetable garden, but also in the perennial beds and at the foot of hedges.
The mulching is very generous: I accumulate up to 30 cm of leaves on the beds to create a true duvet or anorak. This protection insulates very well from the cold and allows earthworms to continue their work even in freezing temperatures.
In spring, almost everything will have disappeared, and I will only have to plant or move the mulch aside to sow!
And you? How are your autumn tasks in the vegetable garden coming along? Do you have any other techniques to share?
Further reading:
- "Compost and Mulch" by Denis Pépin - Editions Terre vivante
PS: Following various exchanges with Denis Pépin, it seemed useful to clarify: earthworms in the soil do not feed on compost but on decomposing plant debris rich in cellulose (the soft mulches laid on the surface: crop residues, green leaves, soft fallen leaves, fine twigs...). Compost, on the other hand, is intended to provide stable humus and nutrients for the following year's plants. Compost is not necessary before less demanding crops, but only before demanding ones.
Loosening the soil in autumn is essential to aerate compacted soil because the living beings in the soil (especially bacteria) need a lot of oxygen. This is particularly true in autumn when their activity is at its peak. As a result, the soil will be less compacted in spring and easier to work with.
November is a rather quiet month in the vegetable garden because, unless you live in a very mild region, it’s more about “cleaning up” than sowing. As a proponent of moderate effort (both out of conviction and due to lack of time), this is my favourite time to care for the soil and prepare it […]
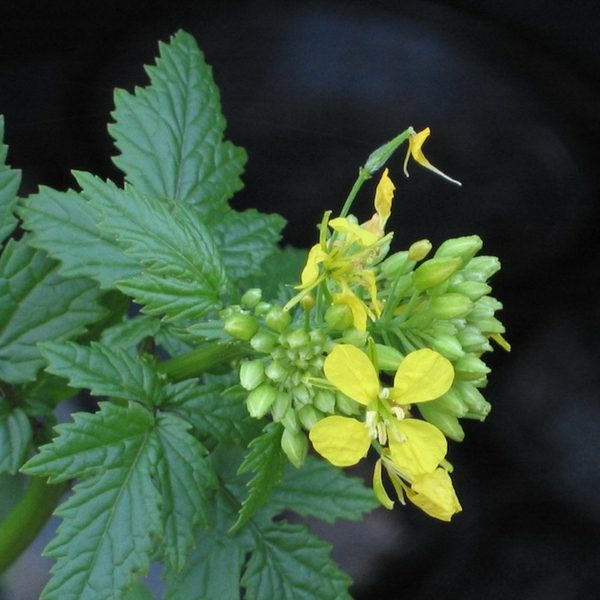
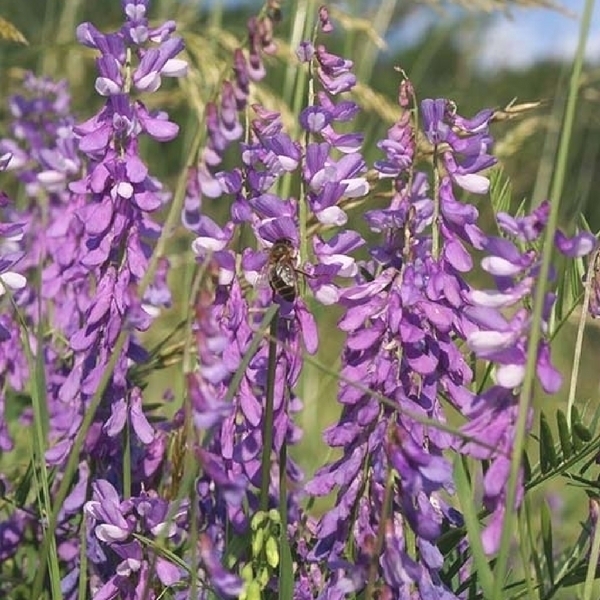
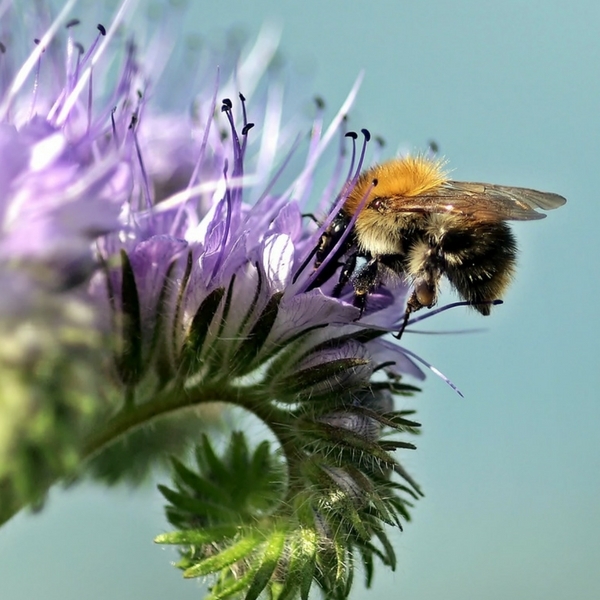
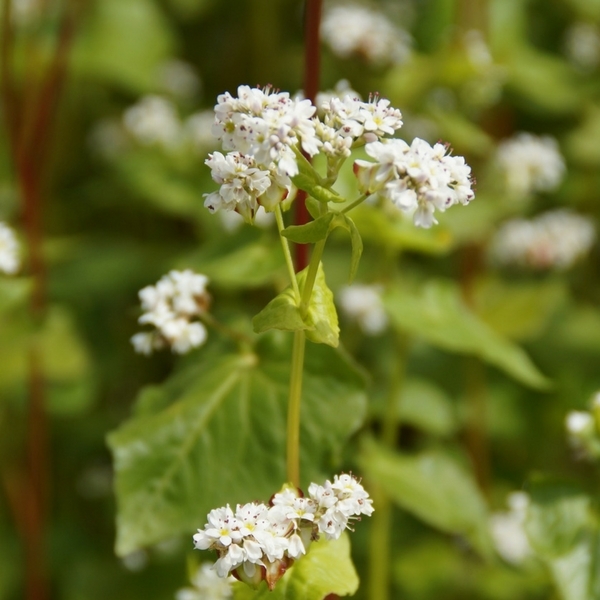
Are you familiar with green fertilisers? White mustard, vetch, phacelia, buckwheat... to name a few, are commonly used in autumn or spring as "green fertilisers".In the organic vegetable garden and the garden in general, growing one or more green fertilisers is part of good practice to maintain soil fertility while giving it a pleasant texture. It’s an ecological way to improve and protect soil… at low cost. And it’s certainly for these reasons they are so widely used in permaculture.
What is a green fertiliser? How does it work?
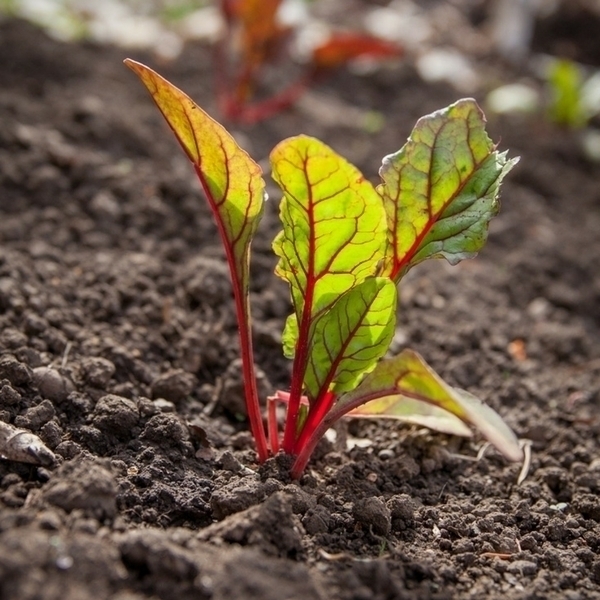
A green fertiliser is a crop that will not be harvested yet is by no means a wasted crop; quite the opposite. Without any miracles (I don’t believe in miracle recipes in the garden), these plants, annuals or perennials, are grown to:
- enrich and return nutrients to soil for the following crop,
- revive degraded soils and manage adventive plants,
- improve texture and protect soil.
How green fertilisers work and why use them
To better understand how green fertilisers work, let’s revisit these three points:
1) green fertilisers enrich and return nutrients to soil
In the vegetable garden, as elsewhere, no magic. Nothing is created, everything is transformed: vegetables do not grow from thin air (well… we’ll talk later about legumes). They draw from soil, to build themselves, various nutrients, including nitrogen, which you supplied via fertilisers, manure and/or compost applied during the crop. In most cases, vegetables "do not eat everything", and some nitrogen remains available in soil after harvest. This nitrogen can be leached by autumn and winter rains and pollute groundwater. That’s where plants used as green fertilisers come in: they take up the residues for their own growth and thus store residual nitrogen in their tissues. Once cut, this nitrogen will be returned to the soil in a form usable by plants thanks to the work of soil organisms (earthworms, decomposer insects) and micro-organisms (fungi, bacteria): this is why they are called "green fertilisers". The same applies to other nutrients needed by plants such as phosphorus and potash.
In the particular case of green fertilisers belonging to the large family of Fabaceae, formerly legumes, such as vetch, bitter vetch or lupin, it’s a little different. As we saw here, they have the remarkable ability to fix atmospheric nitrogen in the soil. They thus transfer nitrogen from the air into soil rather than simply acting as "collectors" like other green fertilisers: they are therefore particularly useful to enrich poor soils.
2) green fertilisers revive degraded soils and limit adventive plants
When starting a garden, whether vegetable or ornamental, you rarely choose your soil. And when building a house, few contractors are mindful of soil health. Compacted by construction machinery or turned over by earthworks, soil is often completely upset, upside down.
Similarly, when deciding to install a vegetable garden, it’s usually in a sunny spot. And, for reasons hard to explain, in 90% of cases that is exactly where couch grass, dock and knotweed thrive.
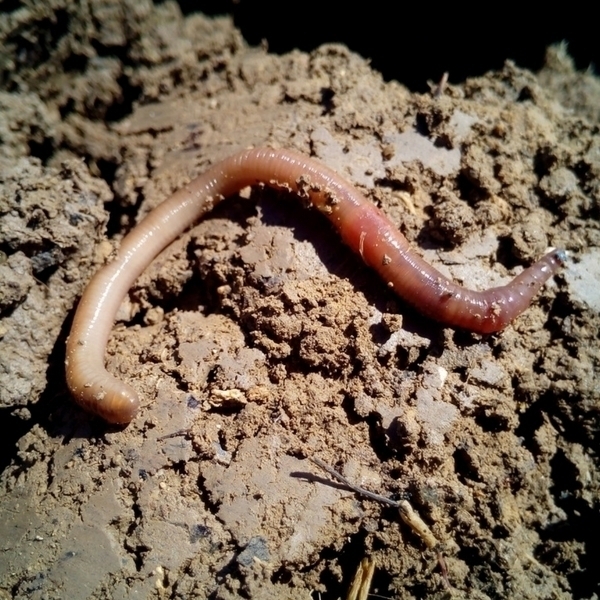
In both cases, a green fertiliser can be sown beforehand to revive soil, decompact it partly through root penetration and partly through the work it provides to earthworms that feed on it. Earthworms are the best-known and most visible soil organisms, but many others will have their activity stimulated by green fertilisers. Above all, they will compete with (and often beat!) adventive plants. Among the most effective are buckwheat and rye.
3) green fertilisers improve texture and protect soil
Nothing is worse than bare soil: sandy soil becomes a sieve with wide holes, letting nutrients run away; heavy soil compacts quickly and turns into concrete. Mulching is an effective protection technique. However, at certain times of year green waste can be in short supply, as can time to shred and spread it.
Green fertilisers are then a godsend. Sowing is quick and their vegetation acts on two levels:
- above ground, as a vegetative cover, protecting soil from raindrop impact, leaching and runoff;
- below ground, because their root system exerts a strong mechanical action.
Which green fertiliser to choose?
Choice of green fertiliser depends on several criteria:
- sowing period,
- desired effect (nitrogen supply, decompaction…),
- crop planned after the green fertiliser as it must fit into crop rotation. For example, before planting brassicas we avoid white mustard because both are from the Brassicaceae family. Phacelia is very flexible in use because it belongs to the Hydrophyllaceae family, which contains no vegetables.
To help you, here is a small table listing main green fertilisers:
| Plant | Botanical family | Cycle | Sowing | Benefits |
| Camelina | Brassicaceae | annual | April to June | decompacts and aerates soil, suppresses weeds - hardy, suited to poor soils |
| Fenugreek | Fabaceae (legume) | annual | late March to late July | enriches soil with nitrogen - suited to calcareous soils and dry climates |
| Alfalfa | Fabaceae (legume) | perennial | March to September | for long-term establishment, decompacting |
| White mustard | Brassicaceae | annual | March to September | traps nitrates, fast growth, smothers weeds |
| Phacelia | Hydrophyllaceae | annual | April to August | structures soil - melliferous |
| Sainfoin | Fabaceae (legume) | perennial | March to June | very hardy (−10 °C) - fixes atmospheric nitrogen - ideal on shallow, calcareous and dry soils |
| Buckwheat or Black wheat | Polygonaceae | annual | May to June | cleansing, decompacting, perfect for heavy, acidic soils and humid climates |
| White clover, Purple clover | Fabaceae (legume) | perennial | March to May | long-lasting cover, fixes nitrogen in soil, melliferous |
| Crimson clover | Fabaceae (legume) | annual | August to September | fixes nitrogen, melliferous, attractive red flowers |
| Rye | Poaceae (grass) | biennial | September to November | cleansing, good winter cover |
| Spring vetch | Fabaceae (legume) | annual | March to April | abundant growth - fixes atmospheric nitrogen, attractive blue flowers |
| Hairy vetch | Fabaceae (legume) | annual | August to October | suitable for heavy and poor soils |
Finally, know that green fertilisers can be used alone or mixed together in an improving mix.
In practice: sowing and terminating green fertilisers
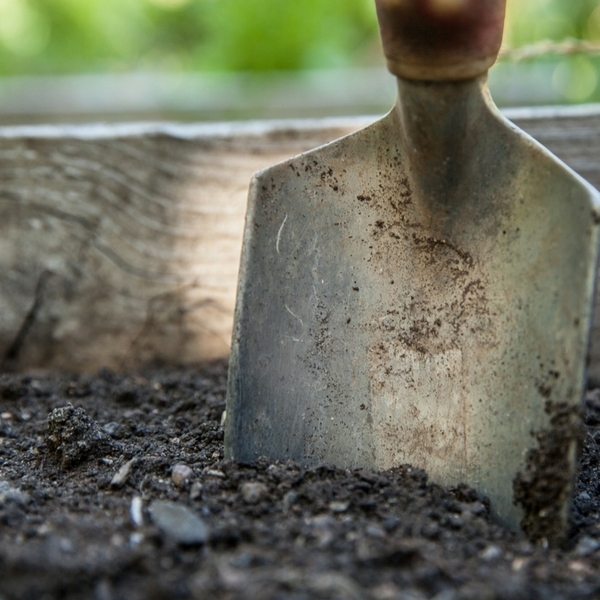
Sowing green fertilisers is simple and quick. Undemanding, they will do with soil that has been roughly decompacted and raked. Sowing is done broadcast, observing recommended seed rate per m². The crop usually does not require watering.
Termination of the green fertiliser occurs naturally by frost or by cutting, more or less quickly (in all cases, before seed formation… to avoid volunteer seedlings).
Once terminated, the green fertiliser can, depending on choice, be:
- chopped then incorporated into the superficial layers of soil (do not bury organic matter, risk of wireworms), the following crop can then be planted only three weeks later,
- left in place as a mulch, it will decompose on site in a few weeks,
- collected and added to the compost, for rapid reuse of the plot.
To conclude, thank you for reading to the end 😉 You now know enough about green fertilisers to forget the traditional "blue fertiliser"... Feel free to ask any questions I haven’t answered!
Are you familiar with green fertilisers? White mustard, vetch, phacelia, buckwheat… to name a few, are commonly used in autumn or spring as “green fertilisers”.In the organic vegetable garden and the garden in general, growing one or more green fertilisers is part of good practice to maintain soil fertility while giving it a pleasant texture. […]
For several years, chickens have been moving into gardens and that's a very good thing! They lay tasty fresh eggs, reduce household waste and, on top of that, bring a very bucolic touch to the garden. However, to protect your plants from their tireless scratching and because a cosy home of their own is better than making themselves at home everywhere, it's sensible to plan an enclosure.
By way of anecdote, when we started out as naïve new country-dwellers, we let our hens roam freely until coexistence became complicated. Very tame, they regularly burst into the house and, at bedtime, rather than return to the henhouse, they settled comfortably on the windowsill. Tired of putting them to bed every night and worried they might end up sprawling on the sofa or laying an egg in an improperly closed cupboard, we soon created an enclosed space... a landscaped one, if you please!
So, if you too are the proud owner of hens, here is a selection of trees and shrubs to create them a little corner of paradise.
In the run, chickens need security
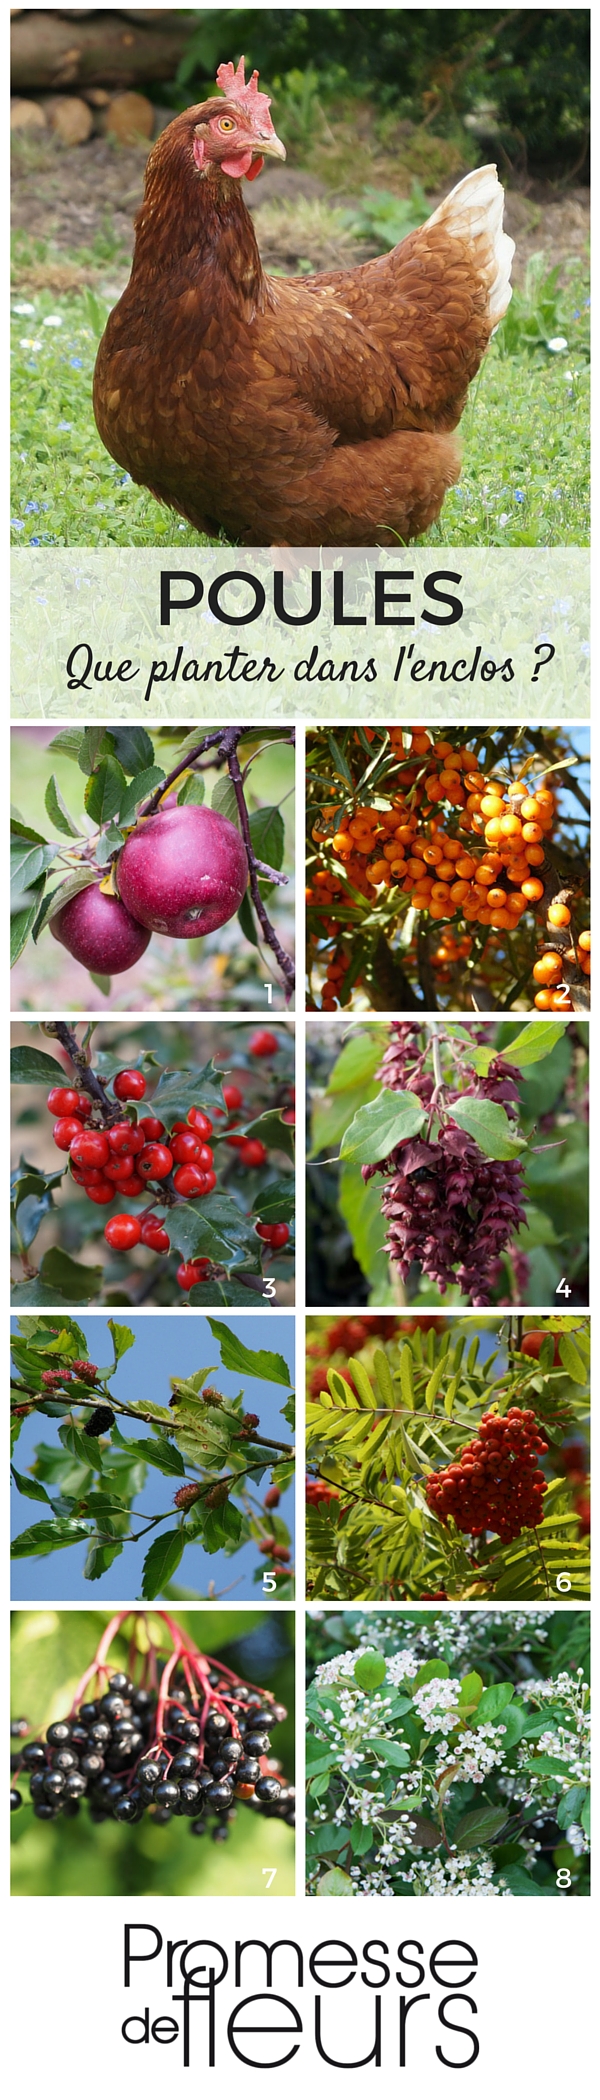
1) Apple tree 2) Sea buckthorn 3) Holly 4) Pheasant tree 5) White mulberry 6) Rowan 7) Elder 8) Aronia
Stray dogs, foxes and even stone martens are common in the countryside. At our place, rather than install a high fence buried into the ground and/or electrified, we fenced simply and chose to let brambles grow. Their dense, thorny growth provides effective protection. However, their exuberant growth requires frequent pruning. As an alternative to secure the run, consider defensive hedging shrubs: Pyracantha, common holly and sea buckthorn are perfect choices.
Chickens catch lice… and the henhouse too!
Hens can pick up lice, which live in their feathers (the "biting lice") and also infest the henhouse. From experience, I can tell you that red mites are an absolute nightmare. These tiny creatures invade the accommodation and feed on poultry at night. To prevent them or at least reduce risk, we use, in addition to sodium bicarbonate or "bi-poux", several dried aromatic herbs as bedding: mint, lavender, tansy and even wormwood. It's a fairly effective natural protection.
Chickens love sun, but shade too! And they are greedy…
Chickens enjoy sunbathing in spring as much as napping in the shade in summer... a bit like us, minus the mojito.
Ideally place hens in an orchard, because they are unrivalled at finding pests, notably the dreaded codling moth (and, a note for beekeepers, the Asian hornet, see here). If you don't have an orchard, planting a shade tree is a thoughtful gesture. The white mulberry, ideal in the south, and the rowan provide cooling shade and also edible fruit for hens. The drawback is that a tree takes several years to provide shade: much faster-growing, black elder proves a good choice.
In place of or to complement these trees, you can also plant various fruit-bearing shrubs such as: Aronia arbutifolia, pheasant tree, currants, raspberries or other soft fruits. Chickens adore these and they provide valuable vitamins.
Finally, in the vegetable patch we always sow a few too many lettuces: they require little work, cost nothing and delight our eight hens… in style!
Further reading :
- Small Encyclopaedia of the Hen and the Henhouse - Michel Audureau - Terre Vivante
- Raising Chickens in My Garden - Michel Audureau - Ulmer
For several years, chickens have been moving into gardens and that’s a very good thing! They lay tasty fresh eggs, reduce household waste and, on top of that, bring a very bucolic touch to the garden. However, to protect your plants from their tireless scratching and because a cosy home of their own is better […]
Homemade compost is traditionally collected and used in spring and autumn. Upon opening the bin, for some, it’s the time for disappointments. Instead of black soil, one finds all sorts of things: undecomposed materials, more or less identifiable ("Oh, a blue, hairy orange!"), greenish and slimy clumps, and even young plants ("Look, last year's potato is having babies..."). All of this emits an unpleasant odour. I confess, I have a bit of experience. In short, everything but good compost that your vegetable garden, and your garden in general, desperately needs!
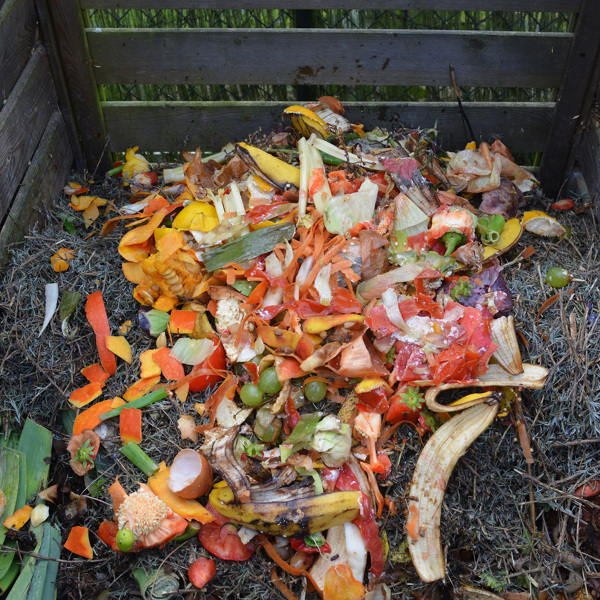
Why? It’s simple: sometimes distributed for free, in order to reduce household waste volume, the composter is often used as a mere rubbish bin. A fatal mistake.
What is good compost, and what is it for?
Good compost is primarily well decomposed. It resembles a bit of soil, is dark, almost black, and smells pleasantly of the undergrowth. There may be a few coarse elements, but overall, the composted materials are no longer identifiable.
Beyond its appearance, good compost is especially a top-quality organic fertiliser. Balanced, with no excessive nitrogen content, it fertilises effectively yet gently and acts as a ferment. Rich in microorganisms, it maintains biological activity and thus soil life. In summary, it is the essential ingredient for the formation of humus, which is itself the cornerstone of any respectable natural and organic garden.
How to make good compost?
Let’s be clear, making excellent compost is not within everyone’s reach; that’s why there are training courses for Master Composters. Nevertheless, producing acceptable compost is not complicated.
So, to finally put an end to failed compost, here are 5 key principles to follow:
1) The right location
The best location for a composter is in shade or partial shade, protected from the summer heat. For obvious practical reasons, but also because a well-managed compost doesn’t smell, place it close to the house or in an easily accessible spot.
2) A good carbon/nitrogen ratio
To obtain balanced compost, it is important to maintain a good proportion of each type of waste. Essentially, to the so-called "balanced" waste, add, mixing them, 2/3 "brown" to 1/3 "green".
Here are some examples to help you:
| Balanced waste |
|
| Green waste = nitrogen dominant |
|
| Brown waste = carbon dominant |
|
NB: Contrary to what some may say, no biodegradable (and non-polluting, of course) waste is strictly prohibited in compost; it’s all a matter of dosage and balance.
3) Small pieces
To "digest", decomposing organisms and insects (yes, the work doesn’t do itself!) need to be fed regularly, but with small pieces. Therefore, waste should be chopped: with a knife for peels, a few cuts with pruning shears for garden waste, a mower for leaves, or a shredder for pruning waste. You will be greatly rewarded for these efforts with the rapid maturation of your compost.
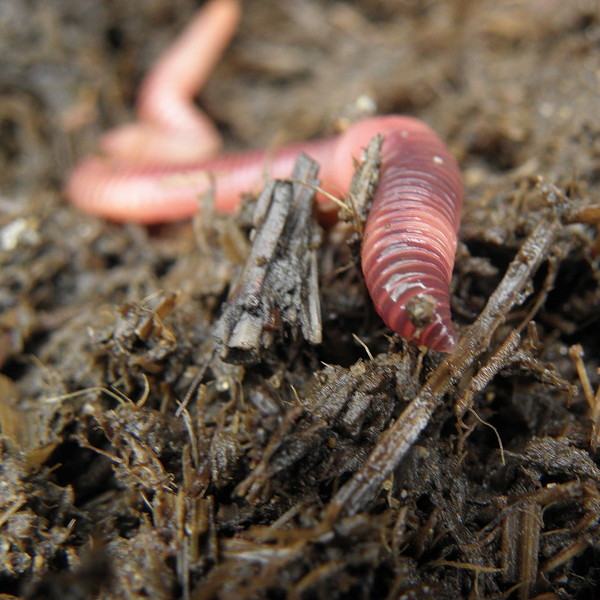
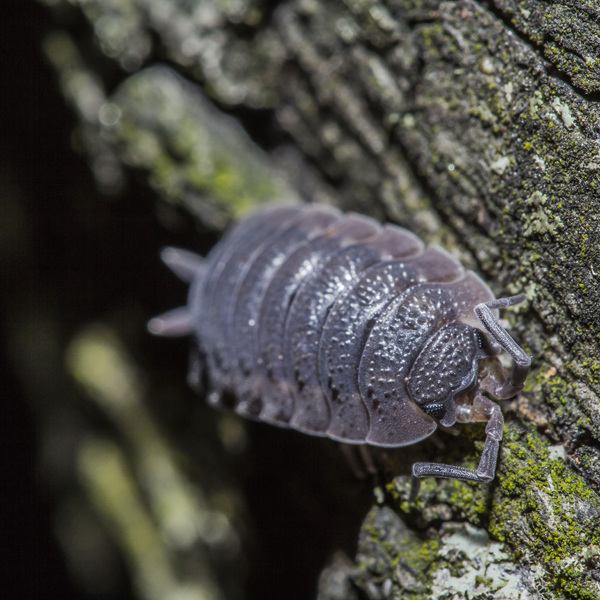
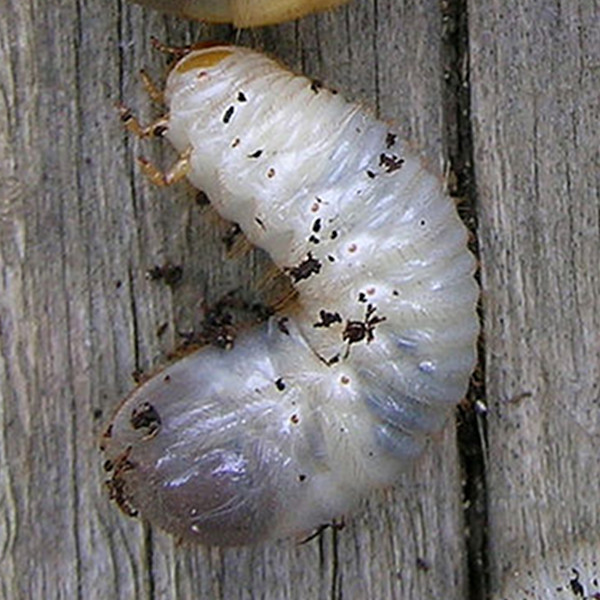
A brief overview of compost inhabitants:

4) Air: regular turning
Without air, there is no decomposition, just fermentation… Hence the essential nature of regular turning, ideally with each addition. For this, use a simple fork or, better yet, in a silo composter, a compost turner. This tool, shaped like a large spring, allows for both mixing and aerating the pile.
5) Optimal moisture (not too much, not too little)
By their nature, your waste will be wet ("green") or dry ("brown"), which should suffice to maintain optimal humidity, provided you remember to close the composter lid. However, during hot weather, materials may dry out: check the moisture and, if necessary, water just enough... as the waste must not be soaked, hence the usefulness of the lid!
You are now ready to create good compost this year... and to go further, feel free to consult our advice sheet: "Green waste: recycling and valorisation solutions in the garden".
Homemade compost is traditionally collected and used in spring and autumn. Upon opening the bin, for some, it’s the time for disappointments. Instead of black soil, one finds all sorts of things: undecomposed materials, more or less identifiable (“Oh, a blue, hairy orange!”), greenish and slimy clumps, and even young plants (“Look, last year’s potato […]