


Long considered the symbolic plant of All Saints' Day, the Chrysanthemum is no longer confined to cemetery displays! With its daisy-like single blooms or perfectly round pompons (the famous "pomponettes"!), it captivates us with an autumn flowering that shines brilliantly until the first frosts. If you're particularly fond of it, why not try propagating it to obtain vigorous young plants? Chrysanthemum cuttings are easy to succeed with!
Discover when and how to take chrysanthemum cuttings very easily, thanks to our illustrated tutorial.
When to take chrysanthemum cuttings?
Taking chrysanthemum cuttings will allow you to obtain fresh, vigorous plants identical to the parent plant, which loses vigour after a few years. Chrysanthemum cuttings are taken in early spring, around April-May, from green shoots, creating what are called herbaceous cuttings.
Required materials
To take your chrysanthemum cuttings, you'll need:
- a tray or small pots (our pots made from plant fibres are 100% natural and biodegradable!)
- a pencil to make holes in the compost without breaking the cuttings
- a sharp pruner, previously disinfected with alcohol to prevent disease spread
- a mini greenhouse or plastic bag
- a spray bottle
How to take chrysanthemum cuttings using the 'enclosed' method?
The secret to successful cuttings is maintaining sufficiently moist compost: it should never dry out nor be waterlogged. It's preferable to let it dry slightly between waterings.
- Prepare small pots, a greenhouse with biodegradable growing kit or a tray at least 10 cm deep filled with an equal mix of seed compost and sand;
- Thoroughly moisten this growing medium;
- Choose healthy, green, vigorous shoot tips;
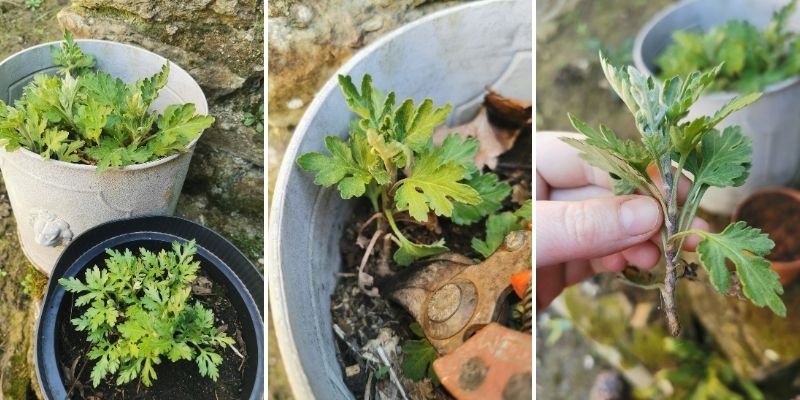
Select shoots for cuttings from the parent plant and take cuttings about 10-15 cm long
- Using pruners, take cuttings from your parent plant - young green leafy shoot tips about 10-15 cm long. They should have about ten leaves. Cut just below a node;
- Recut the cuttings just below a leaf, and remove all leaves from the lower half of the cutting (preparation). Be careful not to damage the stems as these young shoots are fragile;
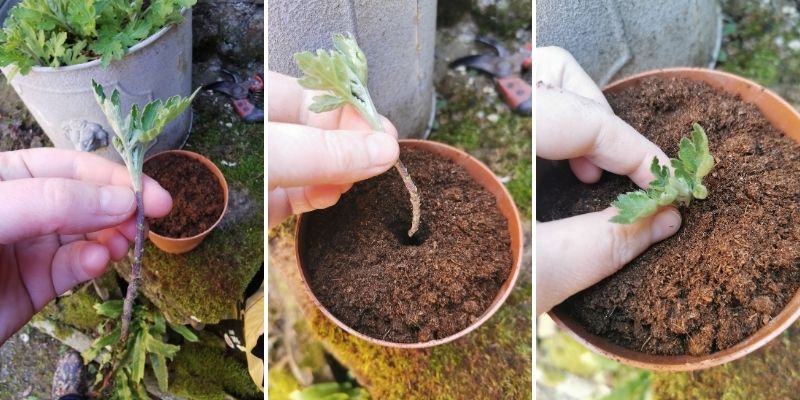
Prepare the cutting, make a hole in the compost then insert the cutting
- Reduce upper leaves by half to limit evaporation;
- To encourage root growth, optionally dip the stem bases in rooting hormone;
- Use the pencil to make holes in the compost then insert the cuttings so the leafless base is well buried;
- Firm down and water lightly;
- Place cuttings in an enclosed environment - in a mini greenhouse with lid closed or simply under a plastic bag to create a warm, humid atmosphere conducive to root development;
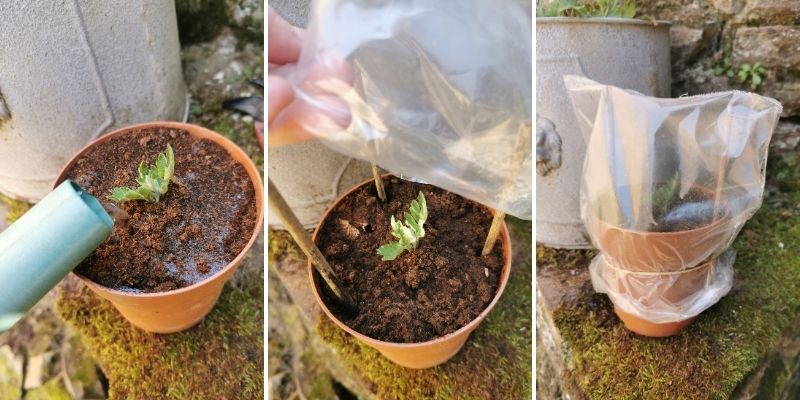
Water then cover the cutting with clear plastic held by 3 small sticks and an elastic band to maintain the enclosed environment
- Place your cuttings in a bright location, but out of direct sunlight, ideally at 16-18°C;
- Ventilate occasionally to allow air circulation and prevent mould;
- Water as needed to keep the compost moist;
- Cuttings show signs of success after about 3 weeks;
- Pot on when they reach 12 cm and keep them warm through their first winter;
- Planting in the ground or pots can be done the following spring;
- Pinch them to encourage branching and flowering.
To go further
Discover our advice sheet: "Propagation by cuttings: all about different techniques and our tips for successful cuttings"


Comments