


Fern manure is used as an insect repellent, particularly against aphids, as well as slugs and snails, and as a curative or preventive treatment against certain fungal diseases (powdery mildew, rust). It also makes an excellent organic fertiliser and compost activator. It's a natural, homemade alternative for caring for your plants, whether in the vegetable garden or ornamental garden. Ferns are multi-functional plants, acting as insecticides, insect repellents, antifungals and fertilisers.
Discover how to prepare an entirely natural fern manure and how to use it, either neat or diluted!
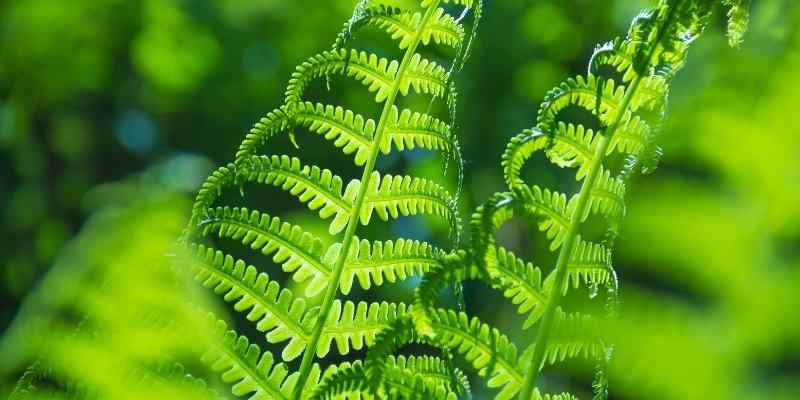
The benefits of a simple fern will surprise you!
Equipment needed
To make your fern manure, you'll need:
- A pair of secateurs
- 2 buckets or other non-metallic containers to avoid oxidation (one for preparation, the other for filtration)
- a clean tea towel or piece of sheet
- potato nets
- a stick
- two opaque, airtight 5-litre containers or empty milk bottles
- a pair of gardening gloves
- a funnel
- kitchen scales
- a tablespoon
Which fern to use?
It is made from wild fern leaves. The bracken fern, in Latin Pteridium aquilinum (also called the common fern) is the most suitable for preparing the manure. It is a vigorous fern, rarely cultivated in our gardens as once established, it quickly becomes uncontrollable and is more often considered a weed. It grows spontaneously, even colonising our woodlands, forest edges or the sides of wild paths. Take advantage of a walk in the woods to gather your harvest! As it is not a protected species, picking is permitted and even recommended, as you'll be helping to manage forests without harming nature! The male fern (Dryopteris filix-mas) has the same properties.
When to make fern manure?
Harvesting is ideally done between June and mid-August, when the ferns are still green. Wear gloves as the fronds can be sharp and harvest them with secateurs. Avoid picking fronds with small brown balls under the leaves, as these are the spores that allow the plant to reproduce, unless you want them to seed everywhere you've poured the manure.
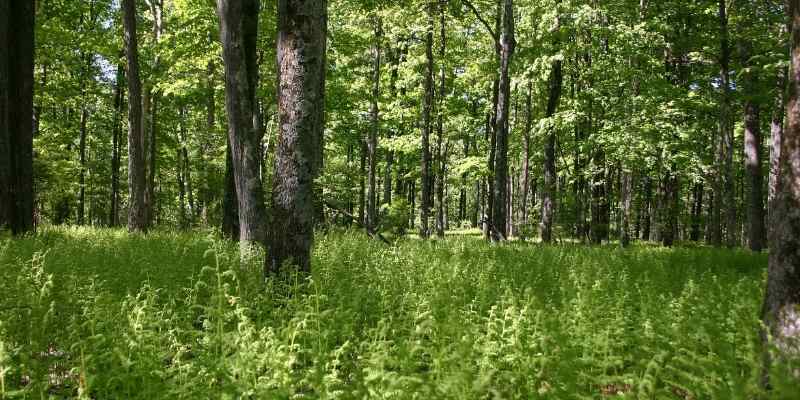
The ideal is to gather your harvest during a walk in the woods...
The recipe
Fern manure is obtained by fermenting the plant in cold water. Simply remember the following dosage:
- 1 kg of fresh fern leaves
- 10 litres of rainwater
You can multiply or divide these quantities according to your needs, as long as you keep the same proportions.
Preparing the manure
Preparation takes around two weeks. The outside temperature should be at least 15°C but below 25°C; if it's too hot, the manure may rot. If you use tap water, let it stand for 48 hours in the open air before using it to allow the chlorine to evaporate.
- Start by weighing your fern leaves using kitchen scales
- Once you have the required weight, you can either roughly chop the fresh fern leaves with secateurs (still wearing gloves), or place them whole in one or more large potato nets, which will make them easier to retrieve during filtration
- Put them in your bucket
- Pour 10 litres of non-calcareous water over the ferns, mix everything together and then cover the bucket with the tea towel
- Place in the shade in a cool place to avoid putrefaction and away from your home as the manure can give off an unpleasant smell
- Leave to macerate like this for around 15 days
Stirring and filtration
Be sure to stir the mixture once a day for around ten minutes with a stick to encourage fermentation.
The fermentation time depends on the ambient temperature and takes around 10 to 15 days. The manure is ready when no more bubbles appear on the surface of the liquid after stirring. It's then time to filter it to prevent it from putrefying.
- Remove the fern leaves and add them to the compost or use them as mulch against slugs
- Stretch a cloth over the second container, securing it with string under the rim of the bucket to keep it in place, and pour the manure over the cloth
- You can scrape the cloth a little with a tablespoon to speed up the flow
- You should obtain a clean liquid, free of impurities, especially if you want to use it in a sprayer
- Using a funnel, transfer the manure into your containers or bottles and screw the lids on tightly
How to store your manure
Stored away from heat and light in a cool place, your fern manure can be kept for a year. If the container swells, don't worry, simply open it to let the fermentation gases escape.
When and how to use fern manure in the garden?
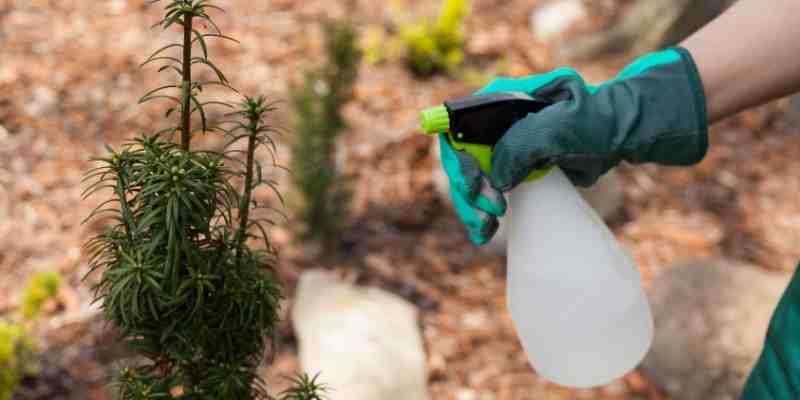
Fern manure can be used from April-May until September, but more generally whenever plants need it and treatment is required. Avoid applying it when rain or a storm is imminent, as the water would wash away your application. Ideally, spraying should be done early in the morning or in the evening, as the sun sets. As UV rays tend to degrade the active ingredients in this natural concentrate, never spray it in full sunlight.
Depending on the use, this preparation can be used neat or diluted with rainwater. Generally, it is used at a dilution of 5 to 10%. Once your diluted manure is ready, place it in a sprayer or watering can. Almost all plants can benefit. It can be applied to vegetable gardens, orchards and ornamental gardens alike. Fern manure can be used as a preventive or curative treatment.
How to proceed?
- As a preventive measure: dilute to 5% (10 cl of neat manure for 5 litres of water) or 10% (1 litre of neat manure for 10 litres of water)
- As a curative treatment: spray the neat manure onto diseased plants. Repeat the treatment twice a week for 15 days.
- As a foliar spray: spray the foliage, underneath and on top
- As a watering: directly at the base of the plants concerned
Why use it?
- Against aphids and other harmful insects: fern manure is a broad-spectrum repellent. Spray this manure diluted to 5% onto the leaves of vegetables, fruit trees or flowering plants every 15 days to repel black and green aphids as well as vine leafhoppers, scale insects and red spider mites. In the event of a severe attack, spray the neat manure onto the affected plant and repeat the treatment at weekly intervals if necessary. You can add a spoonful of black soap (15g/litre) to the mixture to increase its effectiveness.
- Against soil larvae: as a preventive measure, particularly to repel wireworms from potatoes, before planting your tubers, water the soil with a watering can of fern manure diluted to 10%. Repeat the operation at weekly intervals and then plant. Fern manure is also effective against many soil parasites.
- Against slugs and snails: as the fern leaves decompose, they release formaldehyde, a chemical compound that repels and poisons gastropods. Spray at the base of your vulnerable plants, but not excessively, or spread a mulch of ferns.
- Against fungal diseases: fern manure has a preventive and curative action against certain fungal diseases such as rust and powdery mildew: spray it neat onto the affected plants. Repeat the treatment regularly in hot, humid weather, two factors that encourage the appearance of fungi and fungal diseases.
- As an organic fertiliser: ferns are rich in nitrogen, phosphorus, potassium, silica and calcium. This manure is very useful for fertilising and stimulating root development. Make a 10% dilution directly in a watering can and then water at the base of fruit and vegetables at planting time, then regularly throughout growth, approximately every 2 weeks. It is also an excellent compost activator.
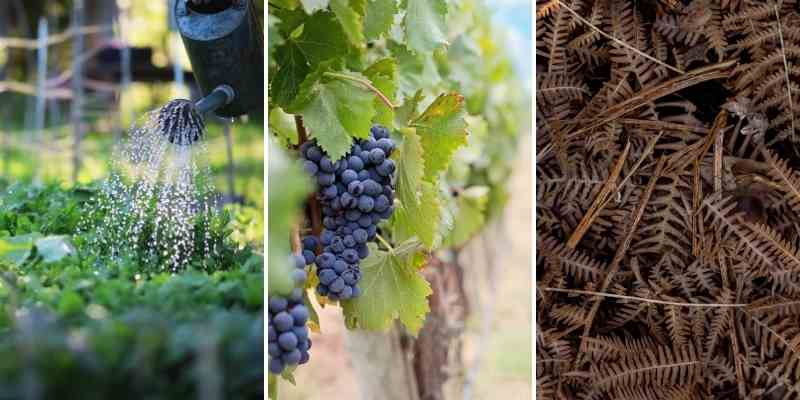
Fern manure is very effective in vegetable gardens and on vines. Don't hesitate to also mulch your sensitive plants with ferns.
→ Discover our video on permaculture with Olivier and Pascal from Lessines


Comments