


The Aucuba Japonica is a beautiful and highly decorative bush thanks to its variegated and evergreen leaf. Female plants of the Japanese laurel also offer lovely red ornamental berry in winter. Undemanding, this shrub is very hardy and easy to grow, in addition to being disease-resistant. This small tree is ideal in a semi-shaded or shaded hedge, alongside evergreen and deciduous bushes, or at the back of flower beds. To propagate this tough bush in the garden, simply take cutting.
Discover our tips and technique for easily propagating Aucuba by cutting.
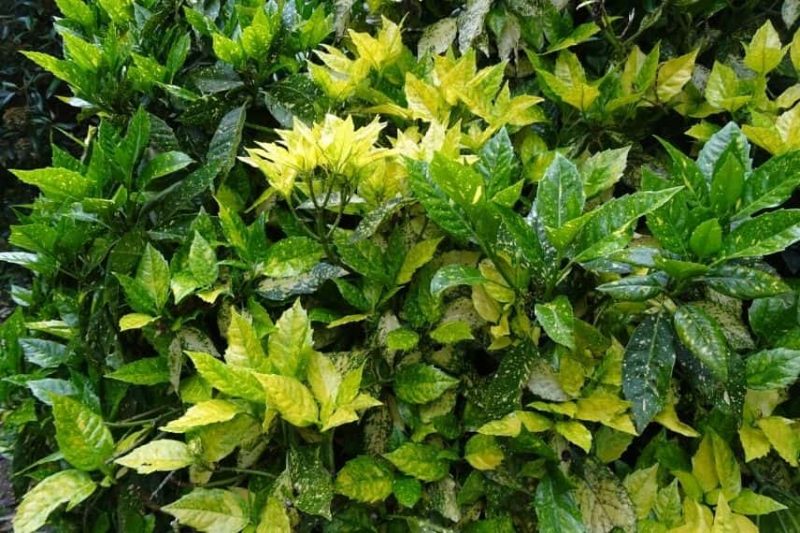
Aucuba japonica
When to take cutting from an Aucuba?
The best time to take cutting from Aucuba is around mid to late summer, between August and September. Indeed, semi-ripe cutting benefit from a very sunny period and enough warmth to develop their root system. This method is the simplest to succeed and results can be quickly observed.
Note that all Aucuba cultivars can be propagated by cutting.
Equipment needed for Aucuba cutting
To make your Aucuba cutting, here is the necessary equipment:
- one or several pots or a seed tray or biodegradable bucket
- a knife
- a secateurs
- a cloche or a mini greenhouse or a bottomless plastic bottle or a plastic bag to create a closed cutting environment
- a spray bottle
- seed and potting compost or a mixture composed of: 1/3 horticultural compost + 1/3 seed compost + 1/3 horticultural sand
- a pencil
- a rooting hormone (facultative)
How to take cutting from Aucuba?
Before starting: remember to disinfect your secateurs with alcohol to avoid any disease transmission between your plants.
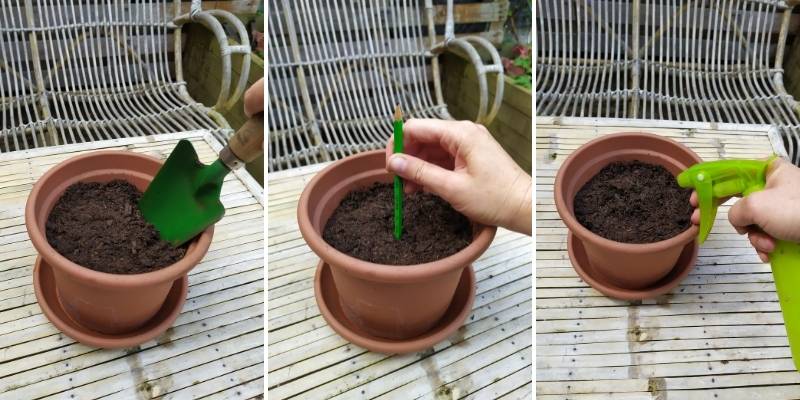
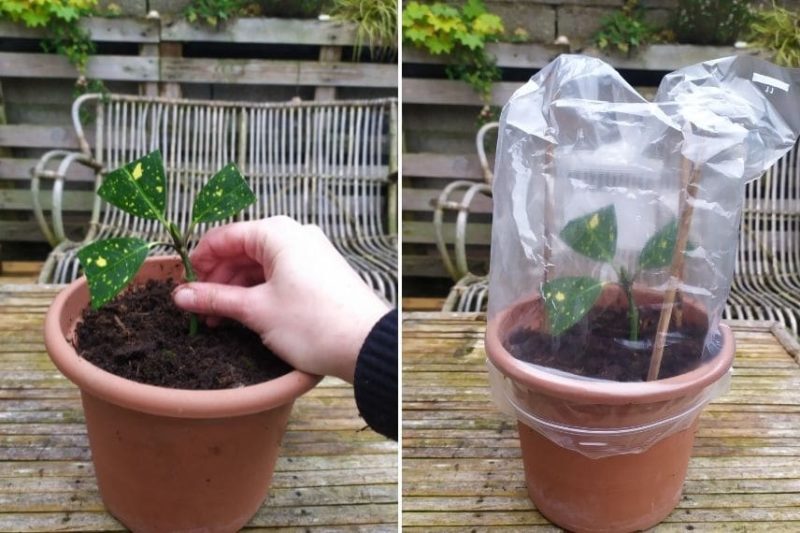
1- In a pot, pour seed compost until 2 cm from the rim, then firm the medium with your hands;
2- Fill your spray bottle with rainwater and moisten the compost well;
3- Using a pencil, make one or several holes in the soil, 4 to 5 cm deep for your cutting;
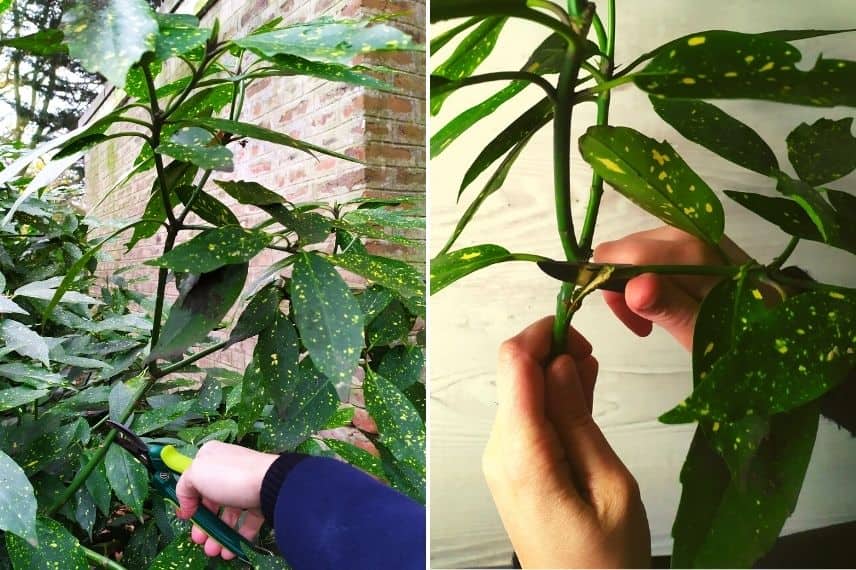
4- Select beautiful and healthy lateral shoot from the Aucuba. The stems should be green and from the current year. Do not take a stem with small fruits or remove them;
5- Using your secateurs, cut a stem 20 to 30 cm in height;
6- On this stem, with your knife, take 5 to 6 finer and smaller stems, keeping a heel (this means keeping part of the supporting branch at the base of the stem);
7- To avoid excessive transpiration from the plant, remove the lower leaf on the cutting and cut the upper leaf in half. This prevents excessive stress on our Aucuba cutting;
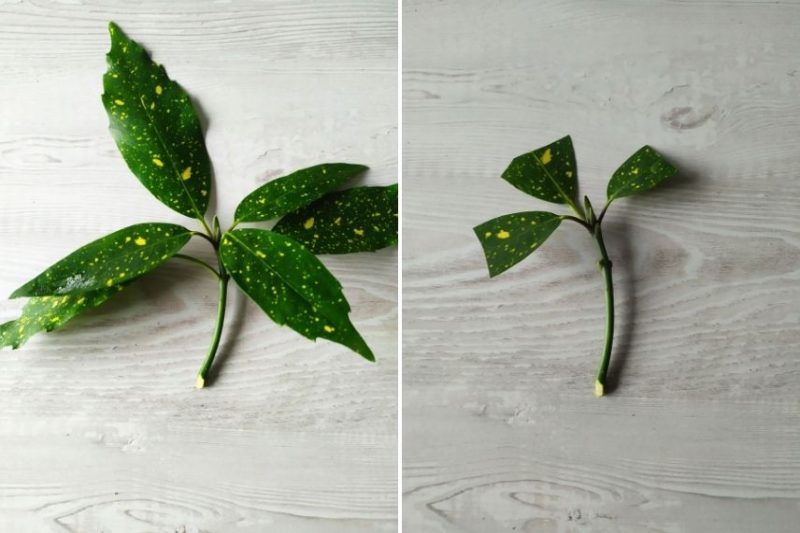
8- You can optionally dip the base of your cutting in plant hormone before potting;
9- Plant the stem in the compost;
10- Firm the medium around the stem with your hands;
11- To saturate the atmosphere with water, place a cloche over your cutting. You can also use a transparent bottomless plastic bottle or a plastic bag secured with bamboo stakes. Be careful, the stem and leaf must not touch the cloche to avoid mould formation!
12- Keep the compost fresh, slightly moist, without overwatering. Renew the air inside the cloche by lifting it for half an hour every 3 to 4 days;
13- Place your cutting in a bright spot, but out of direct sunlight;
14- Leave the cloche on for 3 to 4 weeks;
15- After 2 to 3 months, you will need to repot the plant into a larger pot;
16- During winter, bring your young plant into a cold greenhouse or a bright, unheated room, such as a conservatory. Space out watering.
Planting an Aucuba cutting
- Plant your young Aucuba shoot in open ground at the beginning of the following spring, in fresh but well-drained soil.
- During this spring planting, don't hesitate to enrich your soil with an organic fertiliser or compost.
- With their beautiful decorative foliage, Aucubas are perfect in hedges, spacing them 80 cm to 1 m apart.
- Water regularly during the first year after planting, especially during dry spells.
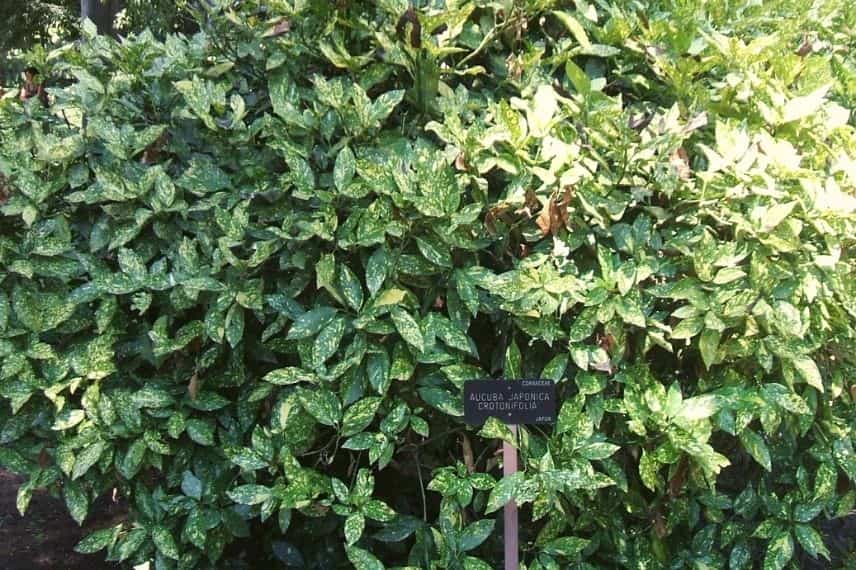
Aucuba japonica Crotonifolia
To go further
- Find out everything you need to know in our guide on Aucuba: planting, pruning and care
- Discover our Aucuba varieties


Comments