


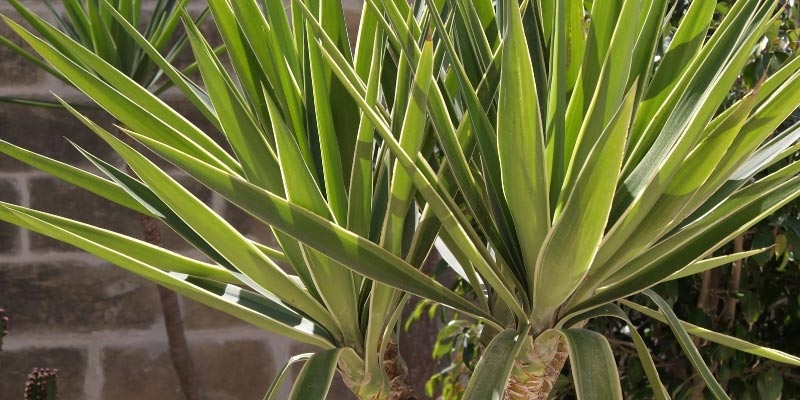
Yucca is a highly ornamental plant with an exotic appearance, grown both indoors and outdoors, in the ground or in pots. Remarkably resilient, whether to drought, challenging growing conditions or cold (down to -20°C for the hardiest varieties), the Yucca demonstrates its tenacious will to live through its ease of propagation. Taking cuttings is extremely simple and allows you to obtain new specimens to replant.
Follow our step-by-step tutorial on how to take Yucca cuttings.
Propagation by cuttings allows you to easily obtain clones of your favourite Yucca varieties!
What type of cutting for Yucca?
By taking a section of the stipe or false trunk, you can create both a tip cutting and one or more trunk cuttings. This technique is ideal for upright yuccas that form rosettes of leaves on these false trunks.
For Yuccas with basal rosettes (developing directly at ground level, without a trunk), you can proceed in the same way but only making a tip cutting, as the stem is too short to be divided into several sections.
When to take Yucca cuttings?
The ideal time for propagation by cuttings is in spring, when growth resumes. You can take advantage of pruning and tidying up your Yuccas to propagate the cut branches and obtain new plants for free, which you can pot up, plant in borders or give as gifts!
Equipment needed for Yucca propagation
- Thick gloves to protect yourself from thorns
- A gardener's saw
- A pair of secateurs with an acute blade
- Pots in terracotta or plastic, deep enough
- Clay pebbles
- Potting compost or soil mixed half-and-half with coarse sand to create a well-draining substrate
- A small hand trowel
- A marker, pencil and optionally some plant labels
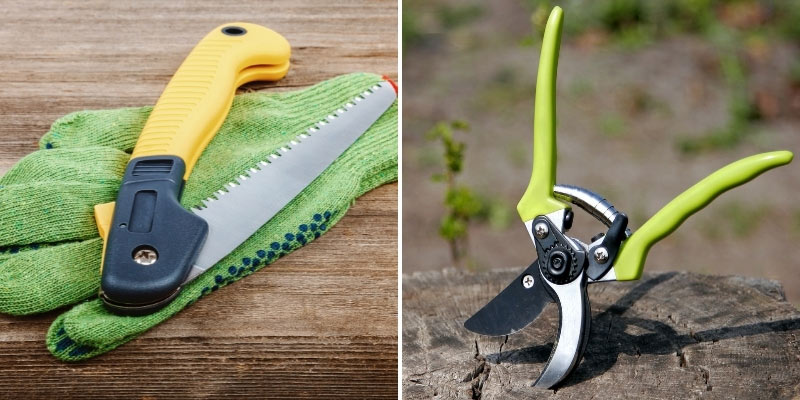
To take Yucca cuttings, you'll need a gardener's saw, gloves and a pair of sharp secateurs
Steps for propagating Yucca
- Select a vigorous false trunk or branch to cut
- Cut with the saw slightly above ground level if you want the cut part to regrow and form new leaves, or at ground level if you wish to reduce the spreading of your yucca
- Saw off the tip cutting, which is the terminal part with the leaves, leaving about 15cm of trunk. Remove some of the foliage by cutting cleanly with secateurs.
- Saw the remaining trunk section into several pieces about 15cm long
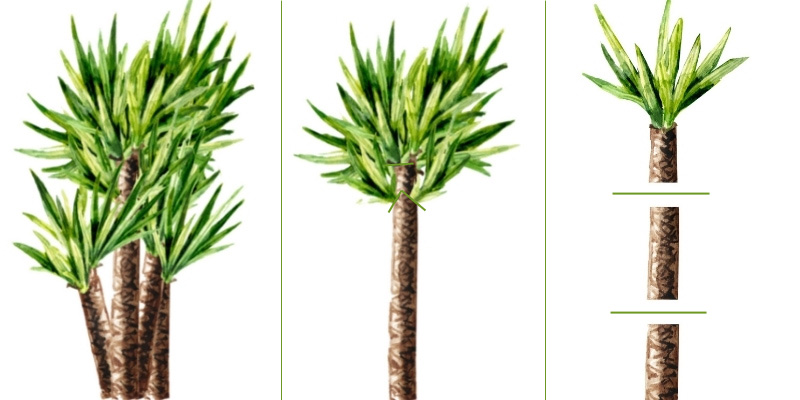
- Mark each cutting to distinguish top from bottom using the marker
- Fill your pots with a layer of clay pebbles then substrate
- Plant the cut pieces each in a pot, orienting them correctly (top upwards and base in the substrate). They should be inserted deep enough into the substrate to stand upright and develop roots
- Firm the substrate around the sections and moisten it
- Label your yuccas with the variety and cutting date
- Place your cuttings in a bright spot protected from frost. Remember to water them regularly but not excessively.
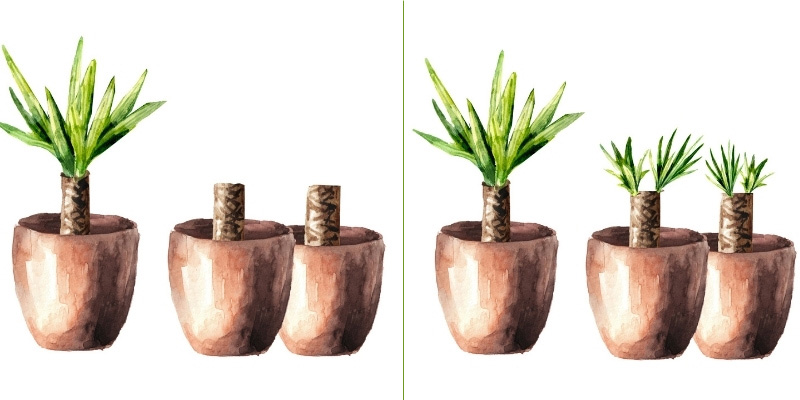
After a few weeks, the cuttings will begin to develop new leaf rosettes
What next?
- Wait for leaf rosettes to appear. Depending on growing conditions and Yucca variety, this may take several weeks
- If needed, repot your Yucca plants once sufficiently developed and rooted into larger pots, handling them carefully. Use a light, well-draining substrate. Your plants can continue to root and grow. Keep watering regularly, allowing the substrate to dry out between waterings
- The following spring or autumn, you can proceed with planting your Yuccas in the garden. They will thrive in sunny borders with well-drained soil.
To go further
- Choose your favourite varieties from our Yucca collection
Discover our Yucca advice sheets:


Comments