


One never tires of admiring the charming pendulous bell-shaped flowers of fuchsias. Whether white, pink, mauve, red or purple, they beautifully adorn hanging baskets and pots on patios, as well as flower beds and borders in the garden. They are also appreciated for their long summer flowering period, from June until October. Easy to cultivate, fuchsias are also simple and quick to propagate by cuttings. Discover how to take fuchsia cuttings through our tutorial and advice.

When to take fuchsia cuttings?
Fuchsia cuttings are mainly taken in August, using the 'covered cutting' method. These are also referred to as "August cuttings". The sunlight and warmth of this season are conducive to good root development in cuttings. This period yields better results and higher success rates.
Note that you can also take advantage of pinching back fuchsias from June onwards to take cuttings. This is actually the technique used in this tutorial.
Required materials
To take your fuchsia cuttings, you will need:
- one or several pots or large buckets, preferably biodegradable
- a pencil
- a spray bottle
- a pruner (cleaned and disinfected before use to prevent disease transmission between plants)
- a cloche or plastic bottle or plastic bag or mini greenhouse to cover the cuttings.
- seed and potting compost or a mix of 2/3 turf and 1/3 horticultural sand
- clay pebbles
- facultative: a rooting hormone
How to take fuchsia cuttings using the covered method?
1- Pour clay pebbles into the bottom of the pot, to a depth of 2-3 cm, to facilitate water drainage.
2- Fill your pot with seed compost up to 2 cm from the rim and lightly firm it down by hand.
3- Use the pencil to make a hole 1-2 cm deep.
4- Moisten the compost using the spray bottle, preferably with rainwater. The substrate should be damp but not waterlogged.
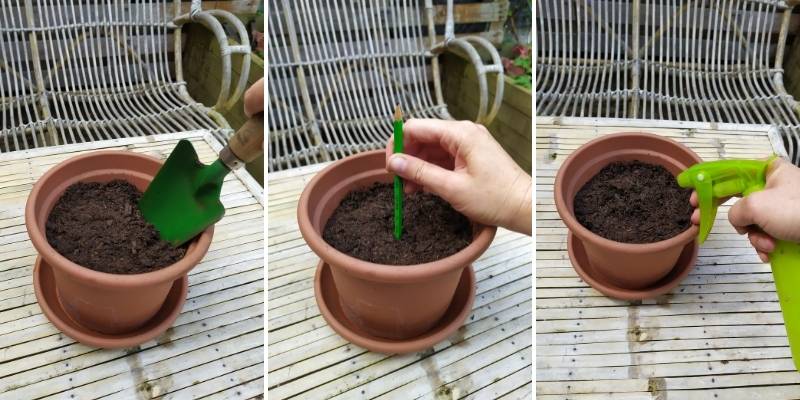
Make a 1-2 cm deep hole and moisten your compost
5- From your fuchsia, take cuttings from the tips of stems, preferably without flowers. They should be 4-10 cm long and have 3-4 sets of leaves. To ensure at least one viable cutting, we recommend taking 4-5 fuchsia cuttings.
6- Using pruners, remove any flowers or flower buds.
7- Remove the lower leaves from the cutting, keeping only the top half of the upper leaves. Too many leaves will exhaust the cutting due to foliage transpiration.
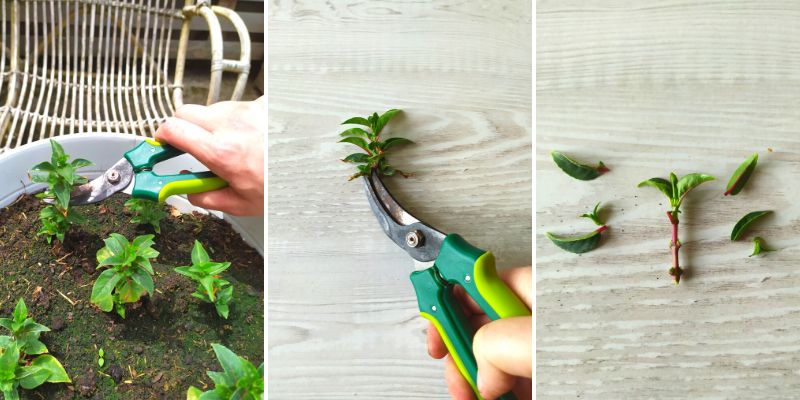
Here the stem is taken from a young fuchsia that needs pinching. Two benefits: on one hand you get a cutting, on the other the pinched fuchsia will produce 2 stems and therefore more flowers.
8- Facultative: to optimise results, you can gently dip the base of the stem in plant hormone to encourage root development.
9- Plant your stem in the pot.
10- Firm the compost around the cutting to keep it upright.
10- Place a cloche or bottomless plastic bottle or transparent bag secured with stakes over the cutting. The cloche will saturate the atmosphere around the cuttings with humidity, promoting root development. Warning: the stem and leaves must not touch the cloche, otherwise there's a risk of mould developing!
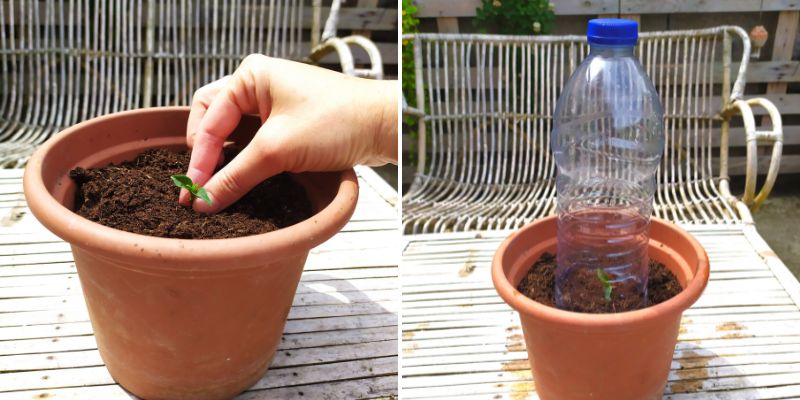
Plant the stem and place a cloche (here the top of a plastic bottle) to create a covered cutting
11- Water regularly to keep the compost slightly moist but not waterlogged. Every 3-4 days, lift the cloche for half an hour to refresh the air.
12- Place your pot in a bright spot, but not in direct sunlight.
13- Unlike bush cuttings, fuchsias root very quickly. After 2-3 weeks, you should see new leaves appearing, a sign of root development. Yes, it's that fast! You can then remove the cloche.
14- If your fuchsia cutting is in a biodegradable bucket, you can plant it directly in the ground with its pot. The biodegradable pot avoids transplant shock. You can also repot it into a container, trough or hanging basket.
Care for young fuchsias
- If your young fuchsia variety is not very hardy, remember to protect it from cold by storing it in a bright, unheated room or cold greenhouse during winter.
- In late winter/early spring: prune the fuchsia by cutting it back to half its height.
- For potted fuchsias: in spring and during flowering, give liquid fertiliser (such as geranium feed) every fortnight. Avoid fertilisers too rich in nitrogen, which would limit flowering.
- For fuchsias in the ground: spread well-rotted compost around the base in spring. Dried blood or bone meal work well when worked into the soil.
- In June, remember to pinch back stems to encourage abundant flowering
To go further:
- Discover all our annual fuchsia varieties, as well as our perennial fuchsias.
- For comprehensive information, read our guide on fuchsias: planting, pruning, cultivation and care
- Discover our advice sheet: "Propagation by cuttings: everything about different techniques and our advice for successful cuttings".


Comments