


How to sow annual seeds: directly in the ground or in seed trays?
Tips and advice
Contents
Most annual flower seeds: Poppies, Marigolds, Morning Glory, Cosmos, Ipomoea, Love-in-a-Mist… can be sown directly in the ground.
However, sowing in seed trays or flats offers many advantages: it allows for earlier flowering, makes planting your flowers easier while sparing you the chore of thinning and weeding.
Discover our tips for choosing the right sowing method and our advice for success.

Sowing in trays or pots for annual flowers
Why Choose to Sow Your Seeds in Trays or Seed Pans
Sowing in trays or seed pans offers many advantages. It is even highly recommended for certain plants that require a lot of heat to germinate, such as cobaeas, and ensures optimal germination results.
Sowing your seeds in trays allows you to:
- achieve earlier flowering by artificially creating, under cover, the ideal conditions for germination ahead of time,
- increase your chances of success (with notoriously difficult varieties or if sowing a little late) by using a suitable substrate and controlling the temperature and moisture of the compost,
- position seedlings exactly where you want them in your flowerbed (ideal for filling any gaps),
- avoid thinning out if sowing too densely,
- skip weeding, which is often necessary with direct sowing, as strong seedlings can be mulched immediately.
How to Sow in Trays or Pots
Sowing in trays, under cover, is done early, from February to mid-April. You can also sow in seed pans outdoors, following the direct sowing calendar.
The ideal germination temperature varies greatly depending on the species. It is generally between 15 and 25°C. This information is provided on the seed packet, and we advise you to always refer to it. Based on this recommended temperature, choose the best spot to sow your flowers: indoors in warmth, in a heated greenhouse or conservatory, or outdoors under a cold frame or mini greenhouse, well protected from cold nights.
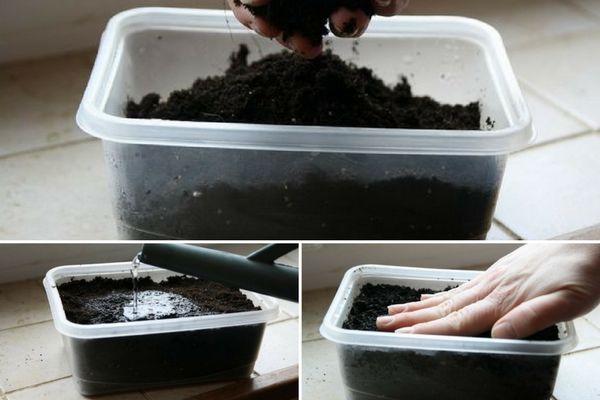
Step 1) Prepare your trays and seed pans:
- Prepare your containers (trays, seed pans) by filling them two-thirds full with seed compost. Ensure the base has small drainage holes to allow excess water to escape.
- Moisten the substrate with a light watering,
- Gently firm it down with a trowel (or your fingers).
Tip: polystyrene trays are perfect for sowing seeds and can easily be found at fishmongers.
Step 2) Sow your seeds:
- Use a stick or knife to create shallow furrows, depending on the size of your seeds and the instructions on the packet.
- Space the seeds at least 1 cm apart. Avoid sowing too densely, as this can hinder germination, force you to discard many seedlings, and encourage damping-off and etiolation (weak, leggy growth).
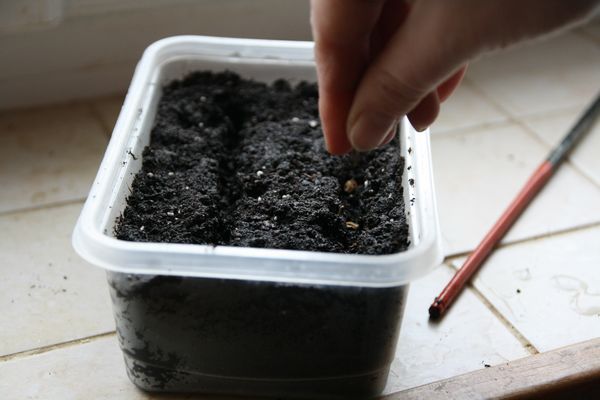
Sow your seeds.
- Cover the seeds with compost (or vermiculite) and lightly firm with a trowel.
- Water gently with a fine spray, taking care not to displace the seeds.
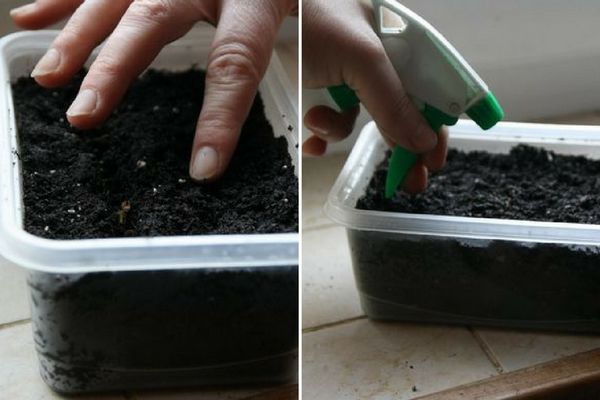
Cover the seeds with compost and water with a spray bottle.
Tip: to prevent damping-off, a fungal disease, sprinkle a thin layer of finely crushed charcoal over the compost.
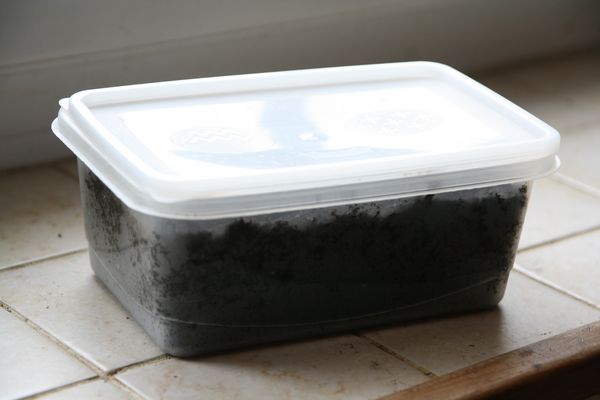
Step 3) After sowing:
- Place the tray on a windowsill, in a conservatory, greenhouse, or under a cold frame.
- For better results, cover the tray with a pane of glass, but remember to ventilate regularly by lifting the glass to avoid excessive humidity, which encourages damping-off. You can also use a mini greenhouse.
- Keep the substrate moist but not waterlogged until germination.
Tip: if sowing heat-loving species, use a heated propagator or place your seed pan on a heat source, such as a radiator.
Step 4) When seedlings emerge:
- Remove the glass cover, at least during the day.
- Place your seedlings in a bright spot to prevent them from becoming leggy.
- Be cautious of direct afternoon sun, which can be fatal to young seedlings placed too close to a window.
Tip: if your seedlings are kept in a place where nights are chilly (cold frame, conservatory…), cover them with glass in the evening to keep them warm.
Step 5) Once your seedlings are well developed:
- Prick them out carefully into pots when they have two true leaves (in addition to the cotyledons, which are not considered true leaves),
- You can move them to a cooler spot, but keep them frost-free.
- Plant them out in the garden after the last frost (mid-May).
Tip: to grow sturdy plants, harden them off! Gradually expose them to outdoor conditions by placing them outside in mild weather.
Alternative method: Fertiss plugs, favoured by professionals for easy sowing and cuttings. Follow Olivier’s advice in the video.
Direct sowing, in open ground of annual flowers
Why Choose to Sow Your Seeds Directly in the Ground
Direct sowing has two major advantages: it’s simple and quick. This method of sowing annual flowers works perfectly well for easy varieties like love-in-a-mist, cosmos, and if you want to create an entire bed of annuals.
When and How to Sow Directly in the Ground
Direct sowing should be done once all risk of frost has passed, usually after 15th May. Depending on the region, this can be from mid-March to June, when the average ambient temperature reaches around 15°C. The soil should ideally be already warmed, moist, and sunny.
Step 1) Prepare the soil:
- Using a hand rake, a hand fork, or a hoe, carefully weed the chosen area for sowing,
- Work the soil by raking with a claw or rake to create a fine tilth to a depth of about 6 mm.
- If the soil is heavy, mix the top layer with a blend of 1/3 sand and 2/3 compost.
Tip: Avoid working the soil if it’s too wet, as it will be difficult to create a fine enough seedbed to properly accommodate your seeds.
Step 2) Sow the seeds:
- Sow your seeds by scattering them evenly.
- Gently cover them using a rake, then lightly firm the soil with the flat side of the rake to ensure good seed-to-soil contact.
- Water gently with a fine spray to avoid displacing the seeds, using a watering can or hose.
Tip: If sowing very fine seeds, mix them with sand or dry coffee grounds.
Step 3) Support seed germination:
- Remember to water if conditions are dry, ensuring the soil doesn’t dry out—consistent moisture is essential for good germination.
- After 10 to 14 days, thin out the seedlings by removing the weakest plants, leaving about 15 cm between each.
Tip: Loved your flower bed? After flowering and once the blooms have dried, shake them to encourage self-seeding for next spring!
Discover other Flower seeds
View all →
Available in 1 sizes

Available in 1 sizes

Available in 1 sizes

Available in 1 sizes

Available in 1 sizes

Available in 1 sizes

Available in 1 sizes

Available in 1 sizes

Available in 1 sizes

Available in 1 sizes

To go further...
→ Discover our advice sheet: 10 easy-to-sow annual flowers!
- Subscribe!
- Contents