


Complete Guide to Planting and Successfully Growing Jerusalem Artichokes in Your Garden
All our advice
Contents
The Jerusalem artichoke, this heritage vegetable with its delicious tubers, is making a grand comeback in our kitchen gardens thanks to its particularly easy cultivation. A cousin of the sunflower with its magnificent yellow flowers, this hardy vegetable adapts to almost all soils and provides a generous harvest for several months. Its planting requires little effort for a unique culinary reward, with a delicate flavour reminiscent of artichoke that will delight the most discerning palates in delicious recipes. Discover our practical tips for successfully planting your Jerusalem artichokes and enjoy this vegetable that’s as decorative as it is tasty!
To learn all about Jerusalem artichokes and their cultivation, don’t hesitate to consult our comprehensive guides: “Jerusalem Artichoke: planting, harvesting, cultivation” and 9 heritage vegetables to grow in your kitchen garden

The characteristics of this forgotten vegetable
Native to North America, Helianthus tuberosus belongs to the Asteraceae family, like the sunflower whose slender silhouette it shares. This perennial plant can reach 2 to 3 metres in height, forming lush vegetation crowned with pretty yellow flowers in late summer.
Its tubers, with white flesh and a subtle artichoke-like flavour, have a characteristic club shape. Rich in inulin, a carbohydrate with prebiotic properties, these underground treasures are an excellent source of potassium. The Canada truffle, as it is sometimes nicknamed, stands out for its remarkable ability to thrive year after year, even in unfavourable conditions.
Height and Growth
This spectacular plant shows impressive growth in full sun or partial shade. Its sturdy flower stems shoot up rapidly, reaching their peak in late summer. The broad, rough leaves unfold along the stems to form a dense natural screen. One month after planting, your Jerusalem artichoke may already measure over a metre, eventually reaching between 2 and 3 metres depending on exposure.
This exceptional vigour makes it an excellent natural windbreak, but requires some tricks to control its spread. To contain its expansion, choose a dedicated space away from other crops, where its vigorous stems can flourish without competing with your other vegetables.
Decorative Flowers
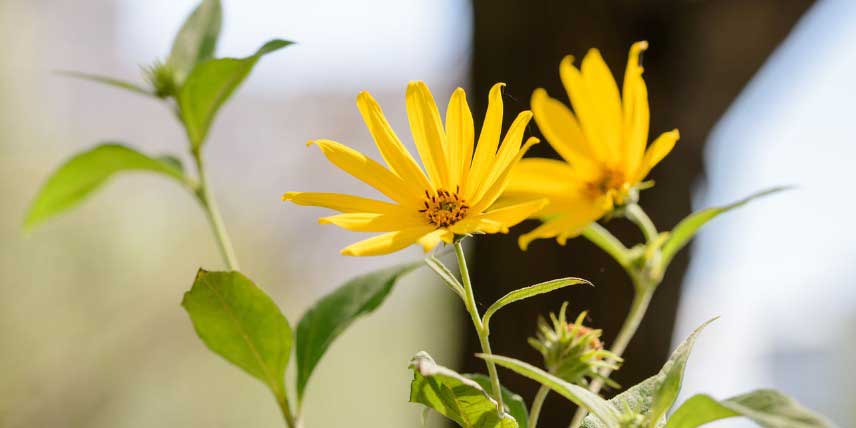
Jerusalem artichoke flowers brighten the garden with their golden petals from August to October. These flowers, resembling small suns, bloom in airy clusters at the top of the stems. Their vibrant yellow colour creates a striking contrast with the deep green foliage.
Measuring 8 to 10 cm in diameter, each flower features a crown of ray florets around a brown-orange centre. This generous flowering attracts numerous pollinators and transforms your vegetable garden into a true biodiversity haven. Bees and butterflies can’t resist these mini-sunflowers that add valuable ornamental appeal to your crops.
Edible Tubers
Jerusalem artichoke tubers are a true culinary treasure sought after by lovers of authentic flavours. Their white, crunchy flesh develops subtle notes of artichoke and hazelnut, particularly appreciated in velouté soups. With their knobbly, irregular shape, these nourishing roots have thin skin ranging from pinkish-beige to purple depending on the variety.
Rich in fibre and inulin, these tubers offer a valuable alternative to potatoes, especially for those monitoring their blood sugar levels. Harvesting takes place from October until the first frosts, allowing you to enjoy these heritage vegetables throughout winter. Young Jerusalem artichokes, more tender, can even be eaten raw, grated in salads.
In addition to its easy cultivation and nutritional qualities, the Jerusalem artichoke offers splendid yellow flowering!
Choosing the right location for your vegetable garden
Ideal growing conditions
Choose a sunny position to ensure vigorous growth and abundant flowering. Your Jerusalem artichoke plant will thrive in a bright location, sheltered from prevailing winds that could damage its tall stems. Partial shade is also suitable, though it may result in slightly reduced but still satisfactory yields.
An open space, at the edge of a vegetable patch or along a fence, provides perfect conditions for this decorative plant to spread its lush foliage without interfering with other crops. Its tall stature can even serve as a natural screen or hide an unsightly wall while producing delicious tubers.
Suitable soil type
Remarkably adaptable, this hardy plant thrives in almost any soil type. It naturally prefers light, humus-rich soils where its tubers develop evenly. Loose, well-drained soil promotes the formation of handsome, regular tubers that are particularly prized for their excellent culinary quality. Sandy or loamy-sandy soils offer ideal conditions, ensuring easier harvesting and generous yields.
Even in chalky or relatively poor soil, Jerusalem artichokes grow without difficulty, demonstrating their remarkable hardiness. Only waterlogged soils should be avoided, as excess moisture can hinder the development of the precious tubers. A sunny position combined with well-structured soil guarantees abundant yields the following year.
Crop rotation
Crop rotation is particularly important with Jerusalem artichokes, as these greedy plants quickly deplete the soil. A plot that has grown these tubers requires at least a 4-year break before replanting Jerusalem artichokes. During this period, grow undemanding crops such as leafy greens or legumes, which will naturally enrich the soil with nitrogen.
A well-planned crop rotation maintains soil fertility while reducing disease risks. After harvesting Jerusalem artichokes, sow green manure like phacelia or mustard to regenerate soil structure. The following spring, plant light leafy vegetables, followed by legumes like beans or peas the year after. This thoughtful succession ensures abundant harvests year after year.
Discover other Jerusalem Artichoke seeds
View all →
Available in 2 sizes

Available in 1 sizes
Step-by-step planting guide
The Optimal Planting Period
For successful planting, two key seasons present themselves throughout the year. Spring remains the preferred time, from March to April, when soils gradually warm up. This period allows tubers to develop a robust root system before summer heat arrives. An interesting alternative emerges in autumn, from September to October, particularly in regions with mild climates.
The choice of planting time also depends on your region and soil type. In northern France, opt for spring planting to give plants sufficient time to establish. In the south, autumn planting works perfectly, with tubers benefiting from seasonal rains for optimal growth. This planting flexibility highlights the remarkable adaptability of Jerusalem artichokes.
Spacing Requirements
Proper plant arrangement determines the success of your Jerusalem artichoke crop. A spacing of 70cm between each tuber is essential for harmonious development. Rows should also be spaced 70 to 80cm apart, allowing ample room for the future towering stems.
Planting in lines along a fence or garden border makes the most of this generous spacing. This arrangement not only simplifies maintenance and harvesting but also prevents competition between plants. In particularly rich soils, these distances can be increased to 90cm to accommodate more vigorous growth.
Planting Depth
Precise tuber burial determines your crop’s success. Jerusalem artichokes should be planted in furrows 10 to 15cm deep, with sprouts facing upwards to encourage rapid emergence. This technique provides optimal protection against weather fluctuations while facilitating root development.
Tuber covering deserves special attention. After placement, fill the furrows with previously loosened soil, avoiding excessive compaction. Light earthing up when first shoots appear will strengthen plant anchorage and stimulate tuber formation.
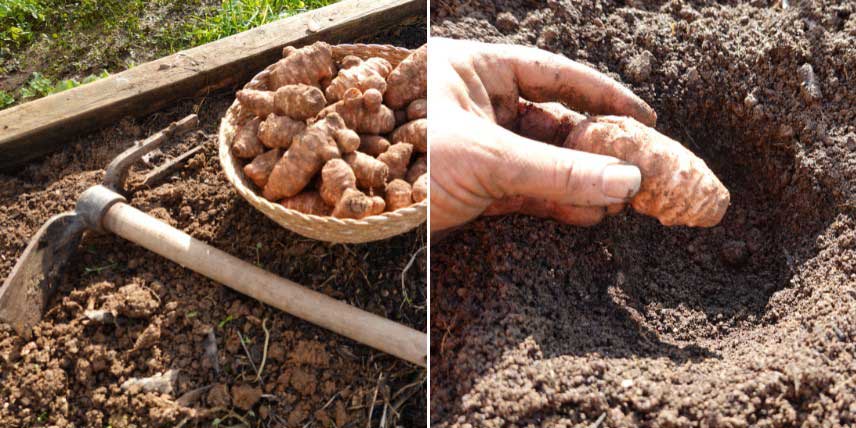
After loosening the soil, dig planting holes and place tubers about 10cm deep
Maintenance Throughout the Seasons
Watering and Mulching
Moderate your watering according to the plant’s actual needs. Regular watering is only necessary during the first few weeks after planting, and then during prolonged dry spells. Applying a generous layer of mulch around the plants helps maintain constant moisture and reduces the need for intervention.
A layer of straw or hay, 5 to 10 cm thick, offers multiple benefits. In addition to keeping the soil cool, this natural mulch gradually enriches the earth as it decomposes and helps suppress weeds. For optimal tuber development, refresh the mulch layer at the beginning of autumn when nights become cooler.
Necessary Staking
The slender stems of Jerusalem artichokes, which can reach 2 to 3 metres in height, require suitable support to withstand winds. Simple staking using bamboo or wooden stakes, placed every 2 metres along the rows, helps keep the plants upright. Connect the stakes with natural twine to create a sturdy collective support.
This support structure should be installed once the plants reach 50 cm in height. Gently tie the main stems to the stakes using soft ties that won’t damage the plants. This collective staking technique has the advantage of protecting your Jerusalem artichokes while making it easier to move between rows.
Controlling Invasive Growth
Managing the prolific nature of Jerusalem artichokes is a major challenge for any gardener. Close monitoring is essential from the first year of cultivation to prevent uncontrolled spread. The most effective method is to define their growing area with rhizome barriers sunk 50 cm deep.
Regularly checking the edges of the planting area helps spot and remove adventurous young shoots. For optimal control, carefully harvest all tubers at the end of the season, even the smallest ones. A rotation of at least 4 years is advisable before replanting Jerusalem artichokes in the same spot, allowing the soil time to regenerate.
When and how to harvest Jerusalem artichokes?
From late October, when the foliage begins to yellow, your Jerusalem artichokes are ready to harvest. A garden fork will allow you to gently lift the soil around the plants to extract the precious tubers. Harvesting can continue until March, as and when needed for cooking.
This staggered harvesting ensures optimal freshness as the tubers keep better in their original soil. To make winter harvesting easier, a protective mulch prevents the ground from freezing too deeply. A generous yield of 3 kg per square metre rewards your patience.
- Subscribe!
- Contents