


Herbaceous cutting is one of the simplest methods to propagate your favourite garden plants. Easy to perform, this propagation by cuttings technique allows you to reproduce many of our beloved perennial plants (geranium, basil, etc.) and certain bushes from young and tender shoots.
In this article, we guide you step by step on when and how to successfully take herbaceous cuttings.
What exactly is herbaceous cutting?
Herbaceous cutting involves taking a young, non-lignified shoot (still green and flexible) from a plant, then replanting it so it develops its own roots. Unlike woody (hardwood) or semi-woody (semi-hardwood) cuttings, herbaceous cuttings are more tender and root very quickly, making them ideal for rapid propagation. However, note that these cuttings are also a bit more fragile and require diligent watering.
Which plants can be propagated by herbaceous cutting?
Herbaceous cutting is ideal for many plants with green and flexible shoots, including perennial plants, herbs, and certain summer-flowering bushes. Here is a (non-exhaustive) list of some plants easily propagated using this method:
Herbs
• Basil
• Mint
• Thyme
• Sage
• Rosemary
• Tarragon
• Chives
• Oregano
• Savory
• Lemon balm
Flowers & Perennials
• Geranium (perennial and balcony)
• Fuchsia
• Dahlia
• Aster
• Phlox
• Verbena
• Delphinium
• Loosestrife
• Aubrieta
• Chrysanthemum
Bushes & Climbers
• Hydrangea
• Clematis
• Lilac
• Forsythia
• Deutzia
• Weigela
• Spirea
• Dogwood
• Abelia
When to take herbaceous cuttings?
The ideal time to take herbaceous cuttings is during the active growth period of plants, in spring and early summer, between May and July, depending on the region.
Why? Because during this period, the shoots are still tender but robust enough to produce roots quickly. Temperatures are mild, natural humidity is more present in the garden, and light is abundant, which promotes rooting.
Take your cuttings preferably early in the morning, before the sun dries out the plant.
Gardener's tip: avoid periods of extreme heat or heatwaves, which can dry out the cuttings before they even have a chance to establish.
How to take herbaceous cuttings?
What equipment do you need for herbaceous cuttings?
To take herbaceous cuttings, you will need:
- Pruning shears: to take your herbaceous cuttings.
- A pot or tray with drainage holes.
- Light soil (such as seed compost).
- Water: preferably rainwater at room temperature.
- A spray bottle: to maintain constant humidity without waterlogging.
- A cloche or transparent plastic bag: to create a mini greenhouse and promote rooting.
- Plant hormone (optional): useful but not essential.
Tip : always disinfect your tools before cutting to avoid transmitting diseases to your cuttings.
How to take herbaceous cuttings step by step?
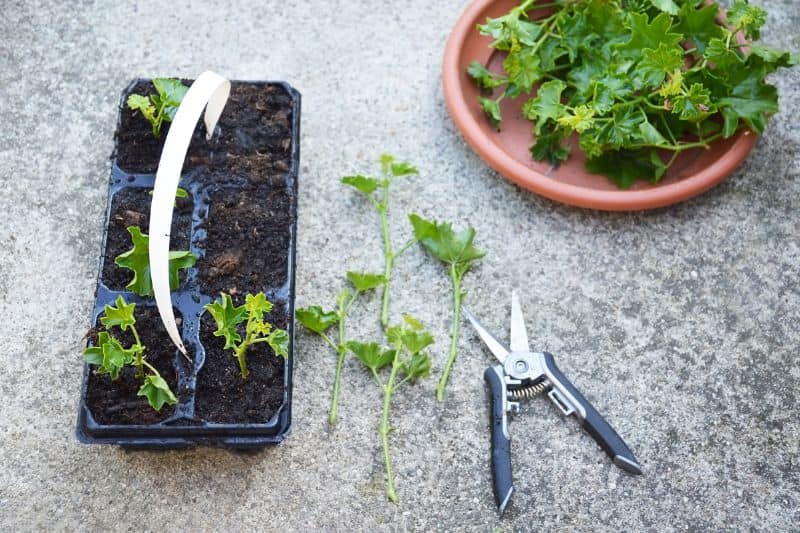
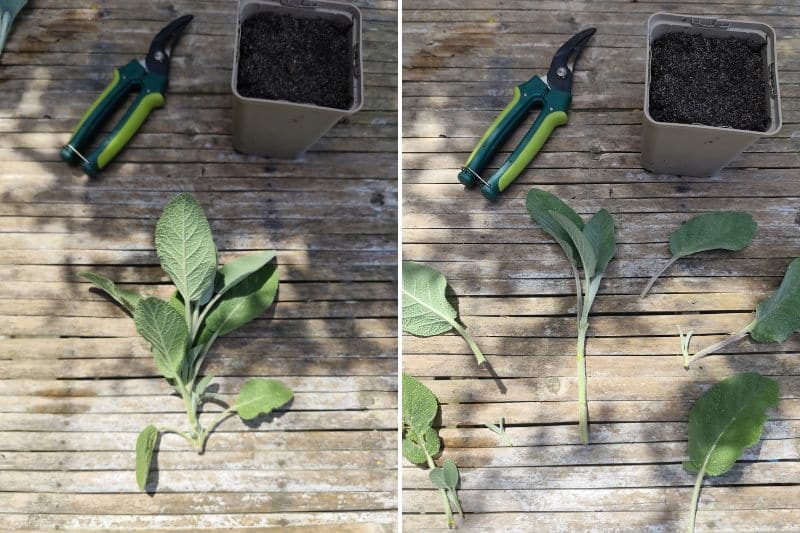
1- Take the shoot: Choose a young, leafy, green, healthy shoot, without flower buds or flowers, about 10 to 15 cm long. Cut it just below a node (where a leaf grows), using a clean tool.
2- Remove the lower leaves: Strip the leaves from the lower half of the shoot. Leave only 2 to 3 leaves at the top of the cutting. The goal: to prevent the shoot from exhausting itself due to "transpiration."
3- Optional: If you have some, dip the base of the cutting in rooting hormone powder. This isn’t essential, but it boosts root development.
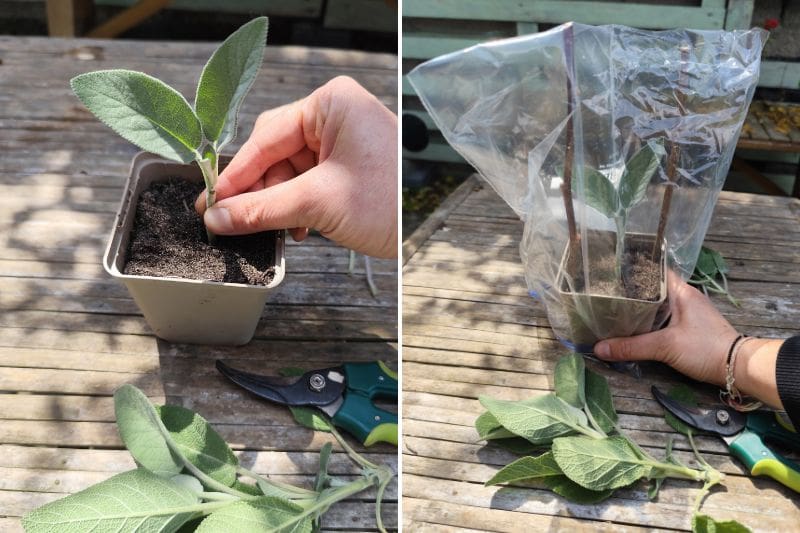
4- Prepare the pot: Fill a small pot with well-draining soil (such as seed compost). Lightly firm it down. Use a stick or pencil to make a small hole 3-4 cm deep. Place your herbaceous cutting in the hole, then firm the soil around the shoot.
5- Water: Moisten the soil with rainwater.
6- Create a humid environment (the "bagging" technique): Cover the pot with a transparent plastic bag or place it under a cloche to maintain constant humidity for 10 to 15 days. You can also use a transparent plastic bottle with the bottom removed. This method promotes rooting and prevents the cutting from drying out.
Tip: Ventilate your mini greenhouse every 2-3 days for 15 to 30 minutes to refresh the air and prevent mould.
7- Place everything in bright shade (but without direct sunlight), at a mild temperature (18–22 °C), keeping the soil slightly moist. Be wary of sun and wind, which could dry out your herbaceous cuttings.
Advice: Herbaceous shoots dislike lack of water and can wilt very quickly. Always keep the soil slightly moist but not waterlogged.
How to tell if a herbaceous cutting has succeeded?
Once your herbaceous cutting is well established, a little patience is required… but certain signs are unmistakable! Here’s how to monitor its progress:
Signs that all is well:
- The leaves remain firm and green: if they don’t wilt, it’s a good sign!
- New shoots appear: this indicates the plant is starting to grow, meaning it’s rooting. You can then remove the cloche.
- Slight resistance when tugged: after 2 to 3 weeks, gently pull on the shoot. If it resists, roots are forming!
Signs of failure (and what to do):
- Soft or wilted leaves: likely too much humidity or heat.
- Black or soft base of the shoot: this is due to excess water; the substrate may be too waterlogged.
- No progress after a month: the cutting hasn’t taken, but don’t be discouraged! Try again with a new shoot and adjust the conditions (less or more water, more light, stable temperature…). Try several cuttings at once: not all will take, which is normal.
Tip: Once the roots are well developed (after 4 to 6 weeks), you can transplant your new plant into a larger pot or directly into the garden!


Comments