


- Step 5: Water after applying the mulch
Once the mulch is well installed, water thoroughly so that it adheres well to the soil and begins to stabilise. This watering also ensures that the lower layers are well moistened and activates the decomposition of organic mulches.
Additional tips and mistakes to avoid
- Do not mulch when there is strong wind, as lightweight materials like straw, grass clippings, or dead leaves may blow away from the garden. Also, avoid mulching when the soil is frozen, as the mulch acts as an insulator and could slow its warming in spring, delaying the resumption of vegetation.
- Avoid making mulch too thick or too thin: A layer thicker than 10 cm can prevent water and air from penetrating the soil, promoting mould and root rot. Conversely, mulch that is too thin will not be effective against weeds and evaporation.
- No overly wet mulch! Excess moisture can encourage the proliferation of fungi and mould. Ensure that the mulch remains well-aerated.
- In general, it is not necessary to remove the mulch unless it is contaminated with diseases or pests. Organic materials can be incorporated into the soil to enrich it.
Over time, organic mulch decomposes and needs to be renewed regularly. Check its condition every few months and add a new layer if necessary. If you are using grass clippings, be sure to let them dry well before applying to avoid rotting.
- Step 5: Water after applying the mulch
Once the mulch is well installed, water thoroughly so that it adheres well to the soil and begins to stabilise. This watering also ensures that the lower layers are well moistened and activates the decomposition of organic mulches.
Additional tips and mistakes to avoid
- Do not mulch when there is strong wind, as lightweight materials like straw, grass clippings, or dead leaves may blow away from the garden. Also, avoid mulching when the soil is frozen, as the mulch acts as an insulator and could slow its warming in spring, delaying the resumption of vegetation.
- Avoid making mulch too thick or too thin: A layer thicker than 10 cm can prevent water and air from penetrating the soil, promoting mould and root rot. Conversely, mulch that is too thin will not be effective against weeds and evaporation.
- No overly wet mulch! Excess moisture can encourage the proliferation of fungi and mould. Ensure that the mulch remains well-aerated.
- In general, it is not necessary to remove the mulch unless it is contaminated with diseases or pests. Organic materials can be incorporated into the soil to enrich it.
- Step 4: Maintain and renew the mulch
Over time, organic mulch decomposes and needs to be renewed regularly. Check its condition every few months and add a new layer if necessary. If you are using grass clippings, be sure to let them dry well before applying to avoid rotting.
- Step 5: Water after applying the mulch
Once the mulch is well installed, water thoroughly so that it adheres well to the soil and begins to stabilise. This watering also ensures that the lower layers are well moistened and activates the decomposition of organic mulches.
Additional tips and mistakes to avoid
- Do not mulch when there is strong wind, as lightweight materials like straw, grass clippings, or dead leaves may blow away from the garden. Also, avoid mulching when the soil is frozen, as the mulch acts as an insulator and could slow its warming in spring, delaying the resumption of vegetation.
- Avoid making mulch too thick or too thin: A layer thicker than 10 cm can prevent water and air from penetrating the soil, promoting mould and root rot. Conversely, mulch that is too thin will not be effective against weeds and evaporation.
- No overly wet mulch! Excess moisture can encourage the proliferation of fungi and mould. Ensure that the mulch remains well-aerated.
- In general, it is not necessary to remove the mulch unless it is contaminated with diseases or pests. Organic materials can be incorporated into the soil to enrich it.
Evenly distribute the mulch over the soil to a thickness of 5 to 10 centimetres. A layer that is too thin will be ineffective against weeds, while a layer that is too thick will prevent water from penetrating the soil properly. Avoid placing the mulch directly against the stems of the plants to prevent the risk of rot.
- Step 4: Maintain and renew the mulch
Over time, organic mulch decomposes and needs to be renewed regularly. Check its condition every few months and add a new layer if necessary. If you are using grass clippings, be sure to let them dry well before applying to avoid rotting.
- Step 5: Water after applying the mulch
Once the mulch is well installed, water thoroughly so that it adheres well to the soil and begins to stabilise. This watering also ensures that the lower layers are well moistened and activates the decomposition of organic mulches.
Additional tips and mistakes to avoid
- Do not mulch when there is strong wind, as lightweight materials like straw, grass clippings, or dead leaves may blow away from the garden. Also, avoid mulching when the soil is frozen, as the mulch acts as an insulator and could slow its warming in spring, delaying the resumption of vegetation.
- Avoid making mulch too thick or too thin: A layer thicker than 10 cm can prevent water and air from penetrating the soil, promoting mould and root rot. Conversely, mulch that is too thin will not be effective against weeds and evaporation.
- No overly wet mulch! Excess moisture can encourage the proliferation of fungi and mould. Ensure that the mulch remains well-aerated.
- In general, it is not necessary to remove the mulch unless it is contaminated with diseases or pests. Organic materials can be incorporated into the soil to enrich it.
- Step 3: Spread the mulch to a good thickness
Evenly distribute the mulch over the soil to a thickness of 5 to 10 centimetres. A layer that is too thin will be ineffective against weeds, while a layer that is too thick will prevent water from penetrating the soil properly. Avoid placing the mulch directly against the stems of the plants to prevent the risk of rot.
- Step 4: Maintain and renew the mulch
Over time, organic mulch decomposes and needs to be renewed regularly. Check its condition every few months and add a new layer if necessary. If you are using grass clippings, be sure to let them dry well before applying to avoid rotting.
- Step 5: Water after applying the mulch
Once the mulch is well installed, water thoroughly so that it adheres well to the soil and begins to stabilise. This watering also ensures that the lower layers are well moistened and activates the decomposition of organic mulches.
Additional tips and mistakes to avoid
- Do not mulch when there is strong wind, as lightweight materials like straw, grass clippings, or dead leaves may blow away from the garden. Also, avoid mulching when the soil is frozen, as the mulch acts as an insulator and could slow its warming in spring, delaying the resumption of vegetation.
- Avoid making mulch too thick or too thin: A layer thicker than 10 cm can prevent water and air from penetrating the soil, promoting mould and root rot. Conversely, mulch that is too thin will not be effective against weeds and evaporation.
- No overly wet mulch! Excess moisture can encourage the proliferation of fungi and mould. Ensure that the mulch remains well-aerated.
- In general, it is not necessary to remove the mulch unless it is contaminated with diseases or pests. Organic materials can be incorporated into the soil to enrich it.
Mulching is a simple and effective technique that protects the soil, limits water evaporation, reduces weed growth, and enriches the earth. It is particularly useful as it makes garden maintenance easier. Discover the benefits of mulching, how to mulch your garden properly, and how to choose the most suitable mulch!
What is mulching and what is it for?
Mulching, or mulch in English, involves covering the soil with a layer of organic materials (cut straw, hay, dead leaves, etc.) to protect it and improve its quality. This simple technique mimics nature: in forests, dead leaves form a carpet that nourishes and protects the soil. This protective layer acts as a natural shield, while reducing maintenance efforts. Here are some good reasons to adopt it:
- Reduced watering: By retaining soil moisture, mulching decreases the frequency of necessary watering.
- Weed control: A thick layer of mulch prevents weeds from growing.
- Improved soil structure: The organic materials used for mulching decompose over time, nourishing the soil and promoting better aeration and drainage of rainwater.
- Protection against temperature fluctuations: Mulching insulates the soil, maintaining a more consistent temperature, which is beneficial for plants.
- Aesthetic appeal: A well-mulched garden looks neat and tidy!
- → Michaël explains all the benefits of mulching in Mulching: why, how?
What is the most effective mulch?
The choice of mulch depends on the specific needs of the garden, based on the type of crops. The best mulch is THE suitable mulch!
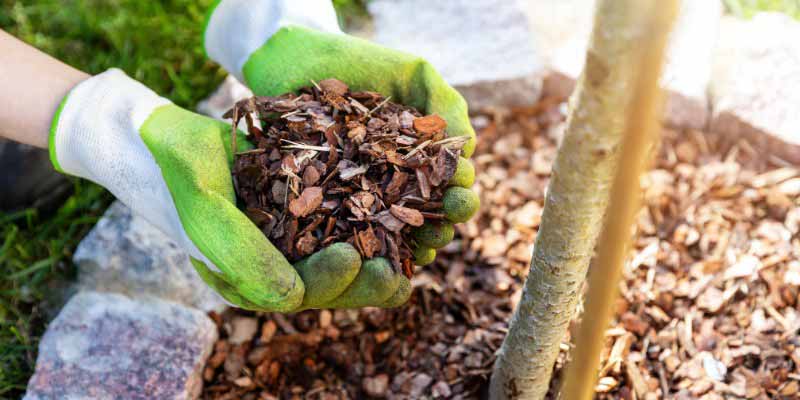
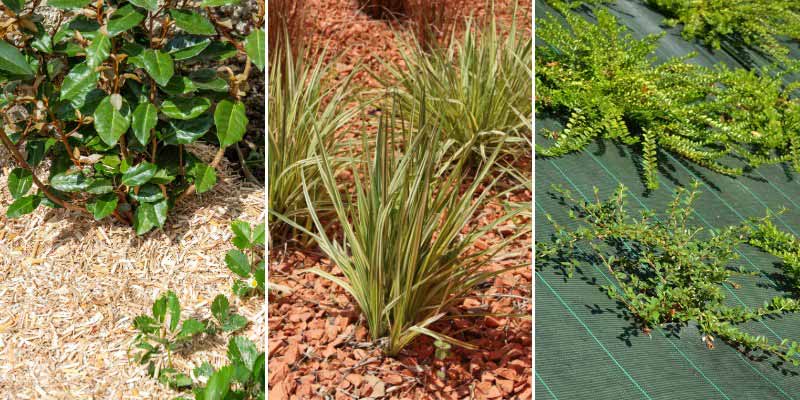
- Organic mulch: (straw, dead leaves, dried grass clippings, wood chips, hemp, flax, miscanthus, RCW, cocoa shells, buckwheat husks) enriches the soil and is particularly suitable for vegetable gardens and flower beds.
- Mineral mulch: (crushed slate, pumice, gravel) improves drainage and heat retention, but does not nourish the soil. It is suitable for Mediterranean plants and rock gardens.
- Synthetic mulch: (plastic sheets or films). Less eco-friendly, it is sometimes used for specific crops. It limits the appearance of unwanted weeds and reduces evaporation, but its action stops there. Dark tarps tend to heat the soil under the sun. To learn more, check out our article on the subject: “Mulching fabric: for or against?”
Good to know: in our nursery, you will find ready-to-use mulches to limit maintenance. These products are practical, easy to install, and suitable for beginners. They allow you to quickly reap the benefits of mulching without preparation.
When should you apply mulch?
There are three good times to mulch your garden:
- At the beginning of the season: Wait until your plants have grown well before applying mulch. If you apply it too early, seeds may not germinate properly.
- In summer: During hot weather, mulch helps retain soil moisture and protects roots from drought. Apply it after watering or rain so it adheres well to the moist soil.
- In autumn: Before winter, mulching protects roots from the cold and prevents soil damage from rain. Natural mulches, like leaves or straw, will also nourish the earth as they decompose.
The 5 key steps for effective mulching
Necessary materials:
- A pair of gardening gloves
- A rake for applying the mulch
- Some mature compost: to enrich the soil before mulching
- Mulch of your choice
- A bag, wheelbarrow, or bucket to transport and spread the mulch easily over the areas to be covered.
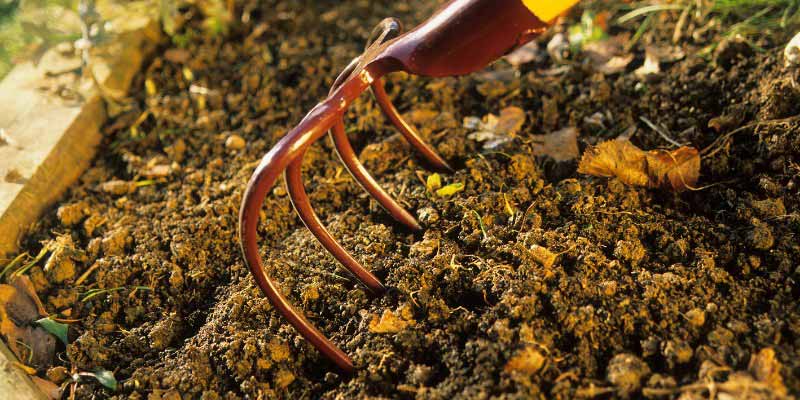
- Step 1: Carefully weed
Before installing the mulch, it is essential to remove all weeds present on the surface to be mulched. Carefully weed the area by removing them by hand or with an appropriate tool. Then, lightly loosen the soil with a rake to promote the penetration of water and nutrients. If necessary, water to ensure the soil is well moist before applying the mulch.

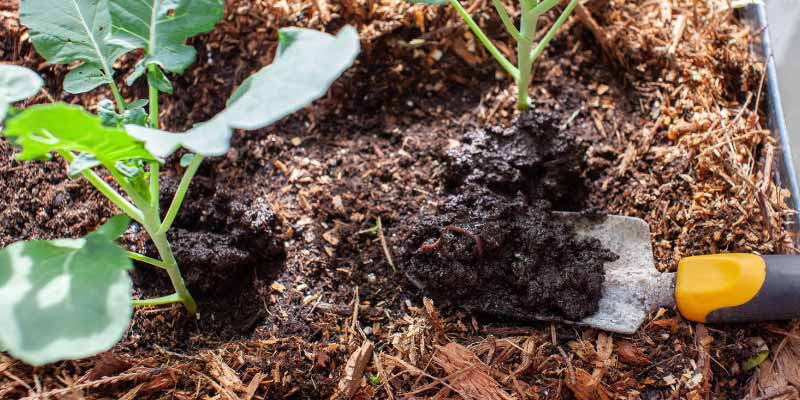
- Step 2: Make a light application of compost (optional)
A well-nourished soil will promote plant growth and improve the effectiveness of the mulch. Spread a thin layer of mature compost (about 1 to 2 cm) over the soil before mulching. This compost will enrich the earth with nutrients and stimulate microbial activity, ensuring a more fertile soil in the long term.
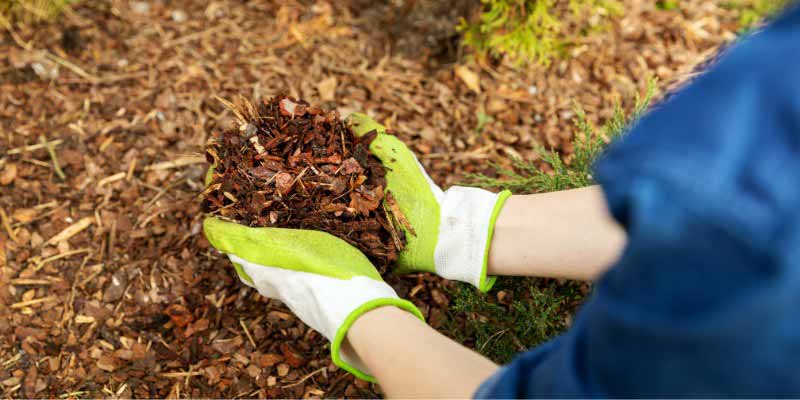
- Step 3: Spread the mulch to a good thickness
Evenly distribute the mulch over the soil to a thickness of 5 to 10 centimetres. A layer that is too thin will be ineffective against weeds, while a layer that is too thick will prevent water from penetrating the soil properly. Avoid placing the mulch directly against the stems of the plants to prevent the risk of rot.
- Step 4: Maintain and renew the mulch
Over time, organic mulch decomposes and needs to be renewed regularly. Check its condition every few months and add a new layer if necessary. If you are using grass clippings, be sure to let them dry well before applying to avoid rotting.
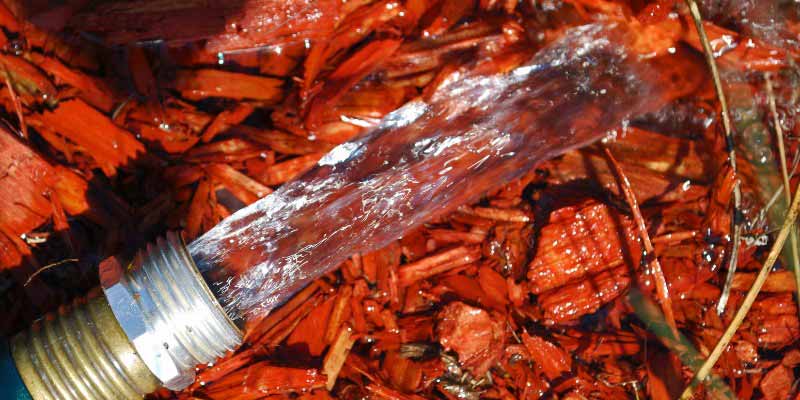
- Step 5: Water after applying the mulch
Once the mulch is well installed, water thoroughly so that it adheres well to the soil and begins to stabilise. This watering also ensures that the lower layers are well moistened and activates the decomposition of organic mulches.
Additional tips and mistakes to avoid
- Do not mulch when there is strong wind, as lightweight materials like straw, grass clippings, or dead leaves may blow away from the garden. Also, avoid mulching when the soil is frozen, as the mulch acts as an insulator and could slow its warming in spring, delaying the resumption of vegetation.
- Avoid making mulch too thick or too thin: A layer thicker than 10 cm can prevent water and air from penetrating the soil, promoting mould and root rot. Conversely, mulch that is too thin will not be effective against weeds and evaporation.
- No overly wet mulch! Excess moisture can encourage the proliferation of fungi and mould. Ensure that the mulch remains well-aerated.
- In general, it is not necessary to remove the mulch unless it is contaminated with diseases or pests. Organic materials can be incorporated into the soil to enrich it.

")
Comments