


The Caryopteris is a lovely small shrub with a bushy habit, renowned for its abundant summer and late flowering. From August until October, this ornamental bush offers clusters of small flowers in shades of pink or blue. This melliferous flowering will delight both butterflies and gardeners. Its decorative leaves come in dark green, light green, grey-green, golden, variegated, or silver-backed tones. This aromatic foliage releases a subtle fragrance when crushed. Often called 'blue spirea' or 'bluebeard', this compact shrub is suitable for hedges, shrub beds, or alongside perennials, as a standalone plant, in pots, or even in rockeries. It’s enough to inspire you to propagate it and brighten every corner of your garden! Especially since this is an easy-to-grow and hardy shrub. Cuttings also allow you to obtain new vigorous young plants.
Discover when and how to propagate Caryopteris very easily with our illustrated tutorial.
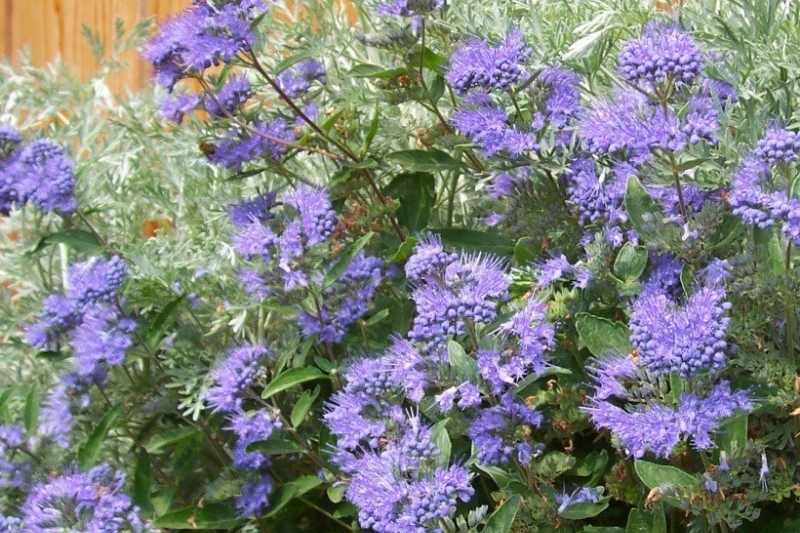
The Caryopteris clandonensis 'Heavenly Blue' is a very floriferous variety with beautiful grey-green foliage
When to take cuttings of Caryopteris?
There are two periods and methods for propagating blue spirea:
- The first involves taking a "covered" cutting in July, or early August. Indeed, this time of year, with plenty of light and warmth, promotes root development and the success of cuttings. This method is easy, and results are quickly visible.
- The second method involves taking hardwood cuttings in November.
Note that all varieties of blue spirea can be propagated by cuttings.
Required Materials
To take your bluebeard cuttings, you will need:
- A pot, tray, or biodegradable pots.
- A pencil
- A pruning shear previously disinfected with alcohol to avoid spreading diseases
- A cloche, a plastic bottle without a base, or a plastic bag. You can also opt for a mini greenhouse
- A spray bottle
- seed and potting compost or a mix of 2/3 turf and 1/3 garden sand
- A rooting hormone (optional)
How to Take Covered Cuttings of Caryopteris?
1- Fill your pot or tray with seed compost up to 2 cm from the rim. Firm it down with your hands.
2- Moisten the compost well with your spray bottle.
3- Use the pencil to make a hole 4 to 5 cm deep.
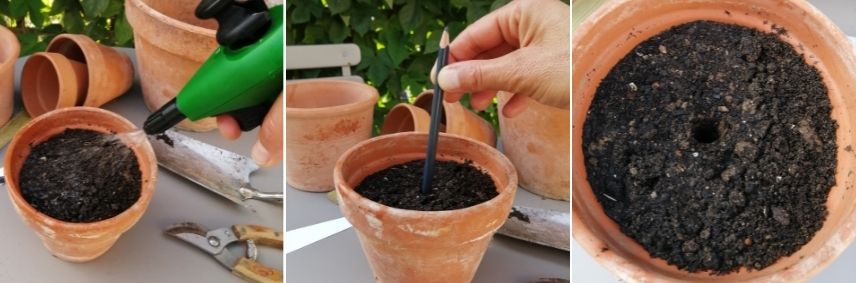
Moisten your compost, then make a hole 4 to 5 cm deep using a pencil
4- Identify healthy lateral shoots of Caryopteris. The stem should be from the current year, green, and free of flowers. If the stem has flower buds, especially in August, you must remove them.
5- With your pruning shear, cut 5 to 6 stems of 10 to 20 cm just below a node. This is where the future roots will emerge.
6- Remove the leaves from the lower part of the cutting. Keep only half of the upper leaves. This prevents the plant from exhausting itself too quickly due to excessive leaf transpiration.
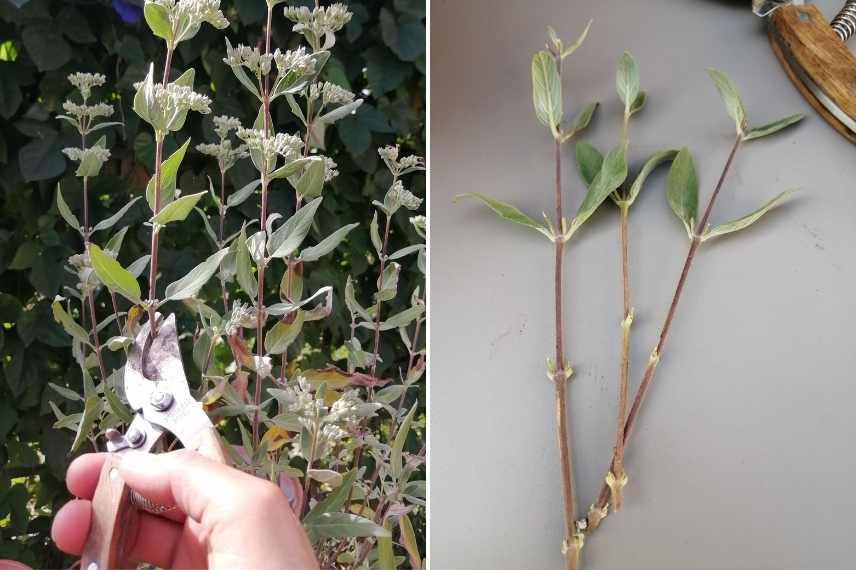
Cut healthy stems below a node, then remove the lower leaves
7- To enhance root development, you can optionally use rooting hormone. Gently tap the base of the cutting in the hormone before potting.
8- Plant your stem in the pot.
9- Firm the compost around the stem.
10- Place a cloche, a plastic bottle without a base, a plastic bag, or a mini greenhouse over your cutting. This saturates the cutting’s atmosphere with water (hence the term "covered"). Be careful: the stem and leaves must not touch the cloche to avoid mould!
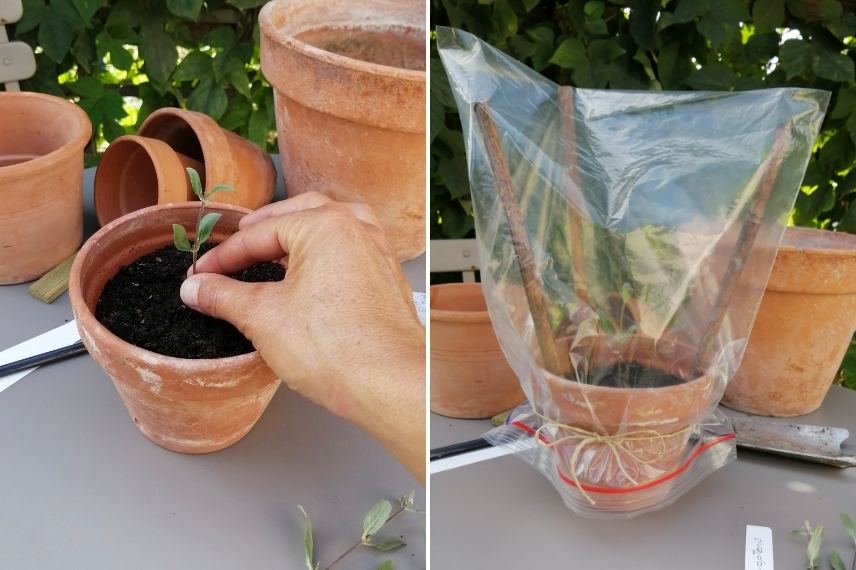
Plant your stem, firm the compost, and place the protective cloche
11- Keep the compost consistently moist but avoid overwatering. Lift the cloche for half an hour every 3-4 days to ventilate and renew the air.
12- Place your pot in a bright spot without direct sunlight.
13- The roots will be well-developed after 2 to 3 months, and you can then repot your Caryopteris into a larger pot.
14- During winter, keep your young plants in a cold greenhouse or a bright, unheated room. Limit watering, especially during frosts.
Note that the leaves of this flowering shrub are deciduous, so there’s no need to worry if the foliage falls.
You can plant your young shoots in the ground at the beginning of the following spring. Choose a sunny spot, even in full sun, in well-drained or even chalky soil. Its roots dislike overly wet or waterlogged soil.
Very decorative, it will look wonderful in hedges, alongside other deciduous or evergreen shrubs, in beds, rockeries, or even at the base of roses.
For a beautiful and long-lasting flowering, don’t hesitate to add flowering plant fertiliser at the end of winter or a handful of well-rotted compost at its base when planting. Once these flowering shrubs are well-established, they can even tolerate temporary drought.
To Go Further:
- Discover all our varieties of Caryopteris, with pink or blue flowers.
- To learn everything about Caryopteris, check out our advice on Blue Spirea: Planting, Pruning, and Care.
- Discover our guide: "Propagation by Cuttings: Everything About Different Techniques and Our Tips for Success."
- Explore our full range of garden trees and shrubs.


Comments