


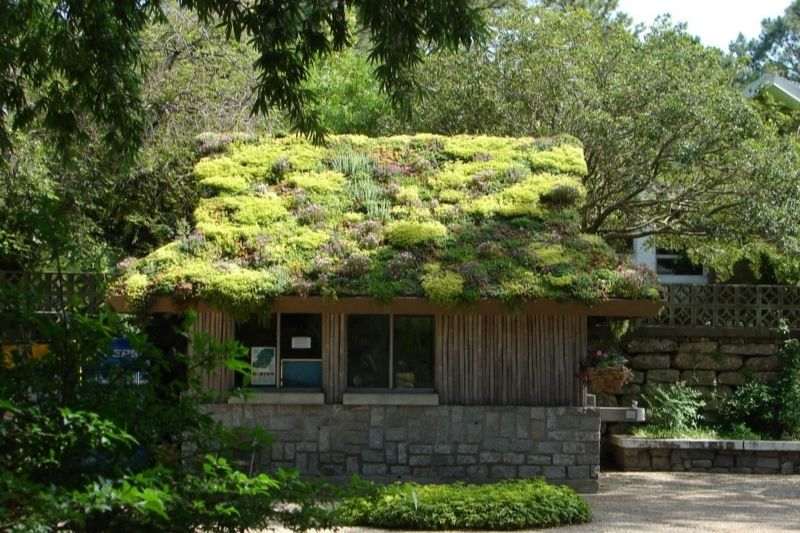
Creating a green roof not only transforms the aesthetics of your home but also contributes to improving the urban environment. This comprehensive tutorial guides you through the essential steps to design and install your own lush roof, whether to increase thermal insulation, promote biodiversity, or simply for the pleasure of having an elevated garden. Discover how to select the best plants, prepare the supporting structure, ensure perfect waterproofing, and maintain your green roof so it thrives year after year. Whether you're a beginner or experienced DIY enthusiast, learn how to create a sustainable green space above your head, contributing to a greener future.

Where and when to create a green roof?
Several factors must be considered when choosing the area to be vegetated:
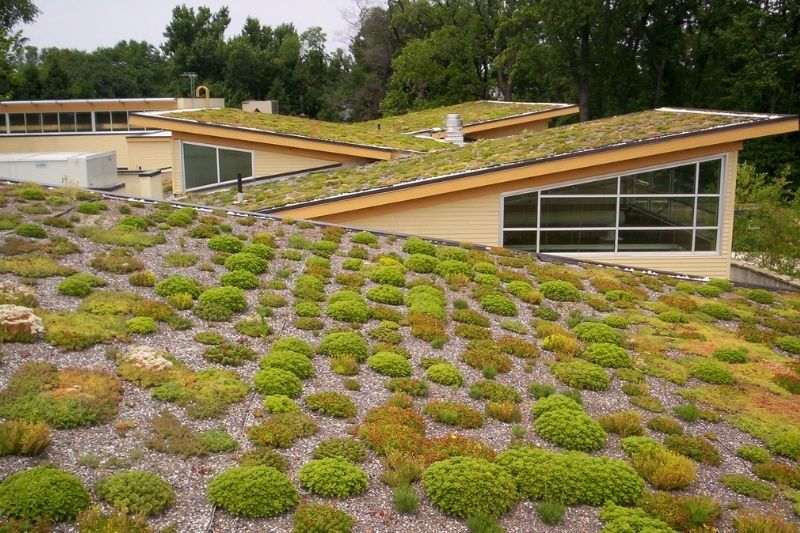
- The natural slope of the roof should be less than 3%. Ideally, it should have a slight incline (2 to 3%) to allow better runoff of rainwater.
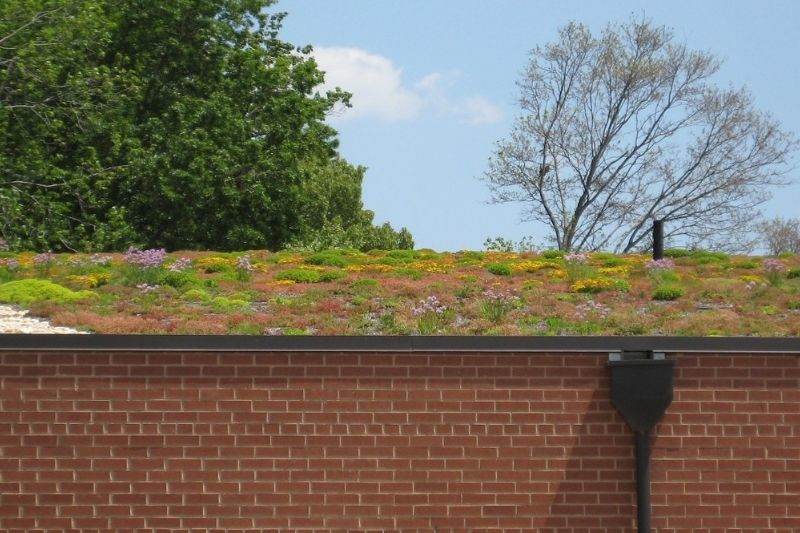
- The strength of the structure must be ensured to support the additional weight of the installation. Here, we opt for an "extensive" roof, which is suitable for small installations and only requires a thin layer of growing substrate (5 to 10 cm).
- Access to the roof must be planned for plant maintenance.
Garden sheds, garages, chicken coops, dog kennels, or even mailboxes can be dressed with vegetation according to your wishes.
Planting is generally done in spring, so this is the time we recommend starting your green roof project, between April and early June.
How much does a green roof installation cost?
By building a green roof yourself, the cost remains relatively affordable for a small area: it will simply include materials and plants, for a cost ranging from a few tens to a few hundred euros, depending on the size of the area concerned.
Which plants to choose?
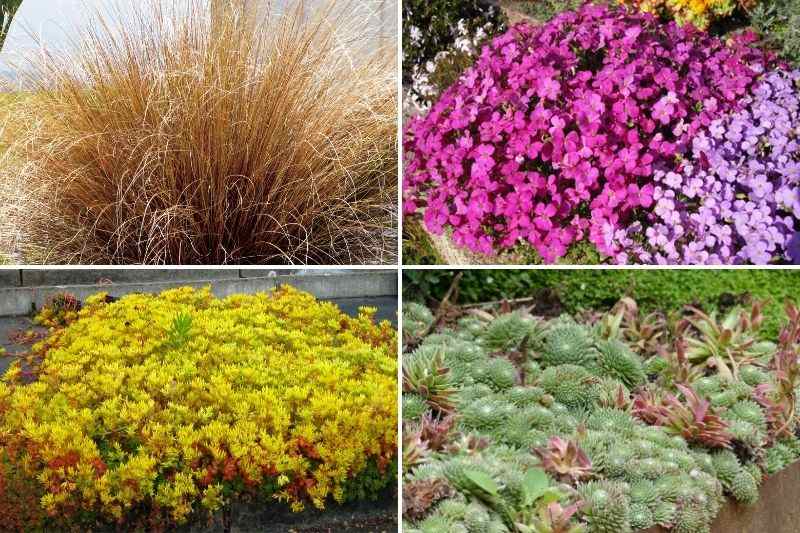
Choose plants that require little maintenance, can withstand extreme conditions (heat, lack of water, frost...) and can thrive in a shallow substrate.
Rock garden plants and alpine plants are perfect candidates, which will quickly colonise the space:
- sedums or stonecrop
- saxifrages
- sempervivums or houseleeks
- dianthus or pinks
- ice plants or delosperma
- arabis or rock cress
- aubrietas
- phlox
- grasses (small varieties of carex, fescues...)
Among these plant varieties, there is a multitude of colours (green, orange, yellow, pink, purple...) and types of flowering, allowing for a very aesthetic and dynamic ensemble.
You will find them as plug plants, in buckets, or even pre-cultivated rolls (a bit more expensive).
If your green roof is exposed to cooler and damper temperatures (North, East), you can opt for decorative mosses.
Note that to grow other varieties of plants (perennials, bulbs, herbs), a substrate at least 15 cm deep will be necessary. Before starting, make sure your roof can support this additional weight.
Of course, we advise against choosing plants with overly robust or invasive roots, which could pierce the waterproofing material while seeking moisture.
Required materials
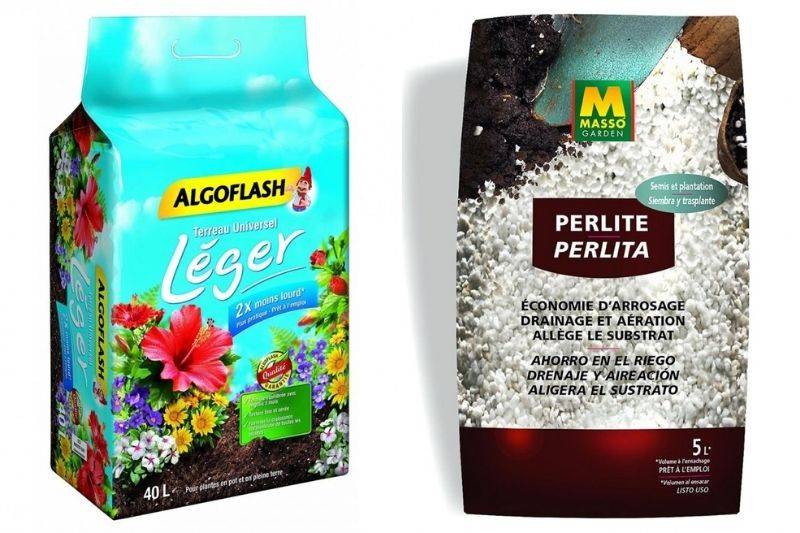
Materials can easily be found in DIY stores, garden centres, or online:
- waterproof membrane (bituminous, rubber, polyolefin, or EPDM - pond liner)
- wooden battens or joists
- moulded polystyrene board or geotextile drainage fabric
- lightweight compost with low water retention or multi-purpose compost, mixed with sand and perlite to lighten it
Steps to create a green roof
Ensure waterproofing
- Cut the membrane to the size of the area to be covered, adding 5 to 10 cm extra margins to cover the outer edges of the roof.
- Fix it on the outside (cladding), using self-adhesive strips, staples, or nails.
Install the frame
- Measure the area to be covered and build a frame with battens, which will be positioned all around. Its height should correspond to the thickness of the future substrate.
The frame will serve to hold the entire structure together and prevent any sliding of the substrate and plants in case of rain. It can be made of wood (simple and economical) or metal (more durable).
If the roof is sloped, additional wooden battens (or rafters) can be added to grid the inside of the frame and create compartments, which will further improve the stability of the whole.
Promote drainage
- Drill holes in the frame at drainage level, so water can escape.
- If desired, install gutters around the roof to collect runoff water. Regularly check these gutters to ensure they are not obstructed (plant debris, moss, etc.).
- Lay a drainage board, which will allow excess water to drain away. Usually sold in rolls, it can simply be unrolled flat over the area to be covered.
These steps are essential to prevent irrigation or rainwater from stagnating on the green roof, especially on roofs with a slight slope. Stagnation would increase the load on the structure and risk causing root rot in the plants.
Add the substrate
- Spread the substrate over the entire area to be vegetated, maintaining a thickness of 5 to 10 cm, depending on the weight your structure can support.
- Compact the whole using a wooden lath or small garden tool (hoe, cultivator...) to ensure levelling.
Plant the vegetation
- Transplant the selected plants.
- Allow about ten plants per square metre, or one plant every 15 to 20 cm on average.
Maintaining the green roof
At the start of your green roof installation, some watering will be necessary to help the plants establish well, especially during the first summer if there is intense heat. The shallow substrate is indeed more prone to drying out.
If you opt for drought-resistant plants, as we recommend, it is absolutely not necessary to install a permanent automatic watering system.
In autumn, weed out any unwanted plants that have colonised the space, prune faded flowers and leaves, and add fertiliser if necessary.
Once the plants are well established, annual maintenance will simply involve light weeding and checking that rainwater drains properly.


Comments