


Previously mainly used for making baskets, willow has made a strong comeback in recent years. Economical, creative, artisanal and natural, the art of basketry has everything to please.
Using living or dried willow branches, it's possible to create numerous decorative elements to adorn the garden: huts, teepees, hedges, as well as willow plant supports. Originally, this term referred to the sacks and pots used as packaging for transporting plants. Today, these supports are used as structures to hold climbing plants and help them maintain an attractive shape throughout their growth.
Slender, spherical or flat, it can take any form, depending on creativity and taste. Here are 3 weaving ideas to make your own willow plant supports at home.
Which willows to use for creating a willow plant support?
Varieties used for weaving
Willow rods refer to young willow shoots, which haven't yet branched and are flexible, thin and strong, used for weaving.
Not all willow varieties are suitable for this use, but there are around a hundred varieties selected for basketry, according to their characteristics and natural colours (green, brown, red, orange, yellow, purple, black):
- Salix viminalis or Basket Willow
- Salix triandra or Almond Willow
- Salix alba ‘Chermesina’ or White Willow
- Salix purpurea
- Salix fragilis
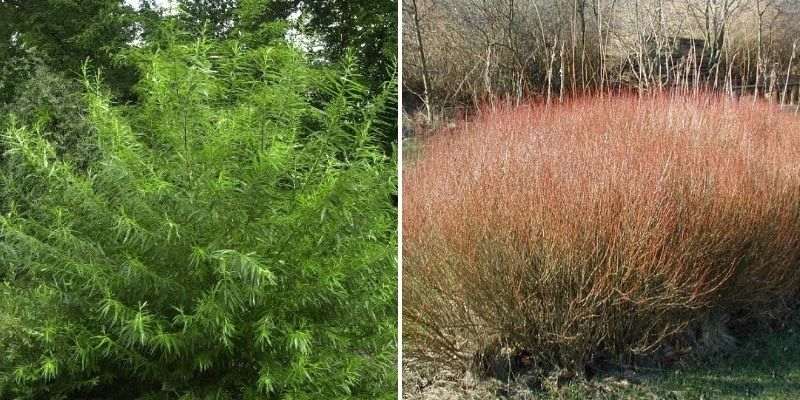
Salix viminalis in full growth and Salix purpurea 'Nana' without leaves (Photo Wikimedia)
Obtaining willow rods
You can easily find bundles of raw willow rods directly from a willow grower.
It is also possible to gather year-old rods near you, taken from living fences, pollarded willows or stumps near streams or along roads.
Willow intended for fresh use, to make a living willow plant support, should be harvested in winter: the ideal period is between late February and mid-April, after the last frosts but before regrowth begins.
Store the willow upright in a cool, dark place to prevent it from drying out.

Pollarded willows are pruned to harvest their branches
Making a practical and decorative willow plant support
Materials and preparatory steps
You will need:
- a clean, sharp pair of secateurs
- some ties or fasteners (string, raffia, plant ties...)
- a container such as a plastic pot
Before making the support, soak the willow rods for several hours, or even days depending on their diameter, to make them more flexible.
For making living willow supports, cut the branches with secateurs by 2 to 3 cm at the base, with an angled cut. This will simplify planting and increase the plant's water absorption capacity.
Living willow support for pots
- Choose a fairly heavy container (terracotta, ceramic), filled with well-packed multipurpose compost.
- Insert the largest and widest willow rods all around the pot, vertically.
- Use 3 additional willow rods to create the 1st row of weaving at the base of the pot: horizontally, weave the 1st rod inwards, then outwards between each of the rods inserted in the pot. Repeat with the remaining 2 rods. The weaving should be firm and tight to ensure the structure is solid and stable.
- Between the vertical rods, insert an empty plastic pot, larger than your original container. This will serve as a template to maintain the shape of the support during weaving.
- At mid-height of the support, repeat the weaving with 3 additional willow rods.
- Remove the template pot.
- A few centimetres from the top of the rods, do a final weave.
- Trim the top of the support with secateurs to even it out.
- Once weaving is complete, water the pot generously before inserting your chosen climbing plant.
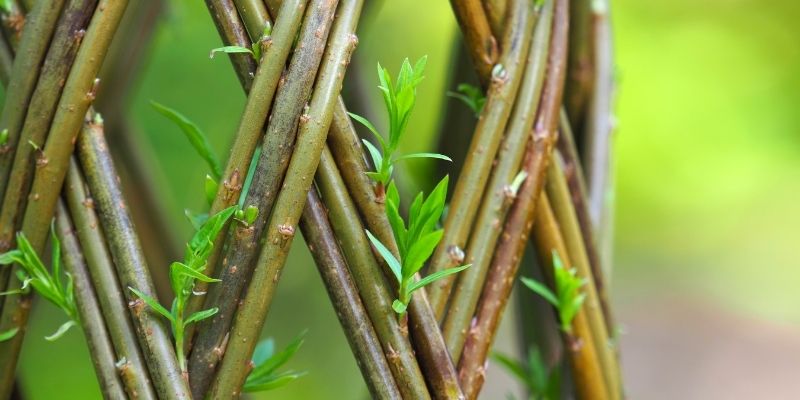
Leaves appear on the woven living willow
Support for small plants
Create a support for small perennial plants, which tend to droop as they grow or have a naturally trailing habit (peony, petunia, begonia, ivy-leaved geranium...).
This natural support will allow the plant to grow through the structure while being held at mid-height, adding a lovely decorative touch.
- Make a hoop by bending a thin willow rod.
- Repeat with another willow rod.
- Secure the 2 hoops together using willow ties or string.
- Attach new willow rods to the structure, spaced 10 or 15 cm apart horizontally.
- Repeat in the other direction to begin weaving: the rod first passes over the perpendicular rod, then under, and so on, like a grid or trellis.
- Tie the rods firmly together.
- Plant 4 stakes (wooden or bamboo) around the plant to be supported, in a square. Their height will depend on the plant's mature height.
- Position the flat support horizontally, attaching it to the stakes.
Living willow support for climbing plants
Create a cone of woven willow, which will serve as a living support for your climbing plant as it develops.
The height of the teepee will depend on the mature height of the plant you wish to grow on it. For sweet peas, plan a structure about 2 metres tall, for clematis about 3 metres, etc.
- Use a plastic pot as a template.
- Insert 5 pairs of willow rods (5 x 2) vertically all around the pot.
- Create the 1st diamond: angle one rod at 45°, then tie it with the rod to the right; repeat with the 2nd rod to the left. The rods will thus cross regularly, passing alternately behind each other, one side then the other.
- Continue diamond weaving over several levels.
- Once the column is stable, remove the template, then tie the tops of the willow rods together.
- Remove the ties used for diamond weaving: the structure should (hopefully!) stand on its own.
As the willow is alive, it will continue growing alongside the plant, adorned with pretty light green foliage from spring to autumn.

Willow supports can take various forms.


Comments