


Ollas, also known as oyas, are irrigation systems that have been used for thousands of years. Eco-friendly, economical, and efficient, this watering technique offers numerous advantages.
The olla system ensures gentle watering through capillary action, directly to the roots of the plants, without waste. It can be used in both vegetable gardens and ornamental gardens, in the greenhouse or even in pots.
Ollas are becoming increasingly easy to find in garden centres or online. But it is also possible to make your own watering pottery quickly, without a potter's wheel and even without advanced DIY skills!
Follow our tutorial to create a small and a large homemade olla at a low cost, and watch Olivier's video on watering with the oya technique.
Choosing the Right Pottery in Advance
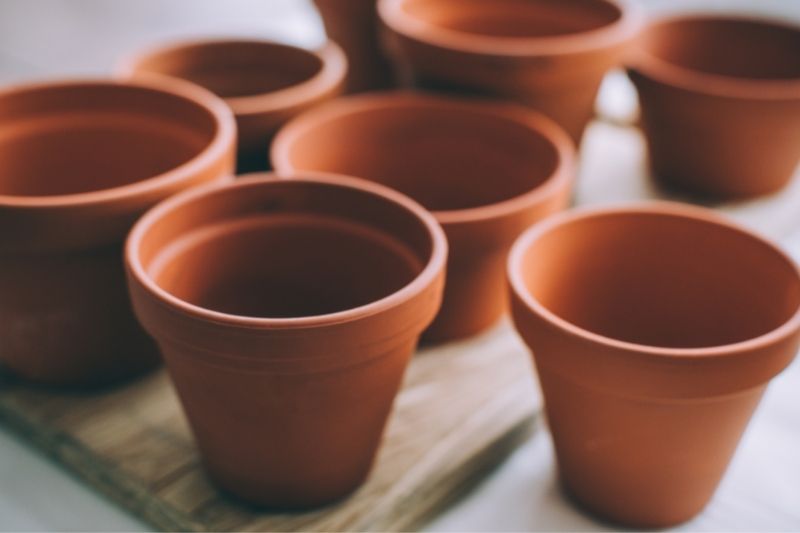
The material of the pots chosen for making ollas must be porous, unglazed, untreated, and not waterproof. Classic clay pots found in garden centres for a few euros are perfect. They can also be upcycled.
The size of the selected pot depends on the water needs of the plant to be watered. For 1 to 2 tomato, aubergine, or pepper plants, a 15 cm diameter olla works very well (equivalent to about 1L of water). Choose a larger container for a bush, and a smaller one for a potted plant.
Making a Small Olla
The small olla is particularly suited to plants grown in pots or annual plants, in the vegetable garden or ornamental garden.
Materials
- A terracotta pot
- A saucer or plate matching the diameter of the top of the pot
- Optional: a piece of terracotta or tile, an aluminium washer
- Optional: silicone, filler paste, tile adhesive, mortar
Steps
- Seal the drainage hole at the bottom of the pot to prevent water from leaking: attach the piece of terracotta or washer inside the pot using your chosen fixing material. You can also use a repair adhesive, moulded to the size of the drainage hole.
- Let it dry for a few hours.
- Check for leaks: place the pot on the saucer, fill it with a few centimetres of water, wait 1 or 2 hours, and ensure nothing leaks from the drainage hole. If you notice a leak, repeat step 1.
Your small olla is already finished!
Making a Large Olla
The large olla is more suited to perennial plants or larger plants (bushes, fruit trees, etc.) in the garden.
Materials
- 2 terracotta pots of the same size
- A saucer or plate matching the diameter of the bottom of the pot
- Optional: a piece of terracotta or tile, an aluminium washer
- Optional: silicone, filler paste, tile adhesive, mortar
Steps
- Seal one of the drainage holes at the bottom of the pot to prevent water from leaking: attach the piece of terracotta or washer inside the pot using your chosen fixing material. You can also use a repair adhesive, moulded to the size of the drainage hole. The second hole must remain open, as it will allow the olla to be filled.
- Turn the pot with the open drainage hole upside down and place it on top of the other. The hole is now facing upwards, and the two openings of the pots are aligned.
- Seal the two pots together using your chosen fixing material.
- Let it dry for a few hours.
- Check for leaks: fill the olla through the hole with a few centimetres of water, wait 1 or 2 hours, and ensure nothing leaks from the drainage hole or the joint between the two pots. If you notice a leak, repeat step 1 or 3.
Your large olla is ready!
Installing a Homemade Olla in the Garden
Installation can be done either:
- Before planting
- After planting, as close as possible to the plant's base, taking care not to damage the roots when burying it
It is estimated that an olla waters plants within 1.5 times its diameter (for a 15 cm olla, this corresponds to about 22 cm of irrigated diameter).
Don’t hesitate to install several ollas, for example, in vegetable rows or around a bush.
Avoid placing them in high-traffic areas, paths, or walkways to prevent breaking the lid or damaging the ollas by stepping on them.
- Using a spade, dig a hole matching the height and diameter of the olla.
- Bury the olla, leaving about 2 cm above the soil (roughly the height of the saucer, to ensure it stays in place). Ensure the pot is level and surrounded by soil on all sides, with no air pockets.
- Firm the soil around the pot with your fingers.
- Fill with water from the top or through the hole, using a watering can or hose.
- Close with the lid (cover or plate).
- Mulch to retain moisture and further reduce natural evaporation.
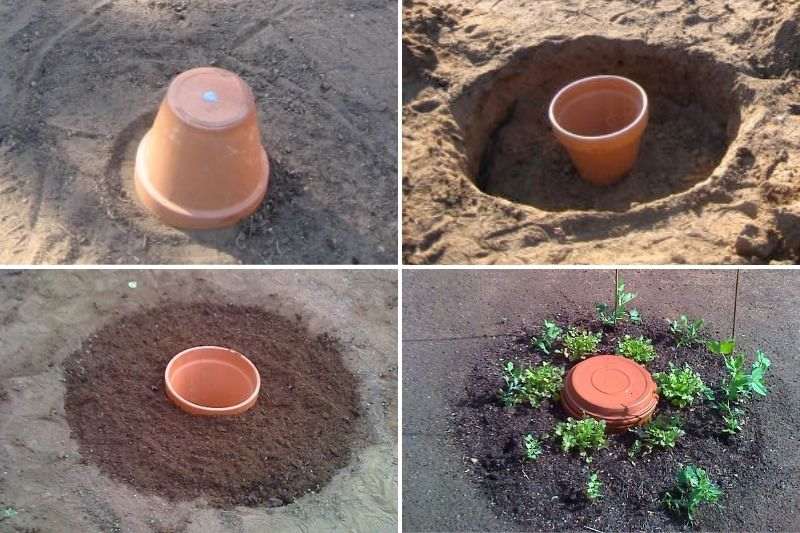
Installing an olla during planting: the clay pot with a sealed bottom is placed in the soil, filled with water, and covered with a saucer. Plants are planted around the olla. (Photo: steveilott)
You can easily check the water level by lifting the lid. Refill as soon as the olla is empty. Typically, the system is self-sufficient for about 5 to 7 days, depending on the weather and ambient temperature.
Tip: for the large olla, you can use a straw or a small stick inserted directly into the hole to check the water level.
In winter, remove the ollas from the soil to clean them thoroughly with water and black soap, before storing them away until the next season. Ollas left in the garden should be protected with thick mulch to survive the cold season. No filling should be done when temperatures are below freezing, to avoid the risk of cracking or breaking the ollas.


Comments