


Delicate and elegant with their flowers featuring fine, crinkled petals like silk, rockroses evoke the garrigue and Mediterranean gardens where their silhouette is frequently seen. Hardy and robust, these shrubs have a relatively limited lifespan: between 10 and 15 years, sometimes less when they take root in soil that is too compact for their liking. This makes you want to propagate them to enjoy their incomparable flowering for longer and to sow rockrose seeds! And it’s just as well because Cistus comes from the Greek kistê, meaning "basket." This alludes to the shape of the rockrose’s fruits, which resemble small baskets filled with seeds. Follow all our advice to sow these seeds and successfully propagate your rockroses.
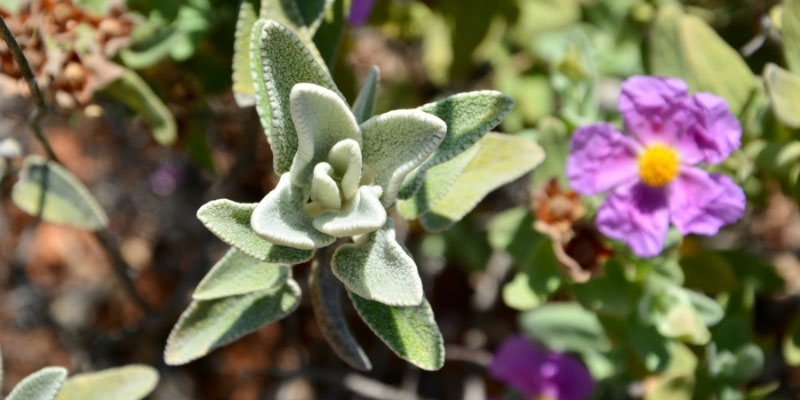
Cistus albidus
When to sow rockrose?
Propagating rockroses by sowing can be done in spring or autumn under cover and works for the different varieties of rockrose. It’s important to know that rockrose is a Mediterranean plant linked to fire ecology; it’s known as a pyrophilous plant: the action of fire promotes the breaking of dormancy in its seeds. In nature, it often propagates after a fire: its seeds need the intense but brief heat of the flames to germinate. Additionally, the spaces unfortunately cleared by the flames allow this pioneer plant to colonise vast areas. To maximise your chances of success with these sowings, you’ll need to simulate the action of fire and heat the seeds to encourage germination. This step might seem a bit technical, but it’s actually very simple to carry out: you’ll just need an oven, in addition to the traditional gardener’s equipment!
Required materials
- Your kitchen oven (conventional, not microwave!)
- Pots or buckets: conventional, biodegradable, or terracotta
- A substrate composed of half compost and half coarse sand, as rockroses require a well-draining mix and appreciate dryness. Alternatively, choose a special sowing compost and avoid cheap composts, often made of poor-quality, undecomposed organic matter (which explains their low cost).
- Rockrose seeds
- Labels
- A mini greenhouse or cold frame
Steps for sowing rockrose
Harvesting the seeds
Rockrose seeds are best harvested in autumn. Be aware that sowing carries a risk of hybridisation; you won’t have a 100% chance of pure varieties, but you might be pleasantly surprised by Mother Nature! Harvesting the seeds is child’s play: simply watch for the inflorescences nearing ripeness and either shake the seeds directly into an envelope or snip off the seed capsules with pruning shears.
Sorting the seeds
After collection, move on to sorting. This essential step isolates the seeds and ensures only the well-formed ones are kept.
Storing the seeds
If you’re not sowing them immediately, store them in an airtight container (small jar, envelope, etc.), away from light and in a dry place. Remember to note the plant’s name and the harvest date on the container for future reference.
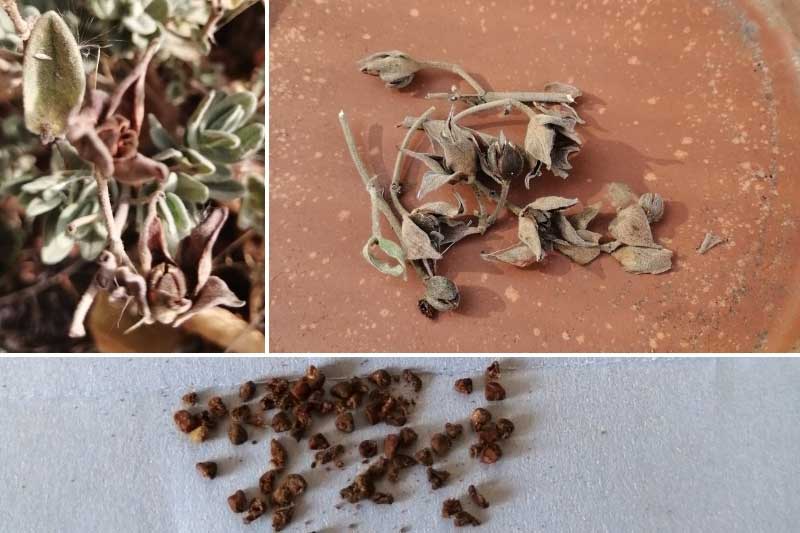
Top: woody capsules of White-leaved Rockrose. Bottom: the seeds
Breaking dormancy
Spread the rockrose seeds on a small ovenproof dish. Preheat your oven to 150°C and heat the seeds for about ten minutes.
Sowing
Distribute the seeds in pots or buckets previously filled with the well-draining substrate or special sowing compost. Cover them with a very thin layer of substrate, water, and label to remember the species sown and the sowing date. Place the sowings in a well-ventilated, bright spot, ideally without direct sunlight. Monitor watering regularly; the substrate should dry slightly between waterings. For autumn sowings, place them under cover during winter (e.g., a greenhouse, mini greenhouse, or cold frame). If condensation forms on the walls, ventilate the sowings by opening them slightly.
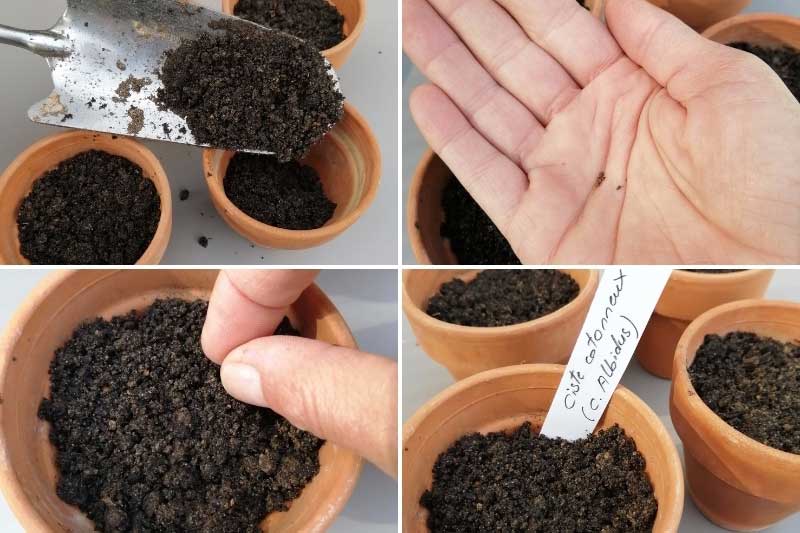
Steps for sowing rockrose seeds
Regularly identify and remove any weeds that might compete with your seedlings. If you’ve sown too densely and the seedlings are overcrowded, don’t hesitate to thin out the weaker ones. Rockrose germination time is about 5 weeks, and the young plants will be mature and ready to be planted in the garden after one year.
Repotting
Repotting your rockrose young plants may be necessary, especially if you’ve sown them in small buckets or trays. Once the seedlings are well-established, carefully remove them from the buckets and transfer them to larger pots, filling in with the same substrate. Gently firm the soil and water, waiting until your young plants are strong enough to be planted in the garden!


Comments