


Rosemary, Rosmarinus officinalis, is a shrub with numerous benefits that needs no introduction. Its grey, evergreen, aromatic foliage, of undeniable ornamental value, adds structure to the garden all year round. Its blue flowering in spring in the north of the country, and from late winter or even year-round in the south, is highly melliferous.
You’ll find it not only in the vegetable garden but also in rockeries or along pathways. A quintessential Mediterranean plant, it thrives in dry soil and is remarkably undemanding, though it dislikes waterlogged soils.
It is used in cooking as well as for its medicinal properties. In short, it’s a shrub you can’t help but love. Here are some tips if you wish to propagate it to adorn different areas of your garden.
Techniques and Tips
Required Materials
As with any cutting, you’ll need:
- A good pruning shear, preferably cleaned and disinfected, to avoid transmitting diseases to your young plant. You can wipe the blade with an alcohol-soaked cloth for this purpose.
- One or more pots to hold the cuttings while they take root.
- Clay pebbles, which retain moisture in the pot while promoting drainage.
- A light substrate
Substrate
Let’s pause for a moment on the substrate. Rosemary is known to prefer dry and relatively poor soils, so it’s important to pay some attention to the "soil" to ensure the cuttings root well and the resulting young plants are healthy.
The ideal is to create a mix consisting of half compost—which will provide some nutrients—and half river sand to further improve drainage. It’s advisable to moisten the substrate beforehand, before planting the cuttings. Otherwise, you’ll need to water your cuttings with a very fine spray.
Several Methods
When to Take Rosemary Cuttings?
There are several methods for propagating rosemary by cuttings. They are carried out at slightly different times of the year, from spring to autumn.
Propagating Rosemary in Water
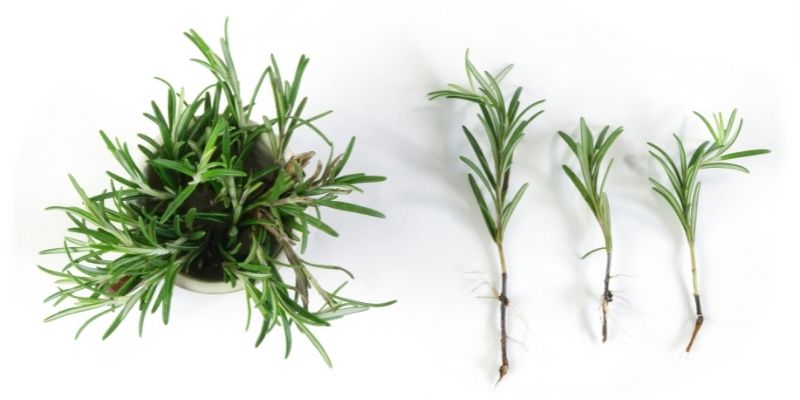
Propagating cuttings in water is a method accessible to everyone. It is done in spring or summer on young, non- or slightly lignified stems, meaning those that haven’t yet taken on a woody appearance and are still flexible.
- Cut stems about 15 cm long. Prepare more than the number of cuttings you want, as it’s unlikely you’ll achieve 100% success. If you end up with more cuttings than needed, you can always trade them for other plants or seeds with amateur gardeners.
- Remove the leaves from the lower part and keep only a tuft of leaves at the tip.
- Place the stem in a glass of water. Avoid tap water, which is usually quite chlorinated, or leave the glass of water out in the open for a few hours before immersing the cuttings to allow the chlorine to evaporate. Ideally, use rainwater, which is also less hard. If you can’t collect rainwater, bottled mineral water is another option.
- Place the glass of water in a bright spot without direct sunlight.
Now, patience is key. Simply change the water in the glass every day to keep it clear.
After a few weeks, you’ll see roots appear on the submerged part. Let them develop a bit before planting the cutting in a pot filled with a well-draining mix of sand and compost.
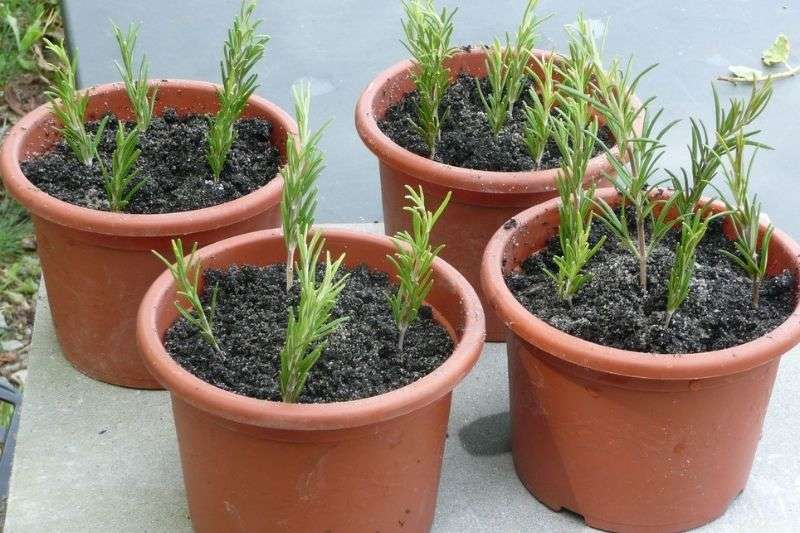
Propagating Rosemary Under Cover
This technique is done using semi-hardwood stems, meaning those that have begun to lignify, a process that typically occurs from August onwards, as the name suggests.
- Take stems about 15 cm long. There’s no need to use longer stems;
- You can remove the leaves from the lower part or not—it doesn’t make much difference;
- Make a hole, for example with a pencil, and place the cutting in it.
- Firm the soil around the stem so the substrate adheres well. Water lightly if the substrate hasn’t been pre-moistened;
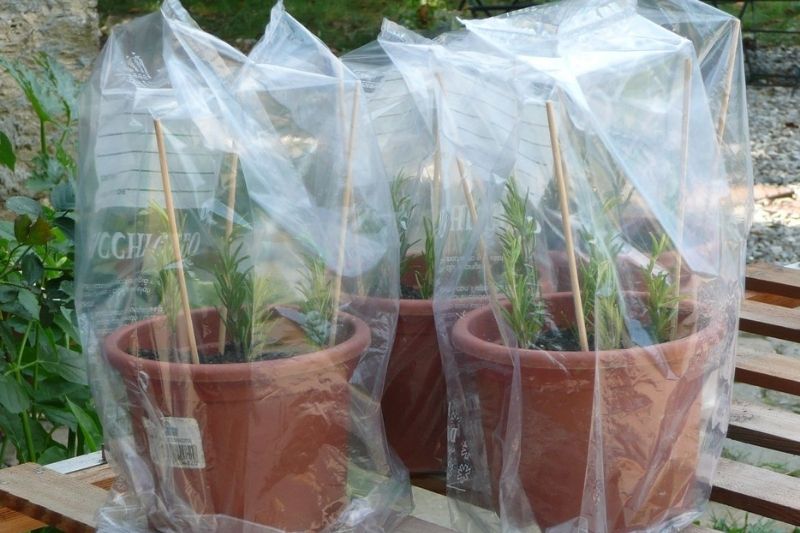
- Place a cloche, a cut water bottle, or a plastic bag over the top, supported by four small stakes to prevent it from touching the cuttings. This will create a microclimate conducive to rooting, thanks to the retained humidity and the warmth from this mini greenhouse effect. Place the pot in the shade to avoid scorching sunlight.
After about a month, you should see new shoots on the stems, a sign that the cuttings have taken well.
Heel Cutting of Rosemary
Heel cuttings are taken from semi-hardwood stems, meaning stems that are beginning to harden and take on a woody appearance. This is done in late summer or early autumn.
- Take a 25 cm stem with a semi-hardwood side shoot. This side shoot will form the cutting, with a small part of the main branch retained at its base (the famous heel).
- Place the cutting in a pot and cover the base with a mix of compost and sand. Water if the substrate isn’t moist and place in the shade. Then, all that’s left is to wait for rooting.
Keep your cuttings in a bright spot, sheltered from frost during winter. If you have a cold frame, that’s ideal. Otherwise, near a window in an unheated room is suitable in northern regions. In milder climates, pots can overwinter under a tree, sheltered from direct sunlight.
When to Transplant Rosemary?
Planting out is done the following spring, when the weather warms up.
When planting, remember to water well to ensure your young plant establishes successfully.
These are the techniques for propagating rosemary by cuttings. But know that other options are available for propagation: sowing seeds, of course, and also layering. Plenty of experiments to look forward to!
To Go Further
- Discover all our rosemary varieties.
- Learn our tips for preventing and treating rosemary diseases and pests.
- Here’s a small selection of drought-resistant perennials, perfect for a no-water garden!
- Discover our selection of 15 medicinal plants with numerous benefits… to grow in your garden!


Comments