


Alocasia - Elephant's ear : growing and caring
Contents
The Alocasia in a nutshell
- The Alocasia is a stunning tropical plant with highly graphic foliage
- It boasts large, glossy leaves with beautiful veining
- There are numerous varieties, offering great diversity in leaf shapes and colours
- The Alocasia requires good light and a warm, humid atmosphere
- It effortlessly creates an exotic and lush ambiance in a house or flat
The word from our expert
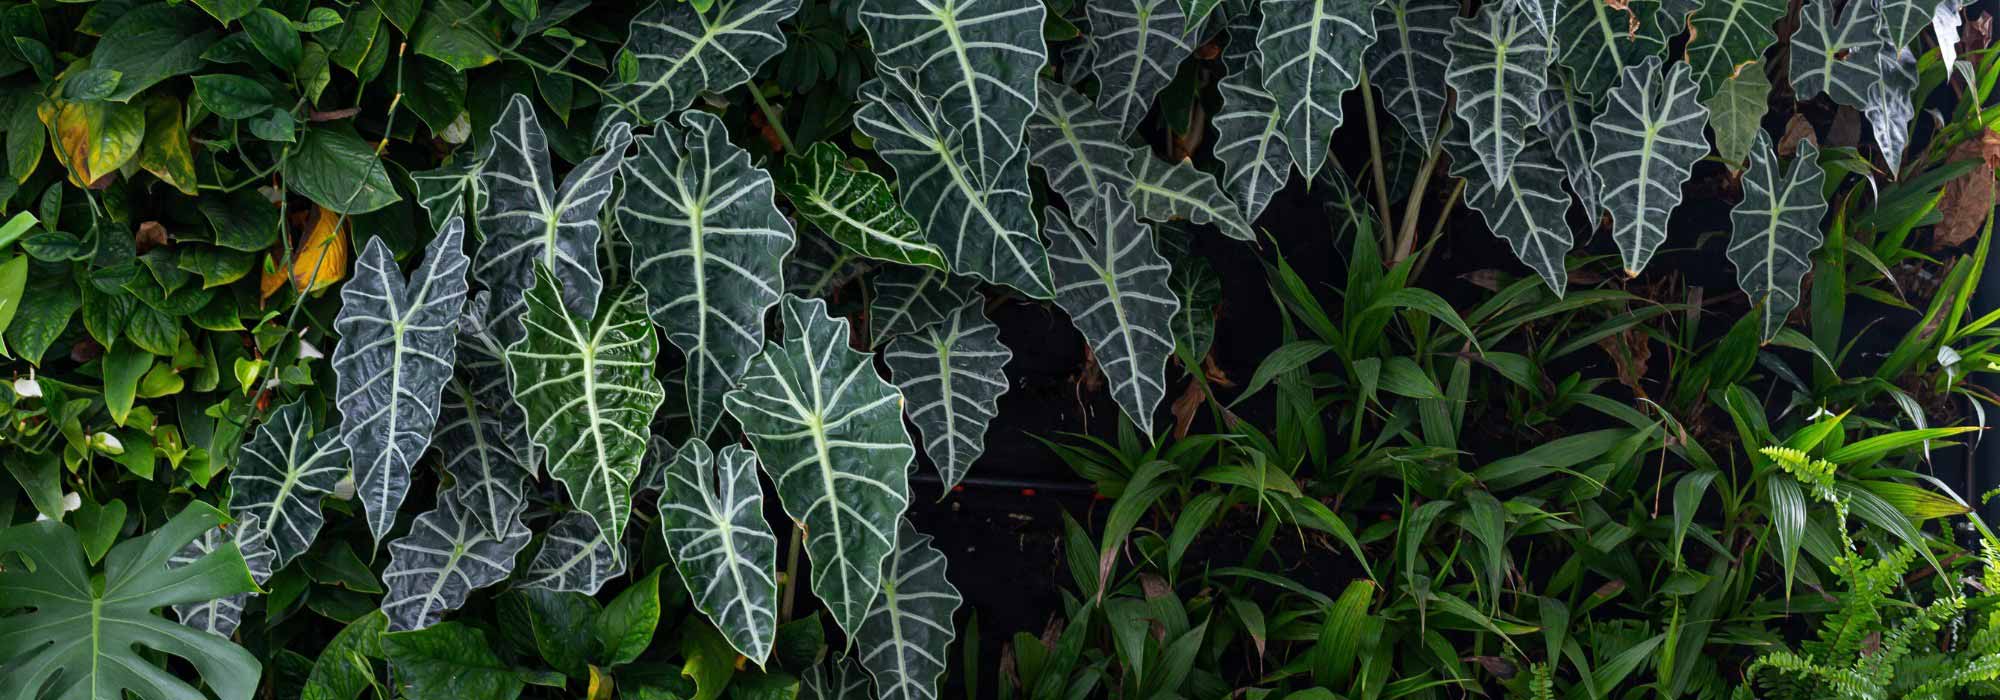
Alocasia, also known as “Elephant’s Ear” due to the imposing shape of its leaves, is a tropical plant native to the humid forests of Southeast Asia. Highly prized as a houseplant, it bears large sagittate leaves, which take on different hues depending on the variety, ranging from green, purple, black, silver, to white-marbled… Its leaves have well-defined and contrasting veins, giving the plant a very graphic style.
Alocasia thrives in bright interiors, with temperatures above 15°C and a relatively humid atmosphere. When its needs are met, it proves to be a stunning indoor plant with rapid growth, perfect for bringing an exotic and lush ambiance to a living room, office, or apartment. It pairs beautifully with other houseplants such as Monstera, Chlorophytum, Pothos, or Calathea to recreate a “jungle” effect. Discover all our tips for successfully growing Alocasia, including how to plant and care for it!

Description and Botany
Botanical data
- Latin name Alocasia sp.
- Family Araceae
- Common name Elephant's ear
- Flowering Rare indoors
- Height Between 40 cm and 2 m
- Exposure Bright but no direct sunlight
- Soil type Light, rich and well-draining substrate
- Hardiness Frost-sensitive
Alocasia is a tropical plant belonging to the Araceae family, the family of Arums, which includes many houseplants with lush foliage, such as Spathiphyllum, Monstera, Anthurium, Dieffenbachia, Philodendron… Native to the humid forests of Southeast Asia, Alocasia thrives under the canopy of trees, enjoying filtered light and a warm, humid atmosphere. Adapted to indoor cultivation, it captivates with its elegant silhouette and imposing leaves, earning it the nickname “elephant’s ear”.
Alocasia is very close to Colocasia, with which it is sometimes confused. Their foliage is very similar, but in Colocasia, the petiole attaches to the lamina towards the centre of the leaf, and the leaves are often oriented downwards, whereas in Alocasia, the petiole is attached closer to the edge of the lamina.
There are nearly 80 species of Alocasia. The most commonly cultivated are Alocasia macrorrhiza and Alocasia zebrina, which have given rise to numerous varieties distinguished by their colourful and highly decorative foliage.
Alocasia has an upright and graphic habit. Its long, slender stems emerge directly from the underground rootstock and bear glossy leaves with prominent veins. The leaves are typically cordate or sagittate (arrow-shaped, with two lobes at the base and tapering to a point), but they can also be deeply lobed, with irregularly cut edges, as in Alocasia ‘Jacklyn’. They also have a very unique shape in Alocasia ‘Stingray’, broad and flattened, cordate at the base and ending in a very slender point.
Alocasia stands out for its original foliage. Its leaves come in a wide range of colours depending on the variety: they can be green, black (Alocasia ‘Black Velvet’…), grey or silver (‘Silver Dragon’, ‘Dragon Scale’, Alocasia melo…), purple (Alocasia azlanii), or marbled with white (Alocasia ‘Frydek Variegata’)… The leaves often have highly contrasting veins, creating graphic patterns on the lamina. They are borne on long petioles, which can also be beautifully coloured (black in Alocasia ‘Black Stem’, pink in ‘Pink Dragon’…). Alocasia zebrina even stands out with its zebra-striped petioles, green and black!
Alocasia leaves often have a glossy, shiny appearance, but some varieties boast a velvety texture, soft and silky (‘Black Velvet’…). This diversity of colours and textures makes each Alocasia unique and gives it exceptional ornamental character.
The dimensions of Alocasia vary greatly depending on the species and variety. Some remain compact and do not exceed 40 cm, while others can reach over 2 metres in height, creating a lush jungle-like impression indoors.
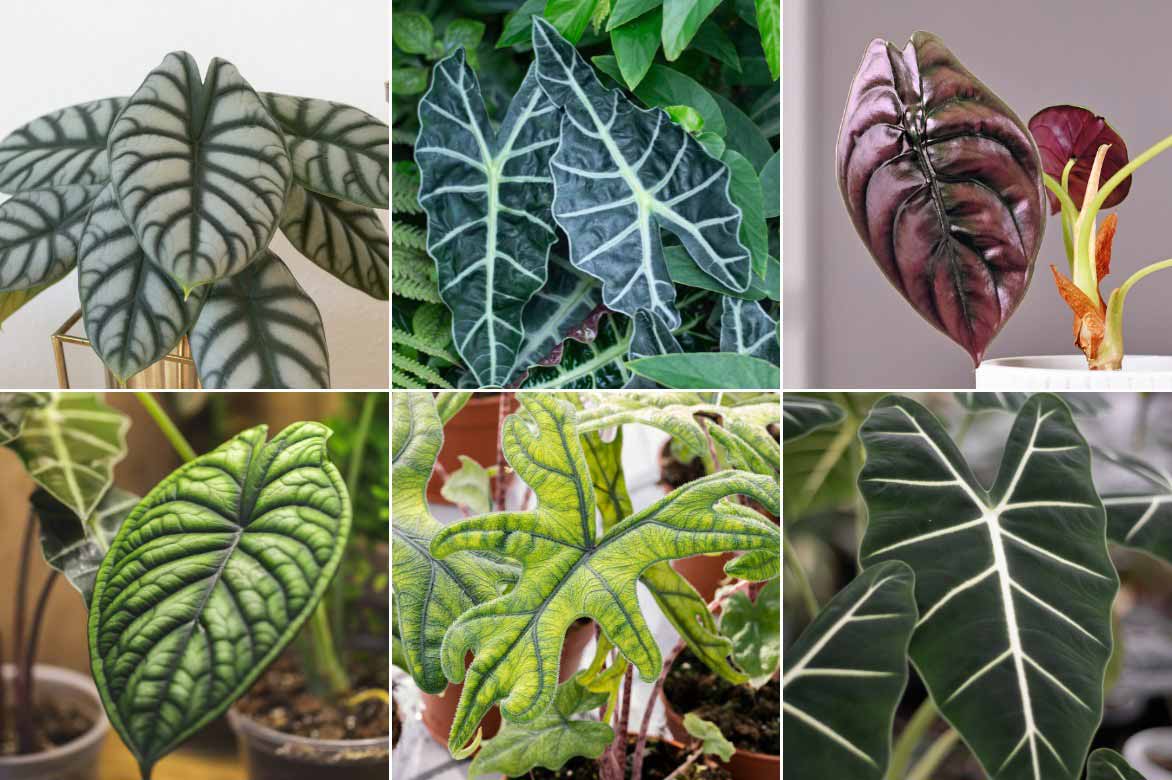
Alocasia ‘Silver Dragon’, Alocasia amazonica, Alocasia azlanii, Alocasia ‘Dragon Scale’, Alocasia ‘Jacklyn’, Alocasia micholitziana ‘Frydek’
Although Alocasia is capable of flowering, its flowering is rare indoors. When it occurs, it manifests as a typical Araceae inflorescence, consisting of a white or cream spathe surrounding a central spadix. However, these flowers are often considered secondary compared to the incredible presence of the foliage, and it is common for gardeners to cut them off so the plant can conserve all its energy for vegetative growth. In nature, Alocasia flowers give way to round, red or orange berries, densely clustered on the spathe. This fruiting, typical of Araceae, closely resembles the fruits of Arum maculatum found in forests in our latitudes.
Alocasia is particularly sensitive to climatic conditions and cannot tolerate temperatures below 15°C. Indoors, it thrives in a temperate environment between 18 and 25°C, but dislikes drafts and sudden temperature changes. Its constant need for humidity makes it demanding in terms of watering and placement. An atmosphere that is too dry or, conversely, excessive water can quickly lead to yellowing leaves or stunted growth.
Alocasia grows rapidly in favourable conditions, producing new leaves at a steady pace, but its growth naturally slows in winter, and some of its foliage may drop during this period. This phenomenon is normal and should not be a cause for concern: with the return of spring, Alocasia usually resumes its growth and regains its full splendour.
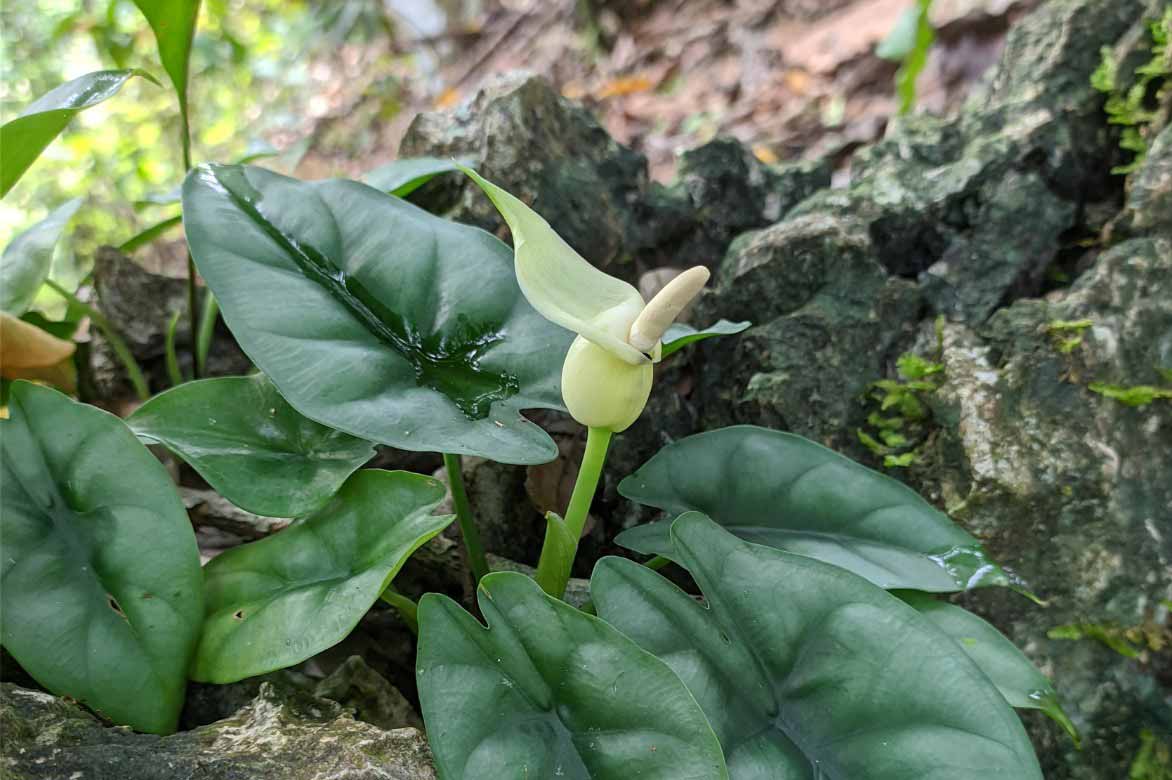
The flowering of Alocasia reversa: a spathe inflorescence, typical of Araceae!
The main varieties of Alocasia
Planting Alocasia
Where to Place Alocasia?
Indoors, Alocasia needs bright, indirect light. In its natural habitat, it grows under the canopy of trees, enjoying filtered light. It is therefore essential to recreate these conditions by placing it near a well-exposed window, but without direct sunlight, which could scorch its foliage. An east or west-facing window is ideal, while a south-facing window requires a sheer curtain to filter the intense rays.
If the indoor space is dark, using a grow light can be a solution to compensate for the lack of light and ensure optimal growth.
Ambient humidity also plays a key role in its well-being. Alocasia prefers a humid atmosphere, similar to that of tropical forests. A room with a humidity level above 60% is ideal. In a dry indoor environment, especially in winter with heating, it is recommended to use a humidifier, mist its foliage, or place a tray of water with pebbles under the pot to maintain a good level of humidity.
Finally, Alocasia should be placed away from drafts, which can stress the plant and cause yellowing of the foliage. It should also be kept away from direct heat sources like radiators, as hot, dry air can hinder its development.
Place Alocasia in a bright spot, ideally behind a window
When to Plant It?
The best time to plant or repot an Alocasia is in spring, when the plant is in full growth phase. During this time, it recovers more easily from the stress of repotting and quickly develops new roots. Winter is a dormant season for Alocasia; it is therefore best to avoid any major interventions during this period, except in cases of absolute necessity, such as root rot.
Repotting is recommended every one to two years, depending on the plant’s growth. If the roots start to emerge from the drainage holes of the pot or the soil becomes too compacted, this indicates it is time to give it a new space.
How to Plant or Repot It?
The choice of pot is crucial for the health of Alocasia. It is imperative that it has drainage holes to prevent waterlogging, which could cause root rot. We recommend choosing a terracotta pot, as it allows better aeration of the soil and prevents excess moisture.
Regarding the soil, Alocasia needs a well-draining, light, and nutrient-rich mix. A mixture of houseplant compost, perlite, and pine bark is ideal. Perlite promotes good drainage, while pine bark improves soil aeration and reduces compaction.
Follow these steps to plant your Alocasia in a pot:
- Place a layer of clay pebbles or gravel at the bottom of the pot to improve drainage.
- Then add the soil mix to the pot.
- Gently remove the Alocasia from its old pot.
- Place the plant in the centre and gradually add the soil around the roots, being careful not to pack the soil too tightly.
- Water lightly after planting, just enough to moisten the soil without soaking the roots.
- Place the pot in a bright spot, away from direct sunlight.
After repotting, Alocasia may show signs of stress, such as temporarily drooping leaves. This is normal, and the plant usually regains its vigour after a few days of adjustment.
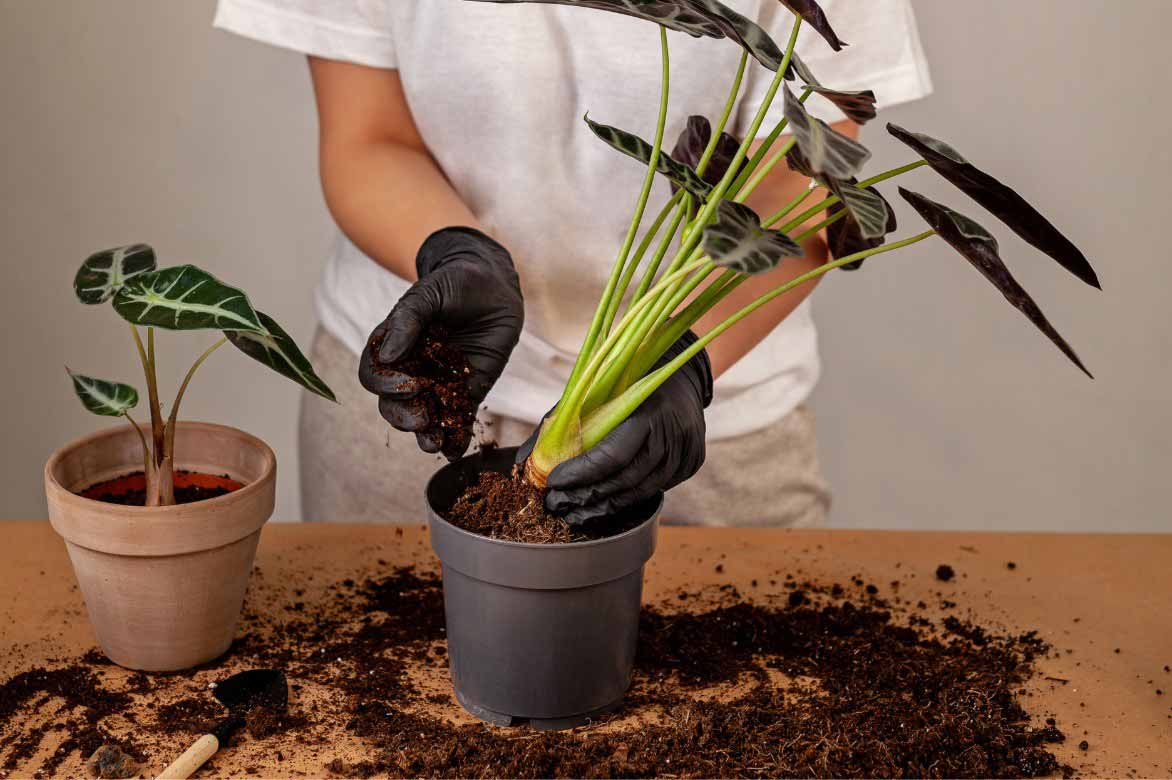
Plant your Alocasia in a pot slightly larger than the root ball
How to care for Alocasia?
The Alocasia is a demanding plant that requires specific care to maintain its spectacular foliage and vitality. Indoors, it is essential to provide conditions close to its tropical habitat, with proper management of watering, humidity, and light. Rigorous maintenance will help avoid common issues such as yellowing leaves or leaf drop.
Watering
One of the most delicate aspects of Alocasia care is watering management. The Alocasia loves moisture but fears excess water, which can lead to root rot. The frequency of watering depends on several factors, such as ambient temperature, air humidity, and pot size.
As a general rule, water when the top layer of the soil is dry to a depth of about 2 to 3 cm. In summer, this may mean watering once or twice a week, while in winter, watering every two weeks may suffice. Use non-calcareous water (ideally rainwater or filtered water) at room temperature. After watering, it is important to drain any excess water from the saucer to avoid stagnation.
Being a tropical plant, the Alocasia appreciates high ambient humidity, around 60 to 70%. In dry indoor environments, especially in winter with heating, it is crucial to increase humidity to prevent the leaves from drying out. Several solutions exist for this:
- Place a humidifier near the plant.
- Use a tray with clay pebbles and water under the pot, ensuring the roots do not sit in water.
- Mist the leaves with water, but sparingly to avoid fungal diseases.

Feel free to mist the Alocasia foliage occasionally
Cleaning and pruning the leaves
The Alocasia’s leaves, often large and glossy, quickly accumulate dust, which can limit their ability to absorb light. Regular cleaning with a damp cloth helps maintain their shine and promotes photosynthesis.
It is also normal for some leaves to yellow over time. The oldest leaves eventually wither naturally to make way for new shoots. When a leaf turns completely yellow, it can be cut at the base with clean pruning shears to prevent it from unnecessarily draining the plant’s energy.
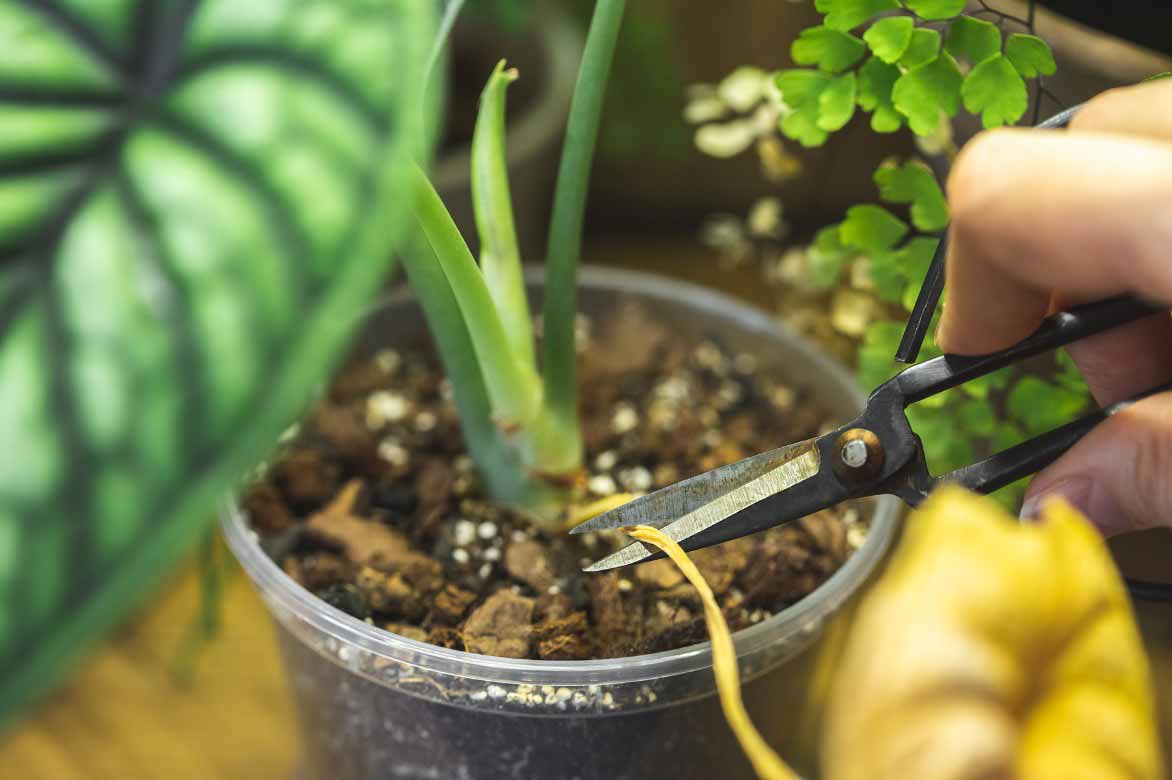
When you see yellow and dry leaves, cut them at the base
Fertilisation
As the Alocasia is a fast-growing plant, nutrient supplementation is recommended to encourage dense and vigorous foliage. During the growing season, from spring to summer, it is advisable to apply a balanced liquid fertiliser, rich in nitrogen, every two to three weeks.
In autumn and winter, the plant enters a dormant phase, and its growth slows. Fertiliser application should therefore be reduced or even stopped entirely until spring returns.
Repotting
Repotting is necessary every one to two years, when the Alocasia starts to feel cramped in its pot or the soil becomes too compact. This operation is best done in spring, choosing a slightly larger pot with fresh, well-draining soil. Good drainage is essential to prevent water stagnation, the main cause of root rot.
Dormancy
As winter approaches, it is common for the Alocasia to slow its growth and lose some leaves. This winter dormancy is entirely normal. During this period, it is advisable to reduce watering, stop fertilising, and avoid repotting or sudden environmental changes. When temperatures and light levels increase in spring, the plant naturally resumes its growth.
Diseases and parasitic pests
Although the Alocasia is a resilient plant when provided with optimal conditions, it can be prone to various issues related to humidity, light, or the presence of parasites. Regular observation and maintenance can prevent most diseases and avoid infestations of harmful insects.
Common Diseases
One of the most frequent problems with Alocasia is root rot, usually caused by overwatering or poor substrate drainage. When the roots are constantly submerged in water, they begin to rot, leading to drooping leaves and general yellowing. To avoid this issue, it is essential to use a pot with drainage holes, a well-aerated substrate, and to avoid excessive watering. If rot is detected, the plant should be repotted immediately by removing the affected roots and using dry, healthy soil.
Another common disease is powdery mildew, a fungus that appears as a white, powdery deposit on the leaves. This problem is often linked to an overly humid and poorly ventilated environment. To eliminate it, simply improve air circulation around the plant and treat the affected leaves with a natural fungicide, such as sulphur or a horsetail decoction.
Pests and Parasites
Alocasia is sometimes attacked by mealybugs, small white, cottony insects that settle at the base of the leaves and stems to feed on the sap. Their presence weakens the plant and can slow its growth. To get rid of them, you can clean the infested areas with a cotton pad soaked in 70% alcohol or spray a mixture of water and black soap.
Spider mites are also a formidable enemy, especially during dry periods or in winter when indoor air is too dry. These tiny mites suck the sap from the leaves, leaving behind yellow spots and a discoloured appearance. A good preventive measure is to maintain high humidity levels around the plant, as these pests thrive primarily in dry environments. In case of infestation, it is advisable to mist the plant with water or use a natural acaricide based on neem oil.
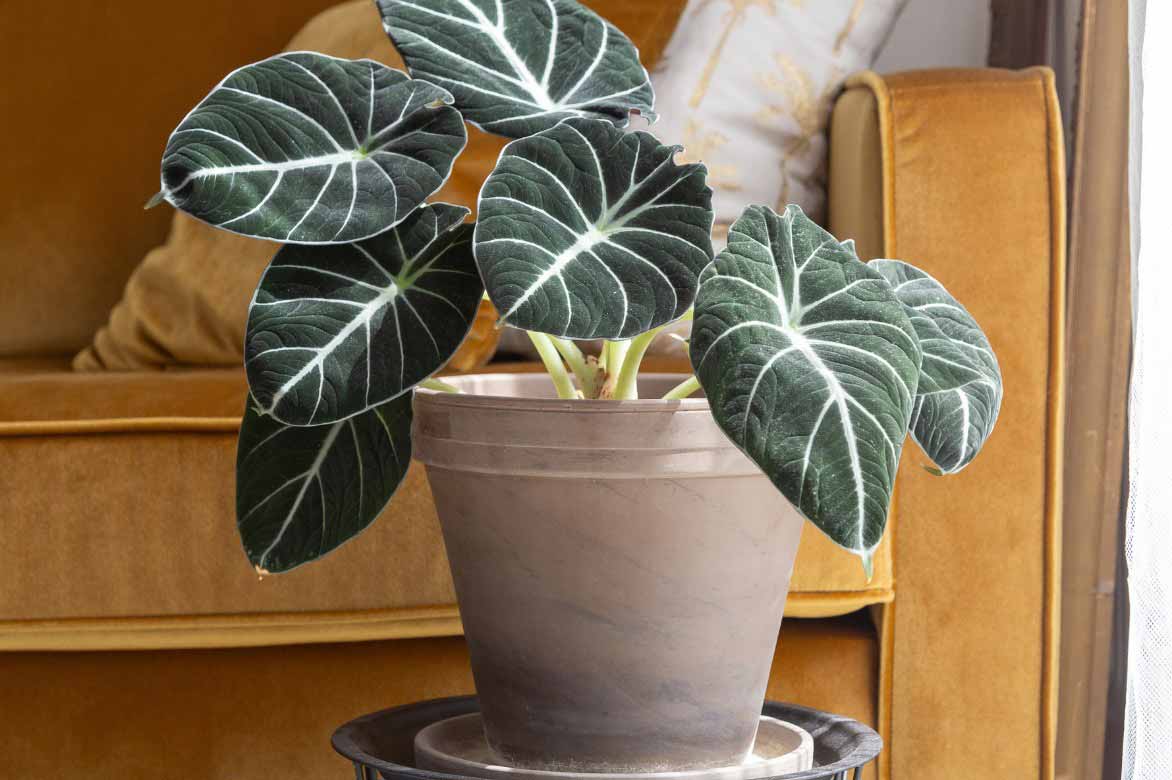
Alocasia reginula ‘Black Velvet’
How to propagate Alocasia?
Alocasia can be propagated by dividing the rootstock. Unlike other houseplants, it cannot be propagated from single leaves or stems, and sowing is rarely practised indoors due to the difficulty of germination. Dividing the rootstock is the most effective method and allows you to obtain healthy new plants, identical to the parent plant.
When to propagate Alocasia?
The best time to propagate an Alocasia is in spring or early summer, when the plant enters its active growth phase. At this time, it will recover quickly from the stress caused by separation and develop new leaves within a few weeks. Winter, a period of dormancy, is not recommended for this operation, as the plant would take longer to adapt and could wither.
How to divide Alocasia?
Before dividing, it is important to ensure that the Alocasia is mature enough and has several well-developed offsets. An offset is a young shoot that forms at the base of the parent plant, already possessing its own roots.
- Gently remove the plant from the pot: It is advisable to lightly moisten the substrate the day before to facilitate extraction and avoid damaging the roots.
- Clear the roots and locate the offsets: With your fingers or a small stick, gently remove excess soil around the roots to better distinguish the different parts of the rootstock.
- Separate the offsets: Using a sharp, sterilised knife, cut the offsets, ensuring each section has at least one leaf and a few roots. If possible, favour offsets that detach naturally.
- Let the wounds dry: To avoid fungal infections, it is recommended to let the cut parts dry for a few hours before replanting. Applying a little cinnamon powder to the wounds can also aid healing.
- Replant each offset in a suitable pot: Use a light, well-draining substrate, composed of tropical plant compost, perlite, and pine bark. Place the offset in a pot with drainage holes and bury it slightly, ensuring not to compact the soil too much.
- Water moderately: After planting, a light watering is sufficient to moisten the substrate without waterlogging it. It is important to maintain a humid atmosphere around the young plants without drowning them.
After division, the new plants may take a few weeks to adapt and produce new leaves. During this period, it is essential to avoid direct sunlight, maintain a stable temperature around 20 to 25°C, and ensure good humidity levels. A bright but filtered location is ideal to encourage rooting.
Watering should remain moderate: it is best to wait until the substrate dries slightly on the surface before watering again. Excess water could weaken the young roots and encourage fungal growth.
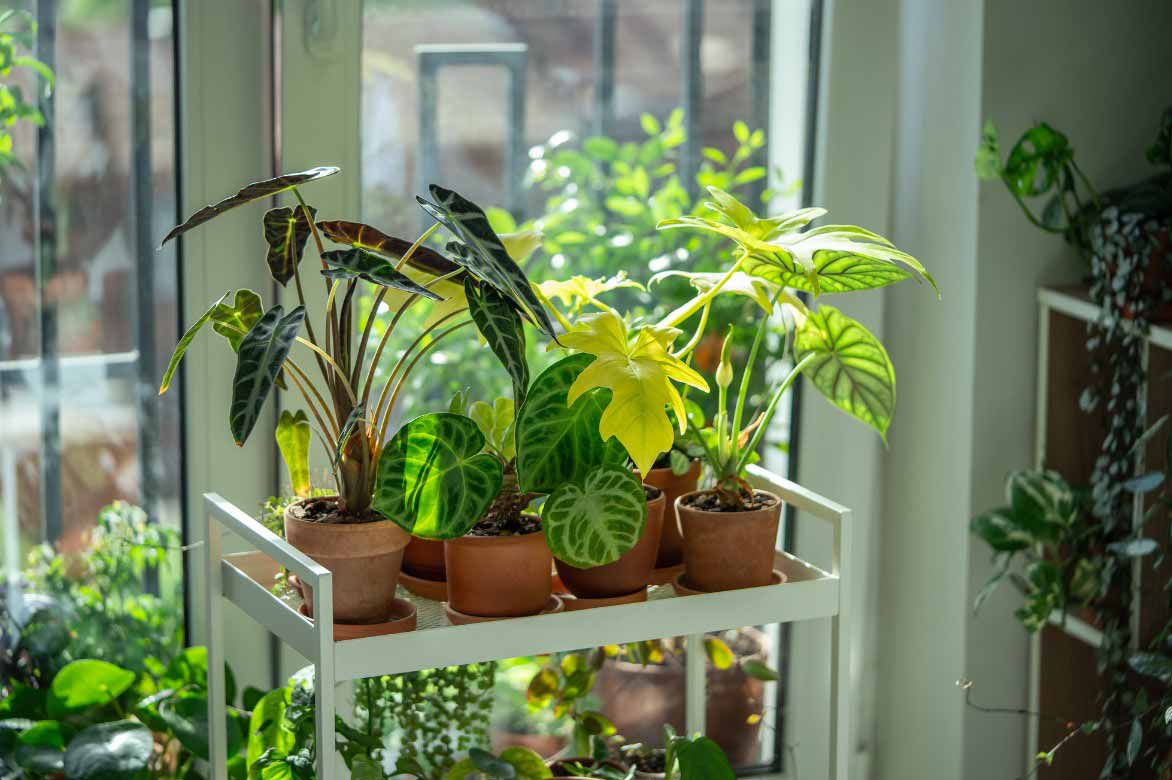
How to pair Alocasia?
For a lush jungle effect, the Alocasia can be combined with other tropical plants boasting exuberant foliage. Philodendrons and Monstera, with their large, split leaves, offer an interesting contrast while sharing the same light and humidity requirements. Calatheas and Marantas, prized for their colourful and dynamic foliage, perfectly complement the Alocasia by adding varied textures and patterns to the ensemble.
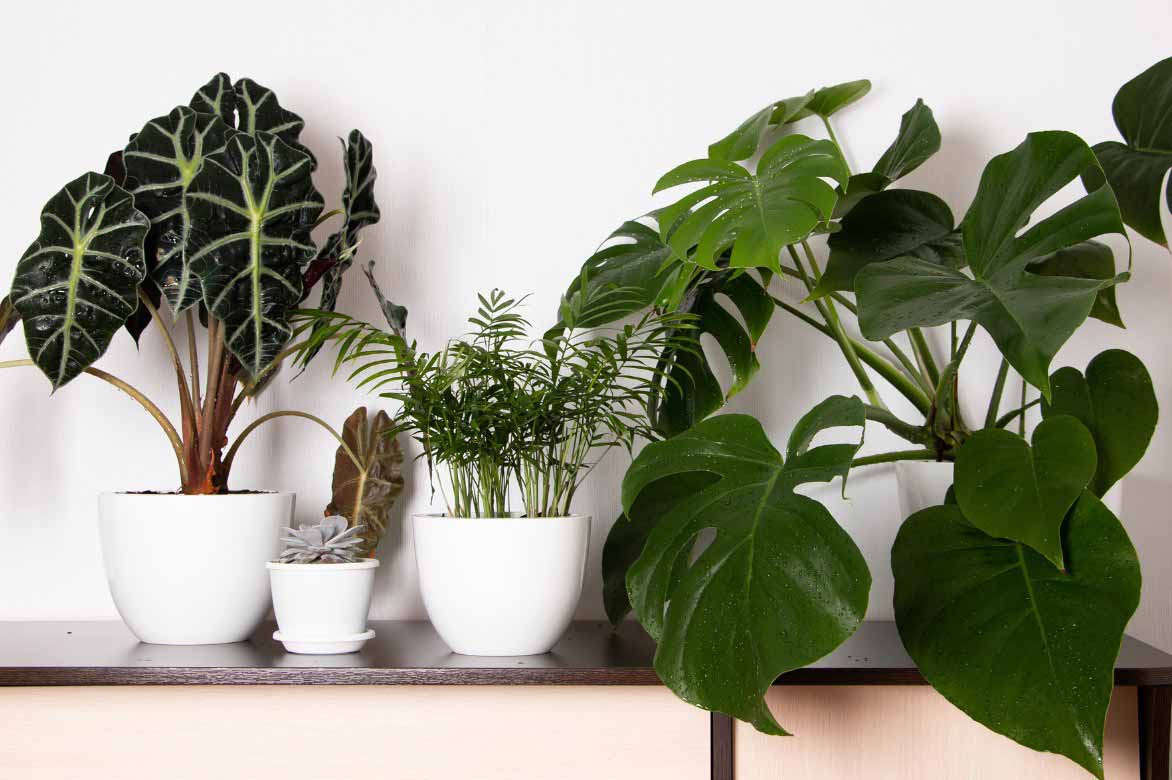
The Alocasia pairs beautifully with the lush foliage of the Monstera
Tropical ferns such as Nephrolepis or Asplenium also make excellent companions. They create a verdant undergrowth reminiscent of the humid forests where Alocasia naturally thrives. In addition to providing a dense and natural effect, they help increase ambient humidity, which benefits all the plants in the arrangement.
The Alocasia stands out for its often glossy and veined foliage. To accentuate its brilliance, it is interesting to pair it with plants featuring matte or velvety leaves. The Alocasia ‘Black Velvet’, for example, with its dark and velvety foliage, pairs very well with a Begonia maculata, whose leaves are speckled with white and slightly translucent.
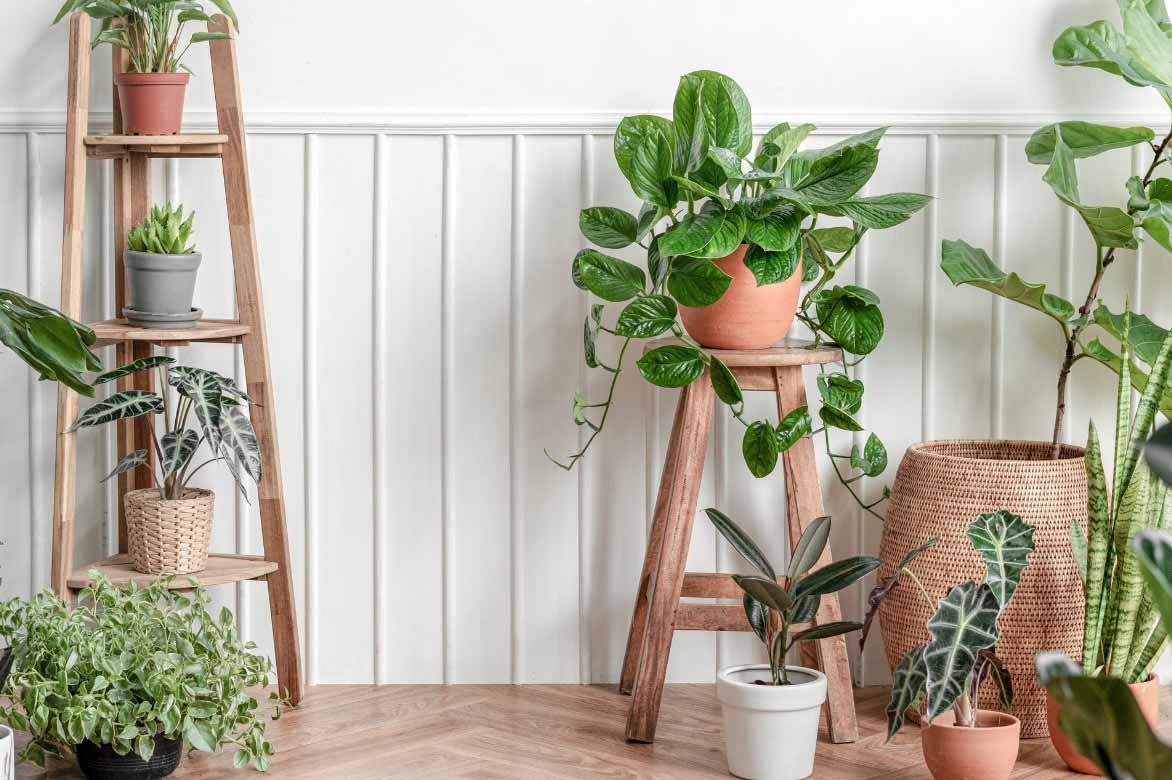
Pair the Alocasia with other houseplants such as Monstera karstenianum, Ficus elastica, Ficus lyrata, Sanseveria cylindrica…
Don’t hesitate to play with heights and volumes to highlight the slender and graphic habit of the Alocasia. In the background, it can be accompanied by tall plants like the Strelitzia nicolai or the Ficus lyrata, which add verticality. Conversely, to fill the space at the base of the Alocasia, creeping plants like Pothos or Peperomia prostrata can be placed in hanging pots or nearby to cascade naturally.
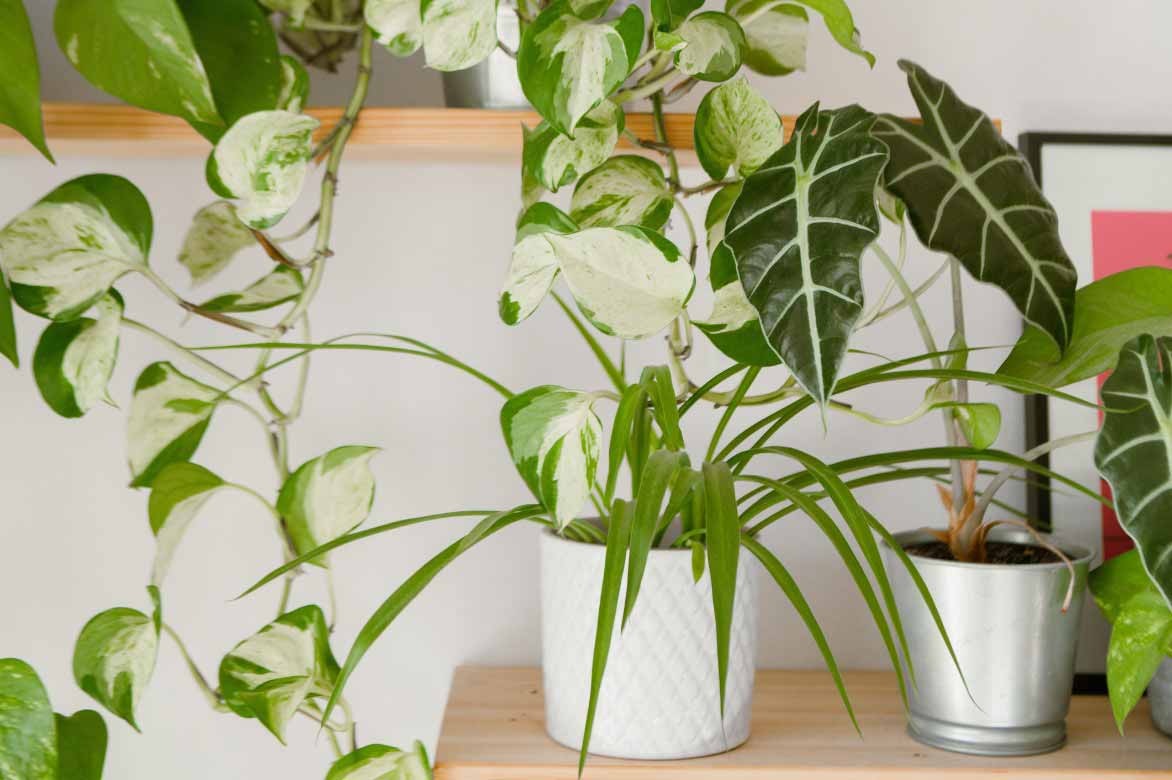
Alocasia ‘Polly’, Chlorophytum comosum, and Pothos Epipremnum ‘Happy Leaf’
Useful resources
- Discover all our Alocasia varieties on our online shop, as well as our entire range of houseplants.
- Explore our selection of books on houseplants.
- Subscribe!
- Contents

Comments