


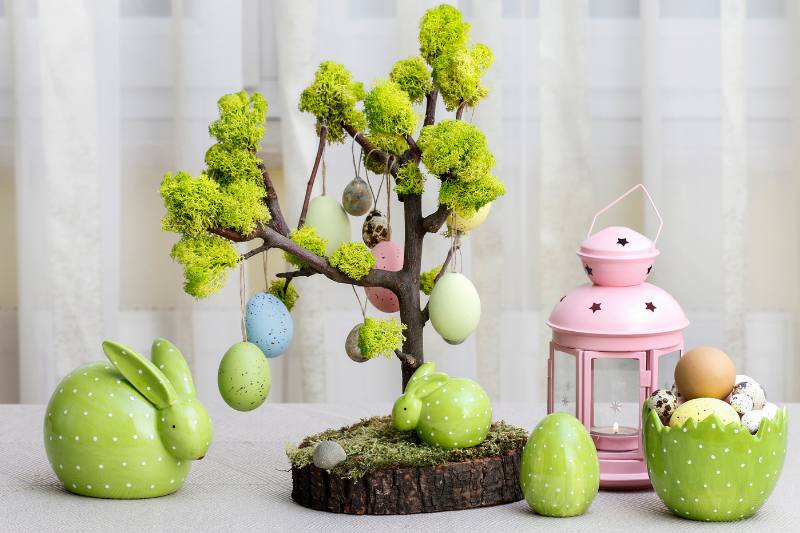
In spring, the garden bursts into colour: daffodils and tulips make their return, a sign that Easter is approaching! For the occasion, perhaps you'd also like to add a decorative and original touch to your home or table? Why not make a homemade Easter tree? Follow this step-by-step tutorial to create a lovely Easter tree using natural materials and suspended eggs.
The History of the Easter Tree
The Easter tree, or "Osterbaum," is a tradition originating from Germany and Scandinavian countries. It symbolises renewal, fertility, and the arrival of spring. Since the 18th century, it has been common in some regions to decorate tree branches with coloured eggs, representing life and nature awakening after winter.
Today, this tradition has spread to several countries and comes in various forms: real decorated trees in gardens or miniature versions like our DIY (do-it-yourself) project. A simple and joyful way to celebrate Easter!
Materials Needed to Make an Easter Tree
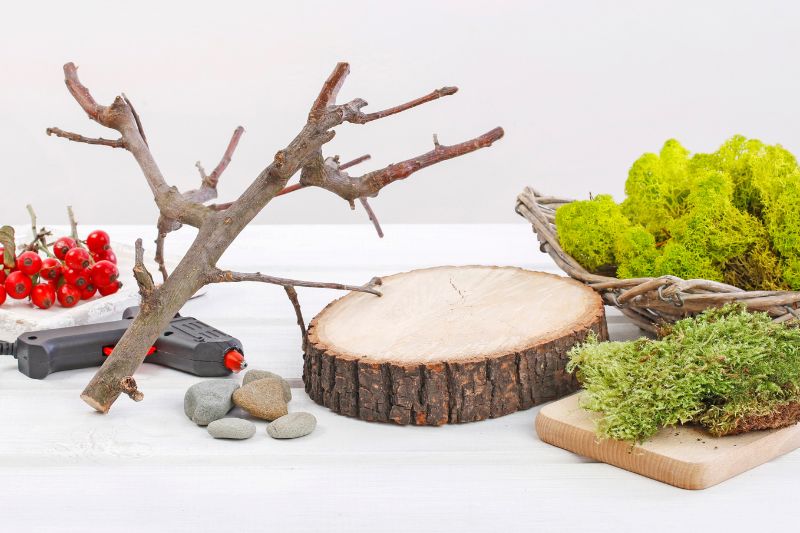
Before you begin, here’s a list of the materials you’ll need:
- A branch with several branchings to form the small tree.
- A slice of wood log to serve as the base support.
- A hot glue gun and glue sticks.
- Natural or artificial moss.
- Small decorative eggs (plastic, wood, or shells you’ve decorated yourself).
- String or thin ribbon to hang the eggs.
- A few small pebbles or natural decorative elements (optional).
Once everything is ready, let’s get crafting!
Steps to Make the Easter Tree
1- Prepare the base: Place your wood slice on a flat surface. Ensure it’s stable, as it will serve as the support for your tree.
2- Glue the branch: Using a hot glue gun, generously apply hot glue to the base of the branch and firmly attach it to the centre of the wood slice. Hold for a few seconds to let the glue set and harden.
Tip: You can reinforce the structure by screwing a flat-headed wood screw from underneath. Then, check that the base is still stable.

3- Decorate the wood slice: Apply glue to the wood slice around the base of the branch, then attach pieces of moss to mimic natural soil. You can also add a few pebbles for a more authentic effect. Let it dry for a few minutes before moving to the next step.
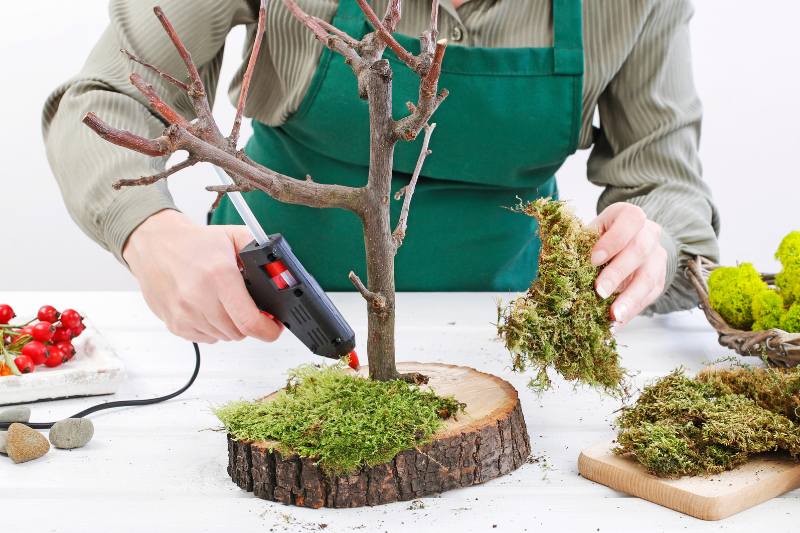
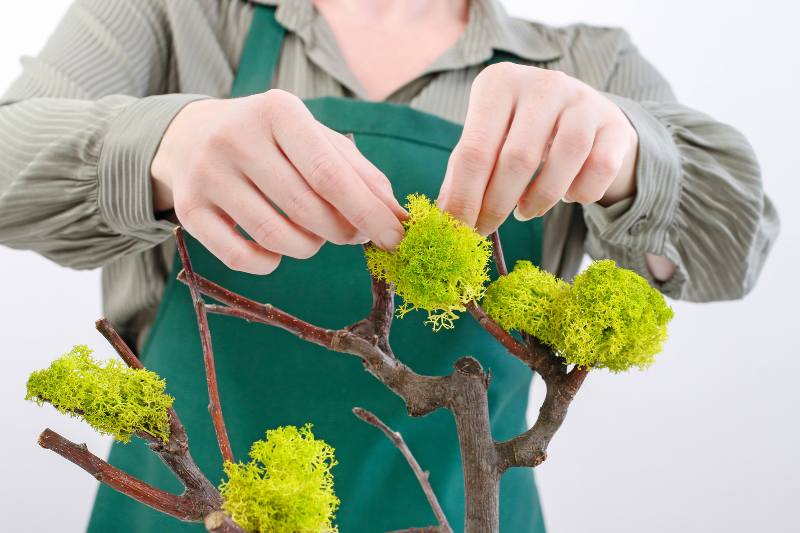
4- Add moss to the branches: To create a leafy effect, glue (again using the hot glue gun) small pieces of moss to the tips of the branches. This will give the illusion of a lush spring tree. Wait a few minutes for everything to dry.
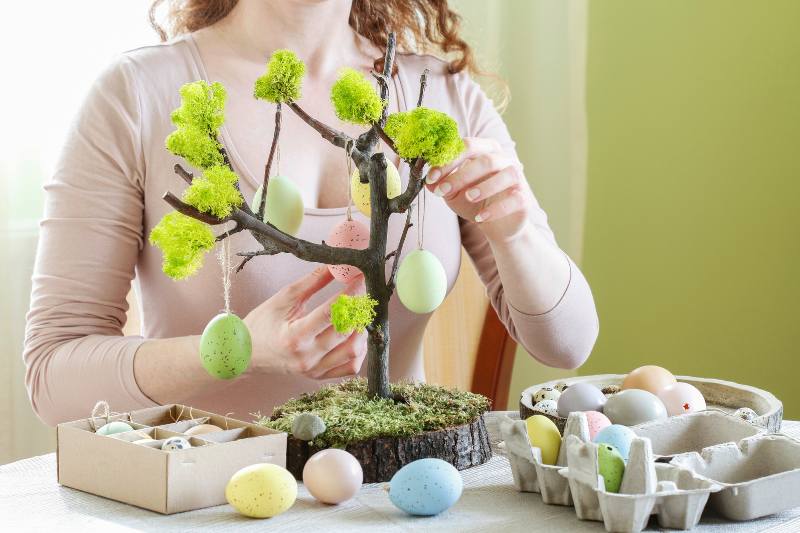
5- Decorate the tree: This is the final touch that brings the magic of Easter! Hang your eggs at different heights for a balanced and harmonious effect. Mix colours for a more cheerful decoration.
Tip: If your eggs don’t have attachments, cut pieces of string or ribbon about 10 cm long and tie (or glue) them to your decorative eggs.
A Few Ideas to Personalise Your Easter Tree
? Add dried or fresh flowers: Small wildflowers (daisies, buttercups, lavender, baby’s breath...) will create a lovely spring effect. You can tie them with thin string or glue them directly to the branches.
✨ Sprinkle with glitter: A bit of spray glue and gold or silver glitter can add a fairy-tale touch.
? Use feathers or Easter figurines: Small rabbit figurines or pastel feathers will make the atmosphere even more festive.
? Add some dried fruit: Slices of dried orange or lemon will bring a colourful and fragrant note to your Easter tree. You can also use dried berries (like rosehips) for a 100% natural decoration.


Comments