


How to propagate lavender ? : an illustrated tutorial
When and how, our tips
Contents
Taking a cutting of lavender or butterfly lavender is easy as long as you follow a few simple rules. This allows you to create fragrant borders at a low cost, multiply your favourite varieties, or replace ageing lavenders.
Discover when and how to propagate lavender very easily with our illustrated tutorial.

When to propagate lavender?
Propagation by cuttings of lavender can be done, depending on your choice:
- in spring, in May-June (this is referred to as herbaceous cuttings),
- in late summer, in August-September (this is referred to as semi-ripe or semi-lignified cuttings).
We recommend prioritising propagation by cuttings in late summer, which yields very good results.
Read also
Lavender: planting, growing, pruningThe necessary equipment
To carry out your lavender cuttings, prepare the following materials:
- a terracotta pot (unless you choose to propagate directly in the ground), as its porosity allows for better air circulation, which is less conducive to the development of mould.
- a sharp knife or pruning shear that has been previously disinfected with 70° alcohol. Indeed, cuttings are fragile and particularly sensitive to fungal attacks. It’s best not to overlook this point!
- a pencil or a small stick to poke the cuttings into the potting mix without breaking them,
- optionally a bell jar, a previously cut water bottle, a frame, or a greenhouse.
Discover other Lavendula - Lavender
View all →
Available in 2 sizes

Available in 6 sizes

Available in 4 sizes

Available in 2 sizes

Available in 2 sizes

Available in 0 sizes

Available in 0 sizes

Available in 3 sizes

Available in 3 sizes

Available in 3 sizes
How to take cuttings of lavender in spring?
To take your lavender cuttings in spring, you need to follow these steps:
- prepare a pot filled with a mixture of potting soil and river sand (in equal parts) or a good seed compost.
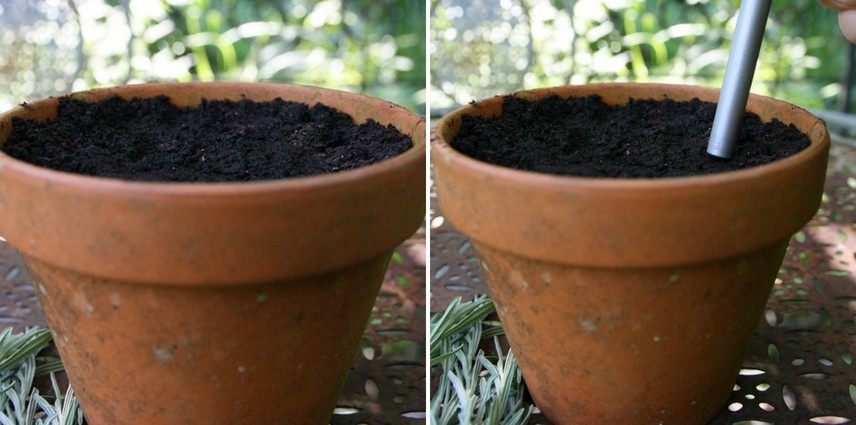
Pot preparation
- thoroughly moisten the substrate,
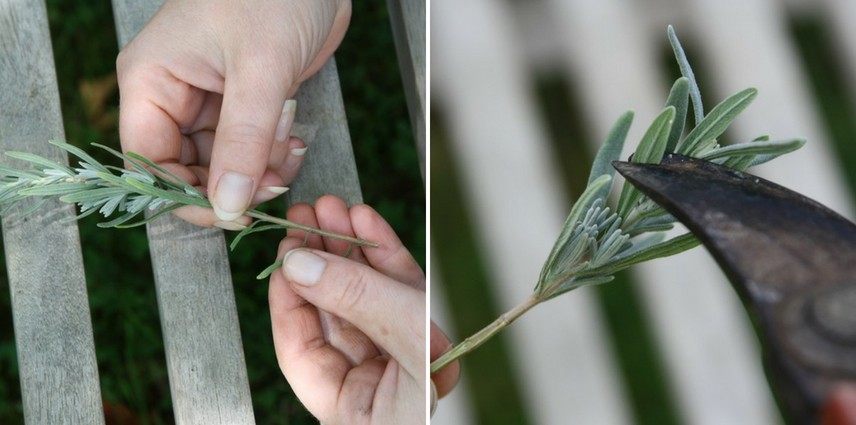
- take the tips of young green shoots from your “mother plant”, about 8-10 cm long. Prefer shoots that have never flowered. They are of better quality for propagation and more likely to produce roots. Finally, cut just below a node.
Cut just below a node (the intersection point of the leaves) and proceed with stripping.
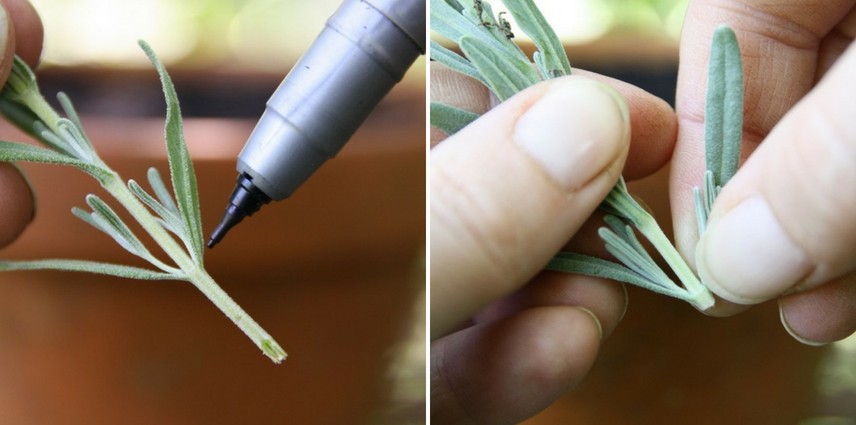
- proceed with stripping. To do this, remove all the leaves from the lower half of the cutting (this can be done easily with your nails). Be careful not to damage the bark, as this would prevent roots from forming at the bare spots. No leaves should remain on the buried part, as they could rot.
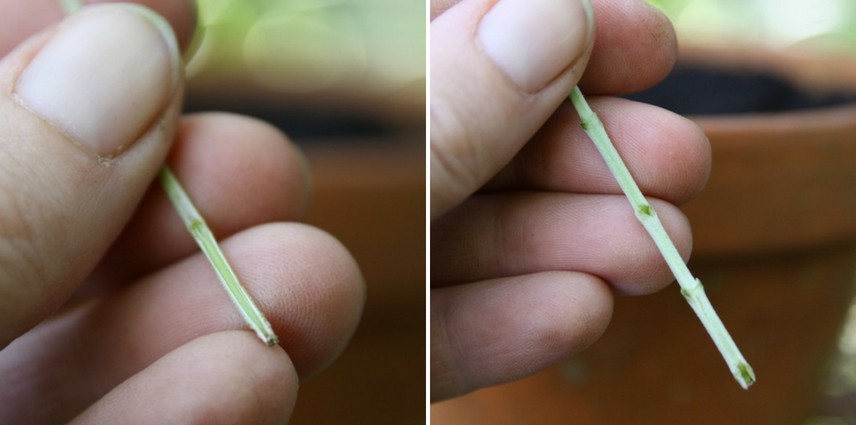
Damaged bark on a shoot / well-stripped shoot
- cut the remaining leaves in half to limit evapotranspiration, which would lead to rapid drying of the cuttings,
- using a pencil, make a hole in the potting soil before inserting your shoot. Ensure the potting soil adheres well to the cutting with your fingers. A tip is to place the cuttings around the edge of the pot. Better drained, the proximity to the pot walls yields better results.
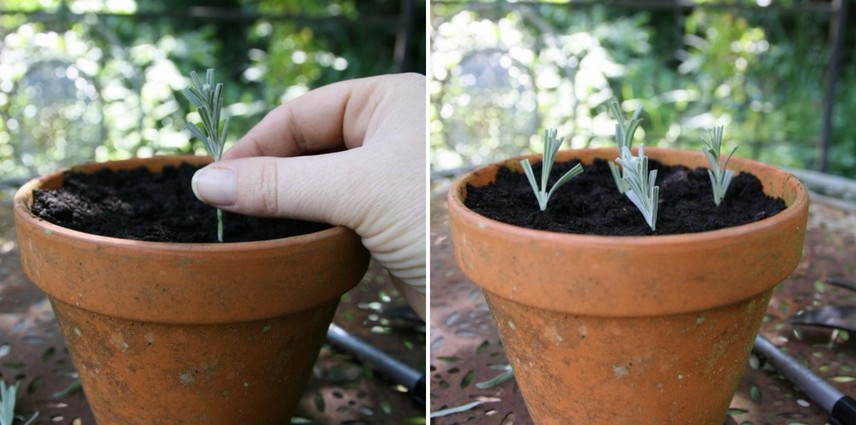
Insert the cuttings into the potting soil.
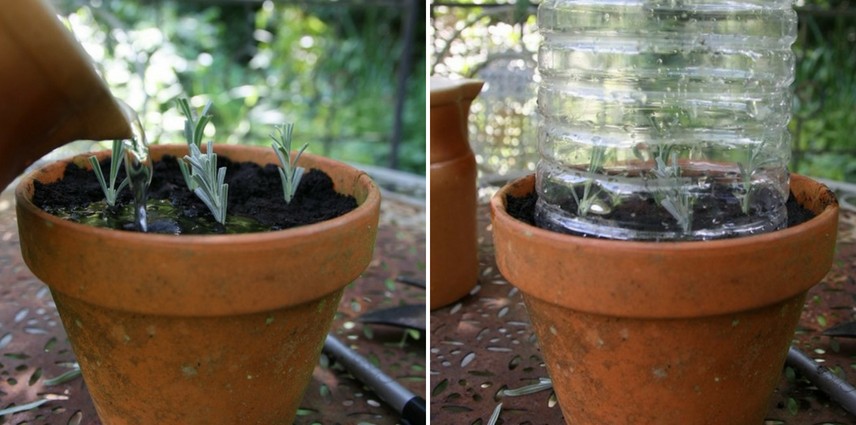
- water gently so as not to displace your cuttings,
- place the pot under a frame, in a greenhouse or on a veranda, in a shady corner. If you have none of these, the foot of a hedge will do, but remember to place a bell (or a cut plastic bottle) over it to prevent the cuttings from drying out. This technique is called propagation under glass. Ventilate occasionally to allow air circulation and thus avoid any risk of mould. You can also bury the pot to prevent the potting soil from drying out too quickly and to protect the cuttings from winter cold.
Place the pot in a sheltered location.
- water as often as necessary to keep the substrate moist while allowing the potting soil to dry between waterings.
- When the cuttings show signs of recovery (appearance of new shoots), keep the substrate slightly moist, without saturation.
The advantage of herbaceous cuttings is their quick recovery. However, these cuttings are very fragile as they dry out quickly if not properly cared for.
Read also
Propagate roses: when and how?How to take cuttings of lavender at the end of summer
To take your lavender cuttings at the end of summer:
- prepare a terracotta pot with a mixture of potting soil and river sand or a good seed compost,
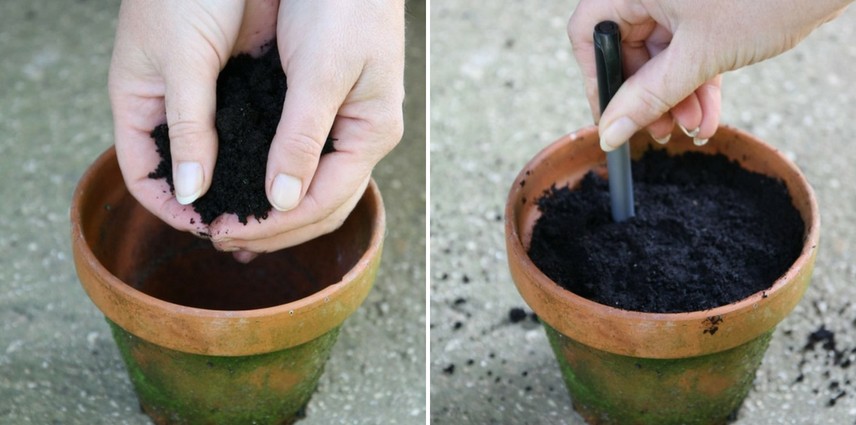
Filling the pot / holes made with the pen before inserting the cuttings
- moisten the substrate,
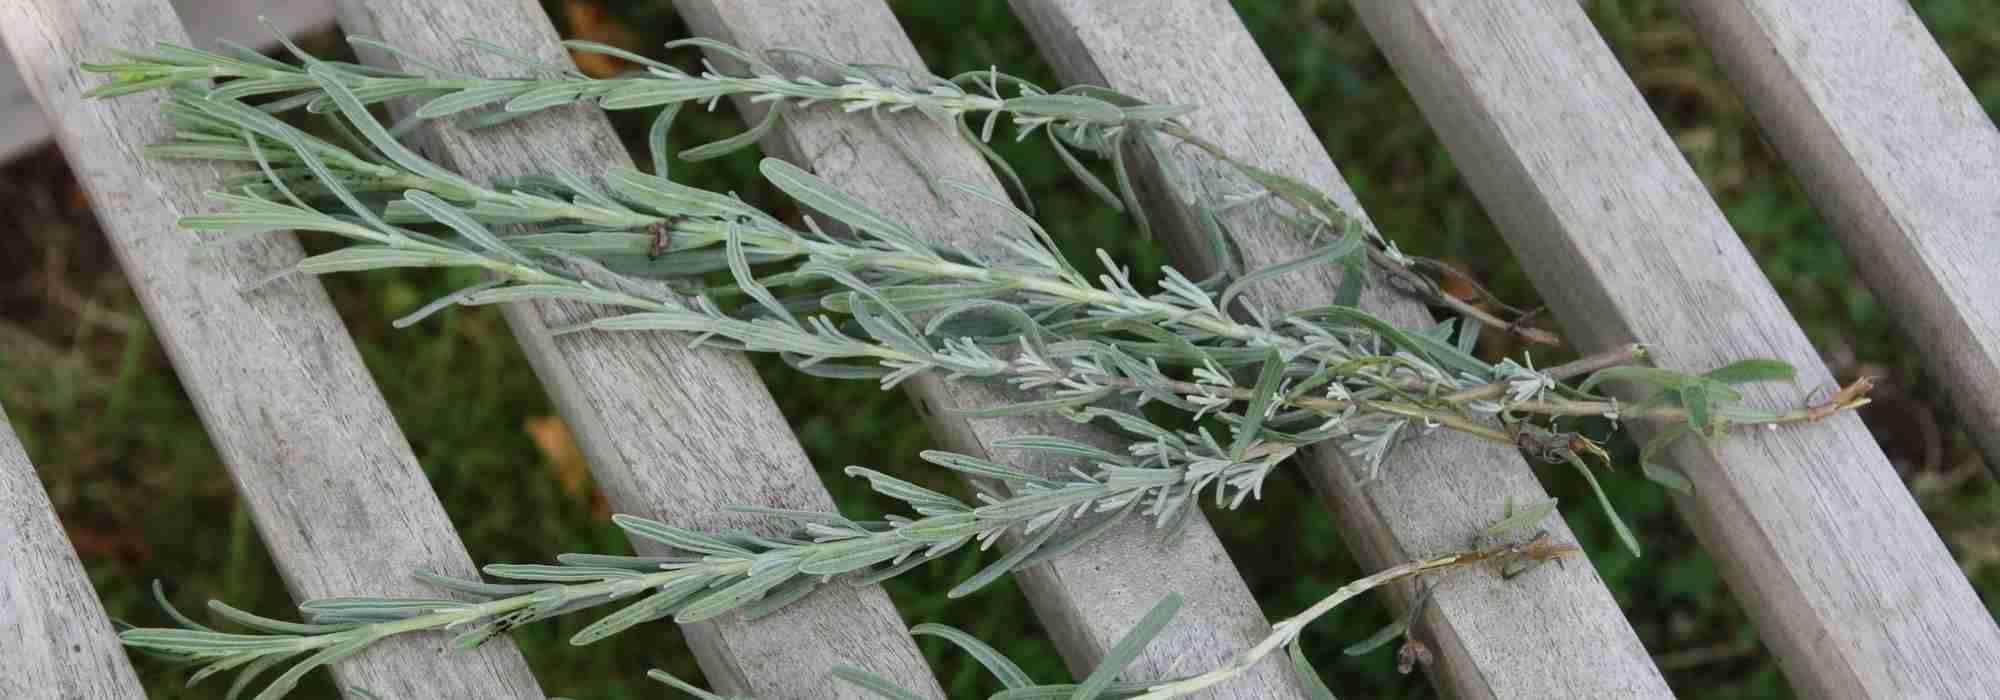
- take semi-ripe terminal shoots (which become woody, hard) of 15-20cm (the longer the better, as this increases the chances of root development), avoiding, if possible, stems that have already flowered,
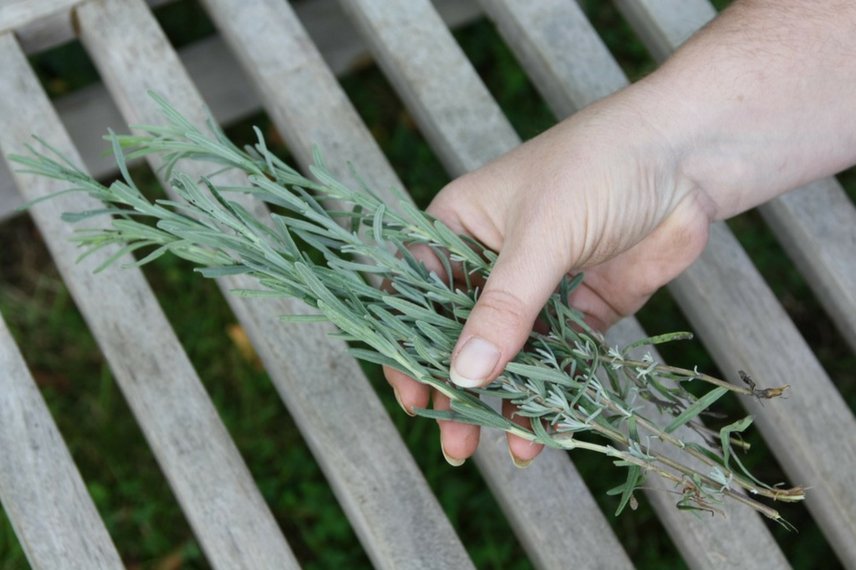
Taking cuttings
- remove the leaves from the lower half of the stems,
- cut the remaining leaves in half
Preparing the cuttings: remove excess leaves and cut the remaining ones in half.
- dip your cuttings in a little rooting hormone powder to encourage the development of rootlets and tap them to remove the excess. This step is optional.
- insert each cutting as deeply as possible into the potting soil or directly into the ground. You can take your cuttings directly in the ground as long as it is light, sandy, and well-drained.
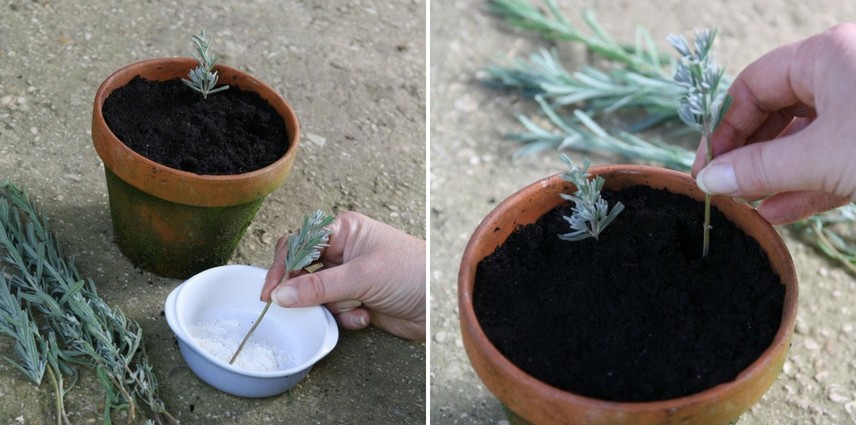
Dip the base of the cuttings in rooting hormone powder and insert them into the potting soil.
- water,
- place your cuttings in a sheltered spot or covered with a cloche, ventilate and water occasionally,
- when the cuttings show signs of recovery, stop watering and forget about them for the winter.
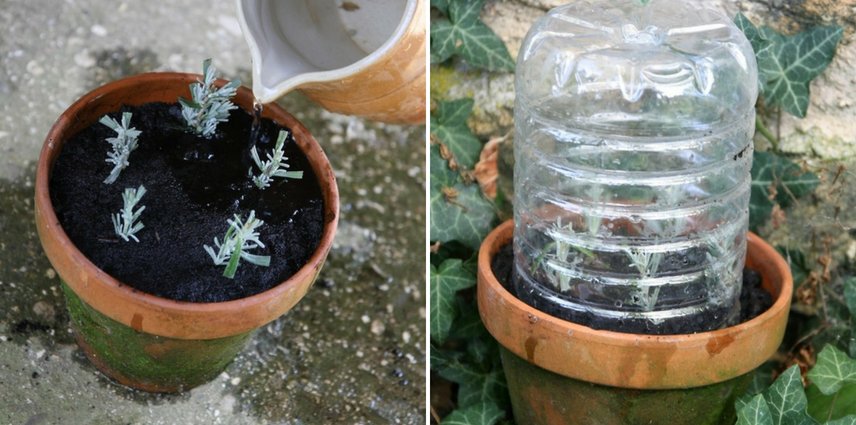
Water and cover your cuttings with a cloche (or bottle).
It takes between 3 and 6 weeks for the cuttings to root.
Moisture is a crucial factor for the success of your cuttings. Monitor the substrate; it should never dry out. Be careful not to drown it either. Excessive moisture encourages the development of mould. Water thoroughly the first time, then only when the potting soil starts to dry out, to moisten it. Remember, lavender is a Mediterranean plant. Therefore, heat is also a factor not to be overlooked.
Protect your cuttings during the first winter (cold frame or conservatory).
Finally, planting in the ground, in the garden, can be done the following spring.
Remember to trim the tips of the cuttings to encourage the growth of lateral shoots and allow for a more compact habit.
Frequently Asked Questions by Gardeners
- Can lavender be propagated by cuttings in water?
Lavender is sensitive to moisture. Propagating in water is not the best way to multiply your lavenders.
- Can lavender be propagated by cuttings in a closed environment?
Using a cloche will create a confined and humid medium around the cuttings. This prevents them from drying out before rooting, but it also creates a suitable environment for the development of mould and may cause your cuttings to rot. Ventilate occasionally and remove the cloche (or open the frame) when the cuttings show signs of recovery.
To go further
Discover our other guides to successfully grow lavender, dry it, and more:
- Lavender: planting, growing and maintaining
- Lavender: which one to choose?
- How to fail at growing lavender in 5 lessons?
- How to dry lavender?
- Discover our ideas to combine lavender in the garden
Finally, also check our advice sheet: Propagation by cuttings: everything you need to know about the different techniques and our tips for successful cuttings.
- Subscribe!
- Contents
")
Comments