


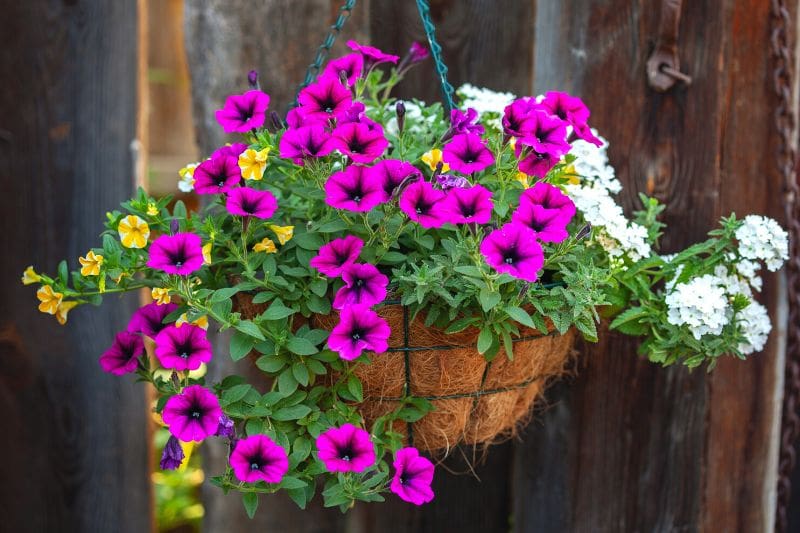
With their trailing flowers in cascades, flowering hanging baskets bring charm and colour to terraces, balconies and gardens. Generous flowering is often striking and easily lasts several months. These hanging baskets are easy to make, even for beginner gardeners, and can accommodate perennials, bulbs or annuals. Discover in our tutorial our tips and tricks to create a hanging basket of flowers and thereby beautify terrace or balcony.
When to make a hanging basket?
Spring is the perfect time to make a hanging basket. Temperatures at this time of year, neither too hot nor too cold, are ideal to encourage rooting of your plants. It also ensures a lovely display of flowers during coming summer.
However take care to ensure risk of late frosts is avoided, around April for southern regions and May for colder regions. But rest assured, you can always shelter your hanging basket in case of an exceptional frost, either in an unheated room or even for a few days in the house.
Note: you can make a hanging basket even in February, provided you keep it under a greenhouse or in a conservatory while waiting for spring to return.
Step 1: Choose the right hanging basket
To succeed with your hanging basket, we recommend choosing a container at least 40 cm in diameter. This gives your plants enough space for their roots.
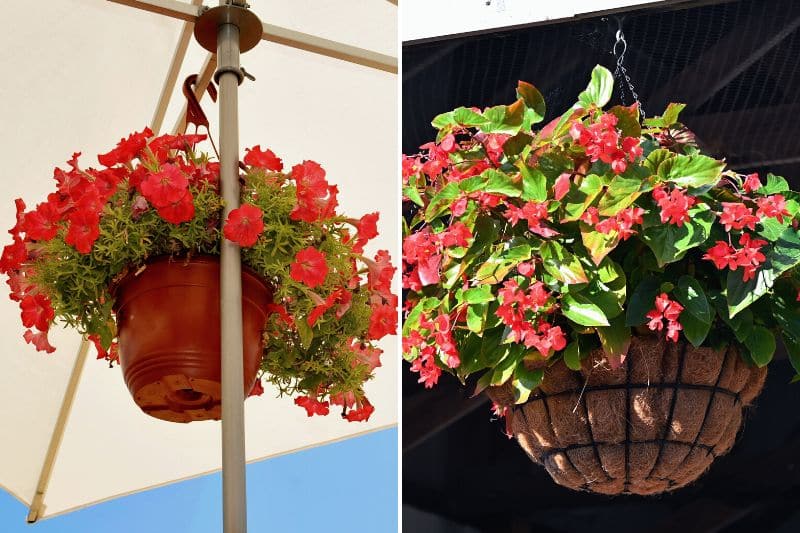
For plastic containers, opt for a hanging basket with drainage holes or even better, an integrated saucer. If basket has no drainage, you can drill several drainage holes 3 cm from base using a drill or a screwdriver tapped with a hammer.
There are also different hanging baskets, in wicker, metal and even wire mesh with a coir fibre liner.
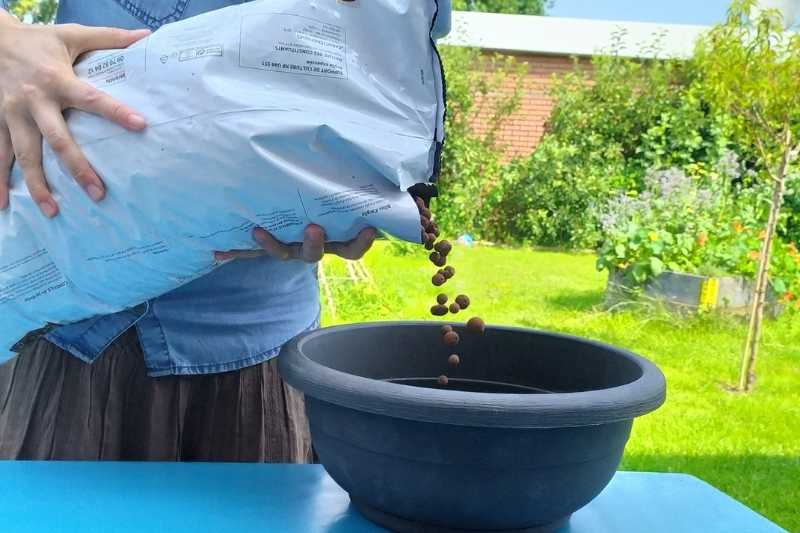
Step 2: Drainage, an important step
For plastic baskets, it is important to lay a bed of clay pebbles at bottom of your hanging basket to prevent water stagnation. They will improve drainage and limit formation of mould in root system of your precious plants.
For wicker or wire mesh baskets with a coir fibre liner, there is no need to add clay pebbles. Indeed, wicker and coir fibre allow excess water to drain away easily.
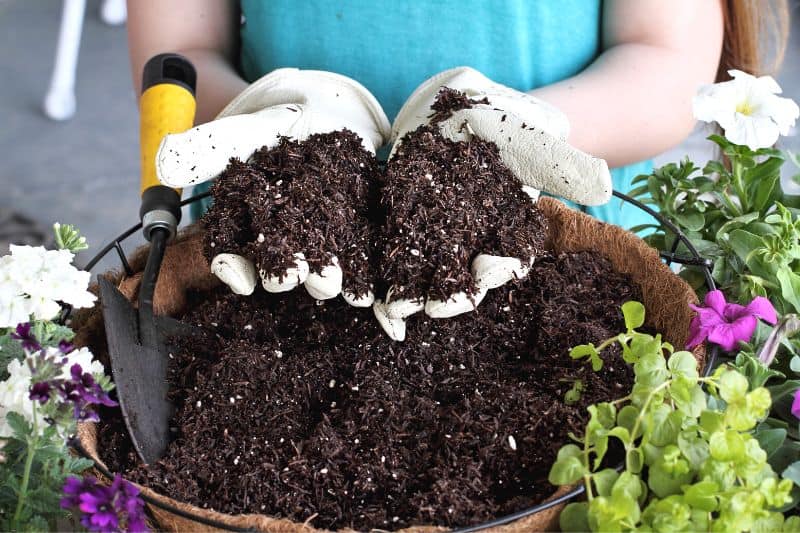
Step 3: Add potting compost
Add your potting compost into your hanging basket up to two-thirds full, firming lightly by hand. We recommend using a potting compost for containers or for "geraniums and flowering plants". This type of substrate is rich in nutrients and will promote generous flowering in perennials, annuals and bulbs.
Note: avoid so‑called "universal" potting composts which are generally too poor for this type of plants.
Step 4: Moisten the compost
Using a spray bottle or a watering can with a fine rose, water the compost thoroughly, preferably with rainwater which is less hard than tap water.
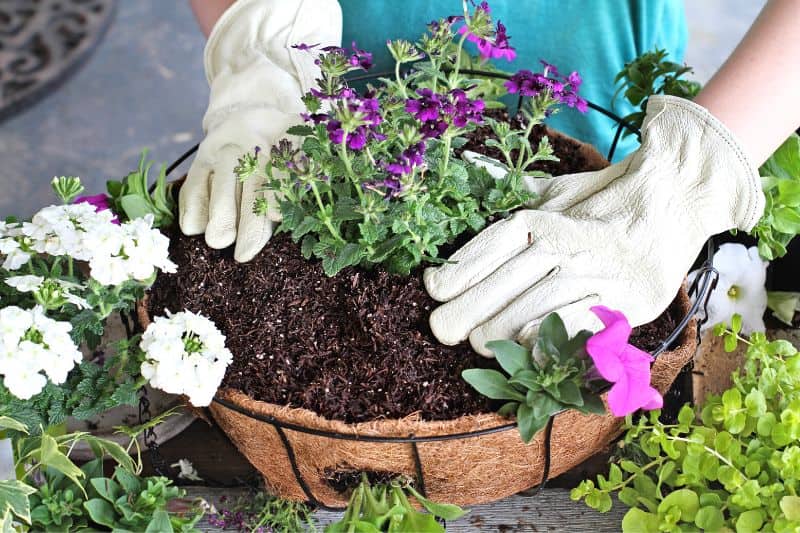
Step 5: Install your plants
You can then remove plants from their pots, then place your plants in the basket. For hanging baskets about 40 cm in diameter, we recommend planting up to 5 plug plants or 3 plants in buckets.
Note: feel free to tease out roots of your plant and to soak the rootball for a few minutes in a tub before planting.
Step 6: Fill in gaps and water
Fill gaps between plants with potting compost, firming well to ensure good contact between substrate and roots. Then water thoroughly your hanging basket using a fine spray until water runs out of the drainage holes.
Care and watering
- Water your flowering hanging basket regularly but moderately. Not too much, not too little. Ideally allow compost to dry out between waterings. Be attentive during hot summer weather, as daily watering will most likely be necessary.
- To obtain long and abundant flowering, we recommend applying liquid fertiliser for flowering plants, once or twice a week.
- To encourage flower production, deadhead spent flowers regularly during main growing season.
Further reading
- To find out which plants to choose and combine, discover all composition ideas by Virginie T. in her article: "Beautiful hanging baskets of flowers".
- Find all our annuals, as plug plants or as seeds!
- Also discover our wide range of perennials.


Comments