


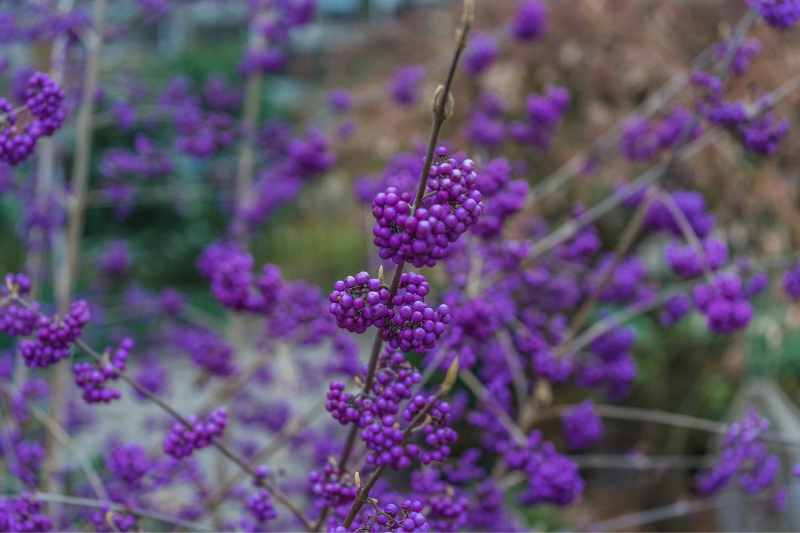
Callicarpa, commonly called "Candy Tree", is an unusual bush that irresistibly draws attention in autumn with its astonishing purple berries, resembling small shiny pearls, as with Callicarpa bodinieri ‘Profusion’ which brightens the garden until winter. Its autumn foliage, with warm colours, is also highly ornamental. Easy to to grow, hardy and disease-resistant, Callicarpa thrives in sun, in any ordinary soil, not too dry in summer. Propagation by cuttings of Callicarpa is generally carried out with semi-ripe cuttings in summer, which ensures getting an identical variety to the original young plant. In this tutorial, we explain how to propagate a Candy Tree with no difficulty!
When to propagate Callicarpa?
The ideal time is summer, when semi-ripe or semi-August-ripened cuttings are ready, that is when they are beginning to turn into hard wood: they are neither too young and spongy, nor too old and lignified. Combined warmth and humidity allow cuttings to develop healthy roots.
How to take Callicarpa cuttings?
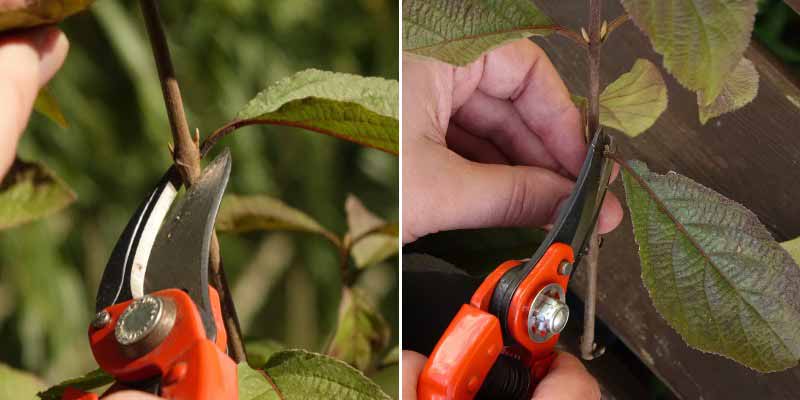
- Take 10–15 cm cuttings from lateral shoots, preferably just below a node
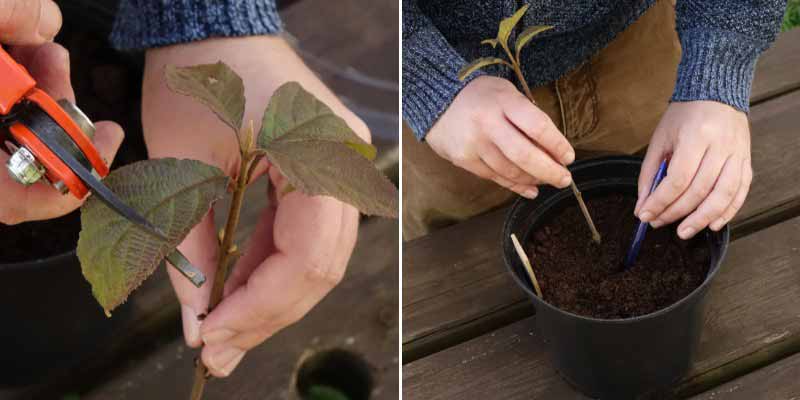
- Remove lower leaves to reduce evaporation, leaving only two leaves on the upper part of the stem
- Dip the base in plant hormone to encourage rooting
- Plant the cutting in a container filled with a mixture of sand and turf or use sowing compost, burying about one-third of its length
- Thoroughly moisten the compost with a spray bottle
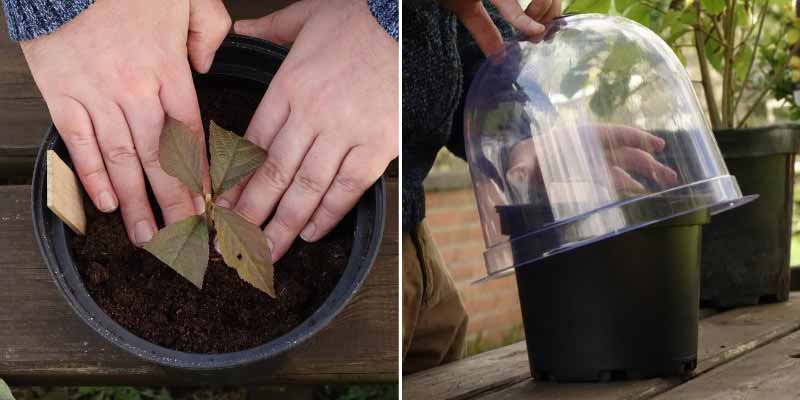
- Firm the soil lightly around it
- Place a clear plastic bag, a cloche or a plastic bottle with the bottom removed, or a mini-greenhouse over the cutting, creating a chamber that retains humidity
- Keep in a warm, bright place, but out of direct sunlight
- Check humidity and ventilation regularly. If necessary, open the bag or cloche to aire and prevent development of fungal diseases
- Keep moist until the cutting has taken
- After a few weeks, gently try to lift the cutting to check whether roots are beginning to form. If present, gradually remove the cover or plastic bag
- If you live in a region with harsh winters, it is best to keep cuttings indoors in a cool, bright place around 10°C. During winter, cuttings require less water. Ensure the substrate remains slightly moist but not waterlogged
- When cuttings are well rooted, pot them on into buckets of 10–12 cm, allowing them to toughen up.
In spring, once the risk of frost has passed and the cuttings have developed a sufficiently strong root system, they can be planted out to their final position, in a sunny or part-shade spot, not too far from the house to enjoy the pretty purple berries !
Required equipment
- A pot, a tray or biodegradable buckets
- A clean pruning shear disinfected with alcohol
- A cloche, a plastic bottle, a plastic bag or a mini-greenhouse
- A spray bottle
- Sowing and potting compost or a mix of turf and sand for the garden
- plant hormone (facultative)


Comments