


The Crassula is a succulent plant highly prized for its fleshy and decorative foliage. There are many species of crassulae, including the Crassula ovata or jade tree, the Crassula arborescens, and the Crassula perforata. Easy to grow and requiring little maintenance, it is ideal for dry gardens and bright interiors.
Propagating Crassulas is an excellent way to obtain new young plants, share with loved ones, or experiment with different propagation methods. Propagation is simple and accessible, even for beginner gardeners. Discover the best techniques for successfully propagating this succulent plant.
To learn more about growing this indoor plant, read our comprehensive guide: Crassula - Jade Tree: Planting and Care.
Why propagate Crassulas?
Propagating Crassulas offers several advantages:
- Economy: No need to buy new young plants; simply take cuttings.
- Preservation of the variety: Propagation by cuttings ensures faithful reproduction of the parent plant.
- Adaptation to the environment: By propagating your crassulae, you obtain plants acclimated to your growing conditions.
When to propagate Crassulas?
The ideal time to propagate Crassula indoors is in spring and summer, when the plant is in full growth. Mild temperatures (between 18°C and 24°C) and sunlight promote rooting of cuttings. Avoid the dormant period in winter, as growth slows down.
Good to know: It is possible to propagate a Crassula in winter indoors. However, the process will be slower due to the plant's reduced growth during its dormant period. Cooler temperatures and reduced natural light will also hinder rooting.

Materials needed to propagate the jade tree
- Sharp and disinfected pruning shear to cut the stems.
- Special cactus and succulent soil or a sandy mix (50% universal soil + 50% sand or perlite).
- Small pots in terracotta or plastic with drainage holes.
- Spray bottle to lightly moisten the substrate.
- Rooting activator (optional) to facilitate rooting.
Which method to propagate Crassulas?
There are several techniques for propagating Crassulas:
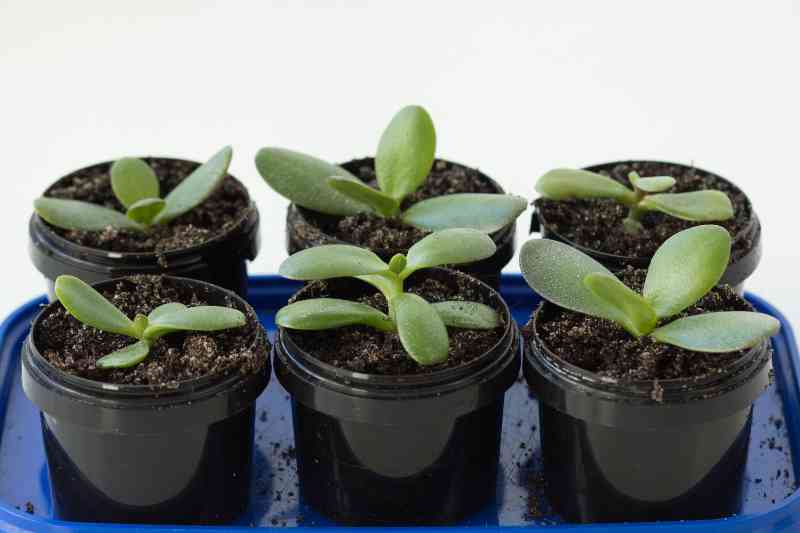
1. Stem cutting (the simplest and quickest method)
- Choose a healthy stem about 10 cm long.
- Cut it just below the leaf node with a clean and sharp pruning shear.
- Let the cut dry for 2 to 3 days to prevent rot.
- Remove the lower leaves, keeping only 2 to 4 leaves at the top of the cutting.
- Insert the cutting 2 to 3 cm into a light and well-draining substrate (mix of soil and sand).
- Water lightly and place in a bright spot without direct sunlight.
- Roots will appear in 3 to 4 weeks.

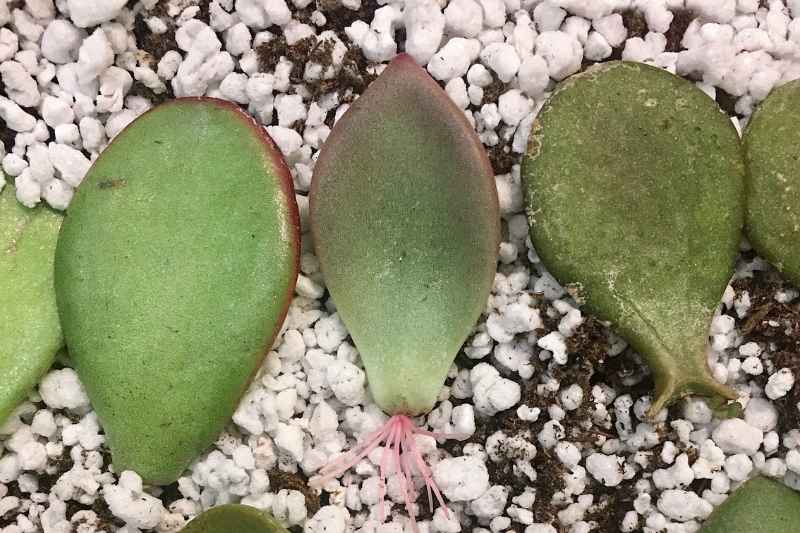
2. Leaf cutting (a slower technique)
- Detach a fleshy and healthy leaf.
- Let the base dry for 2 to 3 days.
- Place the leaf flat on a dry substrate (soil and sand).
- Lightly spray with water without soaking the soil.
- After a few weeks, small roots and rosettes will form.
Oli's little tip: It often happens that leaves detach from the plant and land on the substrate. Nine times out of ten, this leaf will root on its own, just like that. Voilà! A new free plant!
3. Division of offsets
- Look for small offsets growing at the base of the parent plant.
- Gently detach them, keeping some roots.
- Replant them in a pot with well-draining substrate.
- Water lightly and keep in a bright spot.
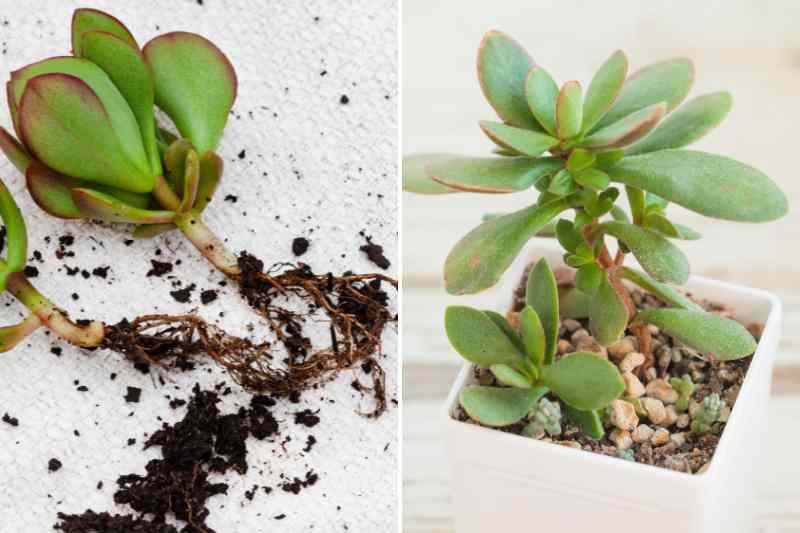
After propagation: care and maintenance
Once rooted, young crassulas require:
- Moderate watering, approximately once every two weeks.
- Bright exposure, but without scorching sunlight.
- Well-draining substrate to avoid excess moisture.
- Annual repotting, if needed, to stimulate growth.
Watch for signs of success: new shoots, stable growth, and firm foliage. If unsuccessful, check that the soil is not too wet and that the cutting has not rotted.
My Crassula cutting isn't taking. What's happening?
If your Crassula cutting isn't taking, it may be due to excess moisture promoting rot in the stems or leaves or poorly draining substrate preventing proper root development. Lack of light, low temperatures, or an improperly healed cut can also hinder rooting.


Comments