


Fancy trying sprouted seeds at home? Whether aiming for food self-sufficiency or simply to enjoy their many health benefits more regularly, you can start easily.
Both tasty in cooking and good for health, these nutrient-dense foods have been popular for several years. In fact, their consumption goes back to Antiquity!
The process is fairly simple and quick, but a few precautions and some basic equipment are necessary to succeed with your sprouted seeds. Beyond the fun and rewarding aspect, home sprouting is much cheaper than store-bought options and guarantees unmatched freshness.
Let’s look together at how to choose seeds, how to proceed step by step to start germination, and of course, how to enjoy them.
Choosing sprouted seeds
Thanks to germination, remember that these seeds offer several advantages:
- increase in their natural nutritional qualities and richness in vitamins, minerals, fibres, amino acids, proteins and enzymes;
- better assimilation of their benefits by the body;
- improved digestion.
Sprouted seeds can be chosen according to several criteria: taste, specific benefits or germination time, which ranges from a few hours to several days. You can choose a seed mix or try a single variety. Seeds may be cereal, legume, oilseed, aromatic, etc.
Try for example:
- alfalfa, certainly one of the most common, with a green, mild flavour (germinates in a few days);
- wheat, with a fairly mild, sweet taste (germinates in a few hours);
- lentil, prized for iron and protein content (quick germination in 2 days);
- radish, valued for detoxifying and draining properties, with a slightly spicy taste;
- leek, whose strong flavour enhances dishes (germinates in 10 days);
- rocket, with a pronounced peppery taste;
- quinoa, high in protein and naturally gluten-free (quick germination);
- oats;
- sunflower (germinates in a few hours, but a little trickier to sprout);
- fenugreek;
- buckwheat;
- soy;
- mung bean, high in fibre (germinates in 2 days);
- barley;
- mustard;
- chickpea;
- watercress;
- etc.
To start, lentil or alfalfa are mainly recommended.
→ Warning, not all seeds can be eaten sprouted. This is the case, for example, with seeds of Solanaceae (tomato, pepper, aubergine…) which are toxic and therefore unsuitable for this process.
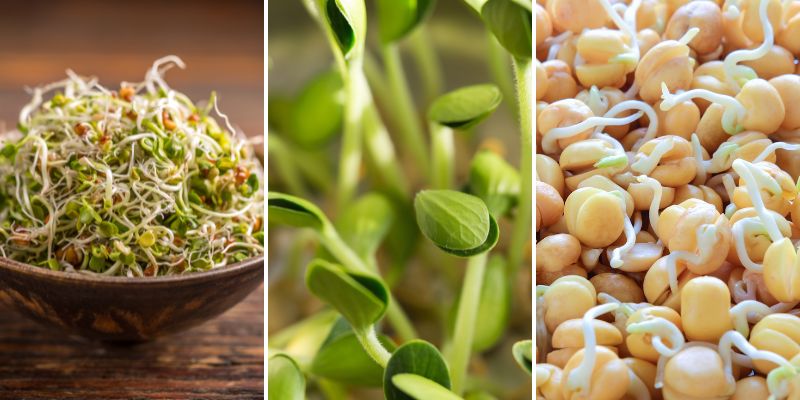
Bowl of sprouted seeds, pumpkin and chickpea sprouts
Equipment needed for germination
If you just want to try making your own sprouted seeds and do not intend to do it regularly, you can absolutely use a few simple everyday items to get started.
Prepare:
- a glass jar;
- a rubber band;
- a piece of fabric that will drain water and allow air to pass (tulle, muslin, old stocking, gauze compress…); you can also reuse the lid by making small holes in it;
- a shallow plate, saucer or any other container to collect draining water;
- mineral or filtered water (better, as it is less concentrated in additives than tap water).
But if you plan to sprout seeds at home regularly, you can invest in a sprouter. It generally consists either of:
- a simple jar with a pierced lid, recommended for small quantities;
- several germination trays, allowing cultivation of several varieties at once and in larger quantities.
The sprouter can be glass, plastic or even terracotta. You can find them easily online or in specialist shops from around ten euros. There are also automatic models, which are obviously much more expensive, intended for specialists and for more challenging seeds. To choose the right sprouter, mainly check the size of the grid or filter openings (they should be fine enough not to let seeds pass). Also opt for a sprouter that is easy to clean. Impeccable hygiene will help avoid any sanitary risks.
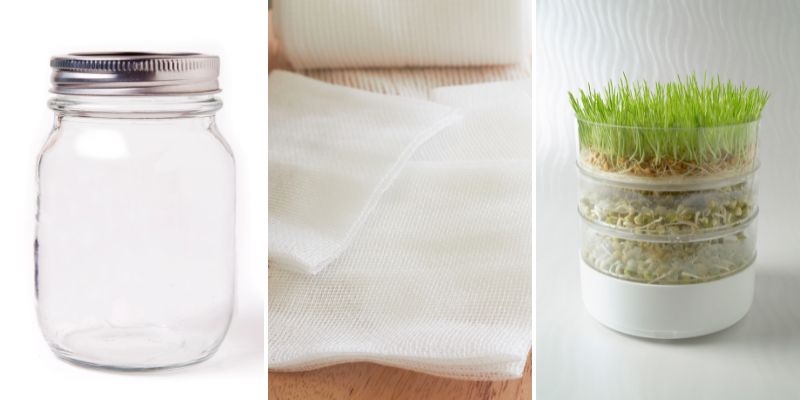
A simple jar and some gauze or a top-of-the-range sprouter!
How to sprout seeds: tutorial without a sprouter
Germination is simple to carry out. To start the process, dormant seeds simply need water.
Soaking
- Thoroughly clean equipment and dry it with a clean tea towel.
- Place about a tablespoon of seeds to sprout in your jar.
- Add mineral water so seeds are fully submerged.
- Swirl the jar to mix.
- Secure the fabric over the jar with the rubber band.
- Leave to soak for about 8 hours in a dark place (soaking time varies by seed—always follow packet instructions).
Draining
- Pour off the soaking water (which may have coloured) through the fabric, which will hold the seeds.
- Refill with water to rinse the seeds, mixing well.
- Pour off and repeat.
- Place the jar in the draining container. Ensure it is upside down or tilted toward the fabric to avoid any water stagnation in the jar.
Starting germination
- Rinse seeds with water 2 to 3 times a day.
- Return them to drain.
- As soon as seeds begin to sprout, you can place the jar in light.
The aim is to keep seeds moist but without excess water that could encourage mould. As they germinate, seeds will increase in volume: start with small quantities before increasing if needed.
Wait a few days to see the first sprouts. Germination time depends on the seed selected. Generally count between 2 and 7 days. When seeds have developed their sprout and first shoot, they are ready to eat. If the first leaves appear (cotyledons), your seeds have become micro-shoots, which can be eaten in the same way.
Storage and use of sprouted seeds
Before eating
Rinse sprouted seeds well and drain them before eating. Some seeds have a husk that will have detached and can be removed before tasting.
To avoid any sanitary risk, check:
- there is no sign of mould;
- smell is neutral, never unpleasant;
- stems are firm and crunchy, not wilted, yellowed or brownish.
Storage
Sprouted seeds should be eaten quickly. They keep in the fridge, cold stopping further germination. Place them in a food container and keep for only 2 to 4 days.
Culinary uses
To preserve all benefits of sprouted seeds, we recommend eating them raw. Some legume seeds can, however, be briefly blanched (chickpea, for example).
Sprouted seeds can be added to many recipes:
- in salads;
- in sandwiches;
- to enliven pasta, rice or potato dishes;
- on toasts or slices of bread;
- in a yoghurt-based sauce;
- sprinkled over a soup or omelette after cooking.
They can be eaten plain, or seasoned. For quantities, start with about a tablespoon.
Discover the wide range of flavours and colours of sprouted seeds!
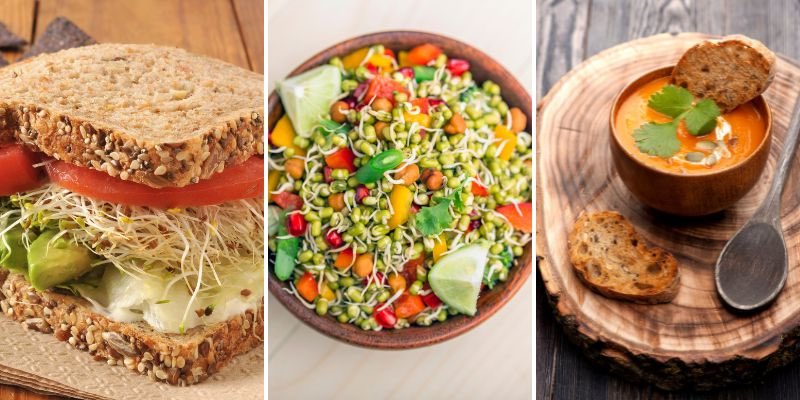
Sandwiches, salads, soups—sprouted seeds are waiting for your ideas!

Comments