


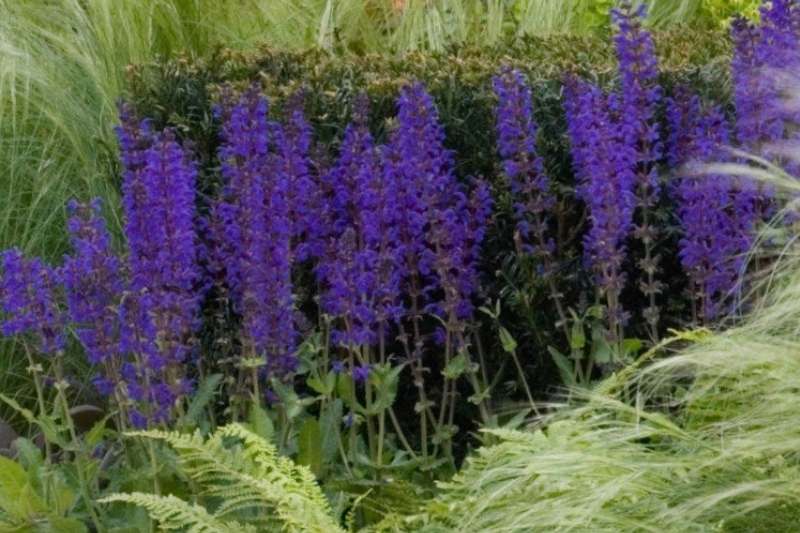
Whether annual, perennial, or shrubby, salvias are stunning decorative plants. Also known as Salvia, they produce sublime clusters of flowers, delighting both gardeners and pollinators from May until September. Depending on the variety, the flowering can range from a deep blue, to an intense violet, a pure white, a soft pink, or even bicolour for some shrubby salvias. If it thrives in your garden, why not try propagating it to expand a flower bed? Salvia cuttings are easy to make!
Discover when and how to propagate Salvia easily with our illustrated tutorial!
When to take Salvia cuttings?
Salvia propagation by cuttings is best done from June to August. This warm period encourages root development. By taking Salvia cuttings, you’ll get new plants identical to the parent, ready to be planted in the ground the following spring.
What do I need?
- A pot, a bucket, a tray, or a mini greenhouse.
- A pencil
- A cleaned and disinfected pruning shear (use alcohol to avoid spreading diseases)
- A cloche, a bottomless plastic bottle, or a plastic bag
- seed and potting compost
- A spray bottle
- A rooting hormone (facultative)
How to propagate Salvia using the "buried cutting" method?
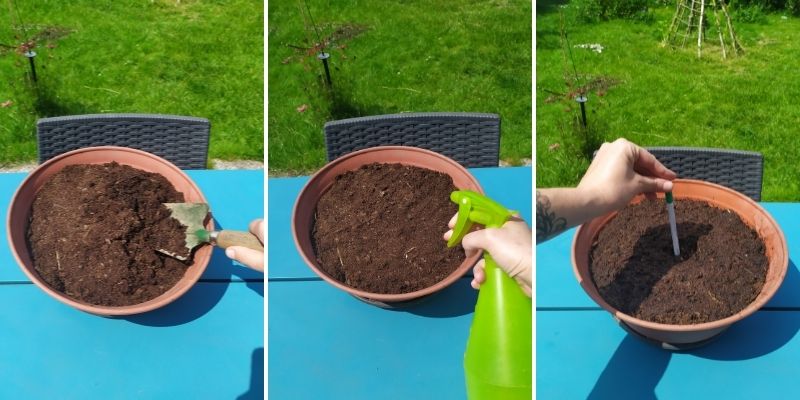
1- Fill your pot with seed compost and firm it down. Note that the pot should be filled to within 2 cm of the top.
2- Moisten the compost.
3- Use the pencil to make a hole 3 to 4 cm deep.
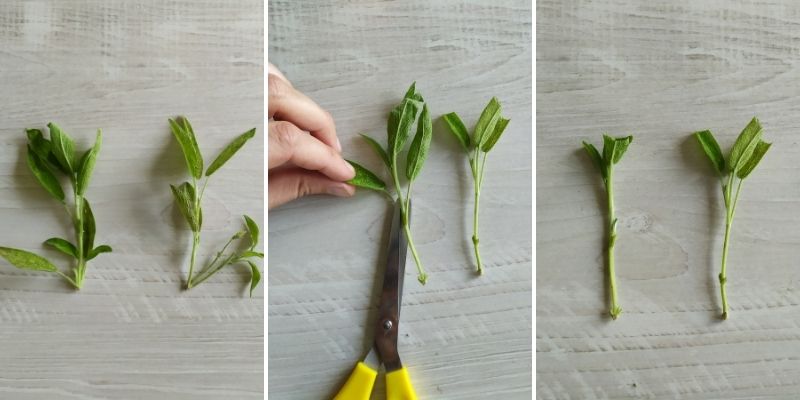
4- Select healthy, green stem tips from the Salvia, free of flowers. If the stem has flower buds, remove them.
5- Using pruning shears, cut a stem about 5 to 10 cm long, just below a node.
6- Remove the leaves from the lower part of the cutting and keep only half of the upper leaves. This prevents excessive transpiration and rapid exhaustion of the plant.
7- If desired, you can use a plant hormone. Simply dip the base of the stem in the hormone before planting.
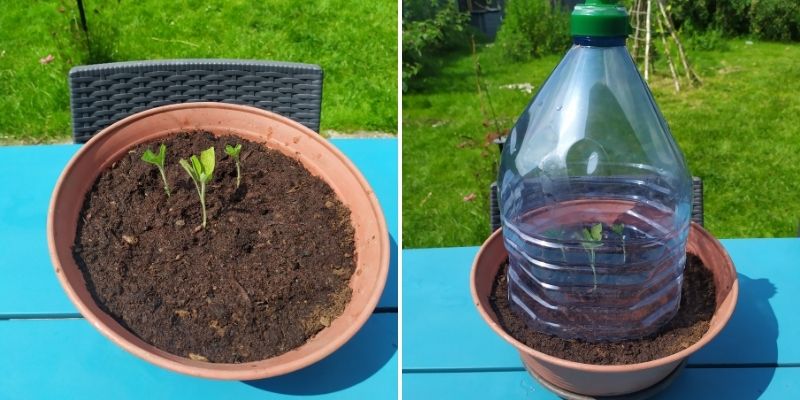
8- Plant your stem in the pot.
9- Firm the compost around the stem.
10- Place a cloche over the top to saturate the atmosphere with water. This is the principle of the "buried cutting" method. You can also use a growth cloche, the top of a plastic bottle, or a mini greenhouse.
Be careful: the stem and leaves must not touch the cloche to avoid mould!
11- Keep the compost moist at all times! It should never dry out or become waterlogged. It’s advisable to ventilate every 3-4 days.
12- Place your pot in a bright spot, but out of direct sunlight.
13- After 2 to 3 months, the roots will be well-developed, and you can repot your Salvia.
14- During winter, keep your Salvia in a greenhouse or a bright, unheated room. You can plant it in the ground the following spring.
To go further:
- Discover our wide range of salvias.
- Learn everything about salvias: planting, pruning, and care.
- Need help choosing? Check out our guide on "Salvias: Which Varieties to Choose?"
- Explore our guide: "Propagation by Cuttings: Everything You Need to Know About Different Techniques and Tips for Success".

")
Comments