


callistemon, also known as bottlebrush, is a melliferous and nectariferous bush that offers astonishing and spectacular flowering with its long stamens gathered into dense bottlebrush spikes. Cold-sensitive but very heat-tolerant, callistemon is commonly found in Mediterranean climates and on Atlantic coasts. Easy to cultivate, callistemon is also very simple to multiply by propagation by cuttings of semi-woody stems.
Here are therefore all our detailed tips for propagation by cuttings of a callistemon from its semi-woody stems!
Tips for successful callistemon cuttings
Why favour propagation by cuttings?
Propagation by cuttings remains the preferred multiplication method for callistemon, because of its simplicity of implementation and its high success rate. Indeed, although root formation can sometimes be slow, it almost always occurs eventually. By contrast, sowing bottlebrush is a much more uncertain method. In addition, while flowering occurs from the first year with propagation by cuttings, it takes between 3 and 6 years when grown from seed.
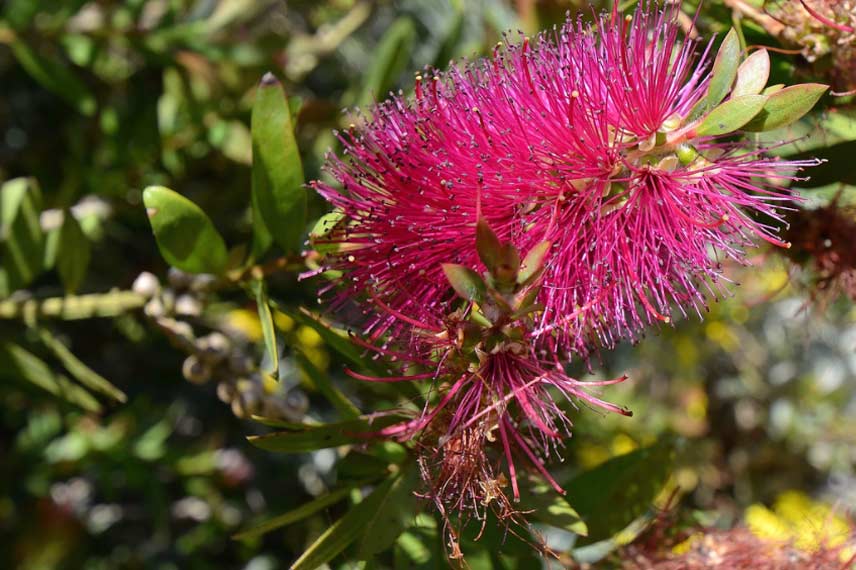
bottlebrush in flower - © Patrick, Vauville Botanical Garden (Manche) - Flickr
What precautions should be taken?
Always use tools that are both clean and sharp. This ensures a clean, healthy cut and helps prevent disease. Likewise, take care to choose a perfectly clean substrate for your callistemon cuttings. Also ensure that the stems selected for cuttings are semi-woody and show no signs of disease or injury. In addition, they must not yet have flowered.
What is a semi-woody stem?
Semi-woody cuttings, also called semi-herbaceous or semi-august cuttings, are taken from stems that grew in spring and have just begun transforming from soft wood to hard wood. Lignification starts from July–August.
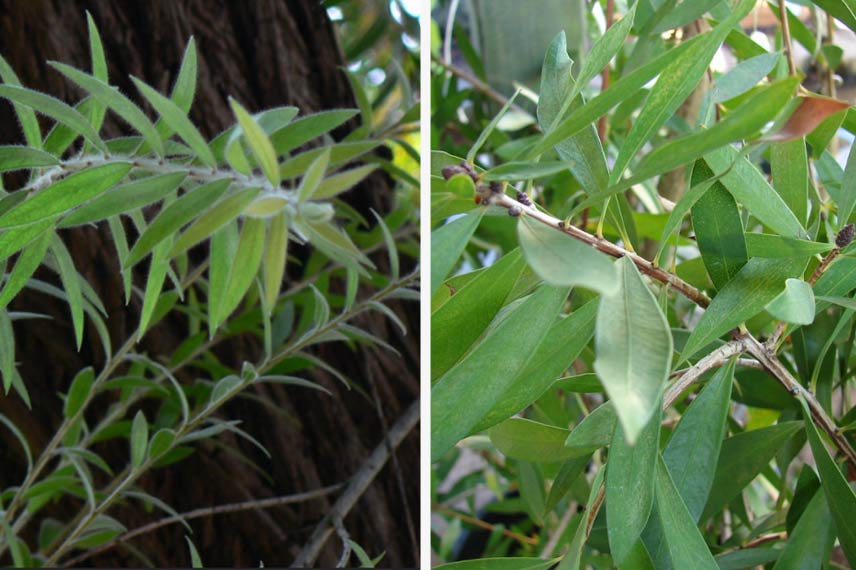
Flexible shoots of Callistemon citrinus - ©Dinesh Valke | Woody shoots of Callistemon citrinus - ©Forest and Kim Starr - Flickr
When to take callistemon cuttings?
Callistemon cuttings are taken at the end of summer. The cuttings are then semi-woody, taken from soft wood in the process of hardening.
How to take callistemon cuttings?
Equipment
- pruning shear that is sharp and clean
- knife that is well sharpened and disinfected
- Buckets perforated at the bottom
- soil that is healthy and sand
- clay balls
- rooting hormone
- organic mulch
- watering can filled with water
Semi-woody stem cutting
- Take semi-august shoots by cutting the stem just below an eye (or bud). The cutting obtained should then measure between 10 and 15 cm in length.
- Make a 5 cm slit along the length of the taken shoot.
- Remove leaves that may be present on the lower part of the stem.
- Dip the cutting in rooting hormone.
- Prepare a mix of soil and sand and fill your buckets with it.
- Plant your cuttings in the centre of the substrate, one per bucket.
- Moisten substrate used for planting.
- Place buckets outdoors in a bright spot but sheltered from direct sun, wind and bad weather.
- In autumn, bring cuttings under cover before first frosts and wait to pot on in following spring.
Solenne’s tip: it is essential to keep substrate of your callistemon cuttings continuously moist to stimulate rooting. However, space out waterings during winter. Then arm yourself with patience, as root appearance can take several months.
Potting on callistemon cuttings
Pot on your callistemon cuttings that have produced roots in spring, after last frosts. You can then plant them in ground or pot depending on available space and your region. Indeed, bottlebrush prefers climates with mild winters as it is not very hardy, able to tolerate frosts around -4°C to -6°C for most varieties, and down to -12°C for Callistemon rigidus. Note that bottlebrush does not like calcareous soils and requires a well-draining soil.
Transplanting a callistemon cutting into ground
- Dig a hole three times larger than root ball volume.
- Install a layer of clay balls or gravel in the bottom of the planting hole.
- Compose substrate by mixing soil, compost, sand and garden soil.
- Place callistemon in centre of hole taking care of its fragile young roots.
- Cover base up to collar with substrate and firm lightly.
- Place a layer of organic mulch at base of young bottlebrush.
- Water thoroughly.
Transplanting a callistemon cutting into a pot
- Use a large pot with drainage holes.
- Install a layer of clay balls or gravel at bottom of container.
- Use a mix of soil, compost, sand and garden soil for pot substrate.
- Place young callistemon and cover up to collar with substrate.
- Firm gently, apply mulch and water generously.
Solenne’s tip: in ground as in pot, water must be regularly renewed throughout the growing season to favour hardening of the bush. Soil moisture requires special attention during first two summers of your young callistemon plants.
Further reading
- Virginie explains how to protect a callistemon from cold in winter.
- Also discover all our tips to prune a callistemon.
- Finally, Sophie explains how to choose a callistemon according to your needs.


Comments