


How to create a beautiful perennial border
Design, plant selection, planting
Contents
In the garden, creating a “flower bed” or a perennial border is not that easy. And although the most beautiful arrangements may seem spontaneous, let’s not kid ourselves, in 90% of cases, improvisation leads to disappointment!
Indeed, lacking a miracle recipe, creating a border requires a bit of thought and the more or less strict adherence to key principles… which we will attempt to outline for you.

Designing and imagining your "flower bed
1) The Location
To begin with, accurately determine the location of your future flowerbed. Avoid, unless it’s a deliberate choice, placing it in the middle of nowhere. Ensure that your flowerbed complements an element of the garden: a pathway, the edges of a terrace, the entrance, or the base of trees.
Observe carefully, at different times of the day and, if possible, over a complete year, the level of sunlight in the chosen location to determine whether it will be in full sun, partial shade, or mostly in shade (shadows are more pronounced in winter than in summer…). Finally, assess your soil type: sandy, clayey, loamy, stony, and, if possible, its pH, which indicates whether it is calcareous, neutral, or acidic.
2) The Size and Shape of the Flowerbed
Consider its size. The perfect flowerbed is both a little ambitious while remaining reasonable, meaning neither too small nor too large… unless you wish to recreate a meadow-like space.
To facilitate maintenance, manage the depth of your flowerbed so that you can access the bottom with just one foot inside: this corresponds to a depth of about 1.2 m, or 2.4 m if the flowerbed is accessible from all sides.
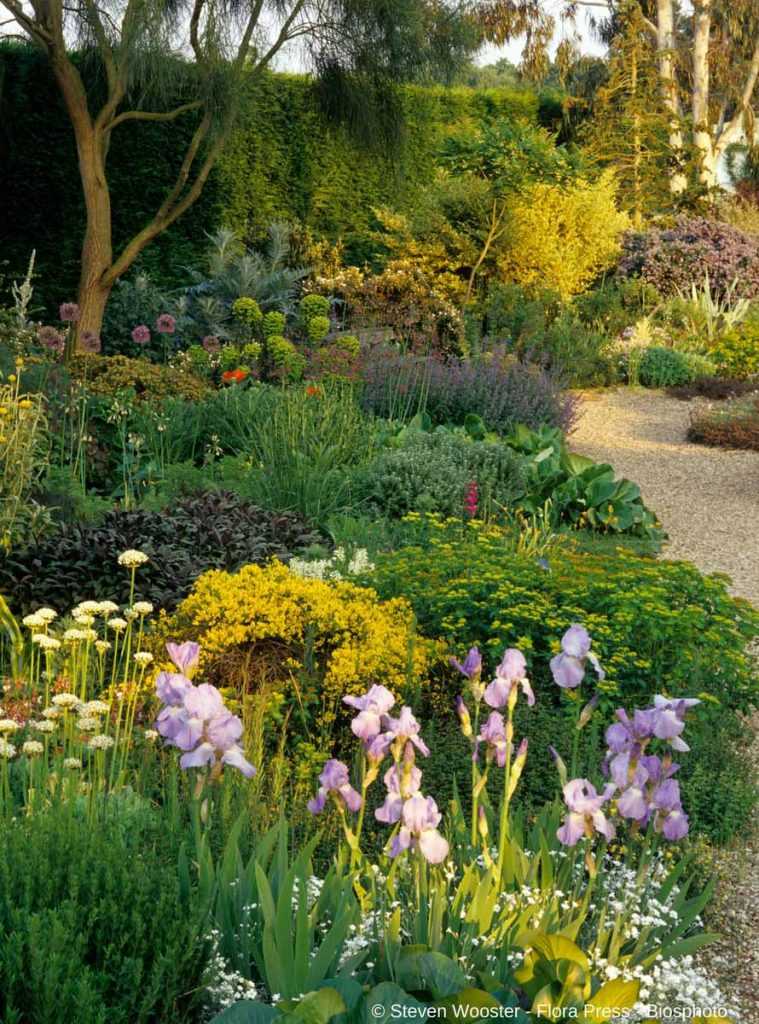
All shapes are possible but be aware that harmony and naturalness do not necessarily rhyme with curved shapes. Large square or rectangular flowerbeds where perennials and grasses mingle can have a very natural effect.
3) The Style
When it comes to style, it’s all a matter of taste, and the garden is the perfect place to break free from conventions and realise your dreams.
However, a flowerbed will always be better showcased in a coherent context… For example, try to avoid, as much as possible, creating a Japanese flowerbed near a house with a strong regional character (unless you live in Matsumoto, of course!).
Once the overall style is decided (English, graphic, Mediterranean, woodland…), try to stick to it! Identify the few plants that will structure your flowerbed and give it its identity: bamboos, Japanese maples in a Japanese garden, Italian cypress, lavenders, jasmine in an Italian garden, palms and gunneras in an exotic garden…
If you are among the gardeners passionate about one or more genera, you may be tempted to gather your collection in one place. Resist and accompany them with other perennials: your plants will be much better showcased. This last remark is also very true for a flowerbed of grasses: they are never as beautiful as when they are paired with other plants!
Choosing plants for your border
1) The right plant, in the right place (sunlight, soil type)
The beautiful appearance of a flowering bed greatly depends on the proper development of the plants. For this, it is crucial to place them in a situation that suits them, both in terms of exposure (sun, shade…) and the type of soil and its fertility.
This precaution will also allow you to create a harmonious ensemble, as nature is well made; plants that thrive together often form good visual associations.
Tip:Some plants can be a bit temperamental while others are surprisingly accommodating. Before embarking on an ambitious project and planting a large quantity of a plant you are unfamiliar with, test it first in a similar location.
The Gravel Garden of the famous gardener Beth Chatto, who popularised the notion of “the right plant in the right place”. It is exclusively composed of plants suited to poor, dry soils.
2) The season of interest and flowering period
Designing a highly flowering bed all year round is illusory, even with perennials that are distinguished by their very long flowering. At best, you will achieve an irregularly punctuated green mass, with a few flowers throughout the seasons. Therefore, opt for a main season of interest (late spring and early summer bed, autumn bed…).
However, to make your bed interesting over a long period, feel free to add:
- plants with remarkable foliage, due to their shapes or hues, as they provide interest over a long period.
- grasses, worthy of interest 9 months out of 12 and stunning in winter under frost,
- shrubs that can provide an elegant backdrop but also, through their early flowering or coloured wood, enliven the scene before the main flowering period of the bed. However, remember that it is unnecessary to choose varieties whose period of interest coincides with the main period of your perennial plants: the visual competition would be too great.
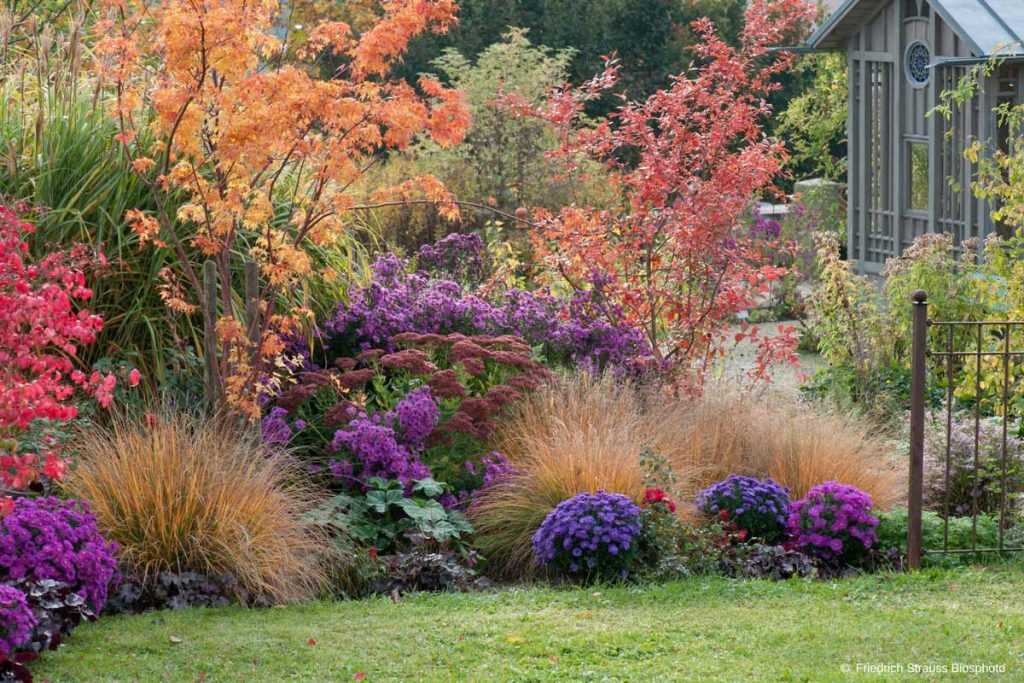
Planting shrubs and grasses in the background helps extend the season of interest of your bed: before and/or after the main flowering period of the perennials.
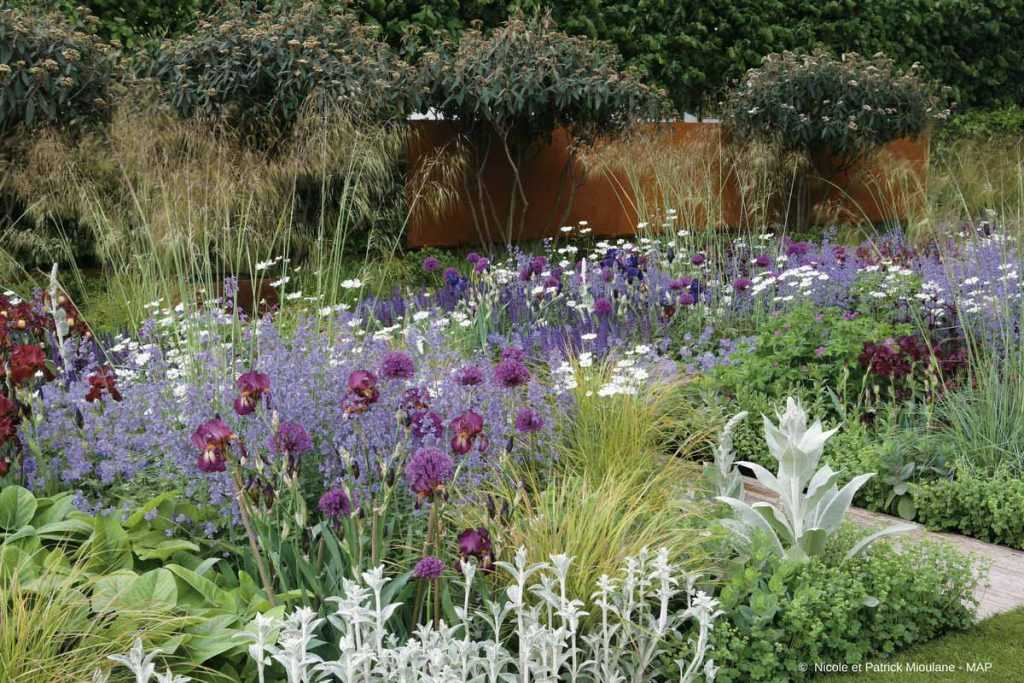
3) Vary shapes and heights
The appeal of a bed also lies in its diversity and volume; nothing is more boring than a flat flowerbed…! As we mentioned some time ago on the blog, it is also the play of contrast between shapes and heights that gives a true presence to the bed.
For this, do not hesitate to use structural plants such as grasses and all those that form beautiful vertical lines like Veronicastrums, Delphiniums that you can slip between your round or bushy perennials to create rhythm and break the monotony of a too strict bed. In the background, to create a slight curtain and give a sense of depth, add airy perennials like Thalictrum or Buenos Aires Verbena or Molinies. However, in contemporary beds, it is no longer shocking to break the codes and place these so-called “transparent” perennials in the foreground of a bed.
Tip:Imagine your bed “in black and white”! Like a painting or a photo, the scene created should be attractive, both dynamic and visually balanced through contrasts and complementarity between shapes.
Juxtaposing flowers of different shapes and grasses helps create rhythm in the beds
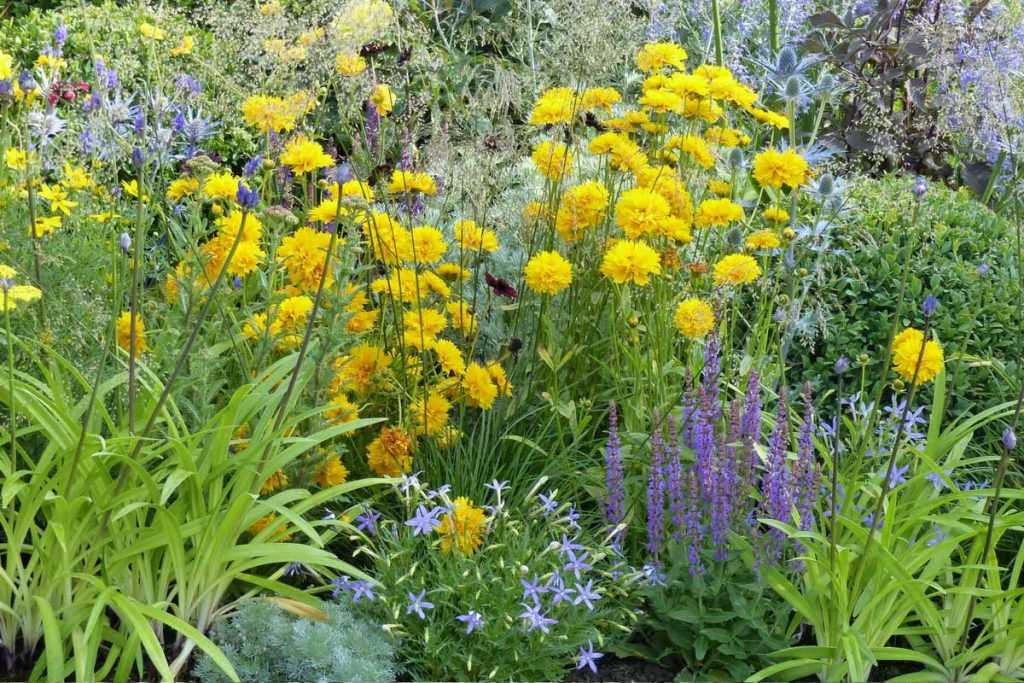
4) The colours
As with style, the choice of colours is very personal and all variations are possible, provided you master their use well… and that is usually where the problem lies. For this, do not hesitate to invest in a reference book like “The Colour Guide for the Garden“. Also, consult the article by Francis Peeters that explains, point by point, how to fail with colours in the garden in six lessons 😉
While waiting to have fully assimilated its content, make your own scales by initially favouring fairly sober harmonies, based on two or three colours, rather than very colourful scenes with fragile chromatic balance.
Tip:When you think “colour”, do not think only of flowers! Coloured foliage also has its role to play and even with a significant advantage, as in the vast majority of cases, it lasts much longer than flowers!
 Using two to three colours at most allows for easy visual harmony.[/caption>
Short on time or inspiration to compose the bed of your dreams?
Consult our “Inspirations” section: you will find atmospheres by colours or styles, as well as practical solutions for specific locations such as under trees, dry and stony soils.
Discover other Perennials A to Z
View all →
Available in 0 sizes

Available in 0 sizes

Available in 0 sizes

Available in 1 sizes

Available in 1 sizes

Available in 1 sizes

Available in 1 sizes

Available in 1 sizes

Available in 1 sizes

Available in 2 sizes
Plan and represent the project
Establish a planting plan
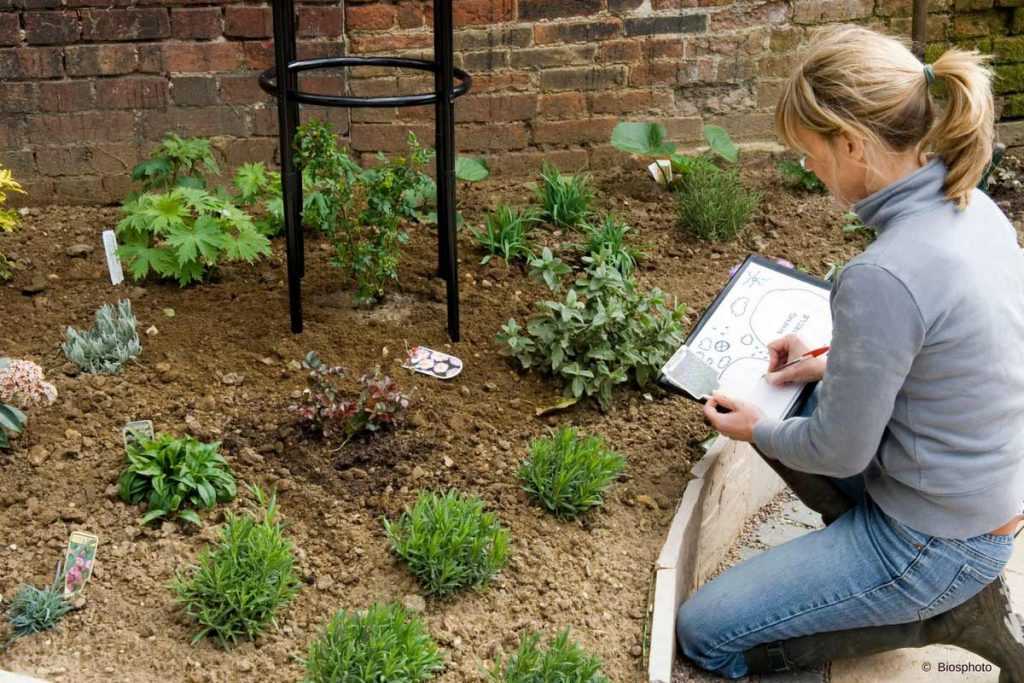
Once you have chosen your plants, your flowerbed can take shape… first on paper! Creating a planting plan is not obligatory but highly recommended. This involves sketching your project on paper.
This step will allow you to:
- get an overall view of your future flowerbed,
- have a precise guide for planting,
- accurately estimate the quantities of plants to order.
For this, there is no need to invest in expensive software: graph paper and pencils are sufficient. However, to make things easier, you might consider investing in a circle template.
Start by listing the selected plants, noting their dimensions (height, spreading) at ripeness. On paper, reproduce your flowerbed to scale. Using the circle template or a compass (less practical), arrange your plants in the allocated space, representing the area they will occupy on the ground once mature.
This plan will serve as a guide for planting your perennials at the correct distance and help you avoid two very common pitfalls, which are to:
- plant too closely, which hinders the proper development of the plants. For this, you will find on each product sheet an indication that allows you to know the average planting density of a plant per m²
- plant too few plants, which will give your flowerbed, at best, a slight “exhibition” look and at worst, a miserable appearance… and will leave room for adventive plants to thrive.
| Density | Distance between plants |
| 1 plant per m2 | 1 metre between each plant |
| 3 plants per m2 | 60 cm between plants |
| 5 plants per m2 | 50 cm between plants |
| 7 plants per m2 | 40 cm between plants |
| 9 plants per m2 | 30 cm between plants |
Read also
Asters : growing and careOrder your perennial plants
Once your plan is developed, you can order your plants. With the quantity issue settled, you may need to decide on the packaging.
Our plants are offered in two types of packaging: the 9 cm bucket and the 2 or 3-litre pot.
- Plants in buckets require a bit of time to settle in and bloom. They reach their ripeness within 12 to 18 months after planting.
- Perennials sold in 2 or 3-litre pots are older and have the advantage of making their presence felt from the very first year. This is an interesting option if you are relatively pressed for time, but it is less economical than plants packaged in buckets.
Note:
Paradoxically, the installation of perennials in 2 or 3-litre pots can be more delicate than that of buckets, especially if you are planting in spring when the plants are developing their tender stems. If you choose this option, handle the plants with care at planting and ensure that your bed is watered very regularly during its first summer.
Please note that on Promessedefleurs.com, you can schedule the delivery date of your plants for a chosen date: they will be reserved for you and we will take care of them while you move on to the next step: preparing the ground before planting.
Prepare the ground before planting
Preparing the ground before planting is crucial. Planting perennials in poorly weeded, uncompacted soil is a venture doomed to failure. In most cases, flower beds are established in place of a short grass meadow. The first step is to remove this herb.
Weed Removal
To remove the herb from your flower bed, choose between these three methods:
1) Removing the herb using a hoe
This is the most “physical” method, but it allows for quick planting. This removal involves cutting the grass and its roots horizontally. To do this, start by marking the outlines of the beds with a spade and then proceed in strips. The “waste” can be composted or stored under a black tarp where it will decompose in a few months.
2) Weed suppression by occultation
To smother an old lawn with minimal effort, you can cover it for several months with a tarp, preferably permeable, or with cardboard, possibly topped with a thick layer of mulch or straw. This method, which is gentle on the soil (and your back…), takes a bit longer but will allow you to plant easily in good soil.
3) Traditional digging with turning
This is a technique still widely used, although it is not ideal. It involves mowing the grass very short and then turning the soil so that the grass is buried and dies. This turning is accompanied by using a rake to break up large clumps of soil. The main drawback of this practice is the burial of undecomposed organic matter, which can be harmful to the soil (risk of anaerobic fermentation in heavy, wet soil, appearance of wireworms).
In the first two scenarios, once the plot is weeded:
- remove the last roots of adventive plants,
- decompact the soil using a fork, if possible, without turning it over,
- make a light addition of compost if your soil is poor and you plan to install relatively hungry plants,
- use the rake to break up large clumps and then rake to achieve a fairly fine texture but without excess.
Planting your perennials
Planting is often the most enjoyable step! It is ideally done in autumn or spring, either after heavy frosts or after intense heat…
- First, soak your pots in a basin of water for 15 minutes for 9 cm buckets, and for half an hour to an hour for larger pots.
- Follow your planting plan and leave the distance between each plant corresponding to their spread at ripeness,
- with the soil having been previously loosened, you can proceed with planting by simply digging a hole that matches the size of your plant’s root ball,
- Place your plant and level the soil, compacting the soil around the plant,
- Water regularly, but without excess, during the first few weeks to keep the soil moist, even for drought-tolerant plants.
- It may sometimes be necessary to provide support for certain plants. Find our tips for staking a perennial plant.
And if all of this seems too complicated, discover Michael’s good advice: “How to Fail at Planting Perennials in 6 Lessons”
Pay attention to the finishing touches.
In most cases, the flowerbeds are adjacent to a grassy area. To give a neat appearance and highlight your plants, we recommend two very useful actions:
1) Cut your edges
Cutting or edging the borders is the simplest and most economical way to clearly define the space. This involves cutting the soil, using a spade or a half-moon, at the boundary between the lawn and the flowerbed.
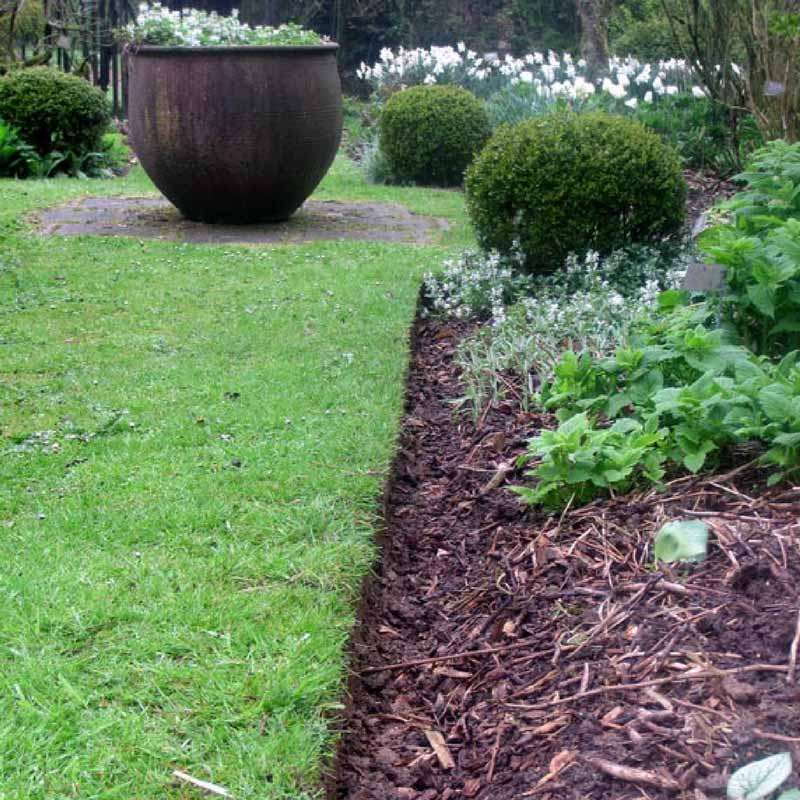
A perfectly cut edge = a neat appearance and limited maintenance!
To learn everything about edging, check out our article: “The pruning of borders, a chore more than effective”.
2) Mulch
Mulching offers a very aesthetic appearance to the flowerbeds, especially when the plants are still small. Like edging, it greatly limits the establishment of adventive plants while protecting and nourishing the soil. To be effective, the mulch should be spread to an average thickness of 7 cm.
You can mulch in all seasons, preferably immediately after planting but ensuring to clear the base of the plants if they are not yet very developed. This precaution will prevent them from rotting if the season is particularly wet.
Attention!
Remember to adapt the type of your mulch to the type of plants: dry, well-drained, and poor soil perennials would suffer from a mulch that is too rich and too moist, such as fallen leaves or chippings. In this case, prefer a mineral mulching (slate, pumice…)
To learn everything about mulching, check out our advice sheet: Mulching, why, how?
Finally, the plants will require more or less maintenance afterwards. Discover all our tips on the maintenance of perennial plants.
- Subscribe!
- Contents
Comments