


Creating a natural pond in your garden
a very rich aquatic medium
Contents
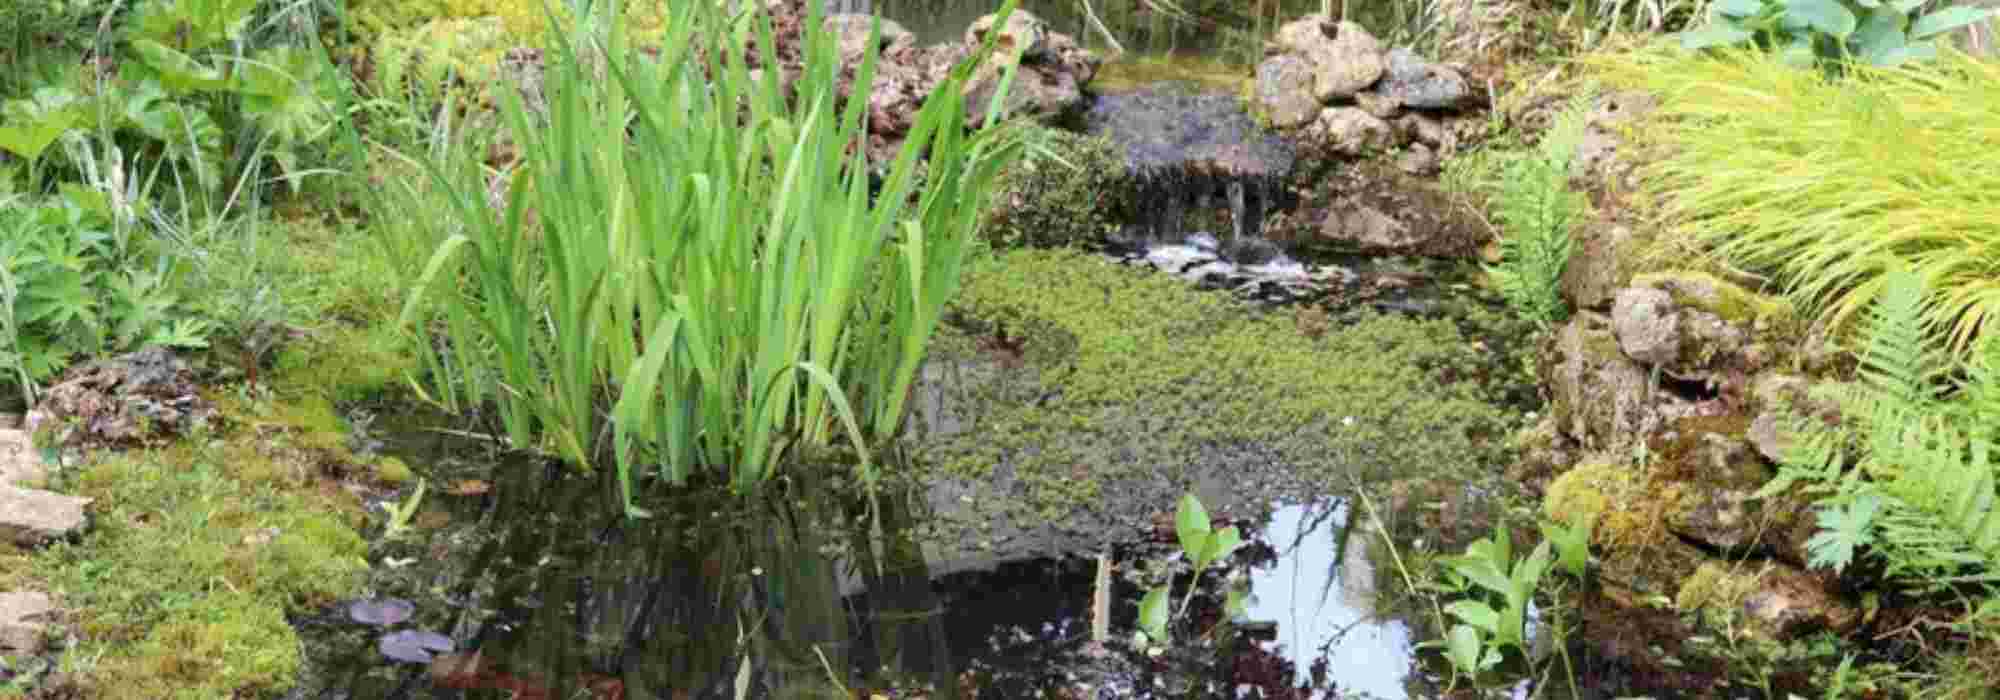
A small pond is often a dream for gardeners. Aesthetically pleasing and providing a refreshing touch, it is also an incredible habitat where fascinating insects and amusing amphibians frolic. Not to mention molluscs, small crustaceans, and even a rare species of aquatic spider: the argyronete.
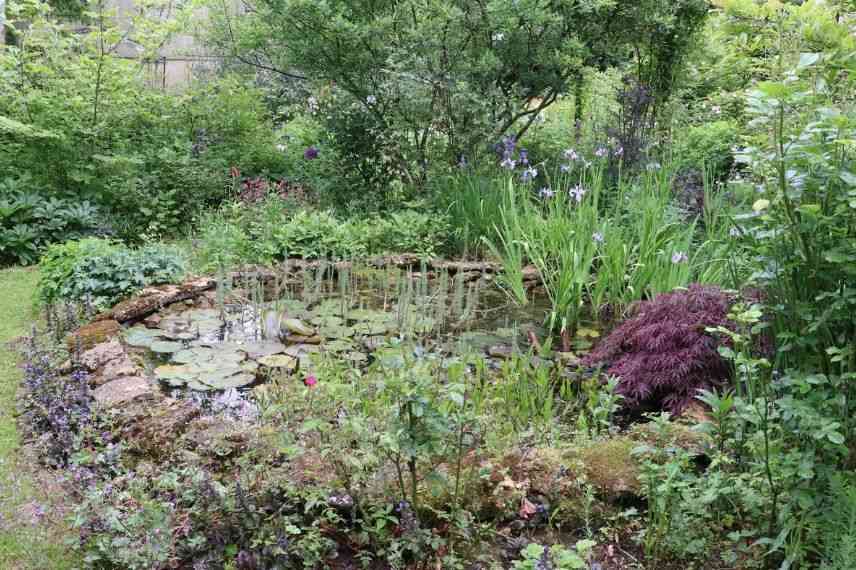
Ponds fit wonderfully into wild gardens, English-style or even in a small zen corner at the foot of Japanese maples. Unfortunately, the work and space required for such a project can deter us from our desires. However, creating a pond is much easier than it seems, and there is no need to make it very large to enjoy it.
Here are all our tips for digging and creating a small pond in your garden.

The location of the pond
Before you start digging the pond, you need to carefully define its location.
Prioritise:
- a clear and sunny spot: ideally facing south. Indeed, light and warmth are essential for the development of life in your water feature;
- an area away from trees: roots could hinder your digging and create holes in the pond’s waterproofing (liner, clay, etc.). Additionally, leaves and needles accumulating in the water will acidify and eutrophicate (increase in nitrogen and phosphorus) the water in your pond, which will harm the wildlife living there.
- a space away from buildings or human constructions: foundations and pipes are obstacles to digging. Moreover, a pond will obviously bring moisture to nearby buildings. However, it is nice to have a refreshing water feature near a terrace. So let’s find a balance!
- a location near a wild area: so that animals can safely colonise your small pond. An area that is too neatly mown for an insect or an amphibian is like a highway for us to cross. Keep this in mind!
- and if possible, not in a thoroughfare: especially if you have young children. Although there are grids available to prevent potential accidents, opt for a location that is more secluded and quiet, which will benefit the small wildlife of the pond.
- the wettest and lowest spot in the garden: water will accumulate in the lowest part of the garden. Therefore, your pond will fill more easily in this location.
Read also
10 aquatic plants, submerged or floatingSealing the pond: the different solutions
Different pond sealing systems are available. Choose based on the size of your pond, its durability, and your budget:
- EPDM Liner (0.5 to 2 mm thick): this is the most practical and durable solution (lifespan: around 50 years). This type of liner is resistant, easy to install, and easy to repair. Suitable for small to medium-sized ponds. The best value for money.
- PVC Liner (0.5 to 0.8 mm thick): an economical option but less durable and more difficult to install due to its rigidity.
- Clay Pans: inexpensive, easy to install and repair, very natural, suitable for ponds of all sizes but… fragile as they are sensitive to frost and drought… This is a viable solution in naturally heavy and moist soil.
To calculate the surface area of a liner (and other layers: mesh, geotextile, …).
L = length to allow = maximum planned length of the pond + 2 × maximum depth.
l = width to allow = maximum planned width of the pond + 2 × maximum depth.
Example: for a kidney-shaped pond that occupies a space of 4 m in length and 2 m in maximum width with a maximum depth of 1.2 m, we get:
L = 4 + (2 × 1.2) = 6.4
and
l = 2 + (2 × 1.2) = 4.4
Therefore, we need to order a liner of 6.4 m in length and 4.4 m in width. It’s wise to allow a little extra, just in case.
Discover other Aquatic plants
View all →
Available in 0 sizes

Available in 1 sizes

Available in 0 sizes

Available in 0 sizes

Available in 1 sizes

Available in 1 sizes

Available in 2 sizes

Available in 3 sizes

Available in 1 sizes

Available in 2 sizes
In practice: dig the pond, lay the liner
The Equipment to Prepare
- Spades, shovels, picks… or even a mini-digger if you can rent one,
- A builder’s level or water level to regularly check the different levels
- One or more wheelbarrows
but also:
- sand, several dozen kilos.
- galvanised steel chicken wire: the same area as the waterproofing surface
- geotextile felt: the same area as the waterproofing surface
- Possible stones and logs
- optional: Ecolat edging and Ecopics
and especially:
- friends, family: digging a pond or a basin is a real adventure! Don’t go it alone… (and remember to provide food and drink!).
Excavating the Pond
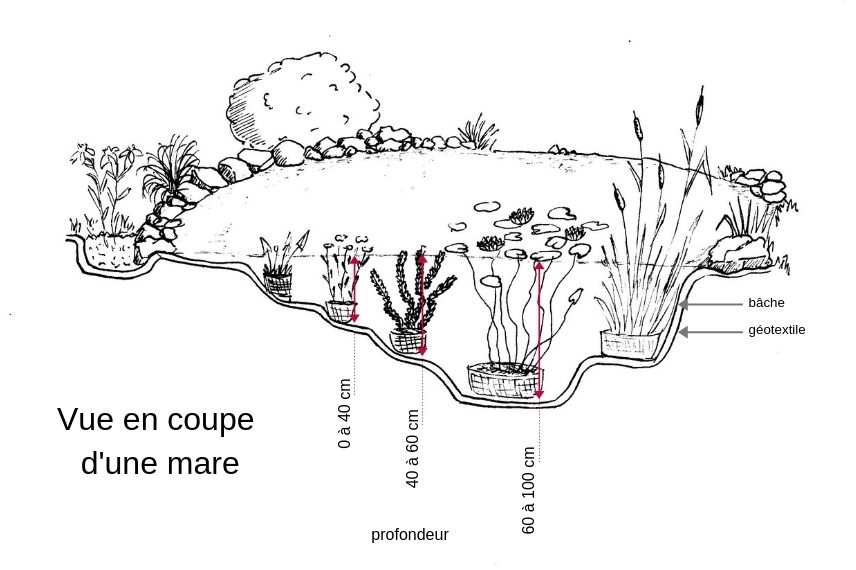
The excavation should be done in such a way that different levels are created. A deep section of at least one metre will help maintain a frost-free zone (to some extent). Creating different levels will accommodate various types of plants: submerged plants, floating plants, semi-aquatic plants, and marginal plants. The deep area will also serve as a refuge for animals that won’t dry out in summer and will have a more stable temperature in winter.
Please note: the best time to dig a pond is early autumn. Indeed, autumn and winter rains will quickly fill it, and you will already see some insects in the pond by early spring. For planting, you can start with marginal plants in autumn, but other plants should ideally be introduced in spring when the risk of frost has passed.
As for the design of the pond, it doesn’t matter: be creative! However, for a natural pond, it is advisable to create simple curves so that it integrates well into the garden.
In practice:
- Outline the ground surface with a hose or stakes
- Start digging by tackling the edges first: plan for terraces and a deeper hole
- Keep the excavated soil to the side: you will use it later. Place it on a tarpaulin to avoid damaging your lawn.
- If you have a slight slope, you can install Ecolat edging to level it out. This edging screws onto Ecopics driven into the ground every 50 cm. Ensure it is level using a water level or spirit level.
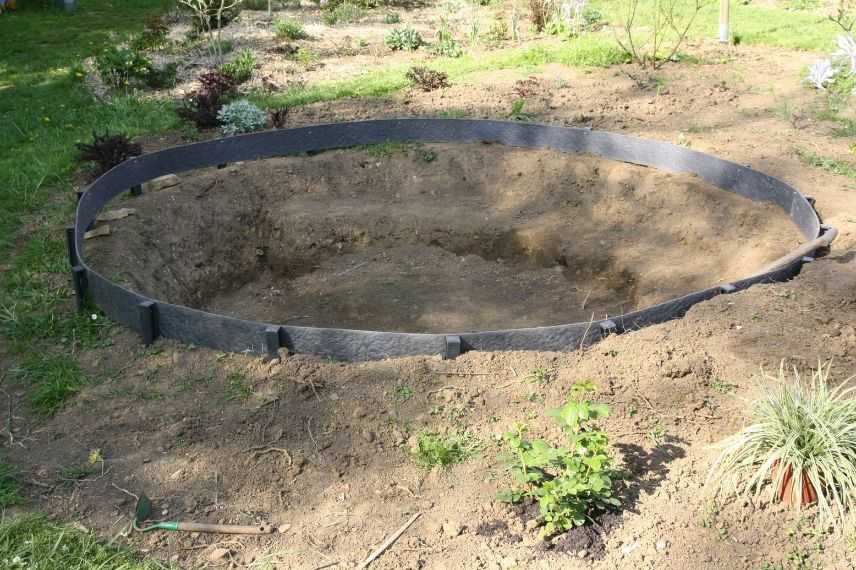
Installation of Ecolat edging to level if needed
- Remove all stones and other sharp materials that could puncture the liner
- Place the hexagonal mesh: this mesh prevents voles, moles, or even muskrats from digging holes and passing through your liner or clay.
- Cover the mesh with river sand to even out the surface
- Place the geotextile: to maintain a buffer zone between the mesh and the liner and prevent the former from puncturing the latter.
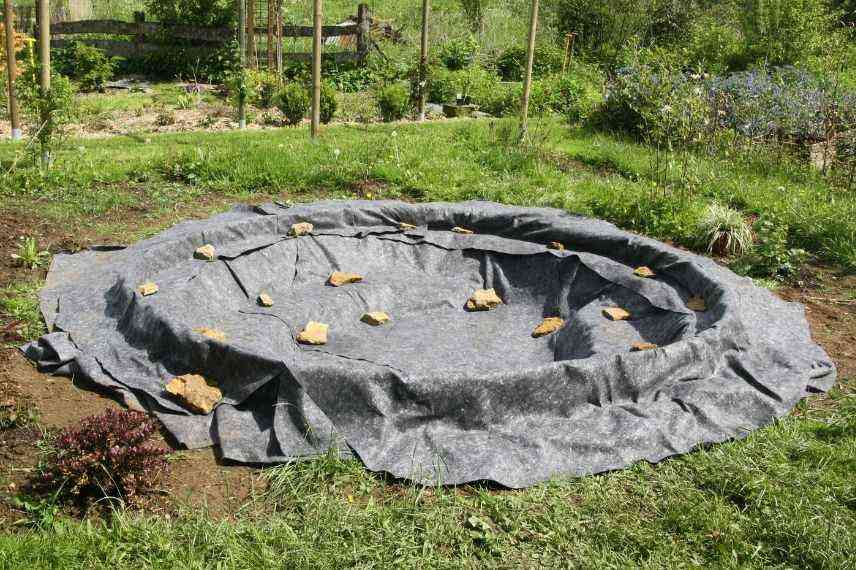
Installation of the geotextile
- Carefully place the liner: if you need to walk on it, do so barefoot to avoid damaging it.
- Fill with water or wait a bit for the pond to fill so that the liner settles into place.
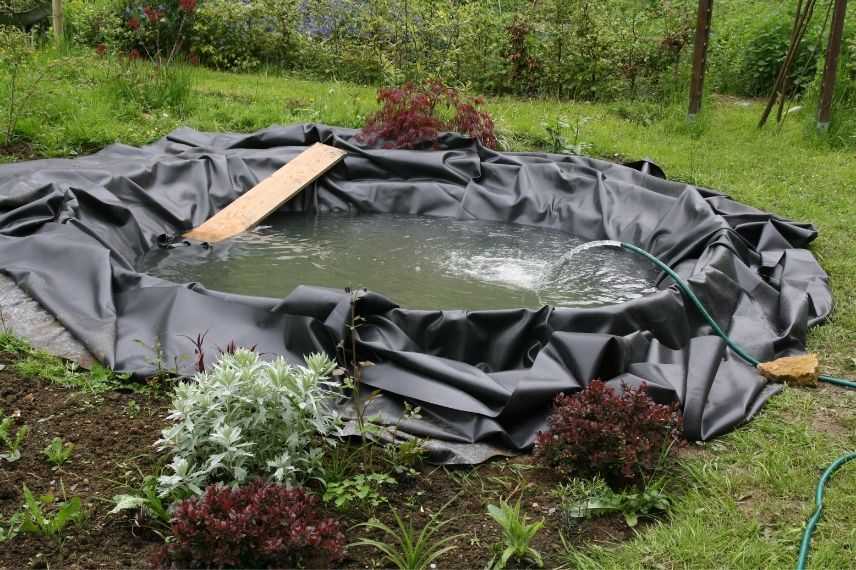
Filling after placing the liner
- Once the pond is filled, you can secure the liner by burying the edges under the lawn, in the soil by bending it, or, more simply, by placing large stones or heavy logs around the perimeter.
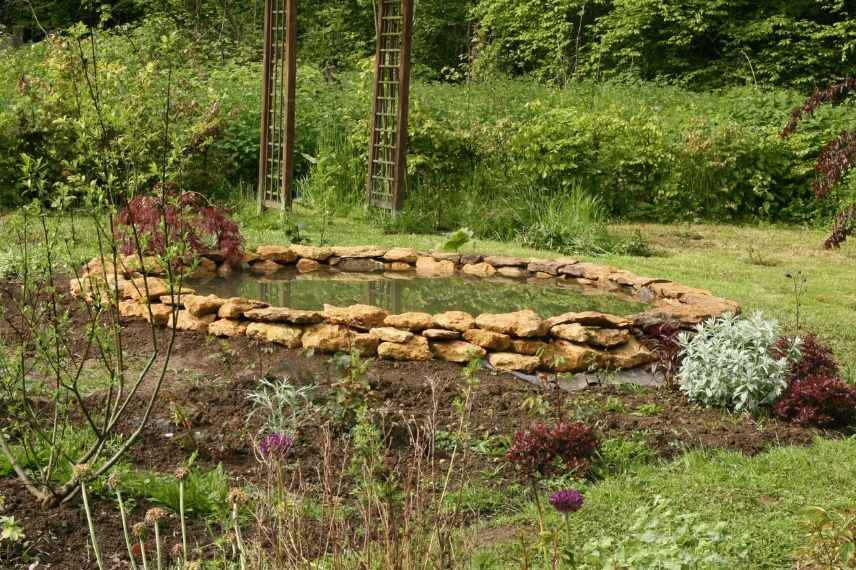
Stoning to conceal the liner… all that’s left is to plant!
- Replace the soil around the pond: this is to secure the liner but also to create a substrate for the marginal plants. Don’t hesitate to throw a few handfuls of soil into the water and onto the submerged “terraces,” again for planting purposes.
- Plant your plants or wait for them to come naturally, if you are in a region that still has natural wetland areas.
- Enjoy your pond for many years to come.
Read also
How to restore a pond?The filling of water and the planting of young plants
Water Filling
- Rainwater: this is the simplest, most economical, and most natural option, but it is also the longest technique depending on the rainfall in your area.
- Water from a tank: if you are fortunate enough to have a rainwater tank, do not hesitate to use its water. The only downside is that a pump will be needed to transport the water from the tank to the pond… which may not be located just twenty centimetres from the tank.
- Mains water: it is expensive and full of chlorine (and sometimes other substances depending on the age of your plumbing…) but it is quick. You will simply need to wait a few days for the chlorine to evaporate before installing your plants and you will be good to go.
Please note: to do it properly, an initial rinse water can be used in the pond and then pumped out. This operation will help eliminate any pollutants that may persist on artificial materials: EPDM, polystyrene basin, fibreglass, …
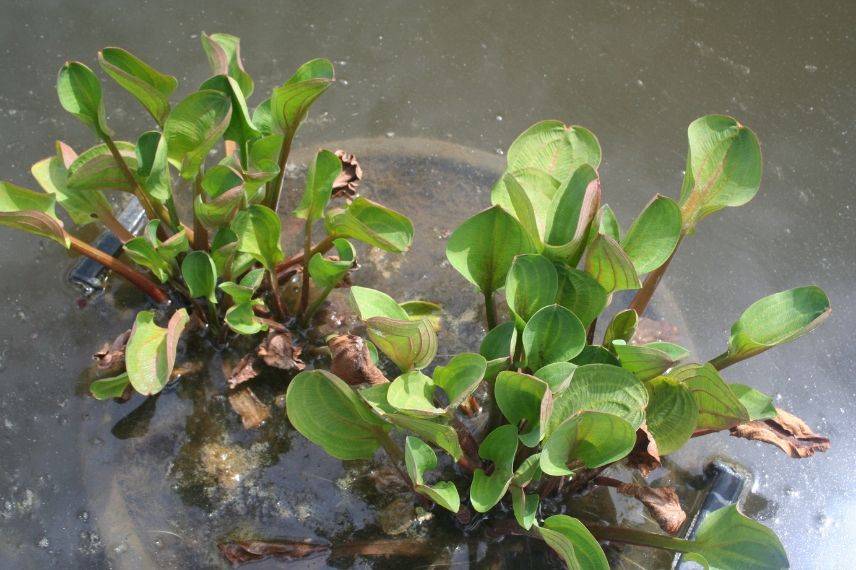
Planting the Vegetation
Not all aquatic or semi-aquatic plants have the same placement in a pond depending on their ecology.
- Submerged plants: often oxygenating, these should be placed in the water;
- Floating plants: very ornamental, they will cover part of the water’s surface. They should therefore be placed in the centre of the water;
- Semi-aquatic plants: these plants should have their “feet” in the water but not be fully submerged. They will be planted in the shallow areas at the edge of the water body;
- Marginal plants: these plants prefer moist, even marshy soils but not directly in the water. They will therefore be placed on the banks around the water body.
 Planting Aquatic Plants
A natural pond with fish or not?
The Natural Pond
Unless your pond covers several ares, you will need to forget about fish. Sorry… In a small area, fish will quickly eat everything that wriggles in the water: insects, crustaceans, and even amphibians. This is a bit unfortunate when you want to maintain some biodiversity at home.
Of course, if the pond is of a significant size, ecological balance can be achieved, and fish along with the rest of the fauna can live in almost harmony. Each regulating the others without total genocide of any species.
A natural pond “fills up” very quickly with a certain wild fauna, so it is unnecessary, dangerous for them, and even outright illegal (in the case of amphibians, in particular!) to collect animals from the wild to “save” and keep at home.
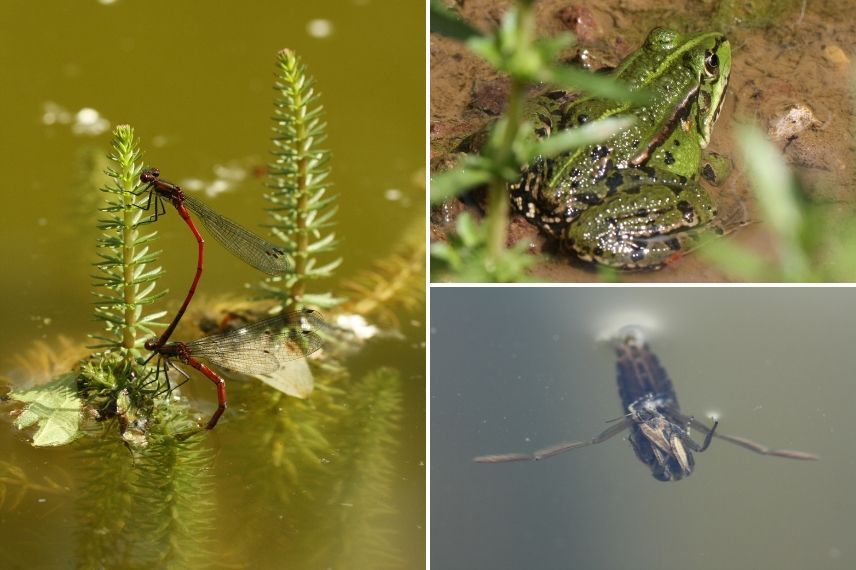
Some enthusiasts of water bodies: dragonfly, frog, and backswimmer
Don’t worry too much about the spectre of a mosquito invasion. Indeed, if your natural pond hosts insects and amphibians that prey on mosquitoes, you won’t have any issues in that regard. The problem with mosquitoes mainly arises in stagnant waters with no other life forms than the larvae of these dipterans: the bottoms of saucers, old tyres, forgotten cans, …
One last little note: frogs croak during the mating season (Scoop!). If you are a light sleeper, avoid placing a natural pond near your bedroom window. In any case, it doesn’t last long, and amphibians are under such pressure from the reduction of their natural habitats that a sleepless night or two is nothing compared to the preservation of species at risk of extinction.
Please note: surprisingly, even if you don’t put any fish in a pond or basin, you will inevitably find some over time. Don’t blame your children or a hypothetical ill-intentioned neighbour! It’s simply that fish eggs and sometimes even some fry have clung to the legs of birds that came to splash around in your “puddle”. A sort of one-way school run for young fish. You won’t look at herons or moorhens the same way again…
Legislation and Safety
And what about the legislation?
If you dig a small pond that is not intended to serve as a swimming pool, a building permit is unnecessary. However, do check with your local council to understand the regulations regarding these small developments. You may, at most, submit a works declaration to notify about any disturbances caused, particularly in the case of excavator work.
Nevertheless, we advise discussing your project with your neighbours and the possibility of waking up to the croaking of frogs or a massive influx of charming dragonflies in their own garden. Some may be delighted, while others may not (sometimes, nature can be unsettling). Always try to educate and maintain good neighbourly relations as much as possible.
Can a pond be dangerous?
A small pond, even if shallow, poses an accident risk for young children. As with swimming pools, you can consider protecting it with a fence. You can also install a metal grid a few centimetres below the water’s surface. This way, any danger will be eliminated.
However, children quickly grasp the concept of danger, so take the time to explain to them why they must remain calm near a water source: for their safety and to avoid disturbing the little world that has made it their home.

Protection grid
The ideal is to introduce your children to the beauty of nature early on by organising a mini fishing activity using an improvised net made from an old colander (the kitchen utensil!) attached to a broom handle. This way, you can catch small creatures that you can observe for a few minutes in an aquarium. To transfer the animals from the net to the aquarium smoothly, use a brush and be gentle; a leg can easily get lost… Remember to quickly return your little finds to the pond, their original medium.
Avoid handling amphibians if possible! Not to prevent a hypothetical illness or poisoning (yet another silly urban legend!) but mainly because these animals have no protection for their skin (hair, feathers, scales, etc.). Handling them is not beneficial unless your hands are very moist.
- Subscribe!
- Contents

Comments