


How to grow oleander in a pot?
Planting and care of potted oleander
Contents
Highly appreciated for its magnificent, long flowering that lasts nearly 6 months, oleander is an ornamental bush that can quite easily be grown in a container or large pot. Relatively not very hardy, it is therefore easier to overwinter in regions with severe winters.
In the wild, oleander, or Nerium oleander, grows in summer near dried-up watercourses between the Mediterranean basin and China. It is therefore important to maintain proper humidity, especially when grown in a pot. Discover our tips to successfully grow it in a pot.

How to grow oleander in a pot?
Oleander can be grown in a pot, provided it is planted in a suitably sized container filled with a well-draining substrate and the tub is placed in full sun.
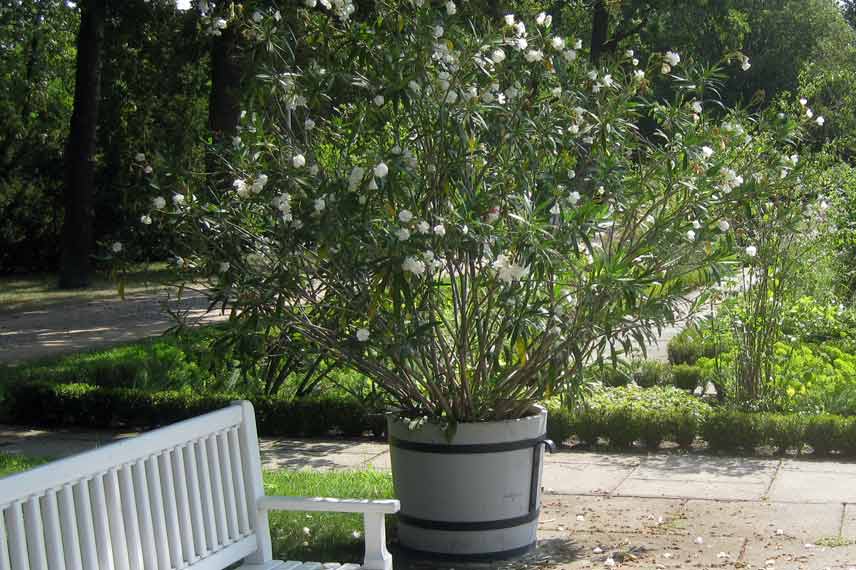
Choosing the right container
Note that Nerium oleander is a bush with vigorous growth that can reach up to 5 m in height when grown in the ground and not pruned.
Therefore, always prefer to plant your oleander in a large tub to give it enough room for the development of its roots. Note that young oleander will need repotting every year.
Likewise, opt preferably for a pot with drainage holes, as the plant does not tolerate standing water.
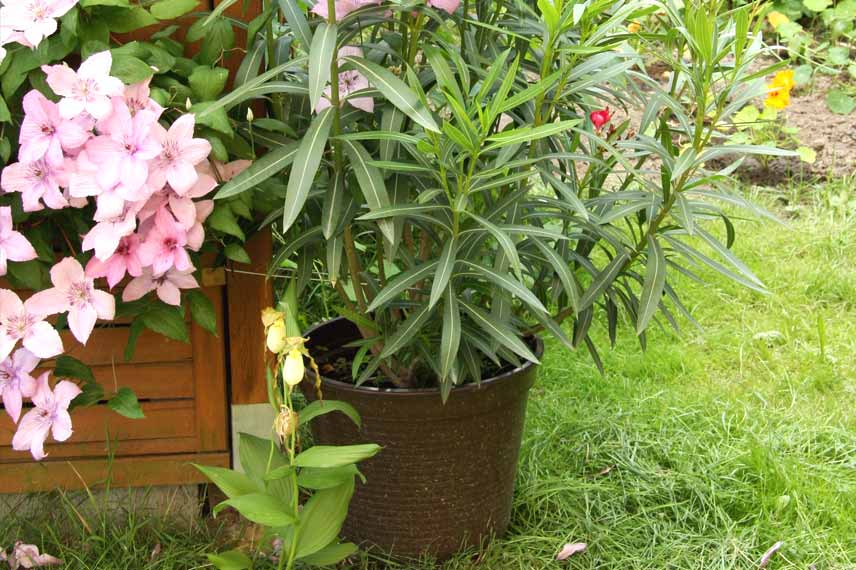
© Maja-Dumat – Flickr
Providing the right substrate
Oleander is a heavy-feeding bush that should be grown in a fertile, fresh and well-draining substrate (excess water causes leaves to yellow).
When grown in a tub, the substrate consists of a layer of clay balls or gravel and a mix made up of potting compost, garden soil, compost and river sand.
Where and when to grow oleander in pots?
Although it can be grown outdoors in southern France and on the Atlantic coast (it tolerates sea spray), oleander is better established on very sunny terraces well sheltered from cold in the rest of the country.
A sunny position is here essential, because although it tolerates partial shade, oleander is less floriferous and bushy there.
In winter, however, pot should be placed in a cold greenhouse or in a conservatory. Ensure it receives as much natural light as possible.
Potting oleander
Plant oleander preferably in spring or early autumn.
- Start by immersing the rootball of oleander in a bucket of water to moisten it thoroughly.
- Prepare a large pot with drainage holes in its base with a layer of clay balls or gravel equivalent to 20% of the pot’s volume.
- Cover with a mixture of potting compost, garden soil, compost and river sand.
- Dig a hole 40 to 50 cm deep in this substrate and place your oleander so that its collar is level with the top of the pot.
- Firm soil around the base and water.
Discover other Nerium - Oleander
View all →
Available in 0 sizes

Available in 3 sizes

Available in 4 sizes

Available in 4 sizes

Available in 4 sizes

Available in 1 sizes

Available in 2 sizes

Available in 2 sizes

Available in 1 sizes

Available in 1 sizes
Oleander varieties suitable for growing in pots
All oleanders can be grown in pots, but this cultivation method is generally reserved for small-sized varieties, ideal on a balcony or terrace.

Nerium oleander Papa Gambetta
- Flowering time July to October
- Height at maturity 1,50 m
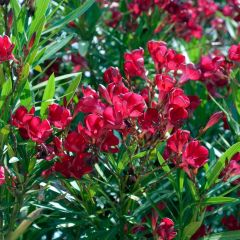
Nerium oleander Jannoch
- Flowering time July to October
- Height at maturity 3,50 m

Nerium oleander Provence
- Flowering time July to October
- Height at maturity 3 m
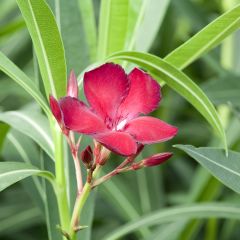
Rose Bay - Nerium oleander Red Single
- Flowering time July to October
- Height at maturity 3,50 m
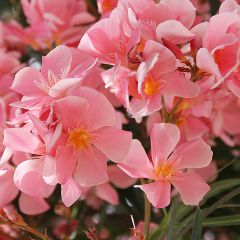
Nerium oleander Salmon
- Flowering time July to October
- Height at maturity 3,50 m
Read also
When and how to take oleander cuttings?Caring for potted oleander
First, container growing allows overwintering your oleander in a greenhouse or in a bright conservatory. If you live in an area where frost is common, bring your plant in at first autumn cold snaps. In spring, it can be returned outdoors once frost risk has passed.
→More information on overwintering oleander
© Wilhelm Zimmerling PAR
Watering oleander plants in pots
In summer, be attentive to the water needs of your potted oleanders, especially during their first two years. Despite natural resistance to drought, regular watering is necessary during flowering, particularly when grown in a pot and when weather is hot and dry. Expect one to two waterings per week.
Be careful, however, not to flood roots and never let water stand in the saucer. Likewise, always water oleander at the base, taking care not to wet the foliage.
To keep substrate cool, you can spread a layer of mulch at the base of your potted oleander.
In winter, oleander needs a period of rest. Place it in full light at about 10°C, and water only every 15 days.
Fertilising potted oleander
Soil becomes depleted faster in pots than in open ground. You should therefore take care to fertilise the soil of your potted oleander regularly to enjoy its abundant flowering.
Every 15 days during growth, supplement waterings with a specific fertiliser for flowering plants.

Pruning potted oleander
Overall, oleander is a bush that requires very little maintenance. Among these, note that a light pruning, carried out in early spring or after flowering (late summer), can be beneficial. This annual pruning is however optional and mainly allows removal of dead wood.
You can optionally pinch shoots during spring to remove fruit remnants, which encourages the appearance of new inflorescences.
Thin out the clump every 3 or 4 years by removing the oldest stems, but take care not to prune oleander too severely as the longest stems produce flowers.
Diseases and pests of potted oleander
Potted oleander is susceptible to attack by yellow spider mites, which are particularly attracted to atmospheres that are too dry in garden greenhouses.
By airing the oleander clump you will prevent the development of circular brown spots on its foliage, caused by Ascochita hetromorpha which appears in cold, humid conditions.
Young branches are, for their part, susceptible to Pseudomonas syringae, which causes dark deforming cankers. This is spread by piercing‑sucking insects or by horticultural operations. Ensure therefore you thoroughly disinfect your pruning shear before each cut.
Attacks by Aphis nerii aphids cannot be ruled out. These are responsible for a black deposit of sooty mould that is treated by spraying with black soap and by means of beneficial insects (ladybirds, hoverflies…).
- Subscribe!
- Contents

Comments