


How to take a fig cutting and succeed?
Best practices for propagating a fig tree
Contents
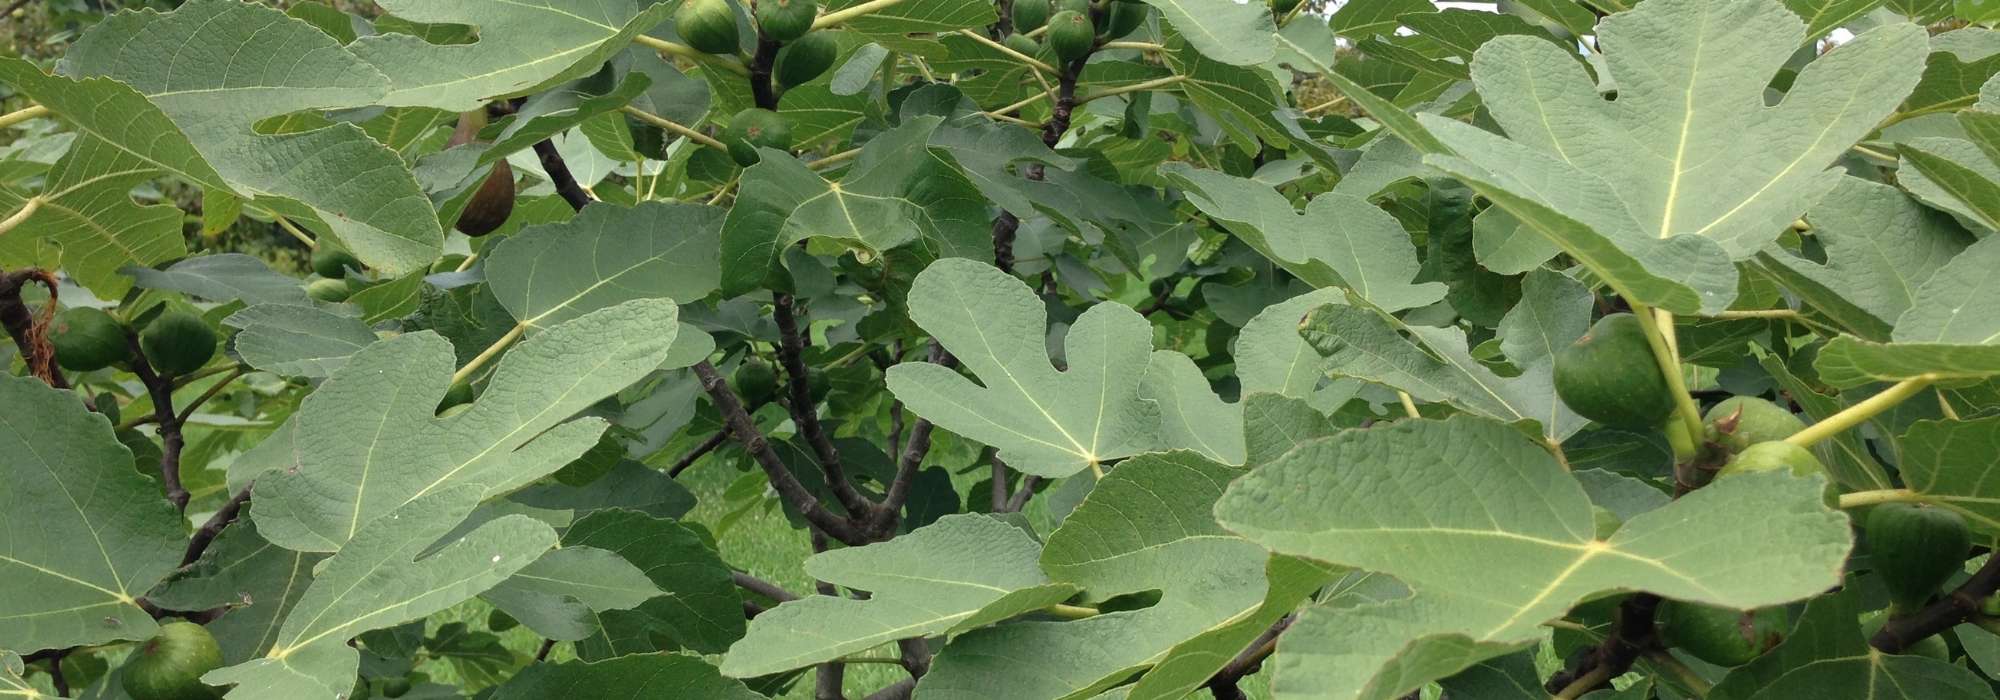
Emblematic of Mediterranean region, the fig tree (Ficus carica) is a fruit tree prized as much for its generous foliage as for its sweet, fragrant fruits. If you dream of harvesting more or of sharing this tree with friends and family, why not try a fig cutting? It’s a simple, quick method accessible to all, ideal for multiplying your fig tree at low cost.
There are several techniques to succeed with a fig cutting: crossette, enclosed method using propagation by cuttings of the fig tree in a plastic bottle, or even propagate a fig tree in a glass of water. We will not cover prickly pear nor fiddle‑leaf fig here but only the propagation by cuttings of Ficus carica.
If layering of fig tree remains an option, we recommend here the propagation by cuttings of fig tree, which produces new young plants more quickly. Let’s look at how to take a fig cutting, the best time to propagate fig trees, and which methods to favour.

When to propagate a fig tree?
Here are the best times to take cuttings from fig tree depending on technique used.
| Technique | Ideal period |
|---|---|
| Covered cutting | February to March |
| Fig tree cutting in water | February to March |
| Crossette cutting | November (after leaf fall) |
Read also
Ficus: planting, pruning and maintenanceHow to root a fig cutting in a humid, enclosed environment?
Here’s how to carry out the fig tree propagation by cuttings in a plastic bottle (or with a plastic bag) :
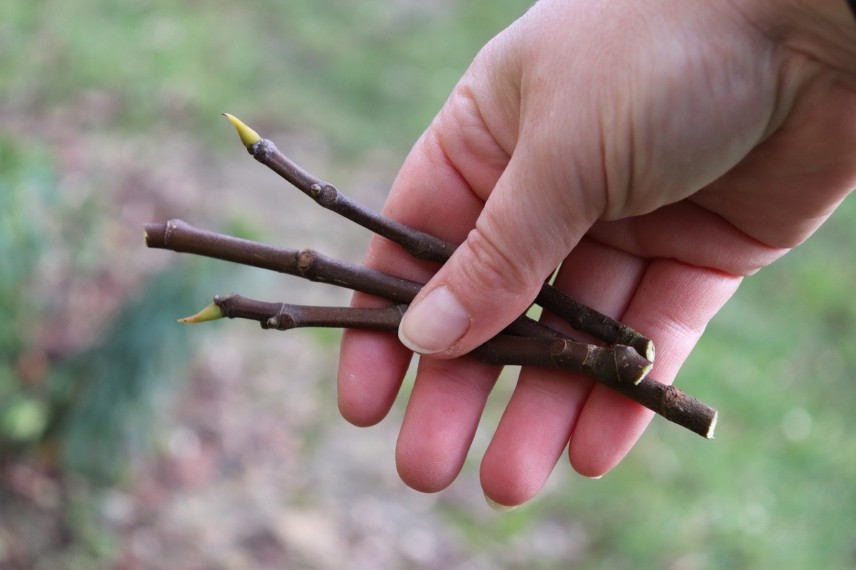
- At end of February, take one-year-old shoots with 3 to 5 buds.
- Cut a plastic bottle in two. Pierce base so water can drain away. Fill lower part of bottle to full height with potting compost for cuttings, firm it down and thoroughly moisten the substrate.
- Insert the fig tree cuttings into the compost, ensuring they are buried so only 1 to 2 buds remain exposed to air.

Insert shoots into compost / Place bottle in a bright, cool spot
- Make holes with tip of knife in upper part of bottle to create small vents. Seal it with tape to create a confined atmosphere. You will not need to open cap or water.
- Place bottle in a bright, cool location (16°C ideal).
- When first leaves have emerged, you can remove cap. The cutting will therefore no longer be in a confined environment and the substrate may dry out. However, it must remain moist; water a little if it seems dry.
- Leave upper part of bottle in place until you can see roots in lower part, even if leaves seem a little cramped.
- Cover lower part of bottle with newspaper to block light to roots.
- Keep bottle indoors until outdoor temperatures no longer fall below 13°C. At that point, you can move your fig tree cutting outside and place it in a shaded, sheltered spot.
- If small roots appear on above-ground part of cutting, cover them with soil so they do not dry out.
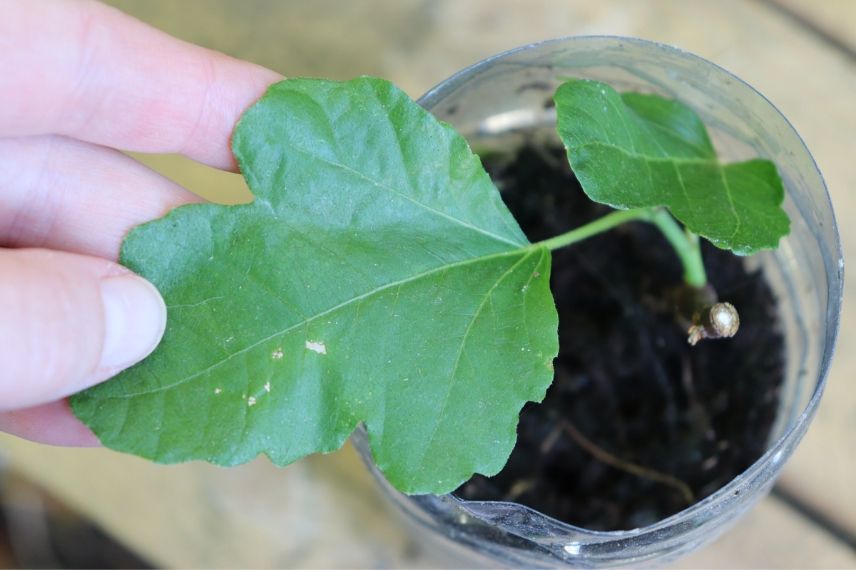
Result 6 months later: 1 cutting out of 3 took (the one without terminal bud)
Discover other Fig trees
View all →
Available in 0 sizes

Available in 3 sizes

Available in 1 sizes

Available in 3 sizes

Available in 3 sizes

Available in 4 sizes

Available in 1 sizes

Available in 3 sizes

Available in 2 sizes

Available in 2 sizes
How to propagate a fig tree using crossette cuttings?
How to take a fig cutting using the crossette method :
- After leaf fall, take lateral shoots 20 to 30 cm long that developed on a 2‑year‑old branch, quite rigid, taking care to keep a section of branch at the base. This is called a crossette cutting.
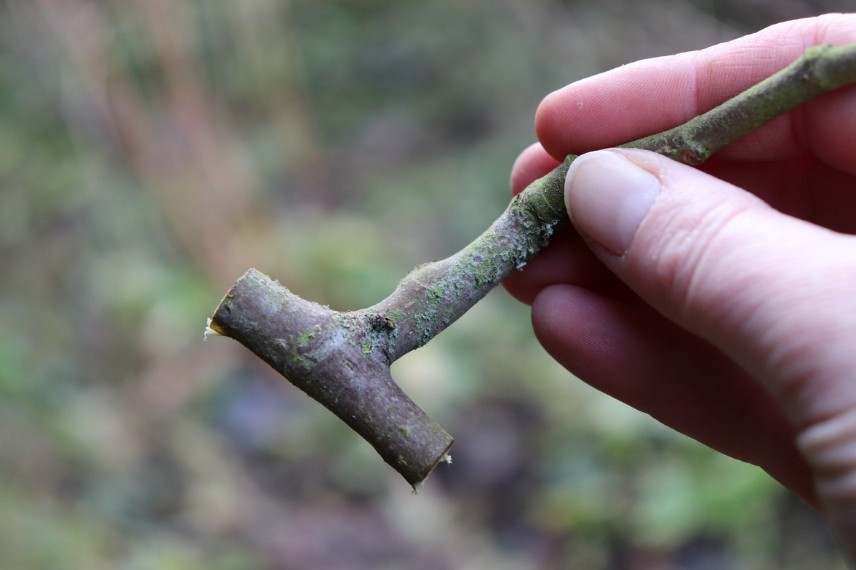
Crossette cutting
- Using a well‑sharpened, disinfected pruning shear, make a slanted cut a few centimetres from the tip of the shoot, just above a bud.
- Bury your fig cuttings in pots filled with sand, leaving one or two buds exposed to the air.
- Place at the base of a north‑facing wall. Cuttings need to be stratified, that is, they require cold to soften the wood and thus encourage root formation.
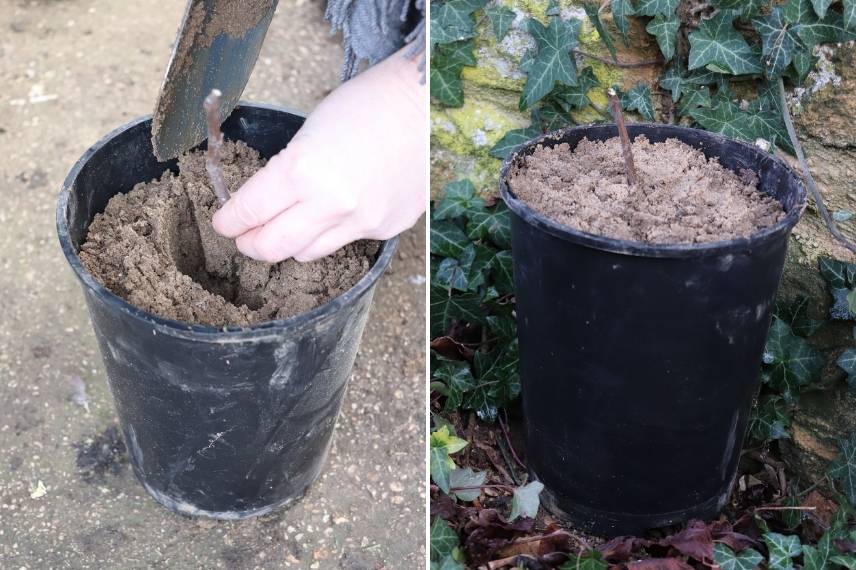
Bury your cutting in a pot filled with sand / Place the pot against a north‑facing wall
- Water lightly and forget about them.
- The following spring, plant your cuttings into the ground at the chosen spot or into pots, leaving only one bud exposed. New leaves should appear, a sign the cutting has taken.
- After they have taken, remove shoots that come from buried buds so that only the shoot at the tip is kept. This makes it more vigorous.
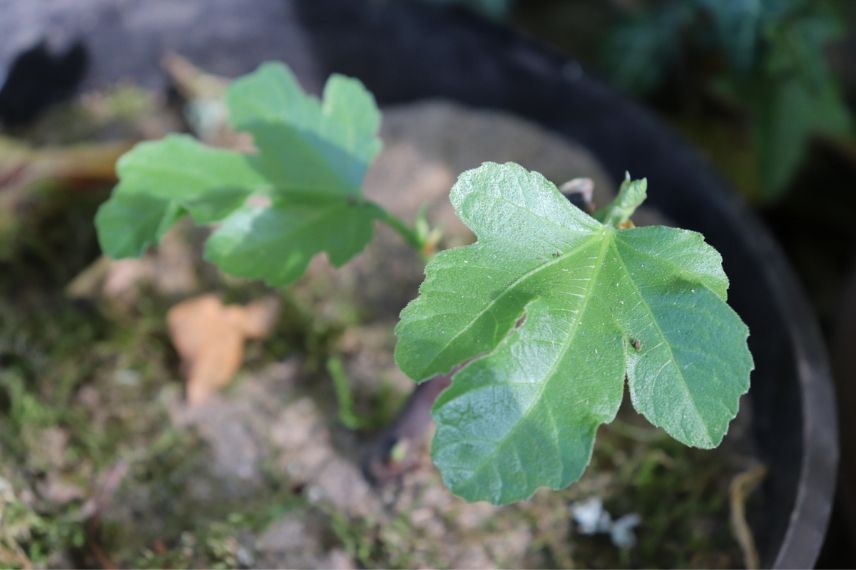
Result nine months later (100% success)
My advice :
I prefer this technique; I always achieve a higher success rate than with the covered method.
In cold regions, give it a well sheltered spot away from late frosts (for example, trained against a south‑facing wall) or grow it as a bush (coppice shoots), which is easier to protect in winter. Finally, young fig trees are more sensitive to winter cold; I advise protecting them well for the first 3 or 4 years in the garden or, if potted, of course bring them indoors.
Propagate a fig tree in a glass of water
It is possible to take a fig cutting in water. Roots appear easily but are particularly fragile and brittle. Consequently, repotting proves tricky and we do not recommend this technique. If you still want to try, here is how to proceed, step by step :
- At end of winter, cut fig shoots about 10 centimetres long.
- Place base of stems in a glass of clear water, without immersing leaves.
- Position glass in light but out of direct sunlight.
- Change water regularly as soon as it starts to turn yellow to prevent mould forming on cuttings. Alternatively, place a small piece of charcoal at bottom of glass so water does not stagnate.
- Roots usually begin to appear after about 4 to 5 weeks. When they are approximately 5 cm long, replant your cutting very carefully into a pot filled with a light substrate such as fine-grained pumice, for example.
- Keep your young fig cuttings under cover and, once frost is no longer a risk, acclimatise them by placing pot outdoors in a shaded, sheltered spot as often as possible.
- Subscribe!
- Contents

Comments