


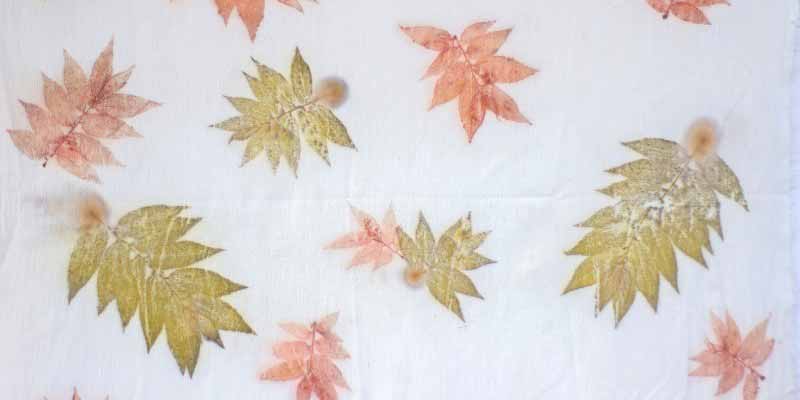
"Tataki Zomé", also called "Hapa Zomé", is an ancient textile art technique that uses plants' natural pigments to dye paper and fabric fibres. Originating in Japan, this technique relies on hammering plant material to release dye and create unique patterns. You can print leaves or flowers and watch colours appear gradually on fabric (bag, tea towel, t-shirt…) or on paper (for decoration, postcards or writing paper, for example). It is an easy activity, ideal to do with children.
Prepare paper or fabric
Before starting, make sure paper or fabric is clean and dry. For fabric, preferably use cotton or linen, and wash beforehand to remove any residue that could prevent dye from penetrating properly. Leave to dry completely before beginning. We also recommend ironing it so it is perfectly flat and free of creases: this will make printing plant material easier.
Choosing and harvesting plant material
Choose fresh plant material (leaves or flowers) rich in tannic acid. You can use, for example, Virginia creeper, ferns, maple leaves and bramble, pansies... For flowers, blue generally works very well, and yellow usually gives a good mark too. Choose plants with vivid, well-defined colours, rich in pigments. Size and shape of plant material will determine pattern of your print, so think about final design when selecting.

Creating the plant print
- Place paper or fabric on a flat surface, for example a wood board.
- Arrange plant material on paper or fabric, placing it face down, because the side in contact with textile or paper will release the dye.
- You can hold it in place with adhesive tape to stop it moving.
- Then lay a scrap of fabric over the plant material, onto which you will tap directly.
- With your hammer, begin to gently hammer the fabric. Take time to hammer the surface evenly to ensure all plant material transfers its colour.
- Once finished, carefully remove the adhesive tape and plant material. You should see a beautiful print on your paper or fabric. If small plant residues remain stuck to fabric, wait until it is dry before removing by gently scraping the fabric.
- Leave paper or fabric to dry completely.
Fixing colours (optional)
If you want to preserve the plant print over time and prevent it running at first wash, you can fix it using iron sulfate (to do before plant printing) or alum salt (after plant printing). However, this will darken fabric. Remember to protect hands with gloves and carry out in a well-ventilated room to avoid inhaling these preparations.
Another technique, simpler and quicker (which does not darken fabric but protects colours slightly less), consists of, once the print is made, soaking the fabric in a basin filled with one litre of water mixed with 200 ml of vinegar. Rinse fabric, then leave to dry.
These soaking techniques work well for leaves, but may cause flowers to lose their colours.
For flowers, after making the print you can press fabric with an iron at low temperature, without steam.
Material required
To get started with plant printing, you will need the following items :
- Fresh plant material (leaves and flowers)
- White or very light-coloured paper or fabric. Natural fibres such as cotton or linen give best results.
- A hammer or rubber mallet for pounding plant material.
- A wood board slightly larger than your fabric or paper.
- If you want to fix colours long-term, use iron sulfate or alum salt. You will then need a basin and gloves to protect hands.


Comments