


Japanese cherry (Prunus serrulata), with its spectacular flowering, is a true icon of ornamental gardens. Its delicate flowers, often linked with culture and poetry, make it a favourite subject for gardening enthusiasts. However, faithfully reproducing unique characteristics of this tree is not straightforward. Multiplication by sowing can cause considerable variability, and may even be impossible for double-flowering varieties, which is why grafting is preferred.
Discover in this guide how to use this multiplication technique to reproduce your Japanese cherry.
→ Find all our ornamental cherries (Prunus).
Grafting in a nutshell
Grafting is a horticultural technique, particularly valued for multiplying specific varieties of plants such as Japanese cherry while preserving their characteristics. By grafting, rootstock's robust root system is combined with aesthetic (or fruiting) qualities of a scion. This synergy not only preserves distinctive traits of certain varieties, but also improves plant resistance to diseases and harsh climatic conditions.
Note: flowers of some Japanese cherry varieties (notably double-flowering ones) are sterile. Therefore, reproduction by sowing is impossible and only grafting allows their multiplication.
Choice of rootstock and scion
Rootstock: Prunus avium, also known as bird cherry, is generally chosen as rootstock for its vigour and robustness.
Scion: Select one or more healthy scions taken from a vigorous Japanese cherry and free from disease.
When to graft a Japanese cherry?
Grafting of Japanese cherry is done in late winter or early spring, just before tree begins to emerge from dormancy and sap starts to flow. Grafting during dormancy reduces stress and increases chances of success.
Spring sap rise and mild temperatures will favour healing and adhesion of the scion.
Once graft completed, protect scion and graft union from late frosts.
Grafting Japanese cherry, step by step
1- Clean and disinfect tools thoroughly before starting to avoid transmitting diseases from one plant to another.
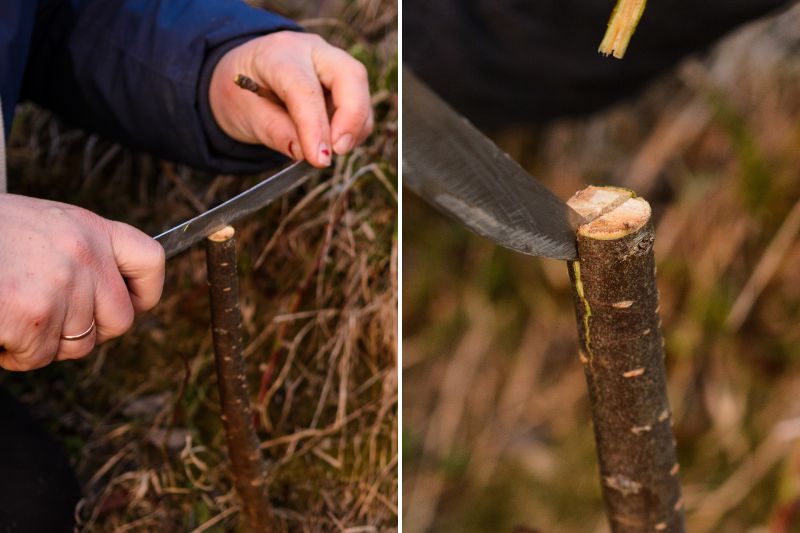
2- On rootstock, cut trunk to desired height to receive scion. Also remove all branches.
3- Here, a cleft graft will be made. Using a knife or a grafting knife, split rootstock down the centre.
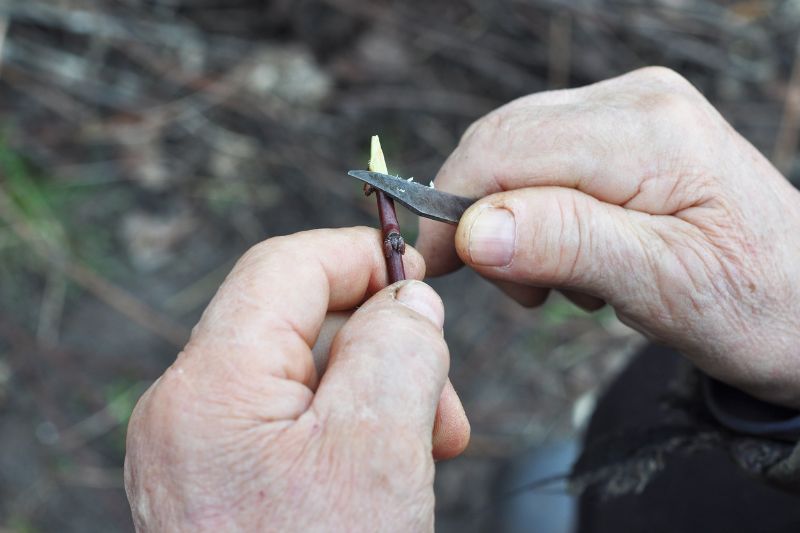
4- Then take one or two healthy scions, 5–10 centimetres long, bearing buds. Trim base of scion on a bevel.
5- Insert scion(s) immediately into split, ideally with first bud facing outwards. Ensure cambium layers of scion and rootstock are in good contact.

6- Use raffia or grafting tape to hold scion firmly in place. Take care not to over-tighten and damage scion.
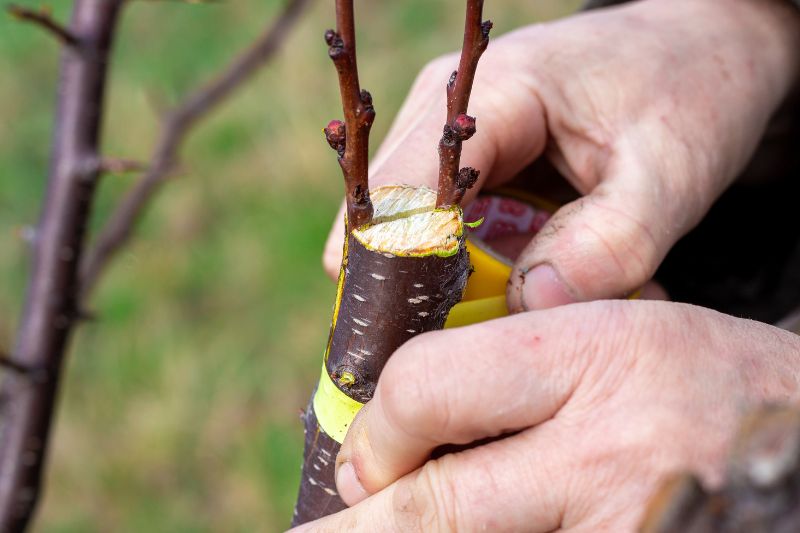
7- Apply grafting sealant to cuts to protect graft from diseases and parasites, and to retain moisture.
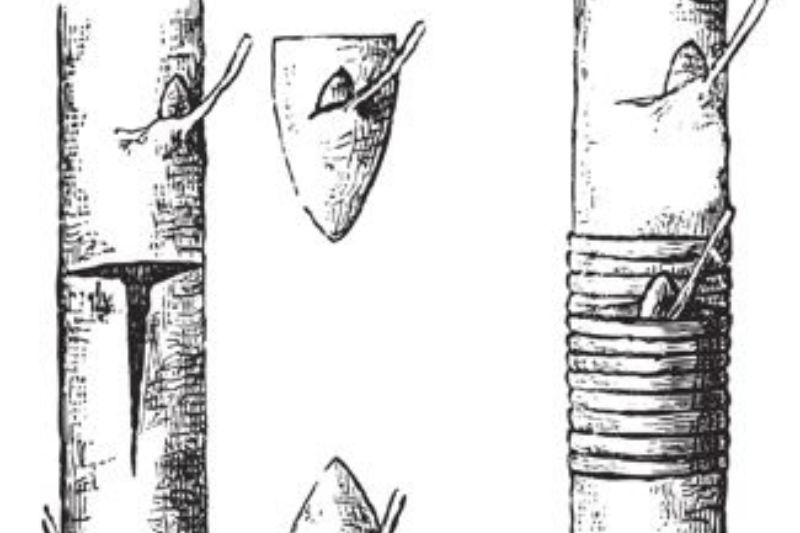
Alternative: A shield graft can also be performed: ideal for small branches, this technique involves taking a shield (a bud with a small piece of bark) from scion and inserting it under rootstock bark. Make a T incision on rootstock, insert shield, then tie firmly with raffia.
Post-grafting care
- Protection of scion :
- Keep graft union sheltered from extreme weather such as frost, strong wind or intense heat. Temporary cover may be necessary until scion is well established.
- Ensure grafting tape or raffia does not constrict scion as it thickens. Adjust or remove ties if necessary to avoid restricting scion growth.
- Watering and nutrition :
- Maintain regular watering so soil remains moist but not waterlogged.
- Provide balanced fertiliser or well-rotted compost if needed, depending on soil quality.
- Monitoring and care :
- Inspect graft union regularly for any sign of disease or parasitic attack.
- Observe scion growth. Healthy buds and new growth indicate grafting success.
- Prune unwanted shoots on rootstock so plant energy is directed to scion.


Comments