


All about propagation by cuttings of clematis
an easy way to propagate your favourite varieties
Contents
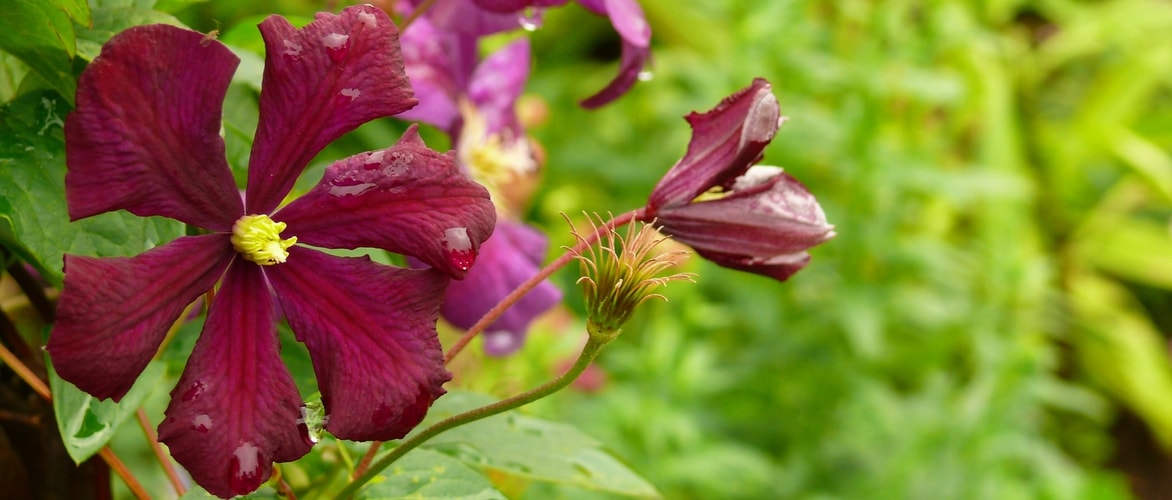
With its large flowers in vibrant colours, the clematis is an impressive plant that easily enlivens gardens. It climbs over arbours, pergolas, and walls, covering them with an abundant flowering. It clings to supports by wrapping its voluble stems around them. With its countless varieties, it offers an exceptional range of colours and shapes. A demanding plant, it requires a sunny exposure but needs its roots in the shade, as well as deep, cool, and well-drained soil. It can also adapt to pot culture. Fortunately, it is quite simple to propagate by cuttings. This allows for easy production of new plants identical to the original variety. You can also layer clematis, and even sow them, but the latter technique is delicate and time-consuming.

Best time to propagate clematis
We recommend propagating clematis at the end of spring, in June or July. Take your cuttings from a well-established plant that is at least two years old.
Read also
Clematis: planting, pruning and care
Discover other Clematis
View all →
Available in 0 sizes

Available in 1 sizes

Available in 1 sizes

Available in 1 sizes

Available in 1 sizes

Available in 1 sizes

Available in 1 sizes

Available in 1 sizes
")
Available in 1 sizes

Available in 1 sizes
Step-by-step technique for propagating a clematis
To propagate a clematis,
- Start by preparing a pot: place a layer of gravel or clay balls at the bottom for drainage, then fill it with a mixture of potting soil and sand.
- Cut a stem about fifteen centimetres long, including at least two buds, using a knife or pruning shear. Unlike other plants, you can cut in the middle of a node.
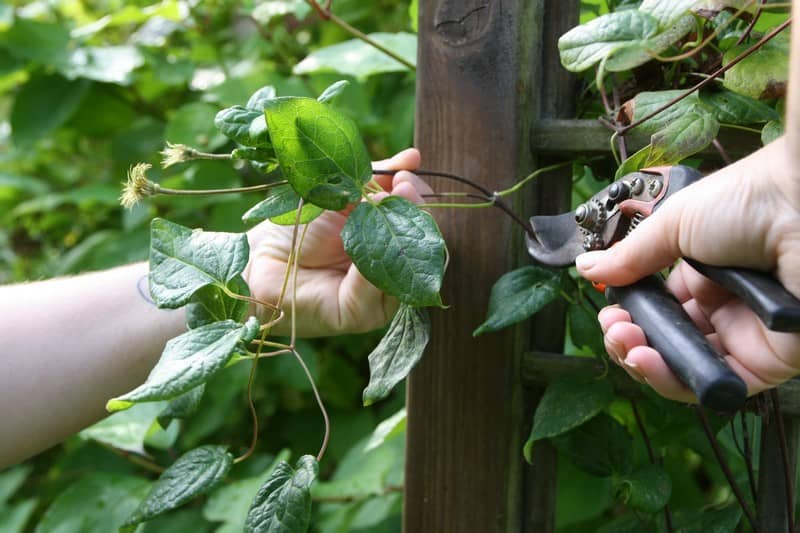
Take a clematis cutting.
- Remove the leaves at the base of the stem, if any. Leave only a few leaves on the cutting. You may optionally use rooting hormone by dipping the base of the stem in it.
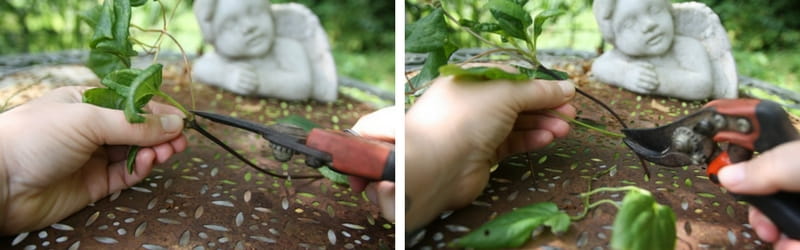
Dressing a clematis cutting.
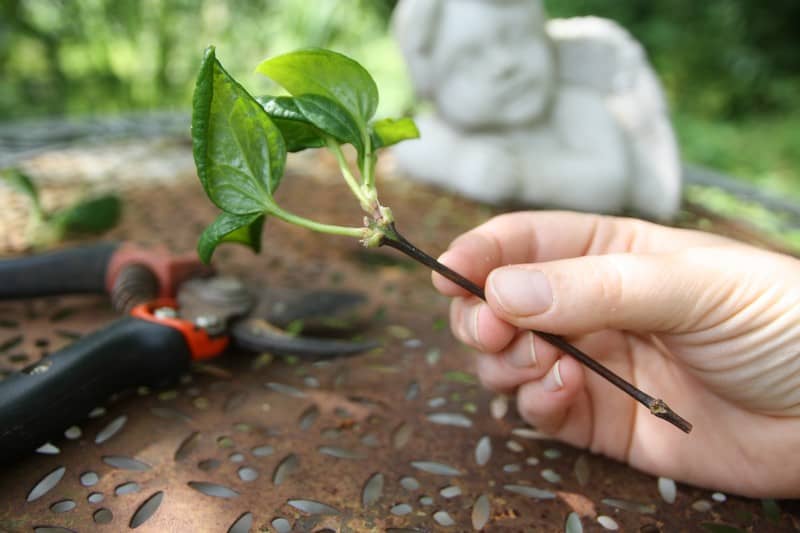
- Your cutting is ready to plant.
- Make a hole in the medium using a stick or pencil, then place the cutting in it. Gently firm the soil around the stem.
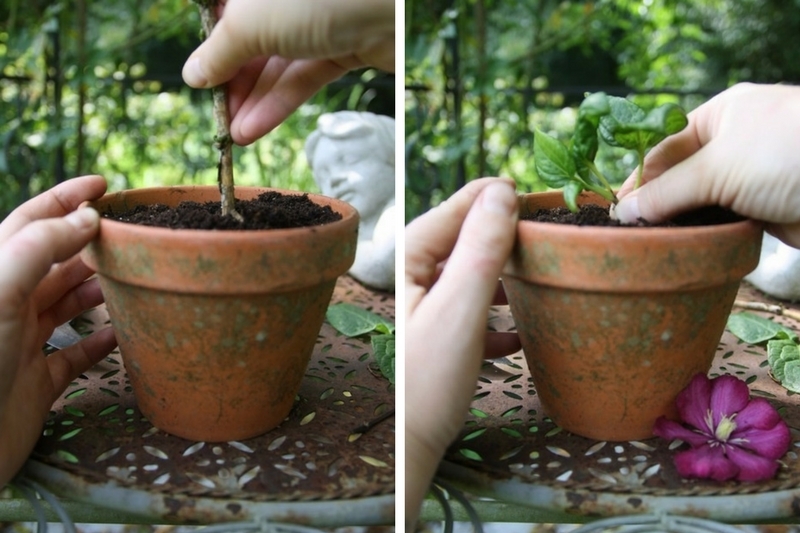
Positioning the clematis cutting.
- Water and cover the pot with a transparent plastic bag, a bell, or a cut plastic bottle to maintain a humid atmosphere.
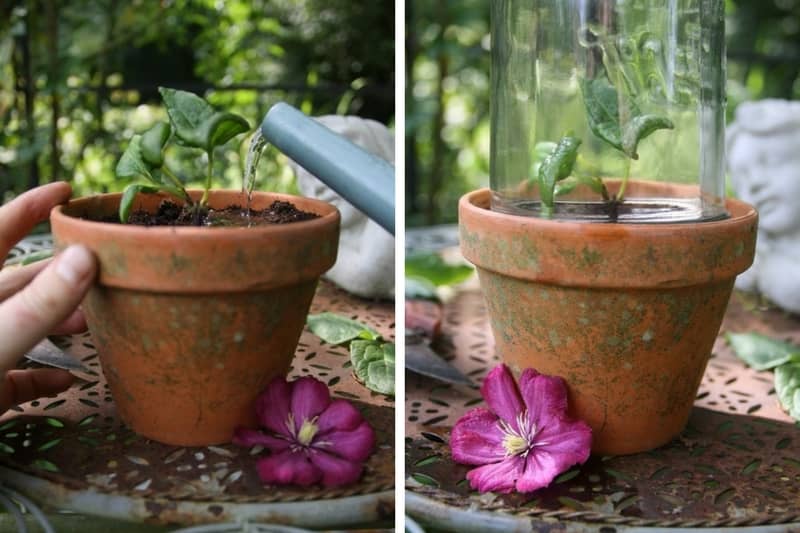
Watering and placing the cutting under a bell.
Finally, place your pot in a cold frame, out of direct sunlight, and water regularly to keep the medium moist.
By the following spring, the roots will have developed, and you can plant your new clematis in the ground.
Read also
Clematis: which variety to choose?To find out more
Discover our advice sheet: “Propagation by cuttings, everything you need to know about the different techniques and our tips for successful cuttings”
- Subscribe!
- Contents
Comments