


How to grow Nerines in pots?
Our tips to successfully plant and care for Jersey Lilies
Contents
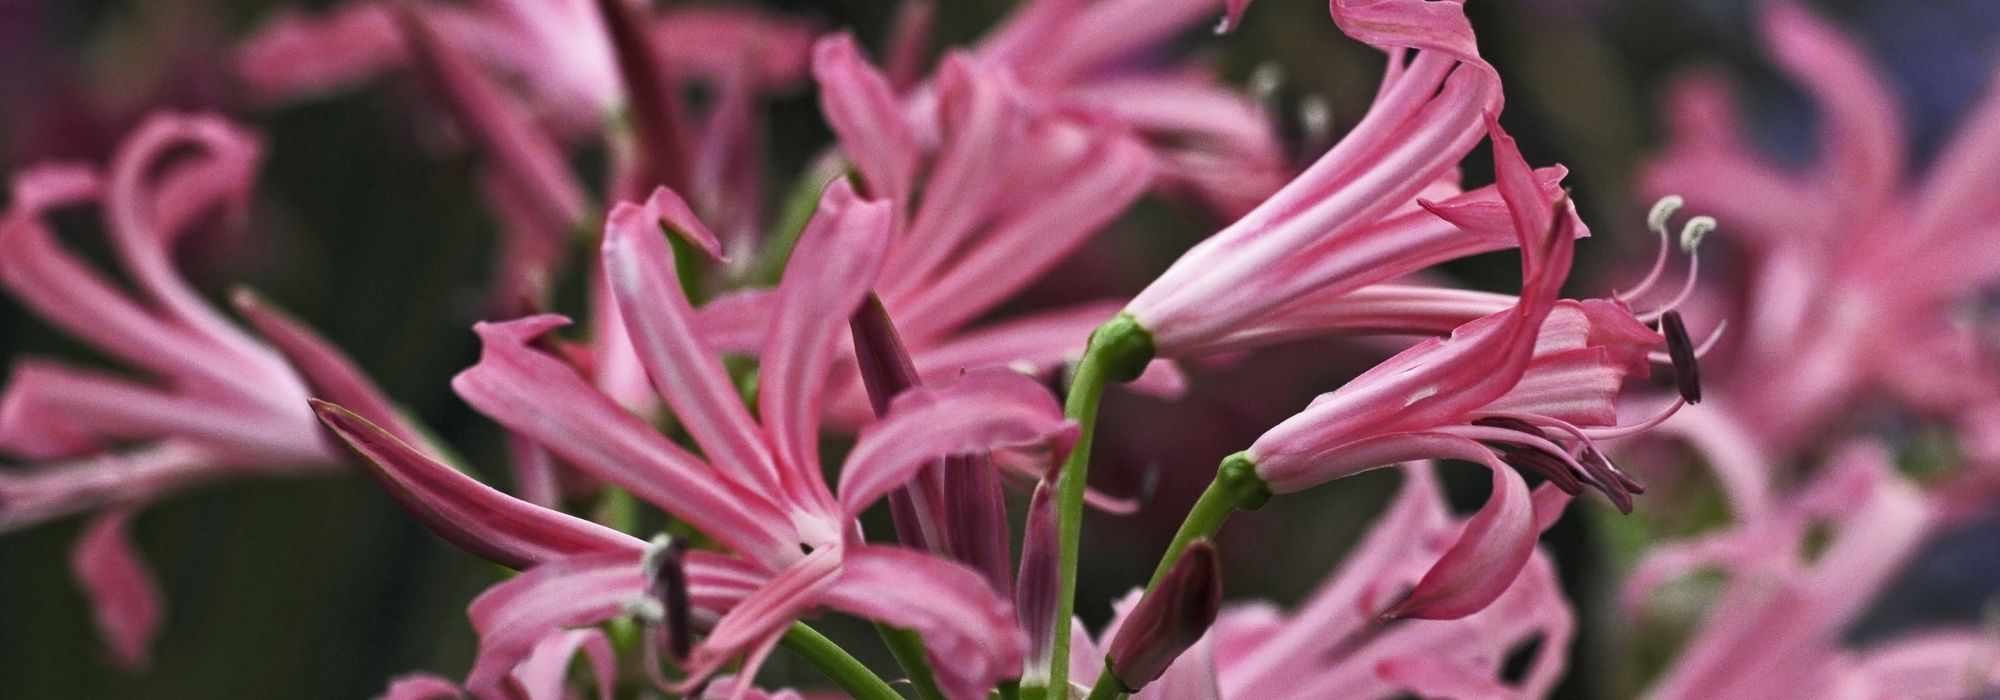
Nerines are also known as Jersey Lily or Guernsey Lily. These are small bulbous plants that bloom in autumn, adorned with lovely umbels of undulating, colourful flowers.
Originating from South Africa, Nerines have a relatively low hardiness, around -5 °C to -10 °C. Outside of mild regions, they should therefore be grown in pots, protected from frost in winter. Their small stature is indeed well-suited for cultivation in containers or as flowering pot plants.
Here are our tips for properly planting and caring for Nerines in pots.
Additionally, we invite you to consult our dedicated file on these lovely plants: “Nerine: planting, cultivation, care.”

Which varieties of Nerines to choose?
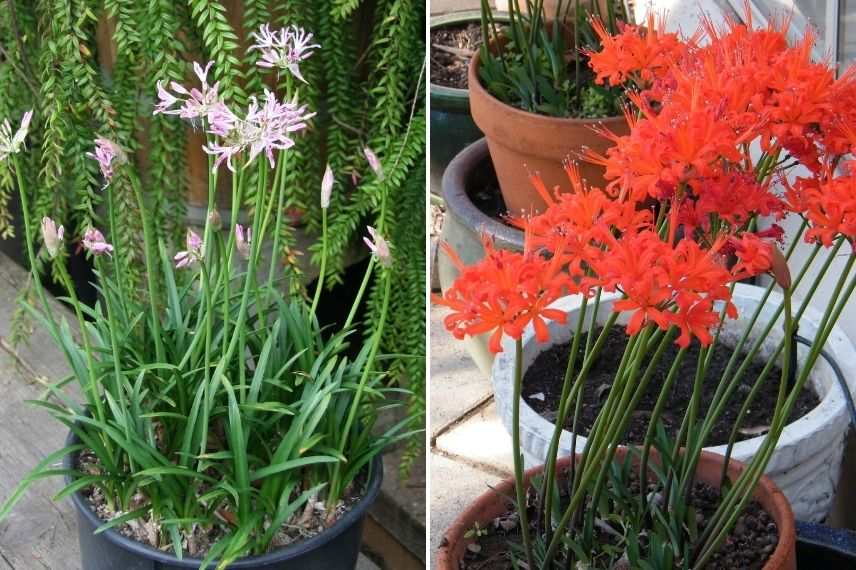
Due to their modest dimensions (50 to 70 cm in height and 20 to 30 cm in spread on average), Nerines can be easily cultivated in pots. You can therefore choose from various varieties, pink, red, or white.
Among the smaller formats, we can mention Nerine undulata and Nerine flexuosa ‘Rose’ (45 cm in height and 10 to 15 cm in spread), both flowering in shades of pink. The Nerine bowdenii also offers beautiful nuances in this same colour.
For a more vibrant touch, opt for the red-flowering varieties, such as ‘Elegance Pearls of Cherry’ or Nerine sarniensis ‘Corusca’, which will attract all eyes with its dazzling orange-red flowering iridescent with gold.
A bit larger (70 cm in height and 30 cm in spread), the hybrid Nerines Amarine ‘Belladiva’ will also look wonderful in a planter.
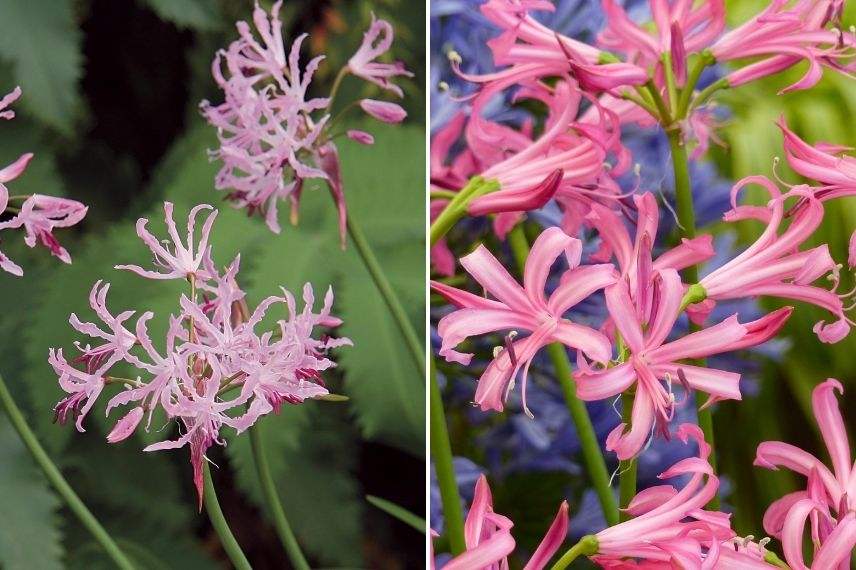
Nerine undulata (photo Michael Wolf) and Nerine bowdenii
Read also
Nerine: planting, growing and careWhen to plant Nerine in pots?
Nerine bulbs are generally planted in pots in spring, between March and May. It is also possible to plant them during the summer dry period corresponding to their dormant phase, between July and August.
When choosing your bulbs, opt for firm specimens that show no signs of mould or softness. Prefer the larger sizes, which will ensure quicker flowering. You will usually find them for sale from the end of winter.
Discover other Nerine
View all →
Available in 1 sizes

Available in 1 sizes

Available in 0 sizes

Available in 1 sizes

Available in 1 sizes

Available in 1 sizes

Available in 1 sizes

Available in 1 sizes

Available in 1 sizes

Available in 1 sizes
Planting Nerines in pots
Container
To plant Nerines in pots, choose a container that is definitely perforated to ensure good drainage, with a depth of about 30 to 40 cm.
The width or diameter will depend on the chosen variety and its spread at ripeness, usually between 20 and 30 cm. A wider container will allow you to grow several bulbs en masse to create a beautiful flowering display. Note that Nerines like to feel a bit cramped to bloom well.
Always prefer terracotta containers, which are porous and thus allow for better aeration of the substrate and improved drainage.
Nerine bulbs are usually planted in pots of 20-30 cm or more (left photo Michael Wolf – Wikimedia and right photo Denisbin – Flickr)
Substrate
Like most bulbs, Nerines appreciate perfectly drained soils that do not allow water to stagnate. In their natural habitat, they thrive in light, stony or sandy soils, even poor ones.
For pot planting, use a light substrate made up of:
- 2/3 of good quality horticultural compost, or compost for planters and pots or compost for flowering plants such as geranium compost
- 1/3 of sand or perlite to promote drainage
Planting
- Place a layer of draining materials at the bottom of your container to about ¼ of its height: clay balls, gravel, terracotta shards, pumice, …
- Fill with the mixed substrate.
- Place the bulb in the container. If you wish to grow several Nerines in the same container, space the bulbs about 5 to 6 cm apart.
- Cover the bulbs with only 2 to 3 cm of substrate to avoid burying them too deeply. The tops of the bulbs should be level with the surface of the soil.
- Water moderately, then empty the saucer after about twenty minutes if necessary.
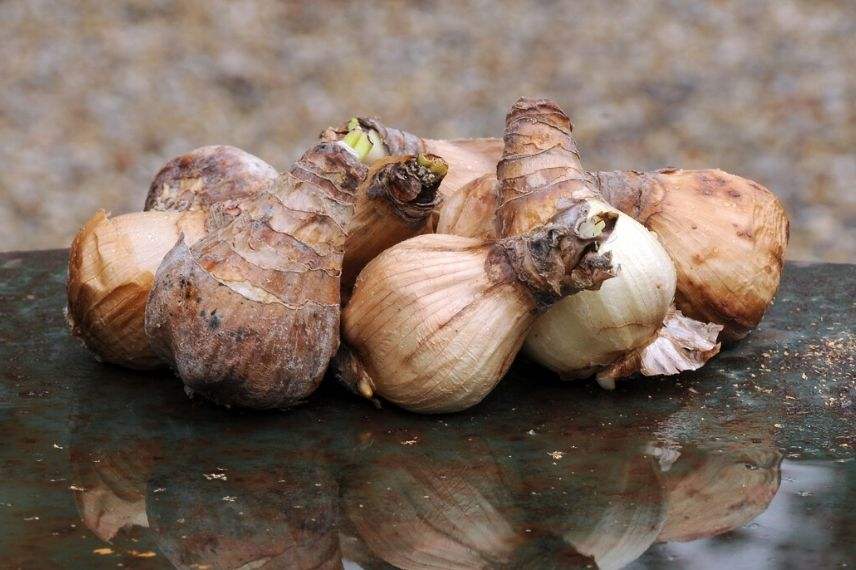
Nerine bulbs
Exposure
Due to their origins, Nerines thrive in warm, sunny situations. Be sure to protect them from draughts and cold winds.
North of the Loire, you can place your pot at the foot of a south-facing wall, which will radiate heat back at night. In the warmer regions of southern France, a position in partial shade, to protect the plants from the scorching rays of the sun, is advisable.
Note that Nerines do not appreciate being moved much: avoid changing your pot’s location during the season.
Read also
Nerines: 5 pairing ideasCaring for Nerines in pots
While growing Nerines is generally straightforward, flowering may require a bit of patience. It often takes 2 to 3 years of establishment before you can admire the first petals.
Watering
During the autumn flowering period, rainfall may suffice to water potted Nerines. If they are in a sheltered area or if autumn proves to be rather dry, ensure you compensate for any lack of water as soon as the substrate becomes dry in the top few centimetres.
The foliage then appears at the end of flowering. At this time, maintain regular watering to keep the substrate moist, allowing the bulb to replenish its reserves.
Next, observe a dry period during the bulb’s dormancy in summer: stop watering when the foliage begins to yellow. This generally helps to stimulate flowering.
Fertilisation
Nerines tolerate poor soils very well, so fertilisation is not essential.
However, when grown in pots, they deplete the nutrients in their substrate more quickly. If you wish to encourage flowering, opt for a “bulb-specific” fertiliser, which is usually richer in phosphate than in nitrogen, following the dosages recommended by the manufacturers.
Pruning
Pruning is limited to removing flower stalks after they have faded.
Leave the foliage in place without cutting it back. Deciduous, it will gradually dry out and yellow before disappearing naturally in spring.
Repotting
Nerine bulbs do not particularly appreciate being moved. Therefore, do not repot while your plants are flowering without issues.
Wait until the roots have fully colonised the pot and the bulbous plants produce fewer flowers before dividing and repotting. This should be done in spring or during the summer dormancy period. This operation typically does not occur before 3 or 4 years.
Diseases
Nerines are not known for their sensitivity to pests or diseases.
Simply monitor the young foliage for any potential attacks from gastropods.
In pots, Nerines will be more susceptible to mealybug attacks, which can weaken the plant. At the first signs (white clusters, brown sticky spots on the leaves, etc.), you can use a cotton bud or cloth soaked in a solution of water and black soap (one teaspoon in 50 cl of water) to dislodge the unwanted pests. Do this in the late afternoon. Additionally, feel free to follow the advice provided in our article “Mealybug: identification and treatment.”
Wintering
Not very resistant to freezing temperatures, potted Nerines should be sheltered in winter, in a frost-free, unheated location, such as a conservatory or a cold greenhouse.
In regions with mild winters, they can spend the winter outdoors, in a sheltered position from cold winds and heavy rain.
North of the Loire, we recommend waiting for the Ice Saints in May before bringing your potted Nerines back outside.
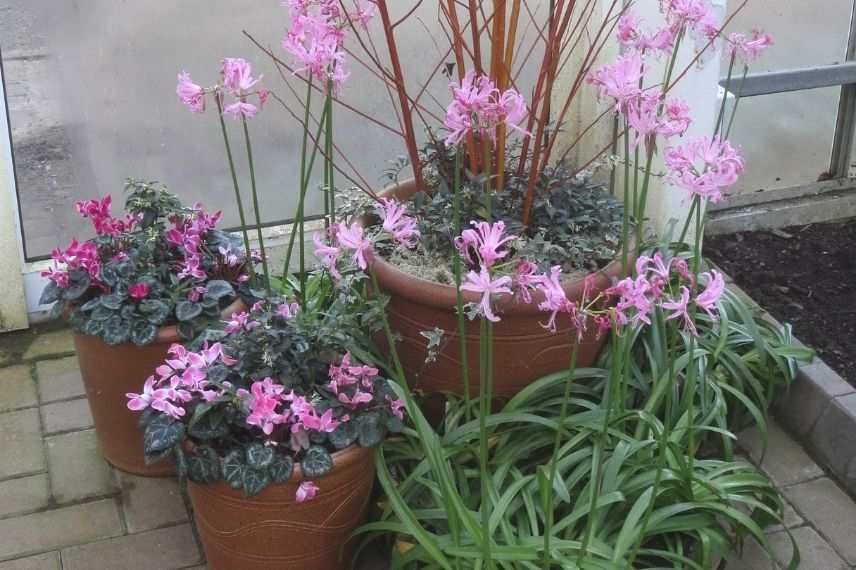
Nerines in pots under a temperate greenhouse (photo David Short – Wikimedia)
- Subscribe!
- Contents

Comments