


Iris reticulata : planting and growing
Contents
Iris reticulata in a nutshell
- Reticulated irises are among the first irises to bloom, as early as the end of winter!
- They adapt well to dry gardens and rockeries, as well as to pot cultivation.
- These miniature irises are perfect for brightening up the front of a flowerbed or a border.
- They offer lovely flowers of rare delicacy, with delicately coloured patterns.
- These are small bulbs that are easy to grow; reticulated irises are hardy, drought-resistant, and not very susceptible to diseases.
A word from our Expert
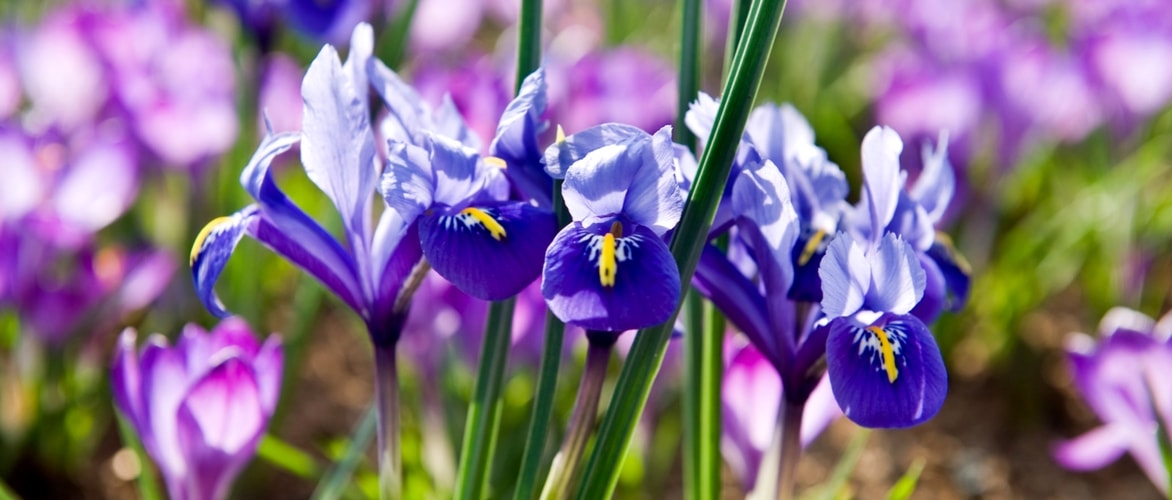
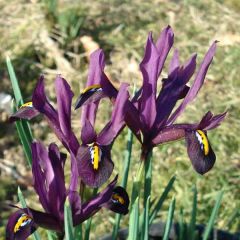
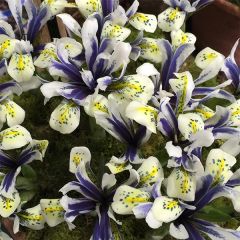
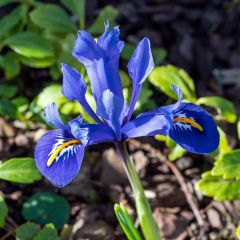
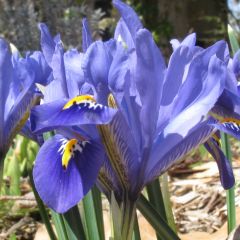
Reticulated irises are dwarf irises that bloom in late winter, in February or March. The stunning deep blue flowers of Iris reticulata ‘Harmony’ are appreciated, as are the delicately coloured flowers of Iris ‘Katharine Hodgkins’. The flowering of these small bulbous plants is often blue or purple, sometimes white or yellow. They feature exceptional details, with petals maculate in orange-yellow, white, or black, giving them a distinctive style and rare delicacy.
This is a miniature iris, which must be placed at the front of borders or in a pot. It adapts very well to rock garden planting. It is entirely hardy and requires little maintenance. It tolerates drought well but dislikes excess moisture, which can cause the bulbs to rot. Grown in well-drained, sunny soil, it is quite resistant to diseases.
Reticulated irises are perfect for bringing colour to the garden even before spring arrives! They offer a much earlier flowering than garden irises (Iris germanica). They brighten up borders and rockeries, adding small touches of vibrant colour. They pair beautifully with other spring bulbs: ipheions, chionodoxas, crocuses… Once their flowering is over, reticulated irises enter dormancy and are easily forgotten. They are easy to divide and can even naturalise if conditions are suitable. Discover the different varieties and all our tips for successful cultivation!

Botany
Botanical data
- Latin name Iris reticulata
- Family Iridaceae
- Common name Reticulated iris
- Flowering February, March
- Height approximately 15 cm
- Exposure sun
- Soil type well-drained
- Hardiness -30 °C
The Iris reticulata is a small perennial bulbous plant that originates from the mountains of the Caucasus: it is found naturally in Georgia, Iran, Iraq, Turkey, and even as far as Russia, in open and often rocky environments. It is quite hardy and can withstand temperatures down to -30 °C.
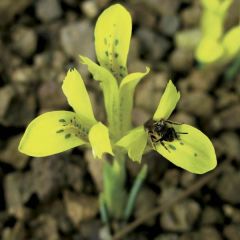
The Iris reticulata belongs to the family Iridaceae, which includes 1,800 species of plants with often elegant and colourful flowers: crocosmias, gladioli, crocuses… The Irises themselves offer a beautiful diversity, with over 200 species and numerous horticultural varieties. The most common in cultivation is the Bearded iris (Iris germanica), but there is also the Japanese iris (Iris ensata), the Dutch iris, Iris sibirica, and Iris pseudacorus. The name Iris comes from Greek and means “rainbow”. The Iris danfordiae is a dwarf iris that is very close to the Iris reticulata, offering yellow flowers and cultivated in the same way as this one.
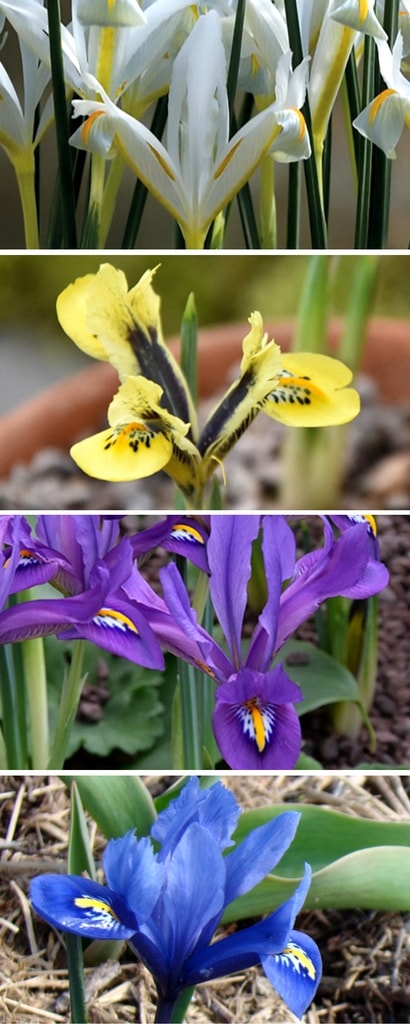
The Reticulated irises offer a beautiful palette of colours! From top to bottom, Iris reticulata ‘Natascha’, ‘Orange Glow’, ‘Scent Sational’, and ‘Harmony’
The Iris reticulata are small-sized plants, quite discreet. They typically measure around 15 cm in height and can reach up to 20 cm. (Nothing compared to the Iris germanica, which can grow up to 1 m tall!) They form small tufts of upright leaves.
The Iris reticulata bears stunning flowers, large in relation to the rest of the plant: they measure up to 7-8 centimetres in diameter. They are solitary and borne on naked stems. Like other irises, the flowers of the Iris reticulata have a very original architecture. They are composed of six tepals (indistinguishable petals or sepals): three are positioned on the outside, reflexed or directed towards the ground; and three others are placed on the inside, upright towards the sky. The flowers also have three stamens.
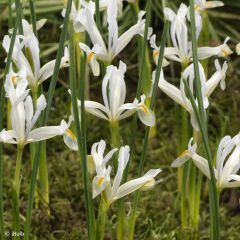
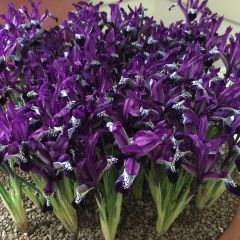
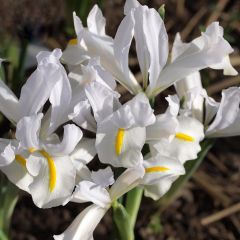
The petals are often in shades of blue, but they can also be purple, yellow, or white. They usually have a central yellow-orange band and white spots, creating a superb contrast. They are sometimes sprinkled with darker spots, black or midnight blue. These patterns give the flower an exceptional delicacy, a delicate and precious aspect. The flowers offer such details that they seem to have been painted.
The flowering of the Iris reticulata is delicately scented. Irises are sometimes used in perfumery, but this mainly concerns the Iris germanica.
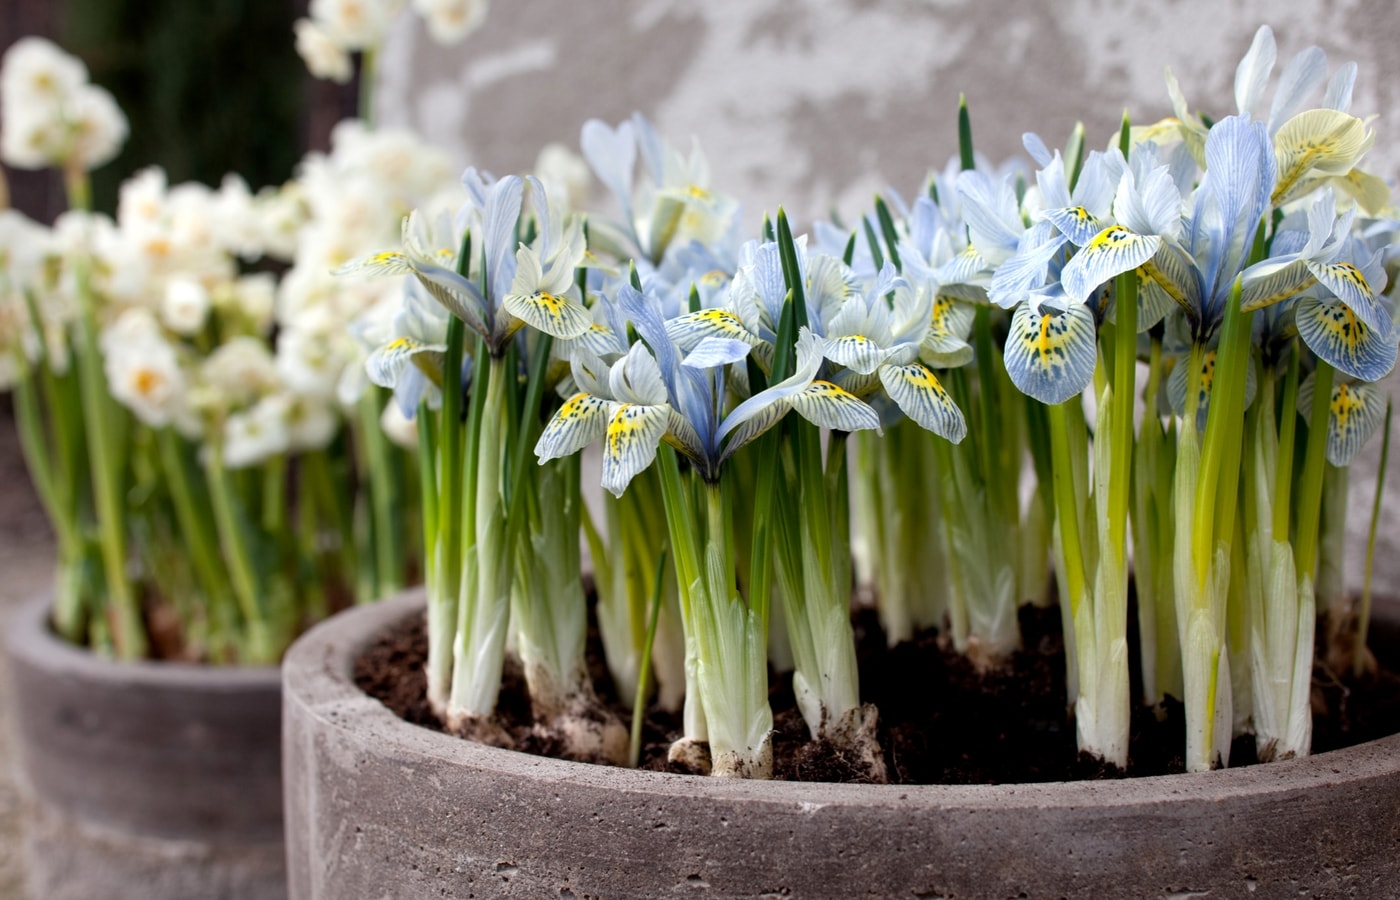
The Iris reticulata blooms very early, before the start of spring, in February or March. It is possible to force them by growing them in pots indoors to make them bloom earlier during winter. Once the flowering is over, the Iris reticulata needs several years to bloom again.
The leaves of the Iris reticulata are fine and elongated, resembling grass leaves. They are upright and measure 10 to 15 centimetres long. They have a four-angled section. The leaves reach the height of the flowers, but once the flowering is finished, they elongate to reach 30 to 40 centimetres in length. They then dry out, and the plant enters dormancy, reappearing in autumn.
The Iris reticulata has small rounded bulbs, about 2 cm in diameter and 3 or 4 cm in height, pointed at the top and surrounded by a reticulate covering. This plant is often grown as an annual, as generally, once the flowering is finished, the bulbs divide into bulblets. Each bulblet will need a few years to grow and bloom again. To ensure they bloom every year, it is better to plant new bulbs each autumn.
After flowering, the Iris reticulata produces a fruit in the form of a capsule divided into three parts, containing round seeds inside.
The main varieties of Iris reticulata
Iris reticulata Katharina Hodgkin
- Flowering time March, April
- Height at maturity 15 cm
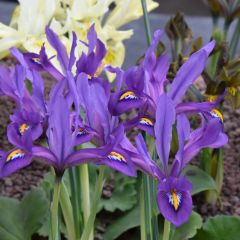
Iris reticulata Blue Note - Netted iris
- Flowering time March, April
- Height at maturity 15 cm
Iris reticulata Dijt
- Flowering time March, April
- Height at maturity 15 cm
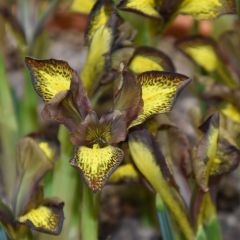
Iris reticulata Eyecatcher
- Flowering time March, April
- Height at maturity 15 cm
Iris reticulata Harmony
- Flowering time March, April
- Height at maturity 15 cm
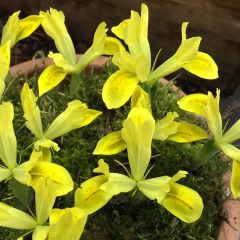
Iris reticulata danfordiae - Netted iris
- Flowering time March, April
- Height at maturity 10 cm
Iris reticulata Natascha
- Flowering time March, April
- Height at maturity 12 cm
Iris reticulata Spot On - Netted iris
- Flowering time March, April
- Height at maturity 15 cm
Iris reticulata White Caucasus - Netted iris
- Flowering time March, April
- Height at maturity 15 cm
Iris reticulata Cantab - Netted iris
- Flowering time April, May
- Height at maturity 10 cm
Iris reticulata Sunshine
- Flowering time March, April
- Height at maturity 15 cm
Iris reticulata Scent Sational
- Flowering time March, April
- Height at maturity 15 cm
Iris reticulata Mars Landing
- Flowering time April, May
- Height at maturity 15 cm
Discover other Iris Reticulata
View all →
Available in 1 sizes

Available in 1 sizes

Available in 1 sizes

Available in 0 sizes

Available in 1 sizes

Available in 1 sizes

Available in 1 sizes

Available in 1 sizes

Available in 1 sizes

Available in 1 sizes
Planting Iris reticulata
Where to plant?
Plant your Iris reticulata in full sun, as this is the best situation for them, although they can also tolerate partial shade. Ample sunlight will ensure a beautiful flowering.
Iris reticulata require well-draining soil, otherwise the bulb may rot! The soil should dry out in summer when the plant is in dormancy. If your soil is heavy and retains moisture, it will need to be drained, for example by adding a layer of gravel during planting, or by placing the bulbs on a mound. Iris reticulata prefer neutral or slightly calcareous soils.
As Iris reticulata enjoy sun and well-drained soils, they thrive in rock gardens, paired with other small plants or bulbs that tolerate drought: sedum, houseleeks, ipheions, crocuses… Plant them at the front of borders to give them an open position and better enjoy their flowering. It is preferable to plant them in groups, placing the bulbs randomly rather than in lines, for a natural effect. Finally, don’t hesitate to plant them in pots and place them on your terrace. This allows you to showcase them despite their small size! You can enjoy their late winter flowering by having them close to your home.
If you need to move the iris bulbs, do so in summer, during the vegetative rest period, to avoid disrupting the plant’s cycle. This will facilitate their recovery.
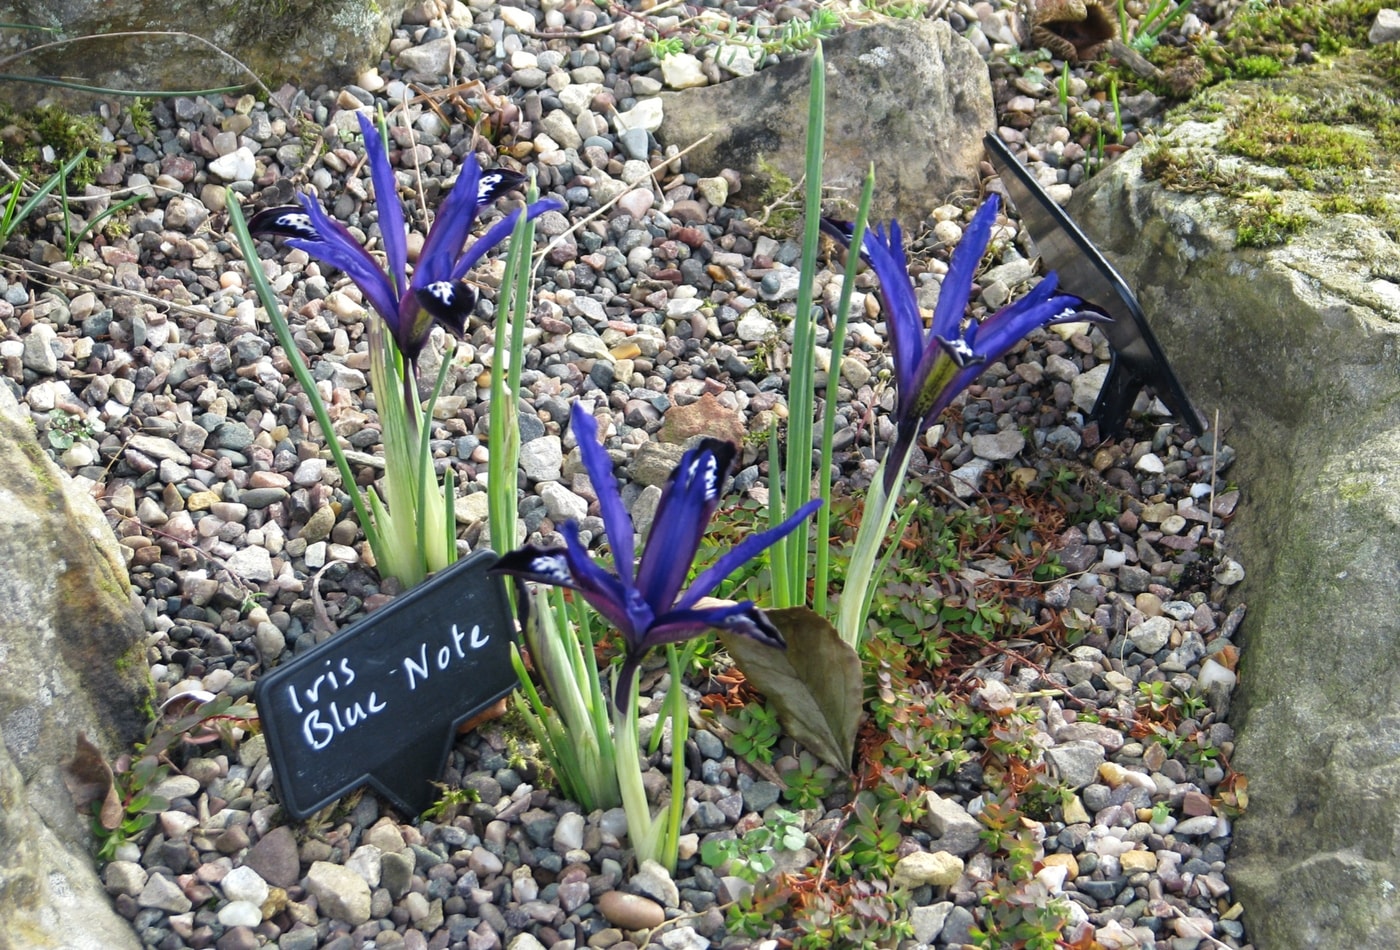
Iris reticulata ‘Blue Note’ in a rock garden! (photo Peganum)
When to plant?
Plant Iris reticulata in autumn, ideally in September or October. They will have time to settle in and bloom in late winter.
Planting is possible until around December, but flowering will then be significantly delayed in the first year.
How to plant Iris reticulata?
As these are small plants, we recommend planting them in groups for a more beautiful effect. Don’t hesitate to gather 15 to 20 bulbs. However, maintain a distance of 7 to 10 centimetres between each bulb. You can use a bulb planter to make the operation easier. Planting is quite simple; it is mainly about ensuring good drainage, as excess moisture could cause the bulbs to rot.
- Loosen the soil with a spade and remove weeds. You can create a small mound and place them on top to facilitate drainage.
- Dig small holes in the soil, 8 to 10 centimetres deep. If your soil is heavy, add a drainage layer of gravel. This will prevent the bulb from rotting due to excess moisture.
- Plant your bulbs the right way up, with the tip facing upwards.
- Cover with soil and lightly firm down.
- Water.
For pot planting:
- Place a layer of gravel at the bottom of the pot for drainage.
- Then add potting soil mixed with a bit of sand.
- Position the bulbs, with the tip facing upwards, close together but not touching.
- Cover with substrate and firm down.
- Water.
It is possible to force Iris reticulata bulbs to make them bloom a little earlier. Do this in autumn, around October. Choose a sufficiently wide pot, place a layer of clay balls at the bottom. Fill it with substrate and place the bulbs in, quite close together but not touching. Cover with substrate, leaving the tips of the bulbs just above the surface, firm down lightly, and water. Cover the pot with a plastic bag. The bulbs need a cold period: place them in a dark, cool place (for example, in the refrigerator or a cellar), with a temperature between 2 and 8 °C. After about three months, when the bulbs start to produce young shoots, place them in a cool, bright location (with a temperature between 15 and 20 °C), ideally behind a window.
Iris reticulata ‘Katharina Hodgkin’ in a pot (photo Wilfried Overwater – iBulb)
Care
Once flowering is over, the leaves of the iris elongate while the bulb replenishes its reserves before entering dormancy. Leave the leaves in place and apply a special bulb fertiliser rich in potash to help it build up its reserves. You can cut the foliage once it has completely faded, not before!
Iris reticulata are not very susceptible to diseases and pests. Occasionally, snails and slugs may nibble on the young leaves. You can protect your irises by using slug pellets (such as Ferramol) or by making a slug trap. They can also be affected by heterosporiosis, a disease caused by a fungus characterised by brown spots on the foliage, which eventually dries out completely. Iris reticulata are susceptible to fusarium, another disease caused by a fungus. If you notice these diseases, treat with a fungicide (Bordeaux mixture, sulphur…). They are favoured by excess moisture, so the best way to avoid them is to plant the bulbs in a truly well-draining substrate. If the soil is too wet, the bulb may rot.
If you are growing your iris reticulata in pots, water occasionally. The substrate dries out faster than in open ground! When watering, avoid wetting the leaves and instead direct the stream towards the base of the irises.
Propagating
To multiply Iris reticulata, we recommend dividing the bulblets. Sowing is a bit more challenging to succeed.
Division of bulblets
Iris reticulata produce bulblets around the main bulb. It is easy to multiply them by collecting these bulblets. Divide them after flowering, once the leaves have withered and the plant is in a dormant state. Choose the largest clumps. Dig them up and then separate the bulblets. Prepare the soil and replant them, the right way up, with the tip facing upwards. Cover with soil and firm down. Water lightly.
Sowing
You can multiply Iris reticulata by sowing in autumn. We recommend placing the seeds in rainwater for a few days to soften them before sowing. This will facilitate germination. Then, fill a pot with potting soil mixed with a little sand. Place the seeds on the surface and then cover them with substrate. Water. Place your pot under a cold frame or outside (in this case, germination will be later). Continue to water regularly to keep the substrate moist until germination.
Association
Due to their small size, we recommend planting Iris reticulata at the front of borders to highlight them and provide an open situation. This way, you will avoid losing them among larger plants. You can even plant your Iris reticulata in a container that you can place on your terrace or windowsill. Create beautiful colourful compositions by mixing different varieties, or by pairing them with snowdrops, pansies, chionodoxas, or crocuses…
Whether in borders or pots, we advise you to combine your Iris reticulata with other small spring bulbs. They will brighten your garden with their delicate flowering from the end of winter. To accompany your irises, choose chionodoxas (glory of the snow) or ipheions, small bulbous plants with star-shaped flowers. You can also pair them with the delicate flowers of Greek anemones (Anemone blanda). Iris reticulata have very similar growing conditions to spring crocuses, as they both enjoy full sun and well-drained soils. They beautifully accompany their delicate flowering. All these bulbs adapt well to pot culture. This allows them to be showcased and kept close to the house for better enjoyment at the beginning of spring.
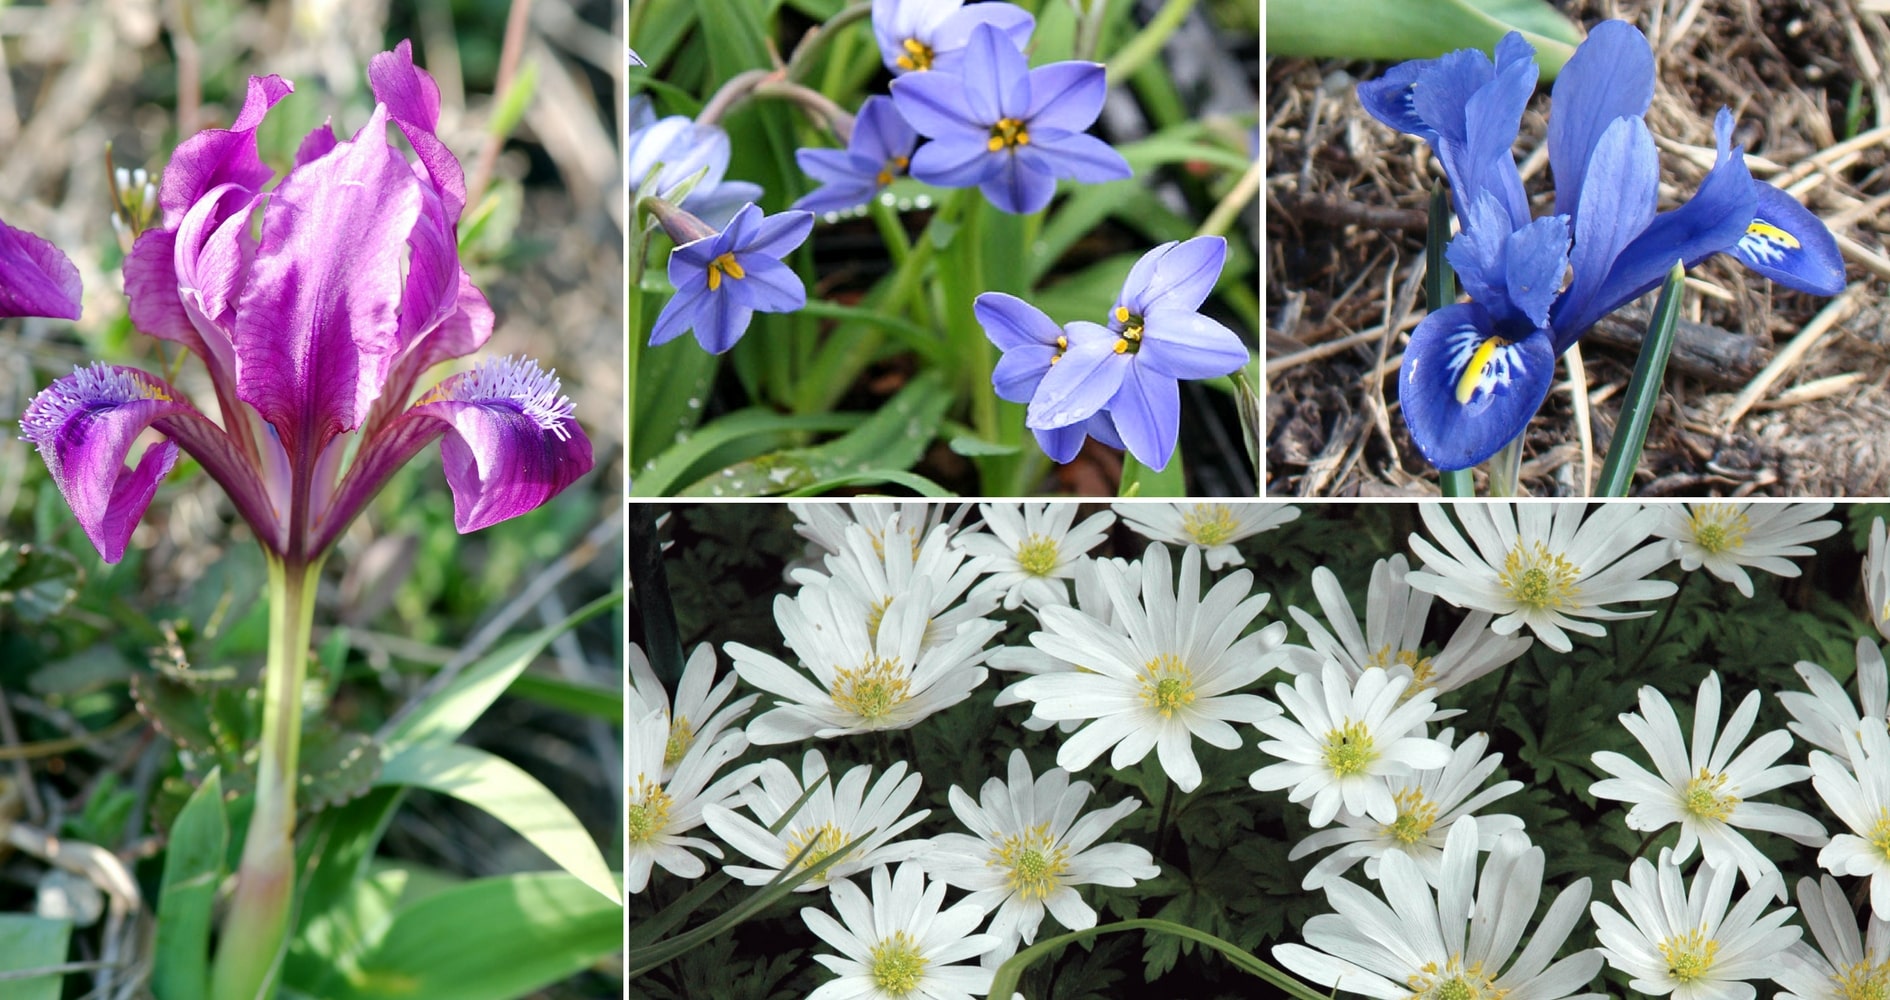
Iris pumila (photo Herzi Pinki), Ipheion uniflorum ‘Jessie’, Iris reticulata ‘Harmony’ and Anemone blanda ‘White Splendour’
Iris reticulata prefer well-drained soils and full sun, making them perfect for enhancing a rock garden. Plant them alongside some clumps of grasses (for example, Stipa tenuifolia or Festuca glauca), small bulbs (muscari, ipheions…), sedums, houseleeks or saxifrages. Create a mineral-dominant garden, water-efficient, composed of small ground-covering plants. This type of garden will require very little maintenance.
You can pair them with other irises, such as Iris pumila or Iris unguicularis, with which they share the same growing conditions. These are dwarf irises that also prefer well-drained, sunny soils.
Do not hesitate to plant the irises in large groups, mixing different varieties. Arrange them randomly to achieve a fairly natural effect. Iris reticulata can naturalise after a few years if the conditions are right! Discover our collection featuring 90 iris reticulata, among the most beautiful varieties: ‘Katharina Hodgkin’, ‘Harmony’, ‘Dijt’ and ‘Natascha’.
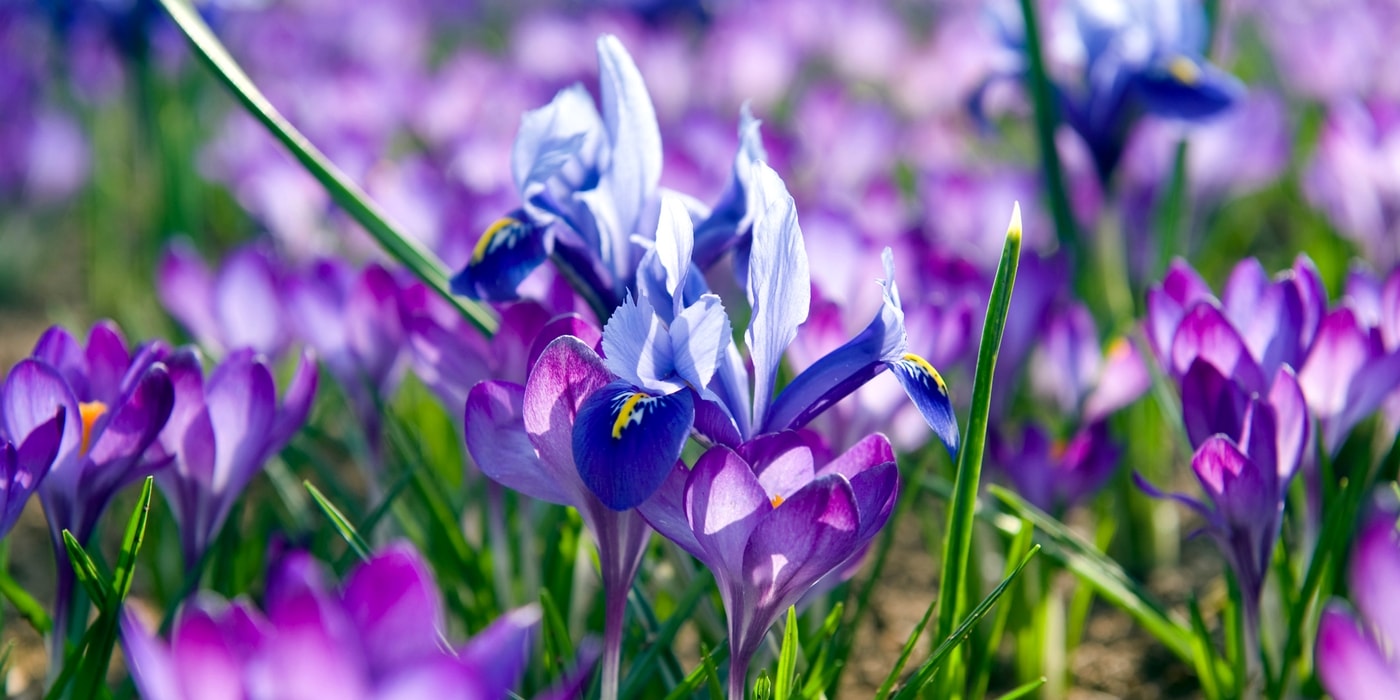
Iris reticulata ‘Harmony’ and Crocus tommasinianus (photo Wouter Koppen – iBulb)
→ Discover more pairing ideas with Iris reticulata in Christine’s advice sheet.
Useful resources
- Our beautiful range of Iris reticulata!
- An article by Pierre on our blog: Small bulbs, big effects!
- Our advice sheet: Iris reticulata, the most beautiful varieties
- Find all our tips for growing Iris reticulata in pots
- Discover all our tips for planting Iris reticulata in the ground
- Our advice sheet: 9 blue flowering bulbs you must have in your garden
- Iris: our new arrivals for 2023
Frequently asked questions
-
The flowering is over, should I cut the foliage?
Do not remove the leaves as they allow the plant to build up its reserves before entering dormancy. After flowering, the leaves elongate and then wither. You can remove the leaves once they are completely dry.
-
Should I dig up the bulbs to store them safely over winter?
Unlike other bulbs such as dahlias, gladioli, or cannas, which prefer to be lifted for the winter, we advise you to leave Iris reticulata bulbs in the ground. Indeed, the iris is quite hardy and will easily survive the winter in the soil.
-
My reticulate iris is not flowering. What should I do?
After the first flowering, reticulate iris need several years before they bloom again. The best way to enjoy their flowering every year is to replant bulbs each autumn. If your iris is not flowering, you may have planted it in a location that is too shaded. Reticulate iris need sunlight to produce beautiful flowers! We recommend dividing them during summer and replanting them in a sunnier spot.
-
Should I add fertiliser?
It is unnecessary to add fertiliser when planting, as the reserves contained in the bulb are sufficient for the iris to thrive, but we recommend adding some after flowering, when the plant is replenishing its reserves. Choose a special bulb fertiliser, rich in potash.
-
My Iris reticulata are not shooting. What should I do?
Stagnant moisture can sometimes cause reticulate Iris bulbs to rot. If your soil tends to retain moisture, install a layer of gravel during planting, or plant the bulbs on a mound to allow for water drainage.
- Subscribe!
- Contents

Comments