


Planting spring bulbs is an autumn "routine" that I diligently carry out every year. It's not my favourite task in the garden, but I know that my diligence will be richly rewarded with the first beautiful days full of colour.
While the ideal time to plant spring bulbs has already begun a few weeks ago, I tend to wait until November to get started... Firstly, because I enjoy, in good years, the public holidays, but mainly because at this time, once the less presentable perennials have been cut back (I practice selective seedheads), I can see more clearly. Finally, if I cut the wifi if I'm lucky, I can easily find a child at home half-dead from boredom during the holidays, who can lend me a hand.
So today, let's see everything you need to know, or almost; to plant bulbs well.
Tip #1: For easy bulb planting: choose the right tool
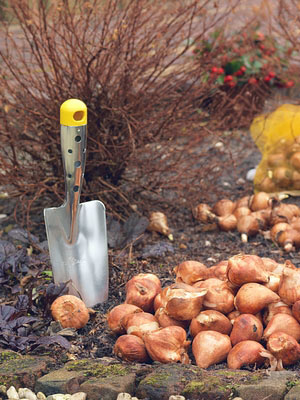
For a long time, I struggled using the first bulb planter that came to hand. You know, that so-called "automatic" thing whose plastic handle usually breaks after the third hole, especially if you're gardening in somewhat firm soil?
Then one day, after seeing this selection, I added a proper bulb planter to my Christmas list that could tackle my 200 holes without breaking... or breaking my back: a long-handled planter with a footrest. And that's when everything changed.
If you're planting less intensively, at the very least, opt for a sturdy tool that is made from a single piece. A good classic planter, used for perennials, can do the job just fine. It will always be better than a flimsy tool!
Tip #2: For abundant flowering: plant at the right time
The very end of summer and autumn (from September to November) is the best time to plant spring bulbs. For early flowering bulbs, like snowdrops and Crocus, the principle is simple: the earlier you plant, the greater your chances of seeing their flowers appear early the first year.
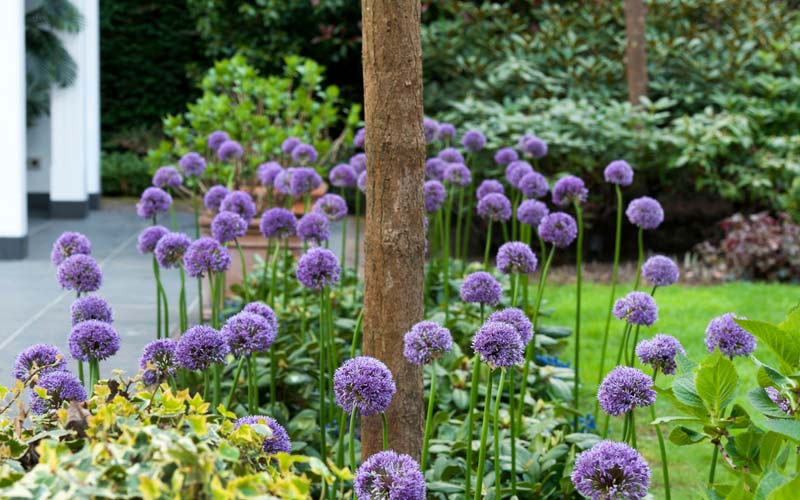
Late spring and early summer bulbs like Camassias or Alliums can also be planted in late winter, but if planted in autumn, they will have more time to settle in and will bloom much better.
For those with a busy planting schedule in autumn or who take advantage of end-of-season promotions, know that it is entirely possible to extend the planting period for bulbs until early winter, especially if you live in a mild climate.
Admittedly, the flowering will be less spectacular the first year, but it works! For all the details, I invite you to check our advice sheet: "Late Planting of Spring Bulbs"
Tip #3: For a real impact, don't skimp on quantity
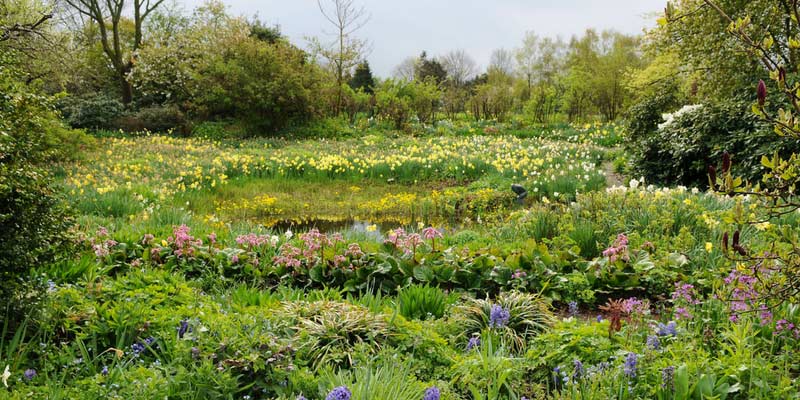
The beauty of spring bulbs, besides warming our hearts by announcing the approaching end of winter, is their ability to enhance the interest of a summer bed. They are also very useful for flowering effortlessly and without maintenance in natural spaces like meadows and orchards. But for it to be effective, the visual impact must be strong enough.
For small bulbs, there is only one solution: plant in numbers and in masses. This applies to crocus, muscari, but especially to snowdrops, which are never as charming as when they stand closely together like a group of little penguins on the ice!

To know how many bulbs to plant, refer to the recommended planting distances in each of our plant sheets. The numbers may seem a bit crazy, but they correspond to what is necessary to achieve a real effect. This figure is expressed in the number of bulbs per square metre, but you are, of course, not obliged to plant a square metre of snowdrops! As you can probably see from the image above, a "patch" of 30 cm² (or 60 bulbs) already offers a very nice visual impact.
Larger bulbs like giant-flowered alliums and Imperial Fritillaries can be planted less densely, as they are remarkable from a distance and often benefit from being accompanied by other plants. If you are planting in an existing bed, these planting distances are less important, but do ensure to create wide patches by planting your bulbs closely together, among the already established plants.
If you are planting in a lawn, the ideal is to opt for bulbs that naturalise easily like botanical daffodils, squills, botanical tulips, and guinea fowl fritillaries... Here too, you can plant a bit less densely because year after year, they will multiply and produce a mass effect at little cost. Remember Pierre's motto: Small bulbs, big effects!
Tip #4: For faster planting: choose the right method
Bulbs, whether planted in groups of 20 or 200, are not planted quite the same way if you want to save time. If you are planting within an already established bed, you will be forced to use a planter and plant individually. However, if you want to create a border specifically for these plants, we recommend a method that involves removing the grass over a wide area rather than planting individually:
In this video, you will see that the grass is put back in place. This is not a requirement: you can also mulch with fallen leaves or pruning chips.
Tip #5: To prevent rot, ensure good drainage and avoid over-fertilising
We can never repeat it enough, and even if some appreciate moist soils, bulbous plants dread waterlogged soils, which inevitably leads to their rot. It is therefore essential, in very wet soil that retains water, to improve drainage. To do this, it's very simple: place a layer of gravel or sand, about two centimetres thick, at the bottom of the planting bed or hole.
Also note that soil that has been fertilised too recently, excessively, or with compost or manure that is not well-matured can also promote the rot of your bulbs. If your soil is poor, you can add fertiliser, but it should:
- be suitable (use a special bulb fertiliser; a fertiliser too rich in nitrogen would encourage foliage growth at the expense of flowers),
- be moderate as bulbous plants are not "greedy".
Tip #6: Plant a bulb in the right direction, at the right depth, is better...

Planting a bulb upside down is a classic mistake of beginner gardeners. Nothing dramatic, as in most cases, the bulb is a contortionist and will eventually turn itself around. This is what is known as geotropism... but, if possible, it's better to spare it this effort! To know which way to plant your bulbs, observe them: the point should be facing upwards and the plateau, from which the roots will emerge, downwards. Logical 🙂
Regarding the planting depth of bulbs, it is often said that the planting depth corresponds to three times the diameter of the bulb... but also that bulbs should be planted at a depth equal to twice their height. And of course, there are exceptions that confirm these rules.
Rather than measuring your bulbs and getting out your calculators, check the indications at the end of each plant sheet... or keep the packets until planting time: it's noted on them!
Tip #7: Beware of voles!
Every spring, we receive a few calls from customers who assure us that their tulip bulbs have not flowered. And in most cases, when we ask them to check the condition of the bulbs, they cannot find them. And when they do, they appear partially gnawed. The culprits? Voles!
If you too have to deal with rodents, don't take any risks: choose bulbs that are generally not attacked or implement the necessary protective measures! To find out how to do this, discover Virginie's tips: "How to Protect Bulbs from Rodents".
And you, do you know how to plant bulbs? What is the trend where you are? Perhaps you have tips to make this task a little less tedious... Don't hesitate to share them in the comments!

Comments