


Seed tapes are easy, practical, and quick to use. Simply place the tape on the ground (in open soil or in a planter), cover with soil, and water. It's perfect for gardeners looking to save time and effort. If you'd like to learn more, check out our advice sheet: How to sow seed tapes? Whether you're a beginner or an experienced gardener, you can also save money by making them yourself! Follow our step-by-step tutorial to create seed tapes, using organic or non-organic seeds.
Why make seed tapes?
Seed tapes are quick and simple to use. They also ensure the correct spacing between each seed. No more thinning out rows, saving time and reducing seed waste. Say goodbye to thinning carrot seedlings after sowing!
Seed tapes also prevent birds from stealing the seeds or rain scattering them. This keeps your vegetable rows neat and straight in the garden.
The seeds retain their germination properties, and the paper decomposes naturally in the soil.
You can even prepare your seed tapes when rain or cold weather keeps you from the garden. This saves time on sowing and, consequently, on harvesting.
Which seeds to choose?
You can create tapes with vegetable seeds: carrot seeds, salad leaves (lettuce, chicory, rocket...), leek seeds, turnip seeds, onion seeds, corn salad, spinach, beetroot, cabbage, turnips, fennel, herbs (basil, coriander, parsley, chives...), or simply flower seeds (annual or biennial). You can also mix things up, for example, alternating carrot seeds with radish seeds.
You can also place several varieties of salad on the same tape or space them closer together for a mix of young shoots. You could even add a few marigold seeds!
Note that this method is more challenging with larger seeds like peas, broad beans, and runner beans, and isn't suitable for seeds not typically sown in rows, such as tomatoes, aubergines, peppers, cucumbers, and courgettes.
When to prepare seed tapes?
You can make seed tapes year-round, but it's a perfect activity for winter days when there's little to do in the garden while waiting for spring. Remember to store your seed tapes in a dry place, away from heat and light.
How to make seed tapes?
What do I need?
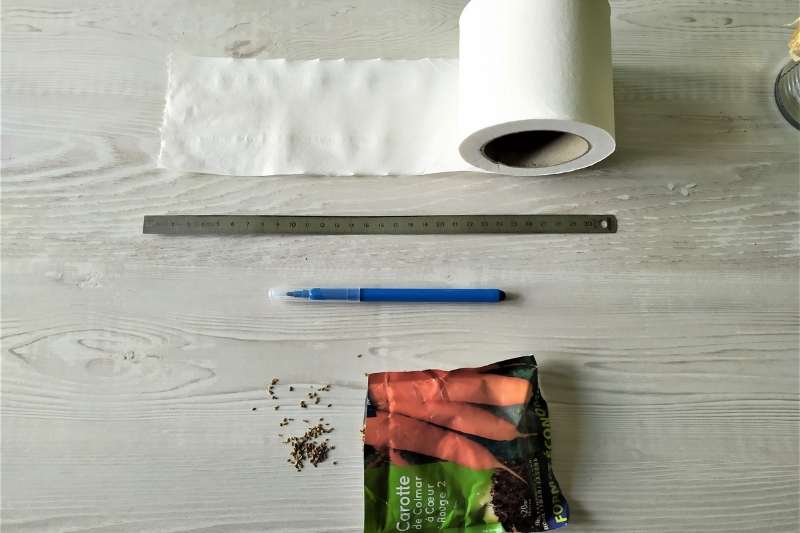
- 1 roll of toilet paper or kitchen towel
- 1 ruler
- 1 pencil
- 1 water spray bottle
- vegetable or ornamental seeds
Steps to make a seed tape:
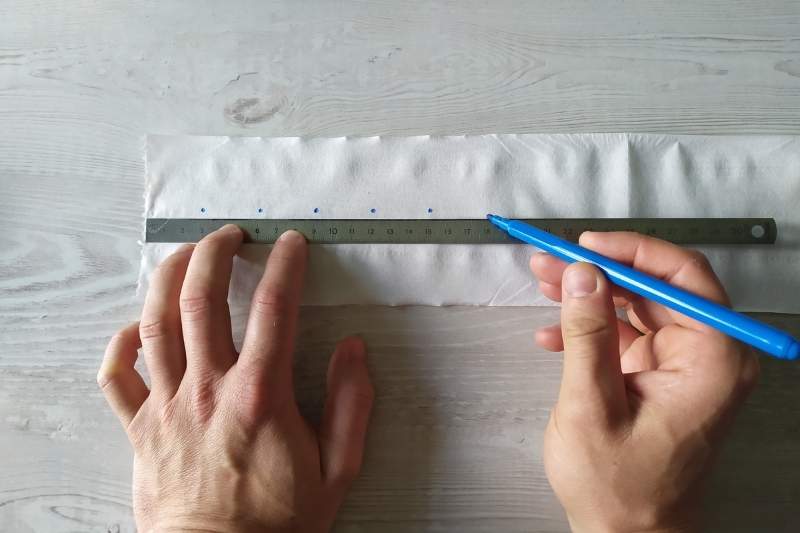
1- Unroll your toilet paper flat.
2- Using a ruler and pencil, mark the placement of each seed in the middle of the toilet paper. In this example, dots were made every 3 cm for carrot seeds.
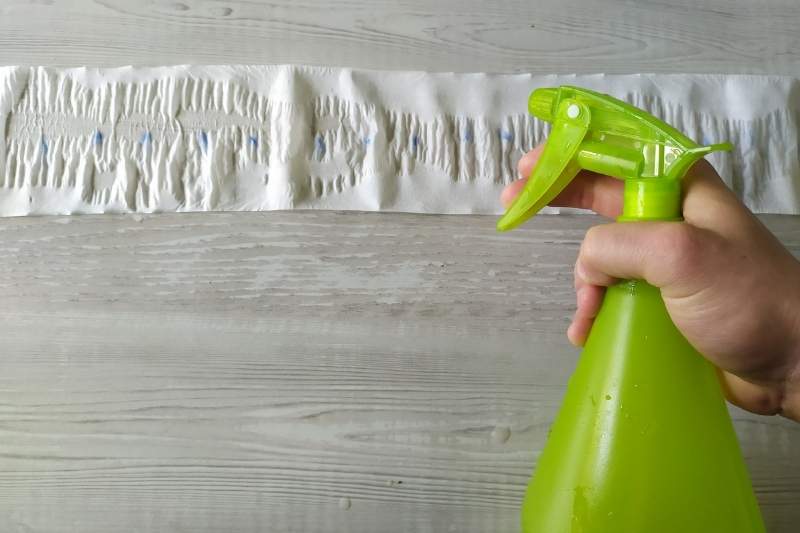
3- Moisten the toilet paper with a water spray.
4- Place the seeds on the marks.

5- Fold the toilet paper over the seeds from both sides and pat it down.
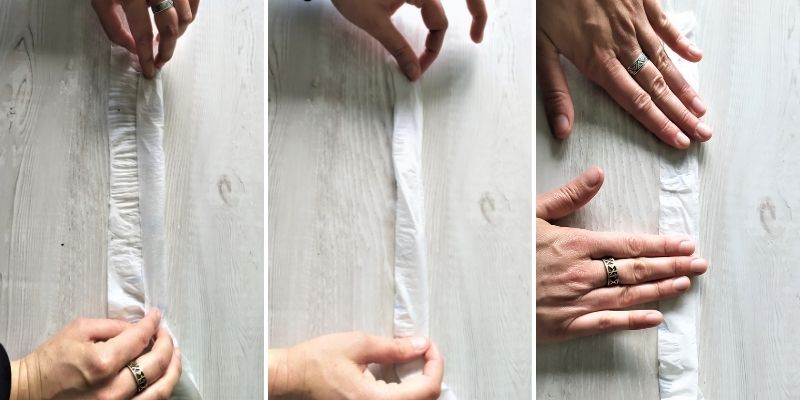
6- Let it dry.
Your seed tape is ready to use... Making sowing carrots child's play!
Ingrid's tip: If, like me, you prepare your tapes in winter, don't forget to write the seed names on the tape.
What next?
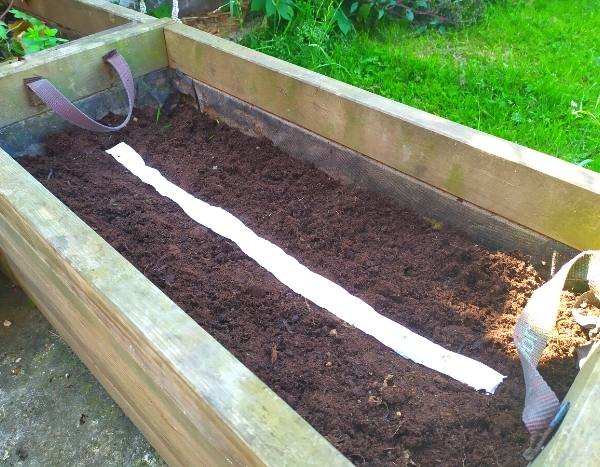
No need to dig a furrow—just place the tapes in the desired spot on weed-free, stone-free soil or potting mix in a planter (or pots) and water. Keep an eye on the seedlings to protect them from slugs. You can place a cloche or tunnel over them to encourage germination and shield young plants from cold or frost in early cultivation. Then, just harvest when the time comes.
To go further
- Discover all our vegetable seed varieties.


Comments