


The trumpet creeper can be propagated by cuttings. However, it must be admitted that this technique proves relatively complex for amateurs, particularly due to the long time it takes to produce roots.
Nevertheless, it is a very practical method of propagation for obtaining a beautiful young plant of trumpet creeper from an existing plant. Moreover, not all cutting attempts are necessarily doomed to failure.
This is especially true when dealing with a species with small flowers, as propagation by cuttings is more delicate to succeed with large-flowered varieties.

To ensure your success, discover in the following lines when and how to make a trumpet creeper cutting.
Materials for propagating a trumpet creeper
Propagating a trumpet creeper requires minimal materials. In terms of tools, equip yourself with a good pair of pruning shears, previously disinfected with 90° alcohol, to limit the risk of disease spread. Pots are also required to plant your cuttings. Protect your hands with a pair of gardening gloves. Finally, the substrate should be light, composed of good soil and river sand.
- Pruning shears
- Pots
- Gloves
- Plant hormones
- Soil
- River sand
When to take trumpet creeper cuttings?
The best time to take trumpet creeper cuttings is between July and August, in the heart of summer.
If you garden by the moon, proceed preferably during a descending moon phase.
How to make a trumpet creeper cutting?
Since propagating the trumpet creeper can be delicate to succeed, increase your chances by making several cuttings.

© Ishikawa Shihchuan - Flickr
1 - Start by filling the pots with your mixture of sand and soil.
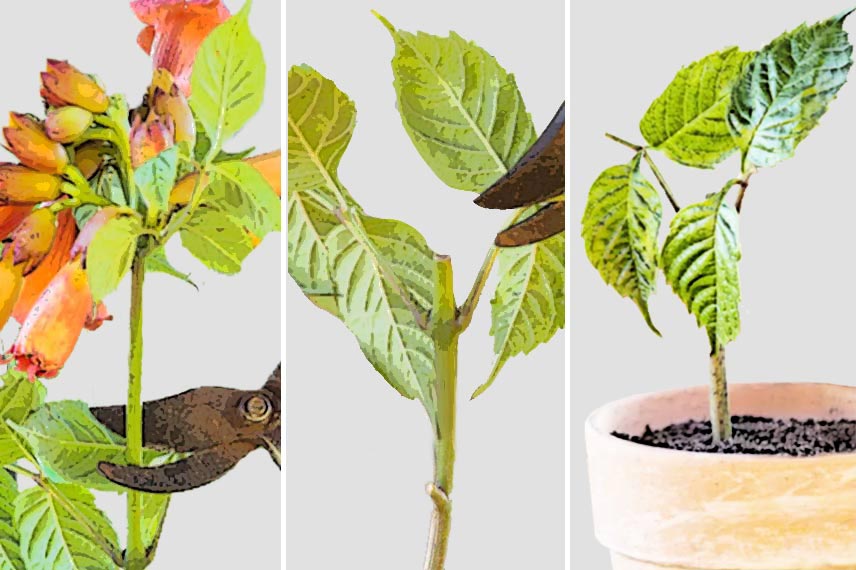
2 - Choose a flowering shoot with at least 3 pairs of leaves.
3 - Trim the top of the stem, at the level of the first pair of leaves (the one just below the terminal spike).
4 - Recut the base to 5 mm below the basal pair of leaves.
5 - Remove the lower leaves of the cutting, without touching the upper leaves.
6 - Cut most of the remaining leaves, to keep only one pair of leaflets (the closest to the stem).
7 - Dip the base of the cutting in hormone powder.
8 - Make a hole in the substrate using a piece of wood.
9 - Bury the trumpet creeper cutting, inserting it three-quarters into the pot.
10 - Firm the soil around the stem and water.
11 - Place the pot in a semi-shaded spot, at a temperature of 25°C.
12 - Keep the substrate moist without ever waterlogging it.
Be patient, as rooting can sometimes take several months. Generally, signs of vegetative recovery appear within 6 weeks, but it may take longer. If successful, you will transplant your trumpet creeper cuttings the following spring, once their root system has sufficiently developed.
Propagating a trumpet creeper in water
Another possible option is to try propagating the trumpet creeper in a glass of water, alongside your potted cuttings. While this technique is more commonly used for multiplying indoor plants, such as Scindapsus and Tradescantia, it can also be attempted on flowering bushes, which include the trumpet creeper. In this case, propagation takes place between April and September.
1 - First, take a section of stem that has not yet flowered, just below a node.
2 - Remove the basal leaves, ensuring they are not submerged in the water. Keep only one or two terminal leaves, cutting the largest ones in half.
3 - Place a bit of charcoal in the water to keep it clear. Alternatively, make sure to change the water regularly.
4 - Immerse the stem in the water, and place it all in a bright spot, but without direct sunlight.
All that remains is to wait and observe the development of the trumpet creeper's root system. If unsuccessful, you will notice the leaves falling, a phenomenon that unfortunately indicates your cutting has not taken. On the other hand, if the roots develop, simply wait until they reach between 2 and 3 cm before potting them in a light soil mixed with river sand.


Comments