


Nothing is more natural and legitimate than wanting to photograph your garden, the animals that inhabit it, its plants and flowers.
Some gardeners enjoy appreciating the evolution of their little piece of paradise over the years, looking at photos in winter and then seeing what can be changed the following year. Others simply engage in the fun of taking beautiful photos and sharing them online or on social media like Pinterest, Instagram, and Facebook.
Thanks to macrophotography or close-up photography, naturalist gardeners accumulate snapshots to observe in detail and close-up a fascinating universe that would be difficult to perceive with the naked eye. Others take up photography for all these reasons.
Are you a master of motion blur and poor framing? These few tips will help shed light on the best way to improve... to beautifully and simply fail at your photos every time!
1) To ruin your garden, animal, and plant photos... Stay restless!
Here’s today’s scoop: if you move, the photo will be blurry!
Note that there are two powerful laws of the universe: when the photographer sees a critter, he runs to get his camera. And when he runs, he is out of breath and trembling. The second is that, one time out of two, the critter has already scurried away... (Yes, this is from experience).
To ensure you only get blurry photos, another option is to move just as you press the shutter. This way, you are guaranteed to achieve a beautiful artistic blur, especially if it’s a bit dark.
* * *
Do you want to photograph insects or other garden animals? In that case, settle down and become a true image hunter. This requires patience and a bit of luck, it must be said. Arachnophiles will have better luck, as spiders are quite accommodating, and if you look closely, they might even give you a lovely smile!
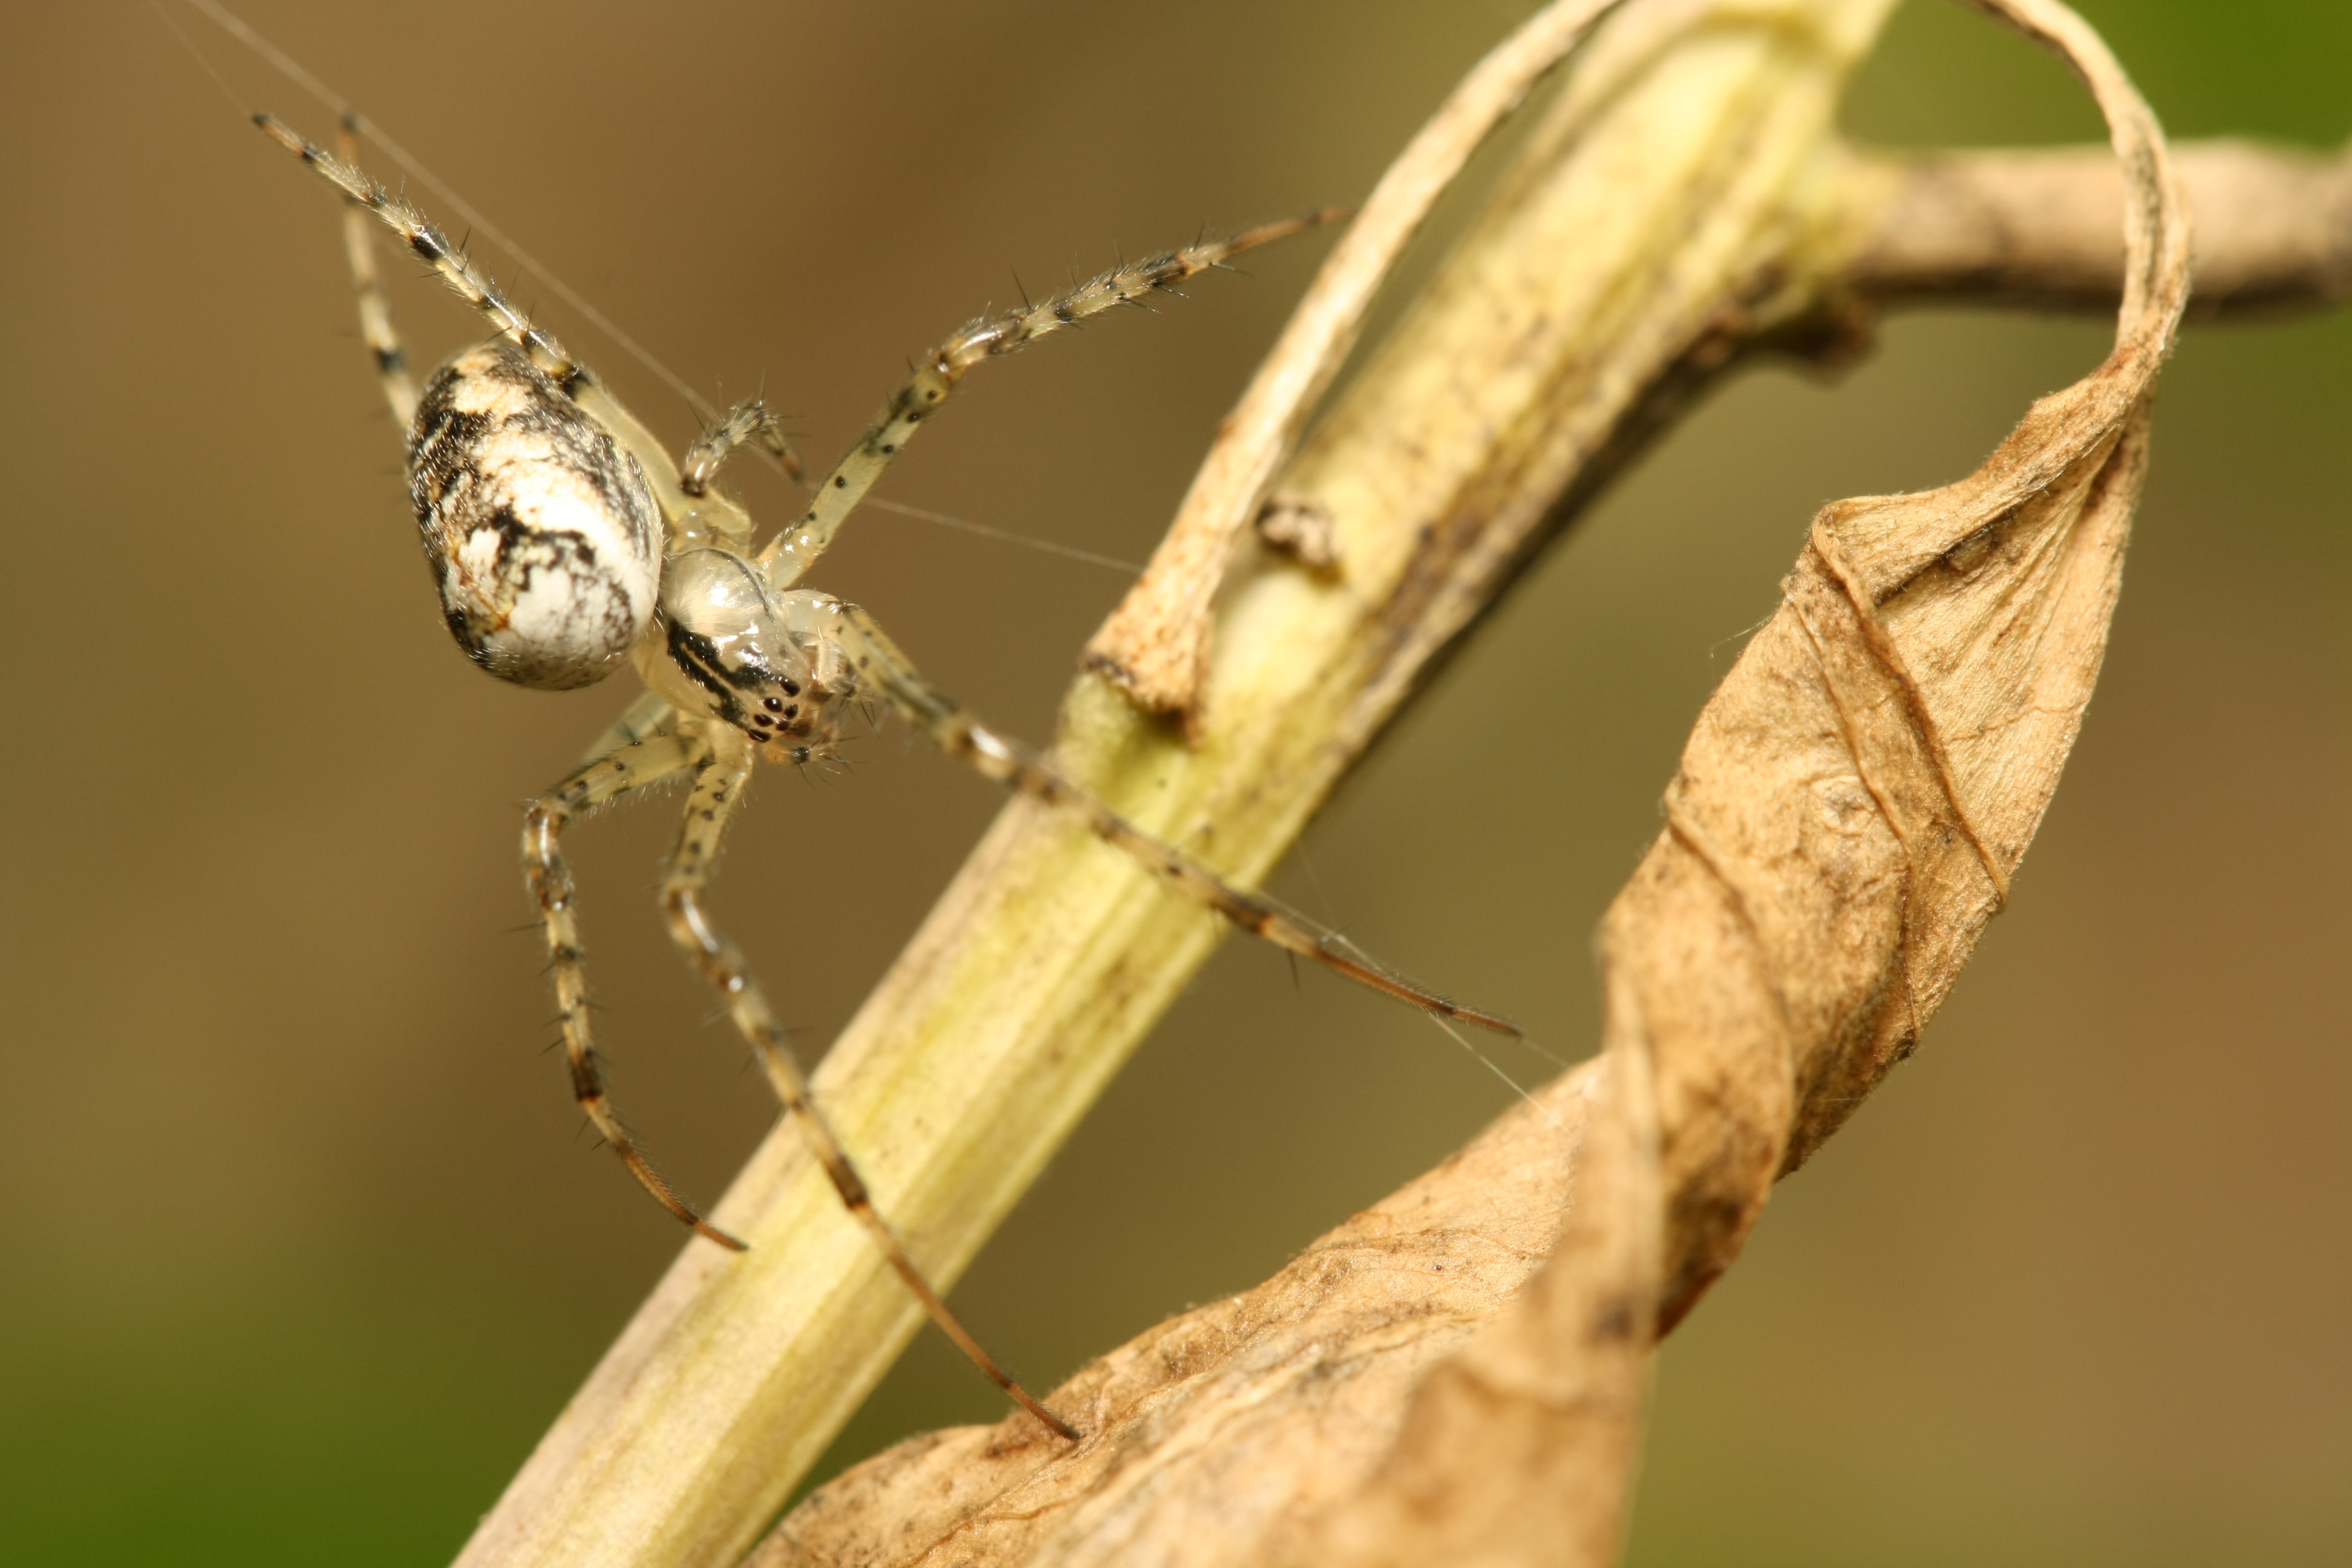 Spider macro: perfect models for practice!
If your hands chronically shake at the decisive moment, invest in a tripod or use the stability of a wall or the back of a chair, for example.
And if it’s windy, the simplest thing is to postpone your photo session.
For experienced users, increase the shutter speed to freeze the subject.
For moving critters like insects: anticipate, let them approach, wait for them to come to you and settle near where your lens is directed.
You can also disguise yourself as a flower or as Maya the bee, but the result is not guaranteed. However, you will certainly amuse your neighbours.
2) To ruin your flower photos, use autofocus!
Autofocus? No, it’s not a new fully automated car, but the English term for automatic focus. A very handy invention... Just press halfway down on the shutter to achieve focus. Use and abuse this technological marvel; nothing is simpler!
* * *
Yes, except that experienced photographers know well: often, in close-up photography, it’s a hassle! The focus rarely lands where we want it to.
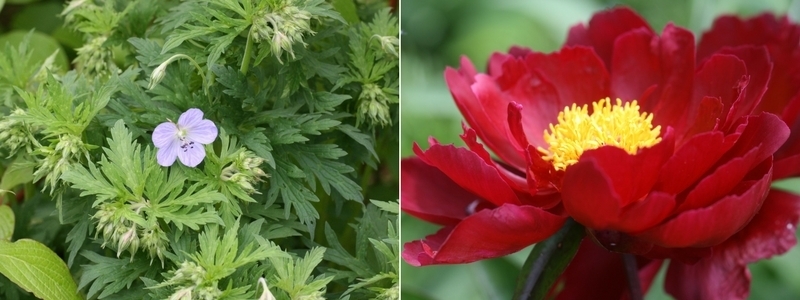
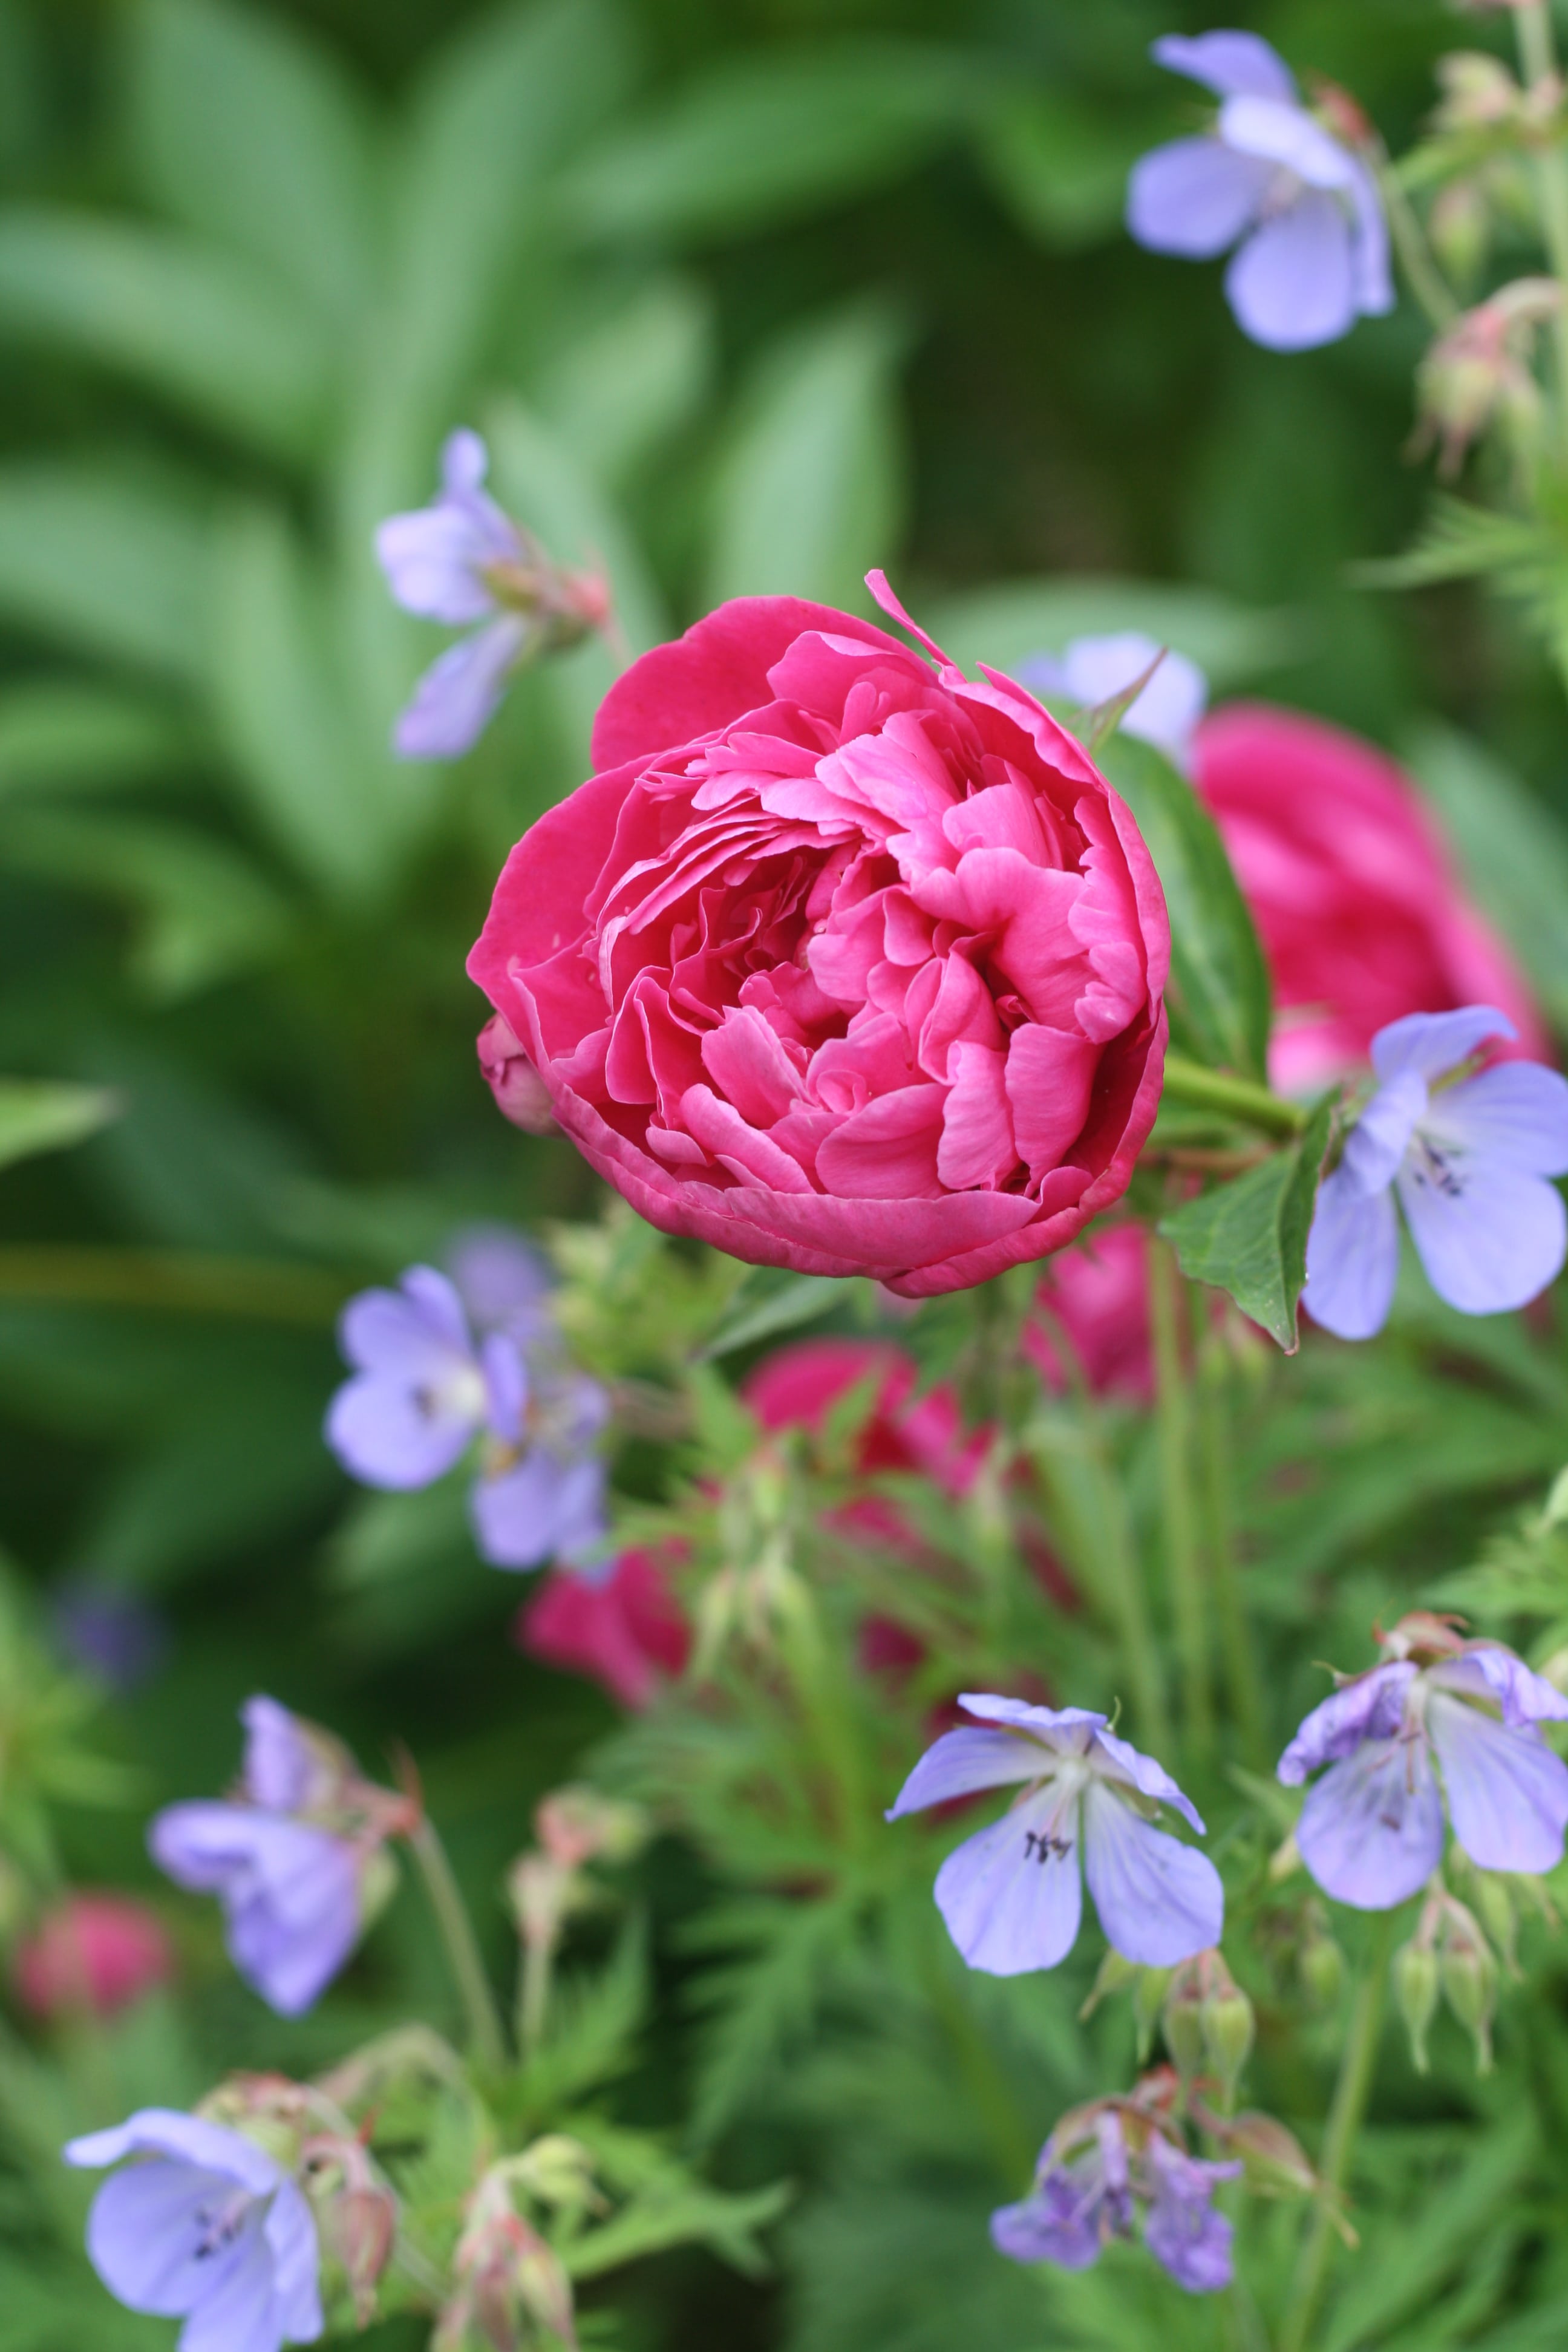
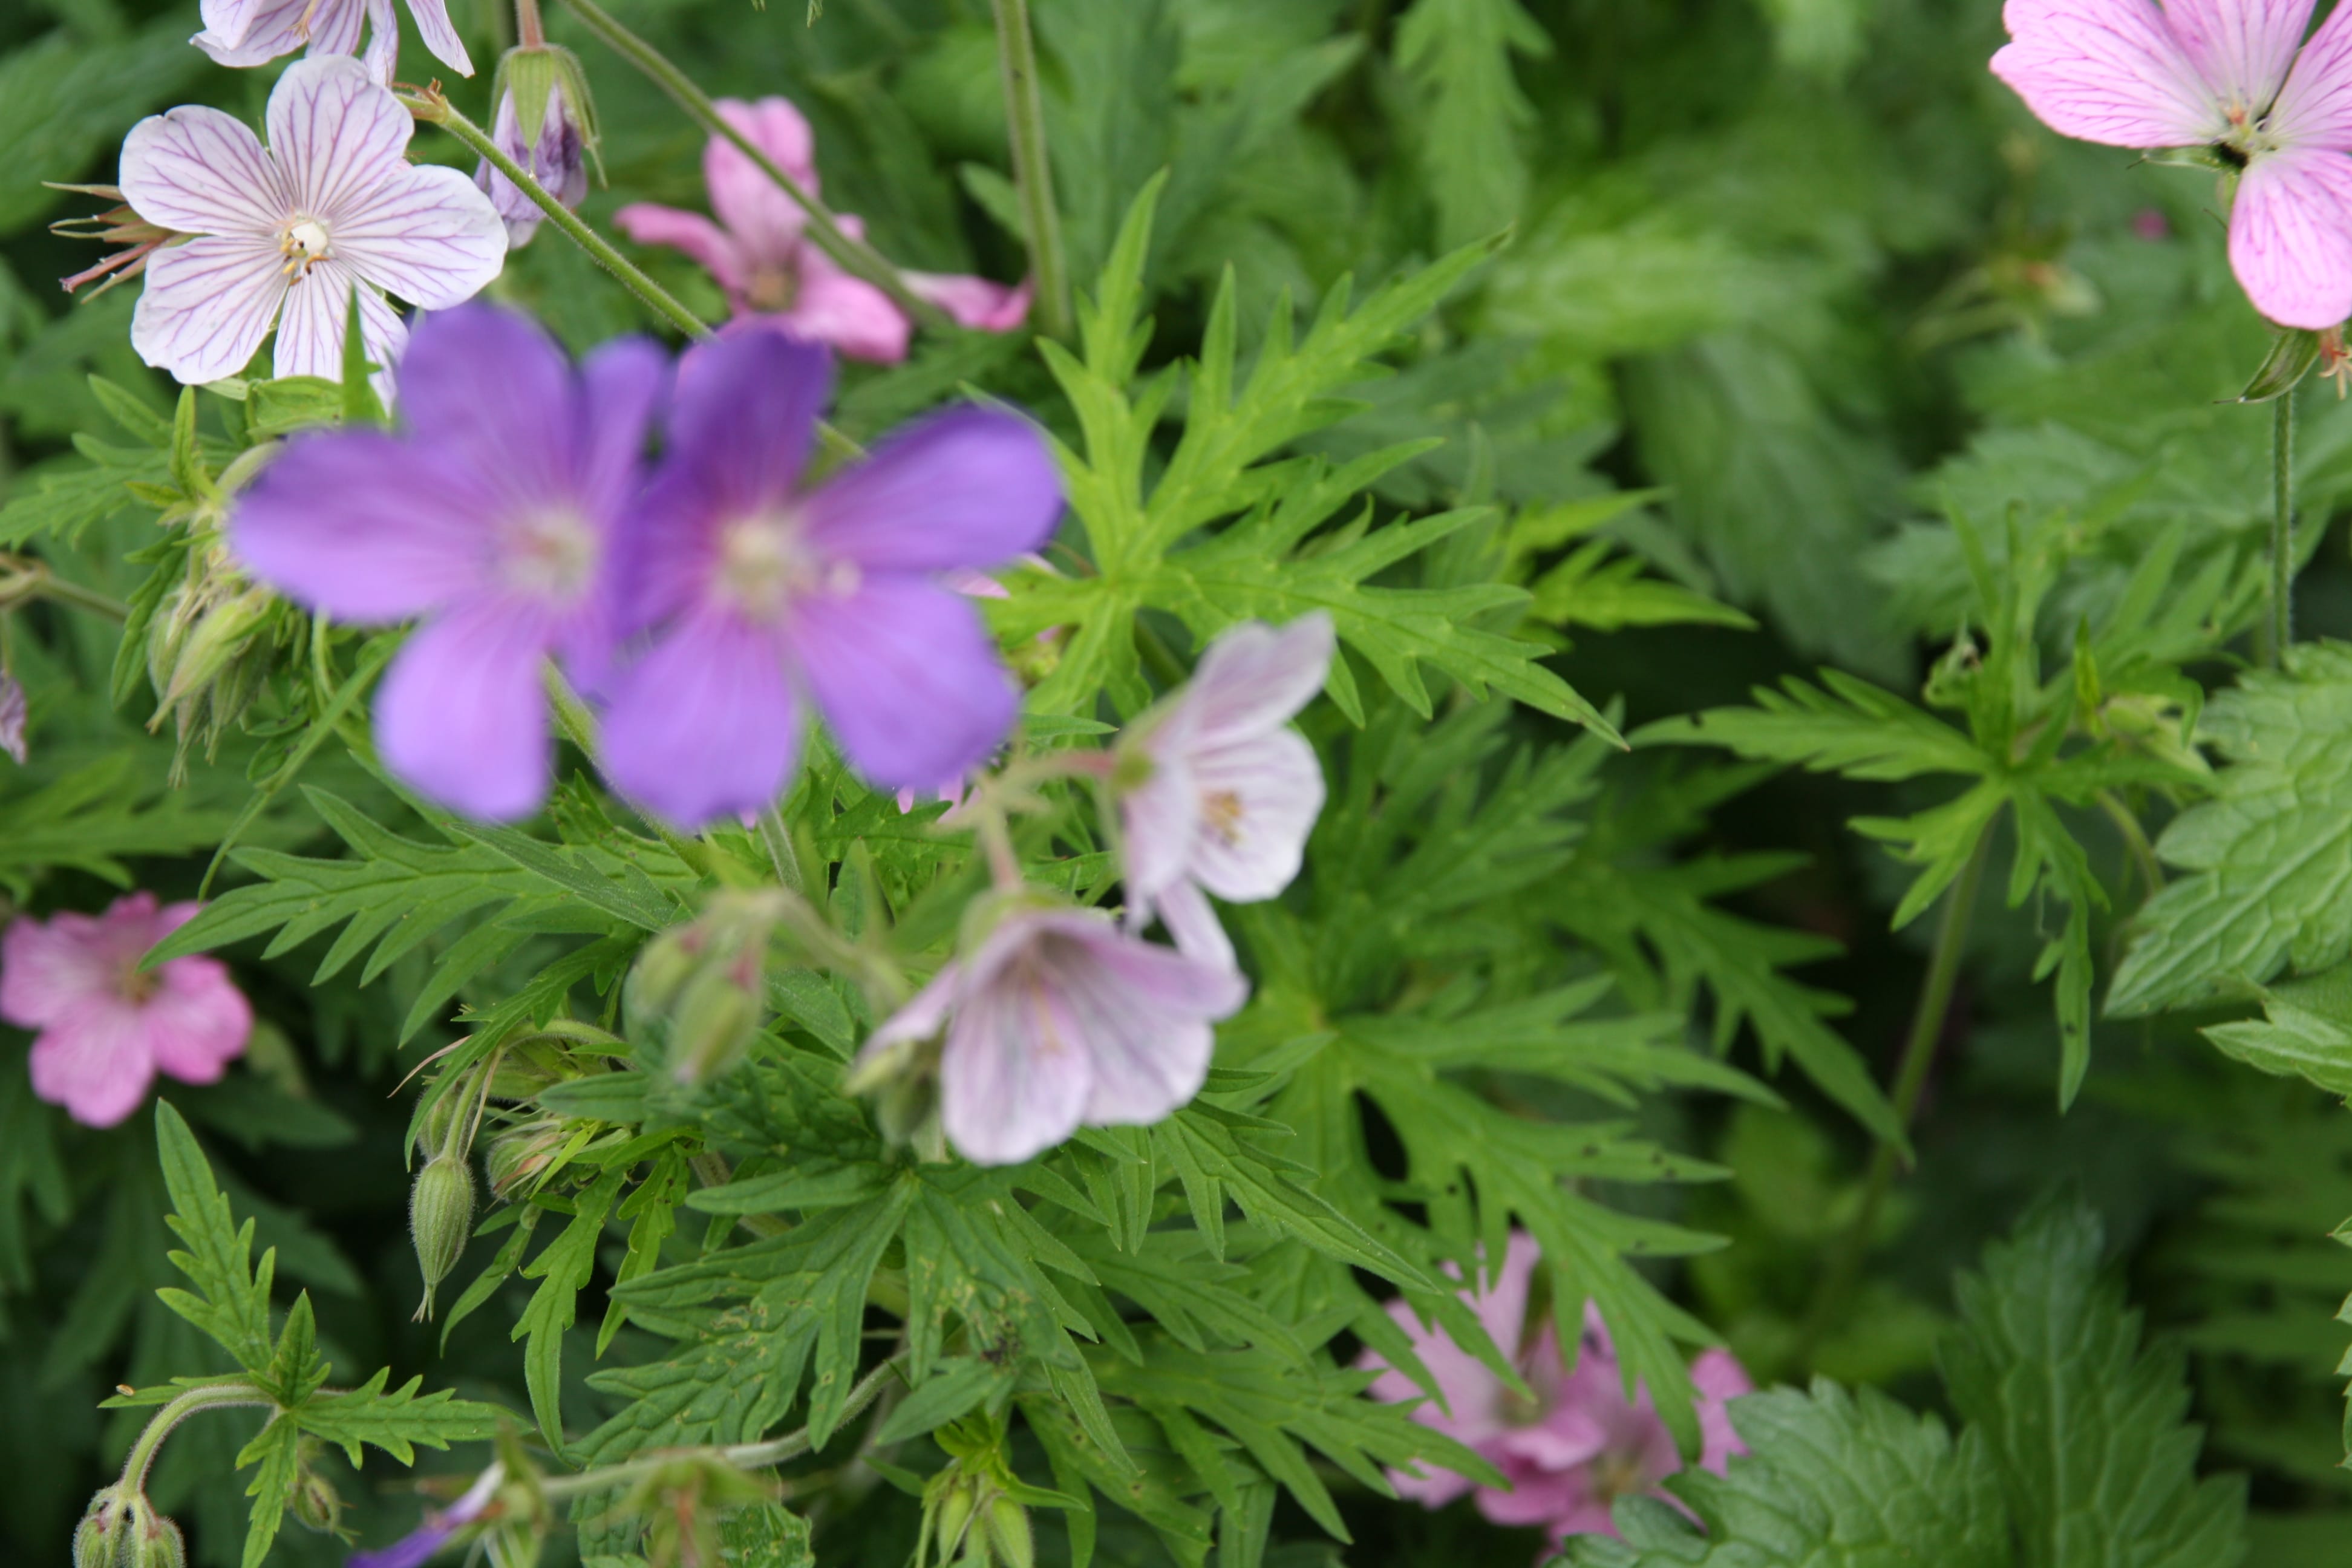 Focus on the background, the hardy geranium is blurry.
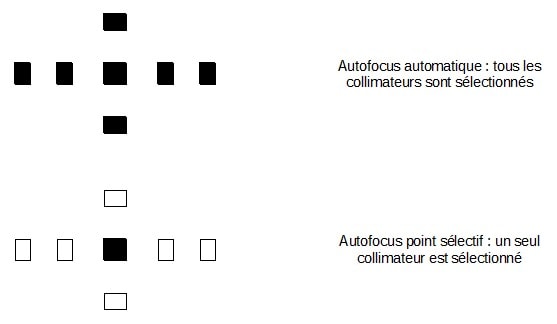
Don’t ask why: it’s a collimator problem! If you look closely in your viewfinder or on the back screen of your camera, you’ll see small black or red rectangles. If you take your photos with all the collimators activated, you can complain all you want, it’s your camera that will focus wherever it wants. You need to select a single collimator, preferably the middle one. This is the collimator you need to place on your subject to ensure it is sharp. Refer to your camera’s manual to find out how to make this selection.
Additionally, choose the AF-S mode (or One Shot for Canon). Press halfway to focus, which will remain locked at that precise point. You can then crop as you wish as long as you don’t release the shutter button. Once you have the desired framing, press fully to take the shot.
Finally, if you can, prefer manual focus. On your lens, slide the small switch from AF (AutoFocus) to MF (Manual Focus) and then turn the focus ring on the lens, you choose the point of sharpness. Don’t hesitate to take several shots varying the focus; you won’t pay any extra!
3) To obtain dull photos with strong contrasts, take your photos in full light!
On a beautiful sunny day, you can shoot away! You’ll get very bright photos in which the colours will be completely flattened. And in shaded areas, it’s almost better: you’ll have a significant contrast with one side dark (of the force...) and another too bright.
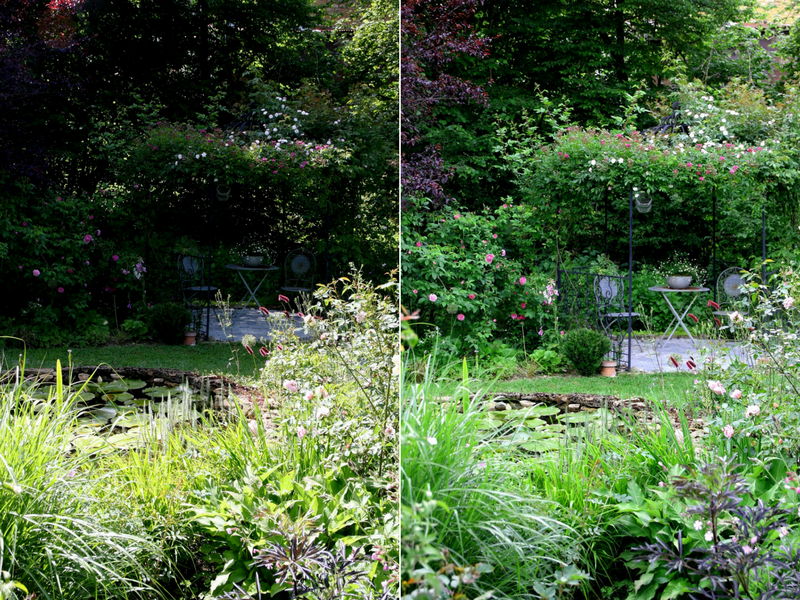 Same viewpoint, but at different times: early afternoon on the left and evening on the right.
* * *
Of course, we don’t always have the luxury of taking photos when we want! That said, know that the best photographers are early risers and night owls (I bet they take naps). They carefully choose their moments: early in the morning and in the evening. Finally, the light is different depending on the time of day, cooler in the morning and warmer in the evening.
However, it is possible to take lovely bright photos during the day; it all depends on the effect you’re after, but in the garden, keep this for close-up shots.
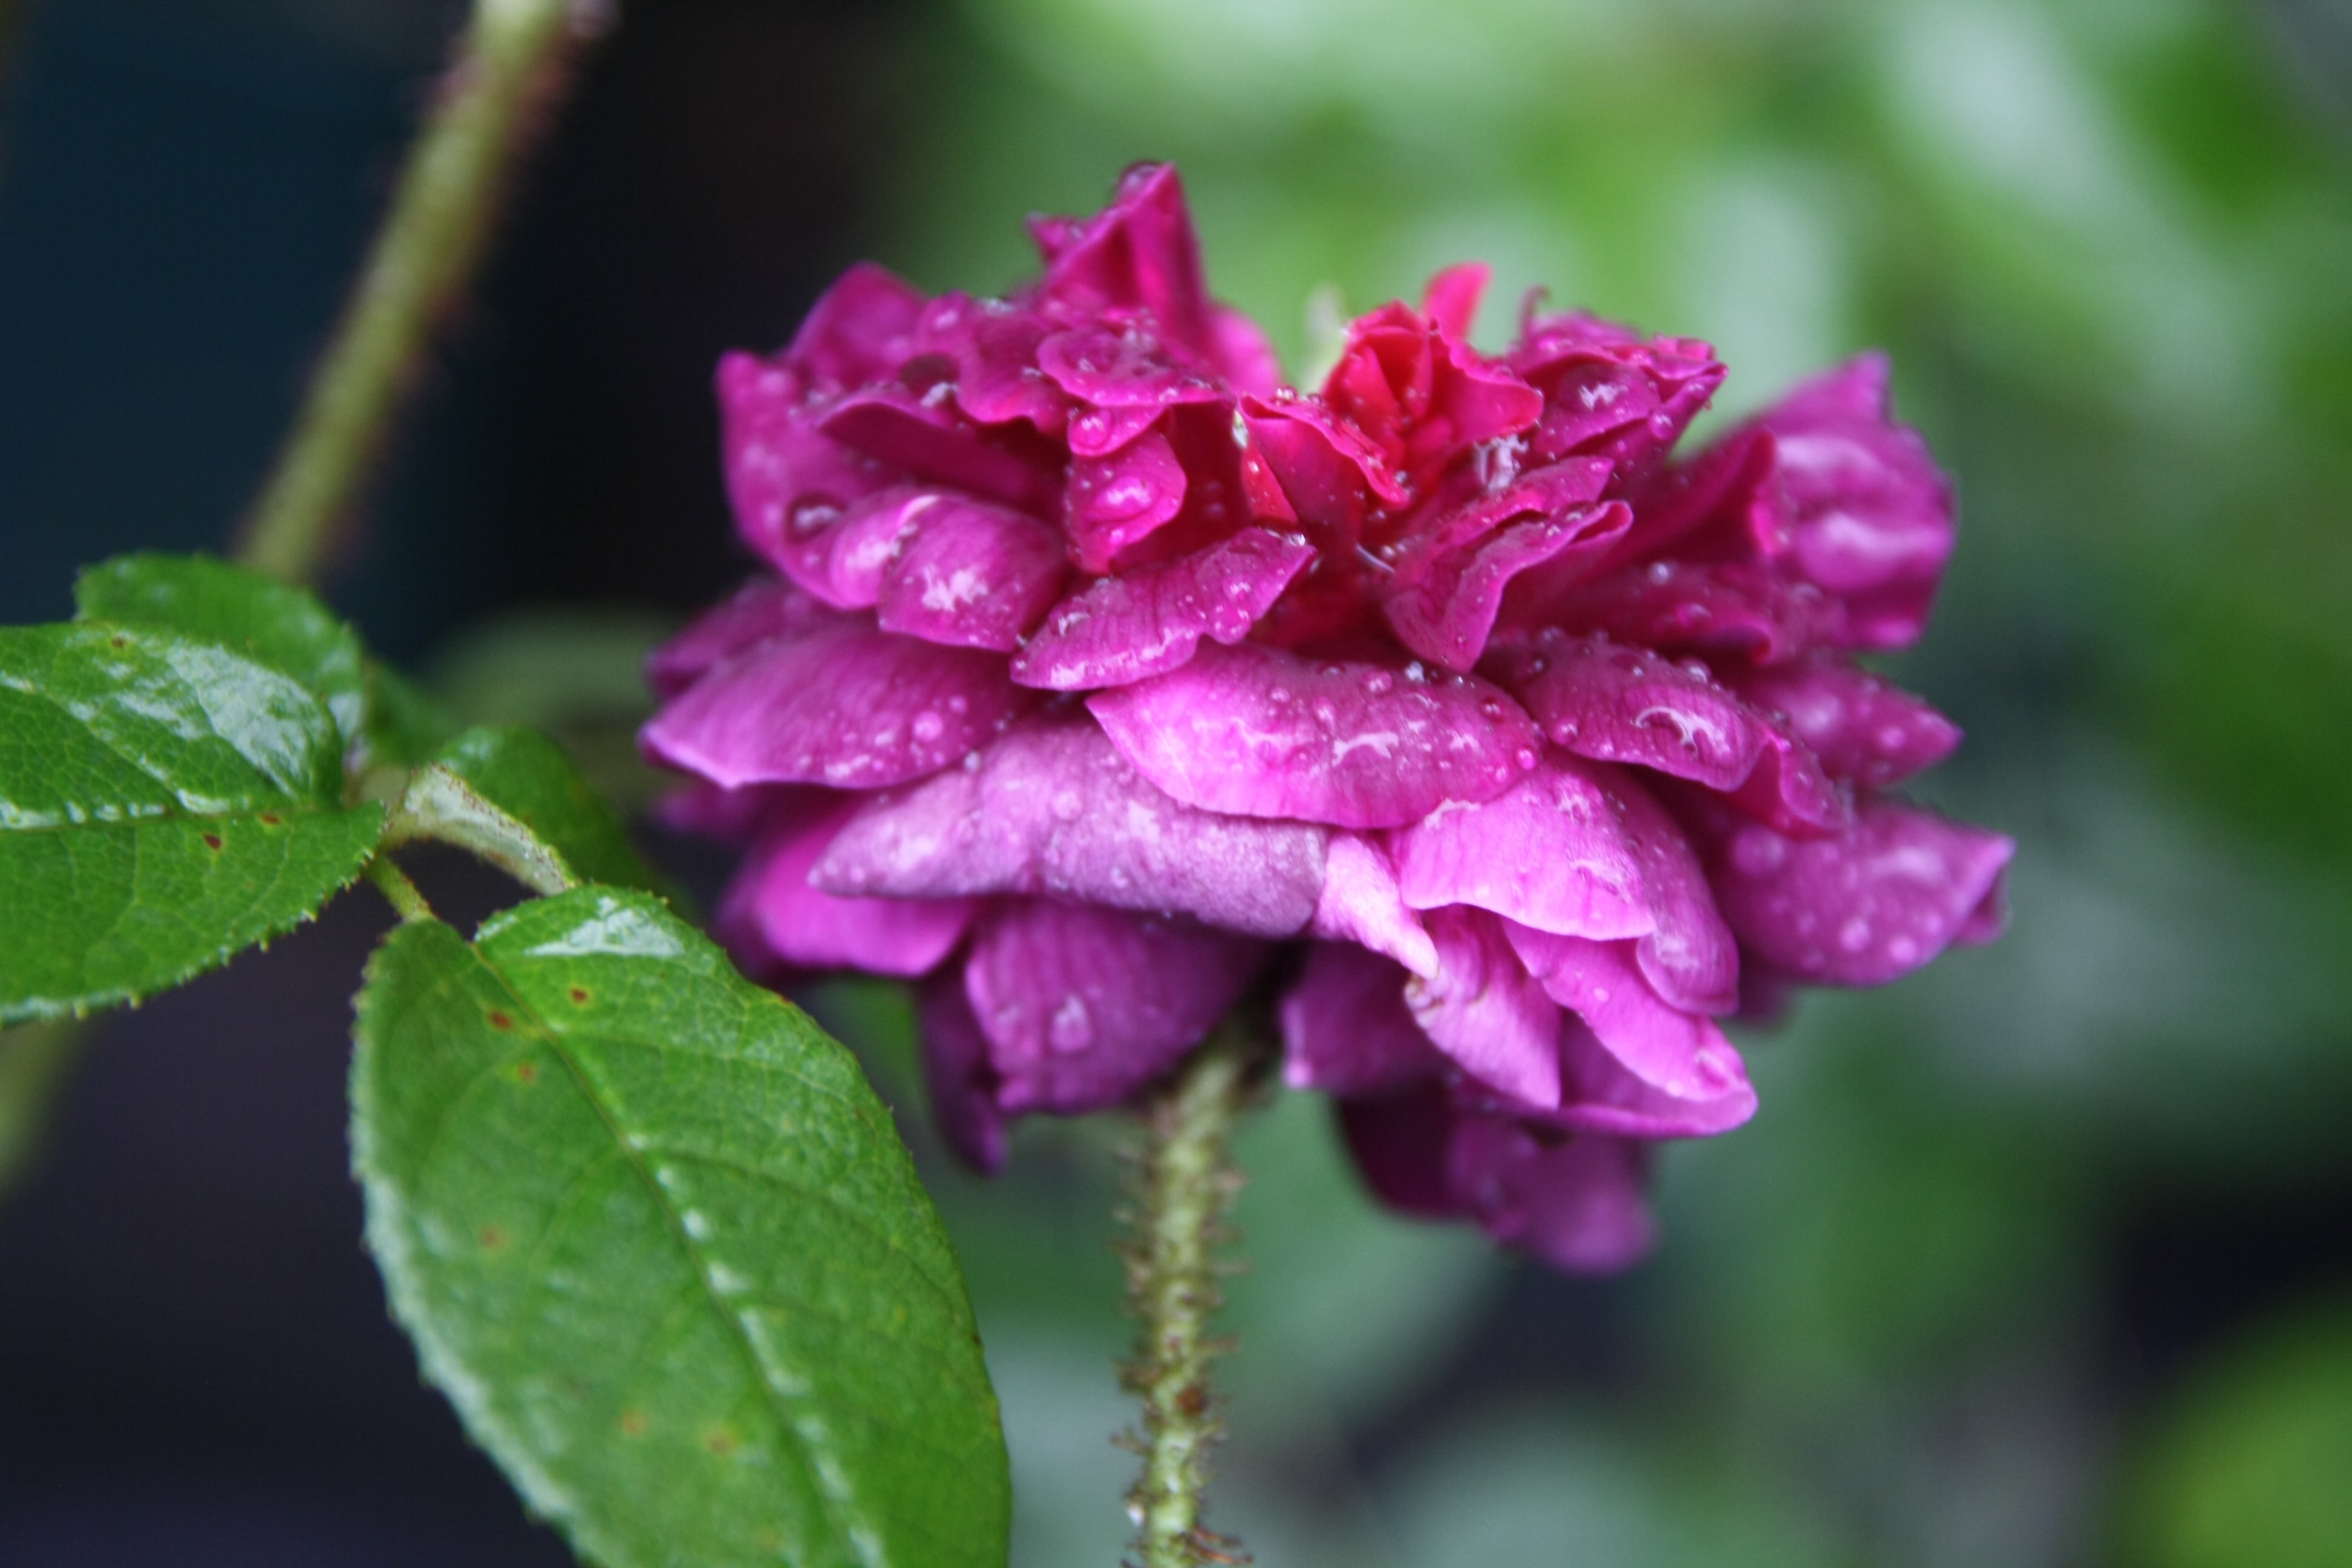
You can also take photos on cloudy, misty days or after rain; the water droplets make flowers and leaves incredibly photogenic.
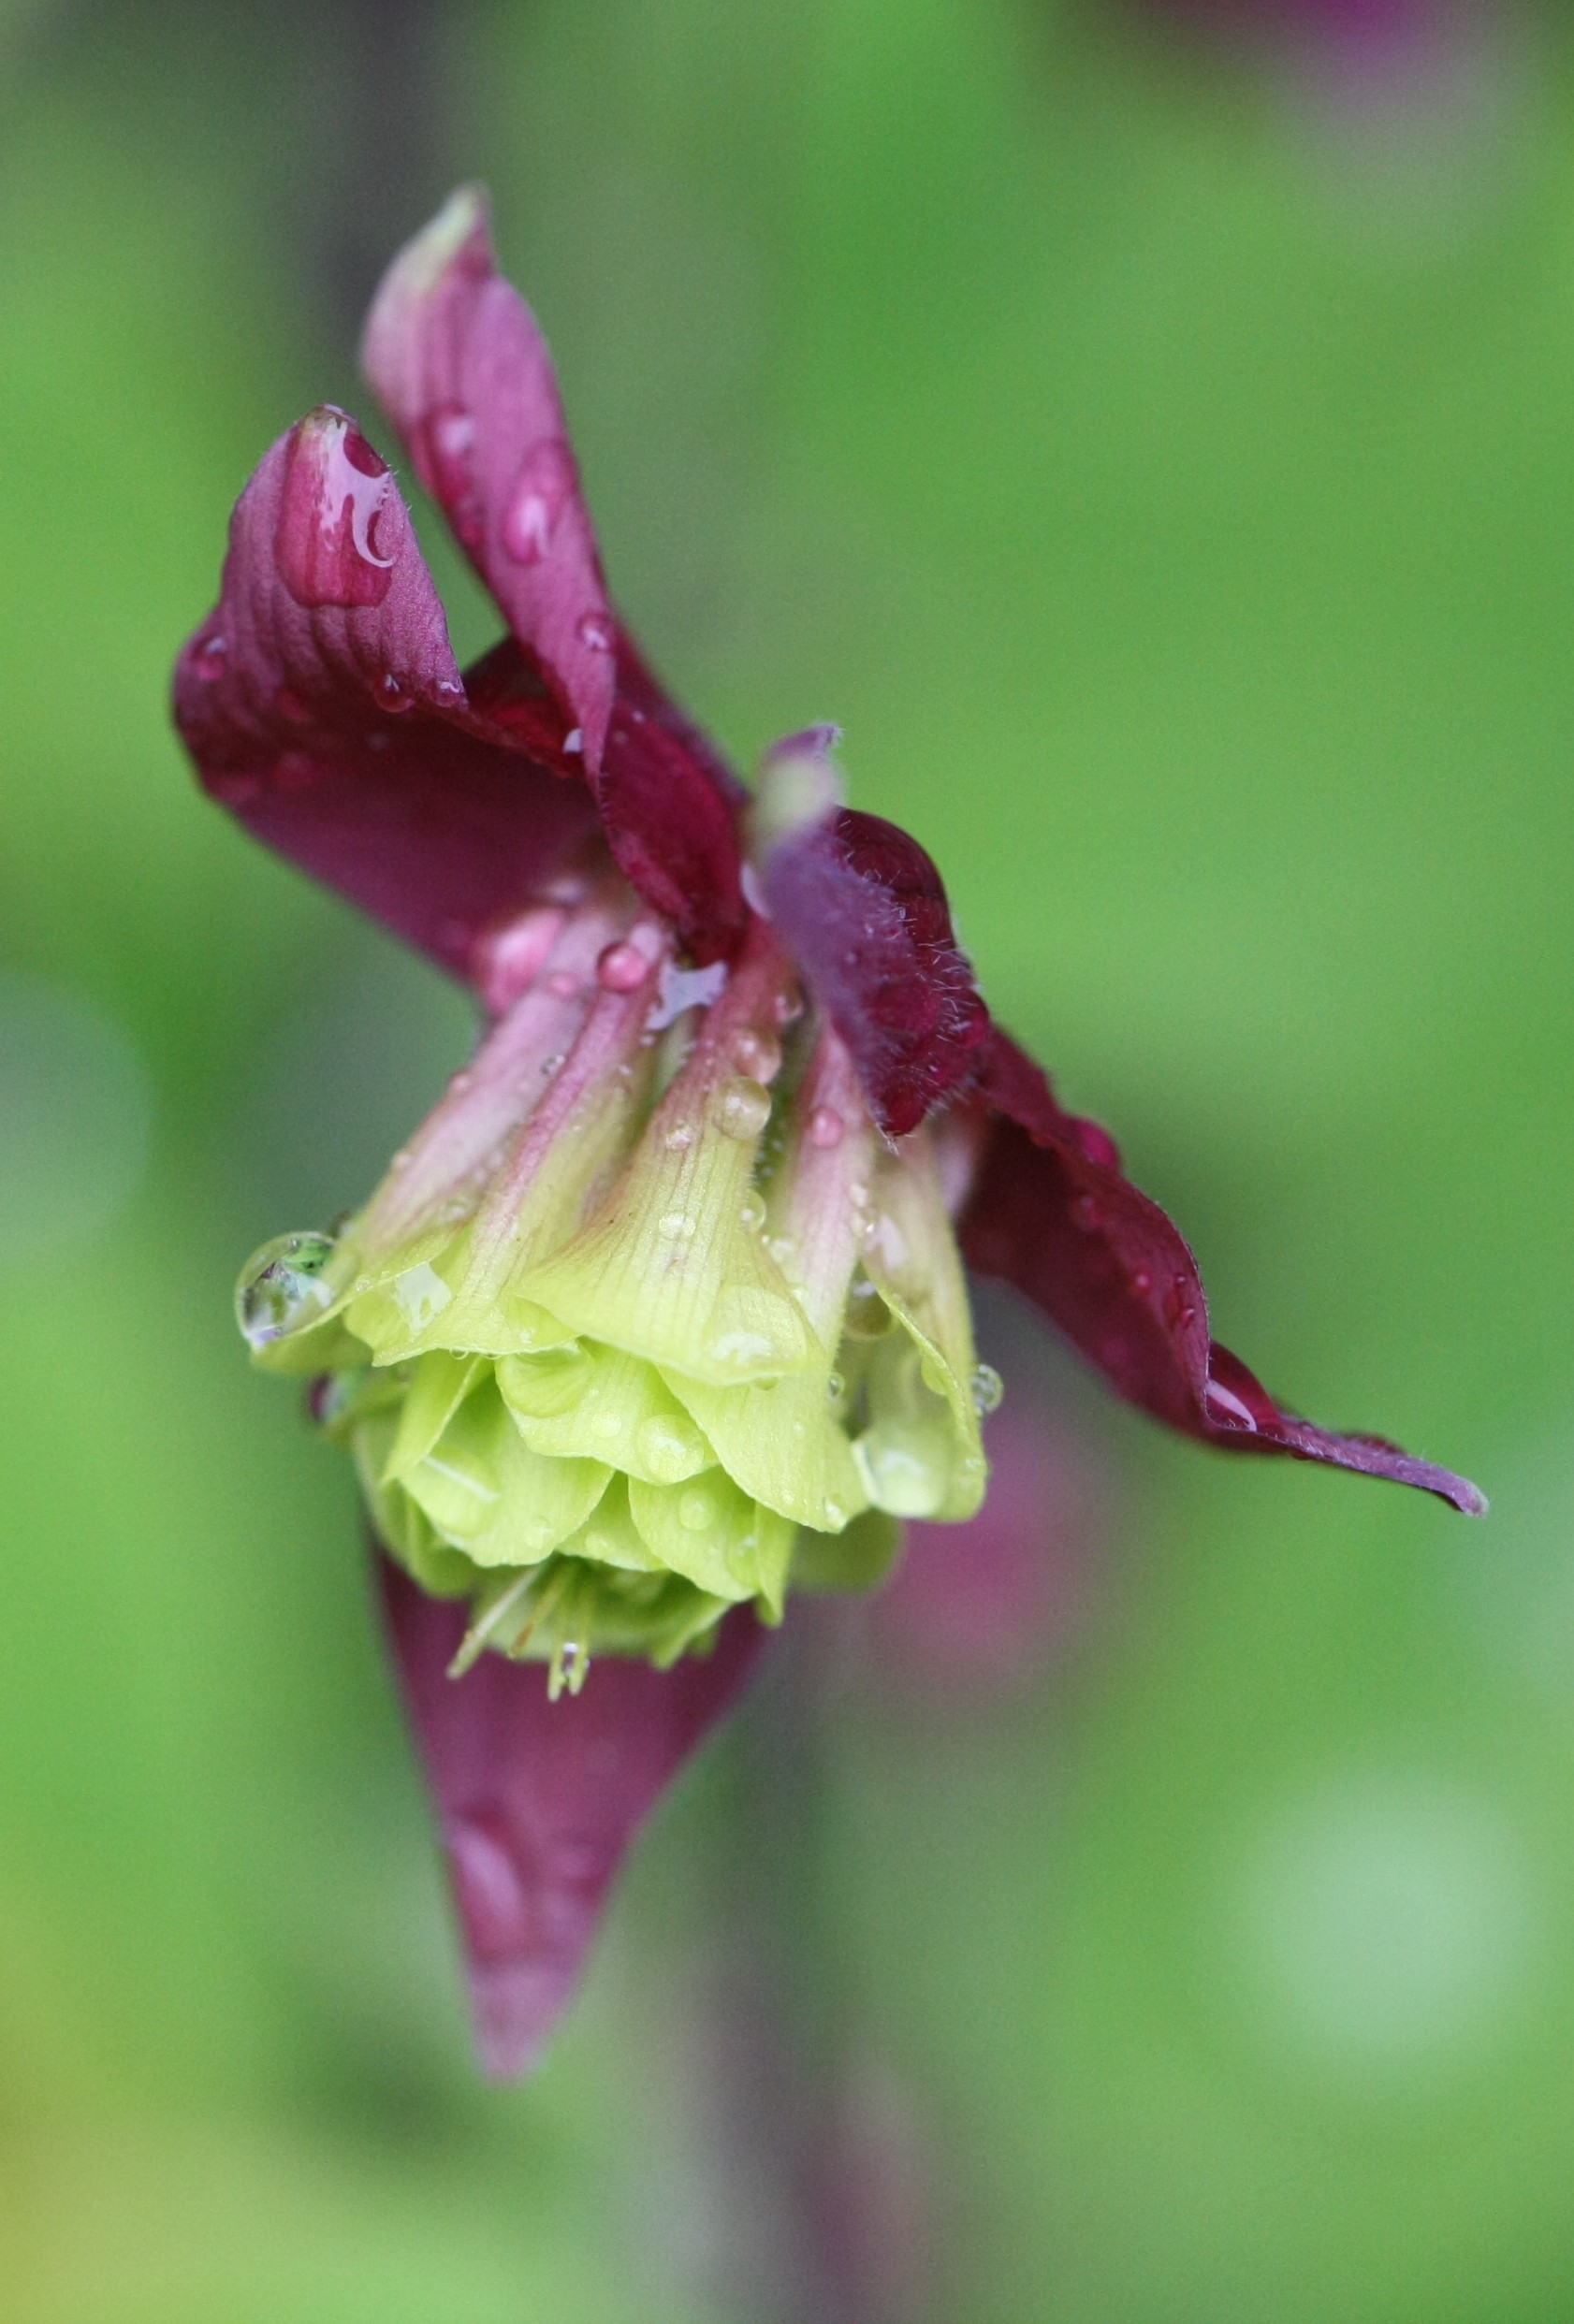 Water droplets add a touch of poetry.
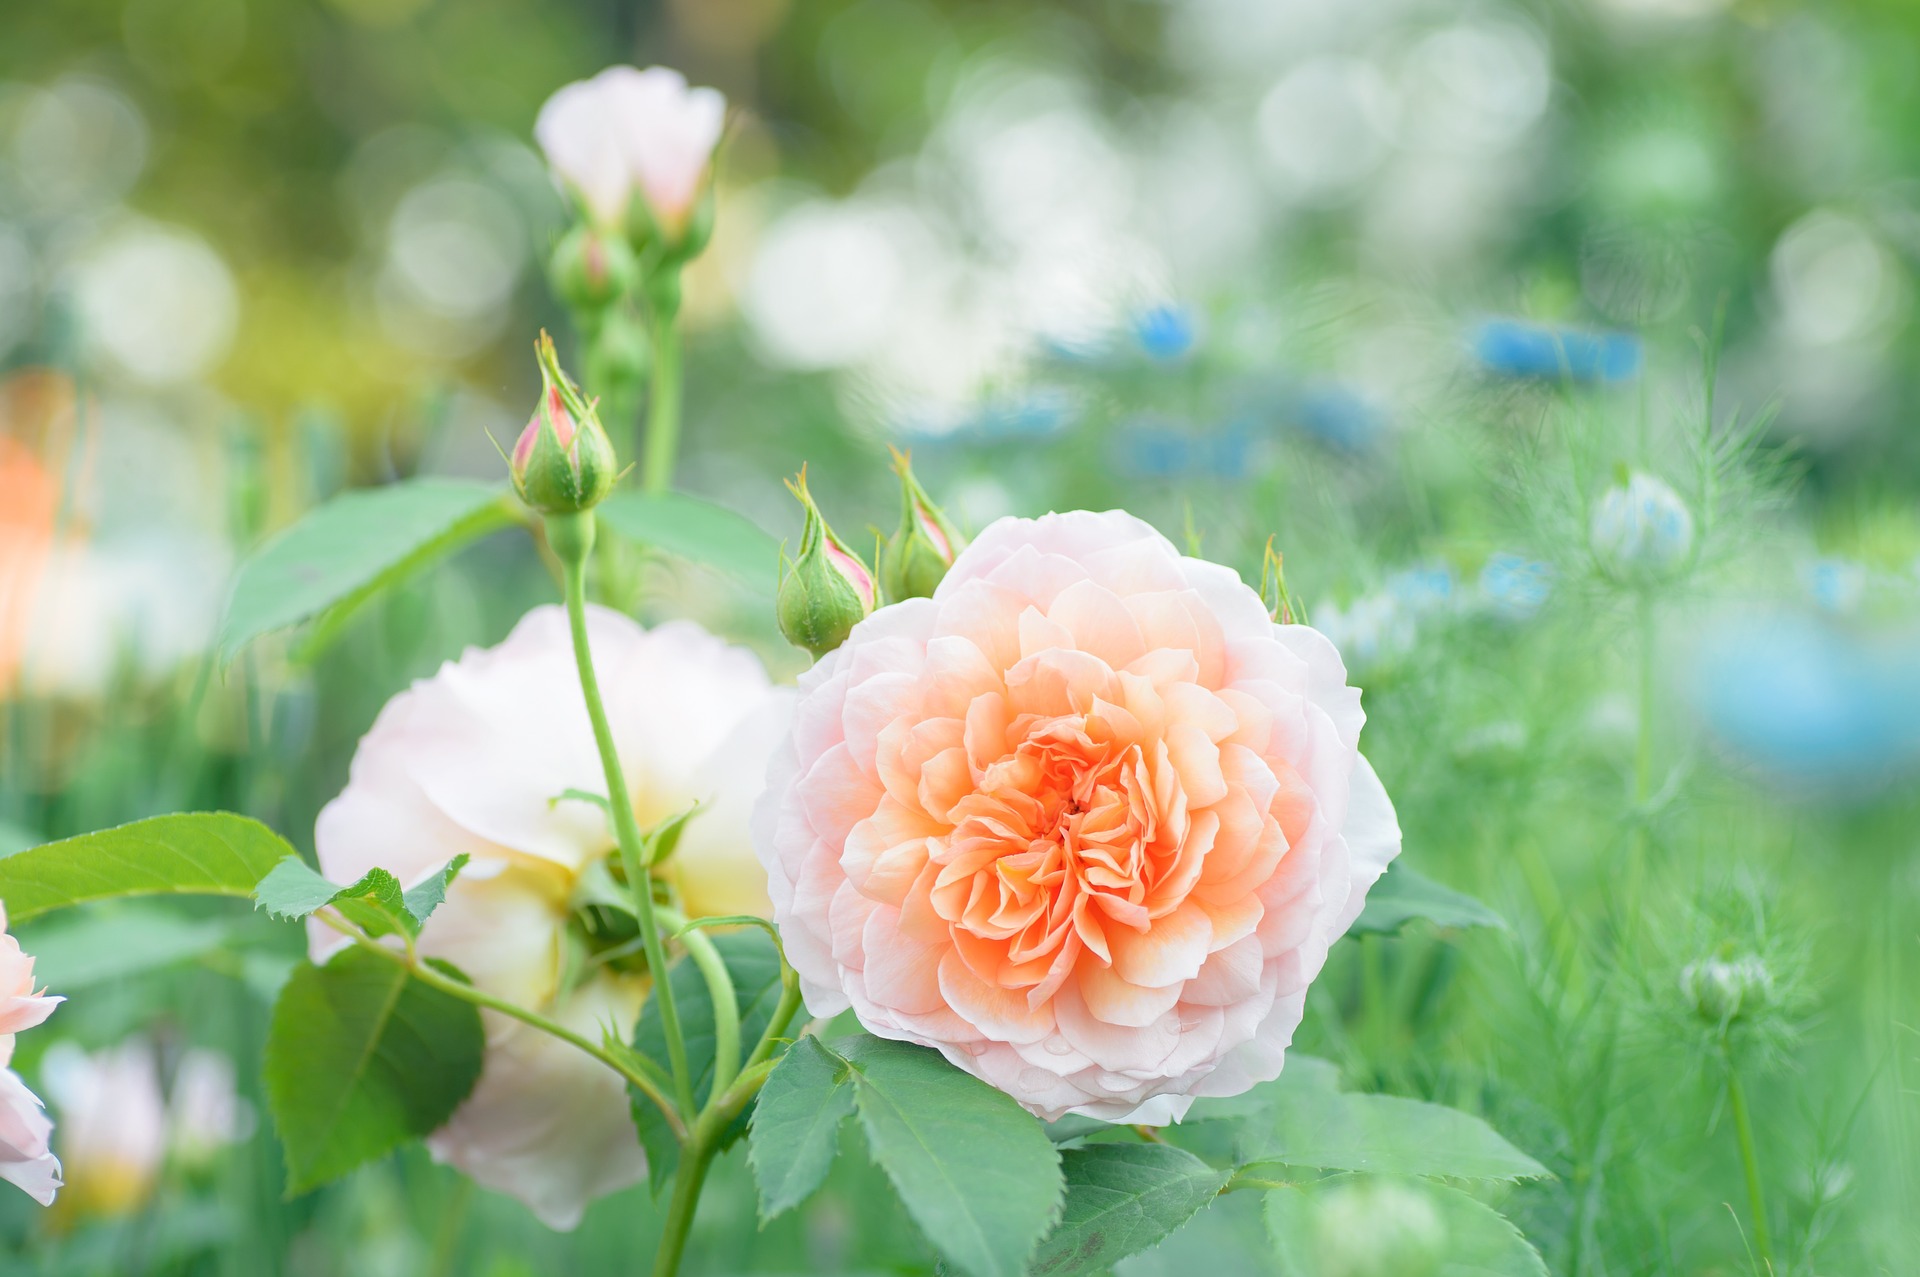
Have fun, play with the sun’s rays or the transparency of the petals.
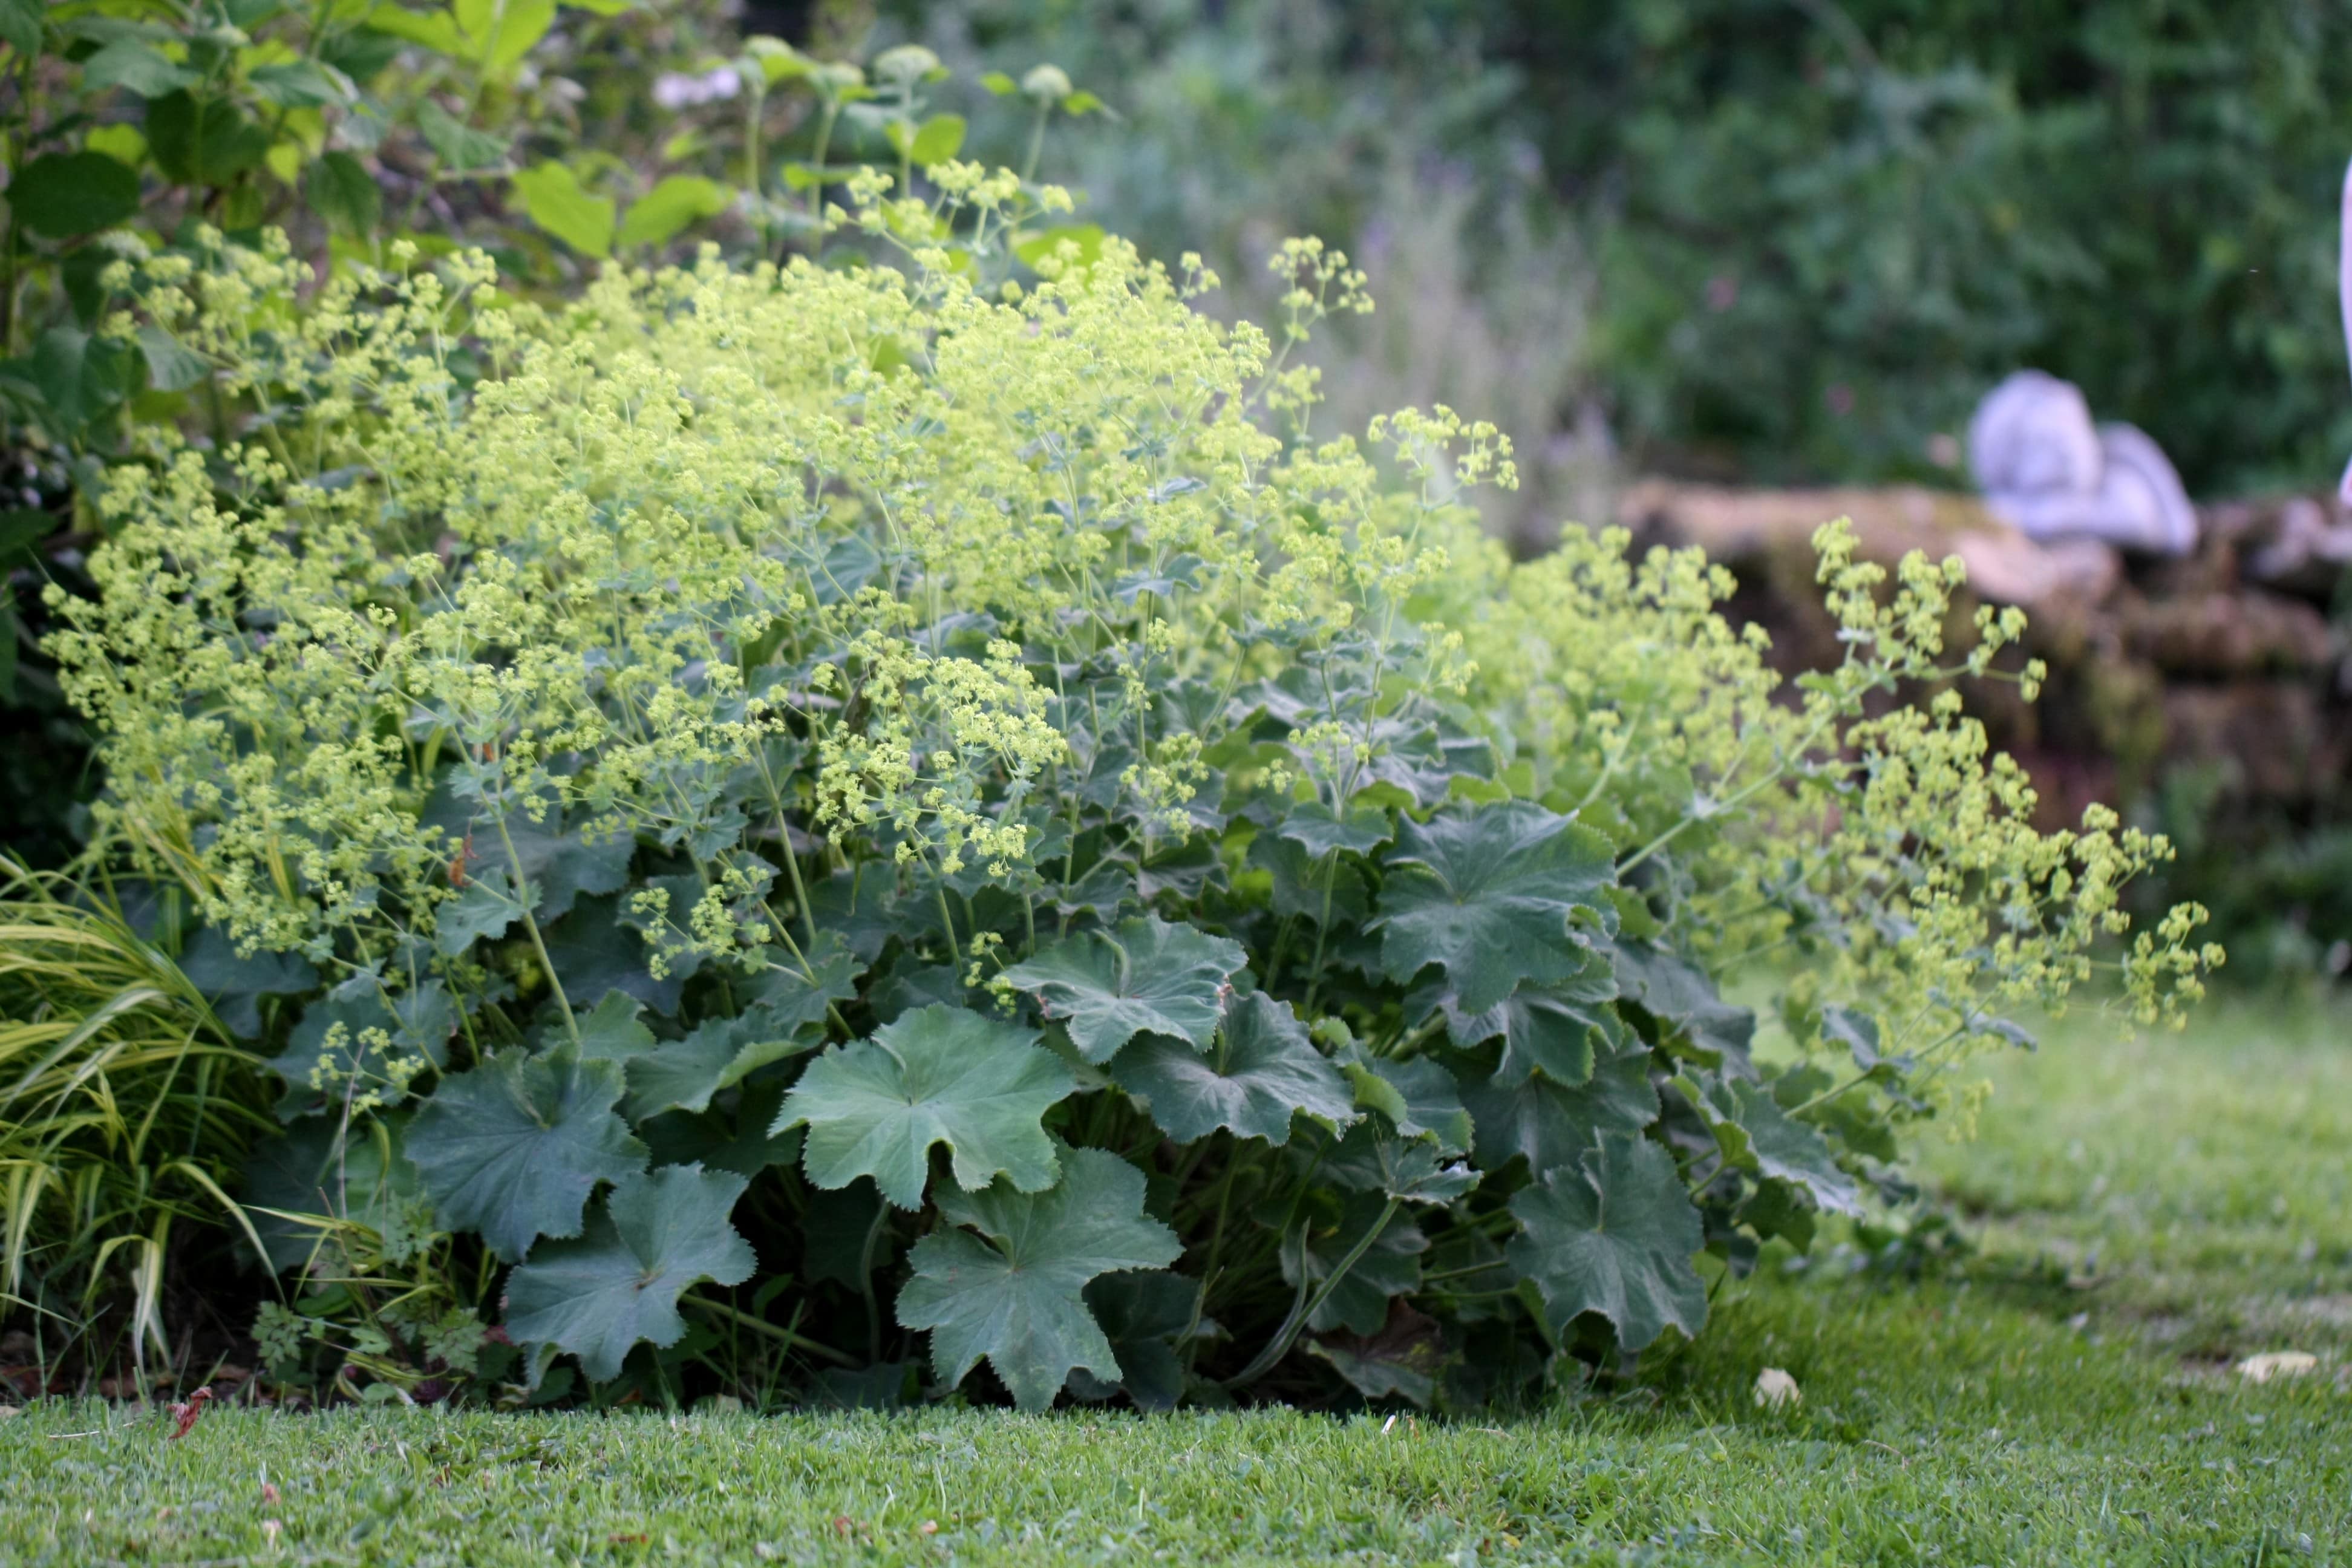
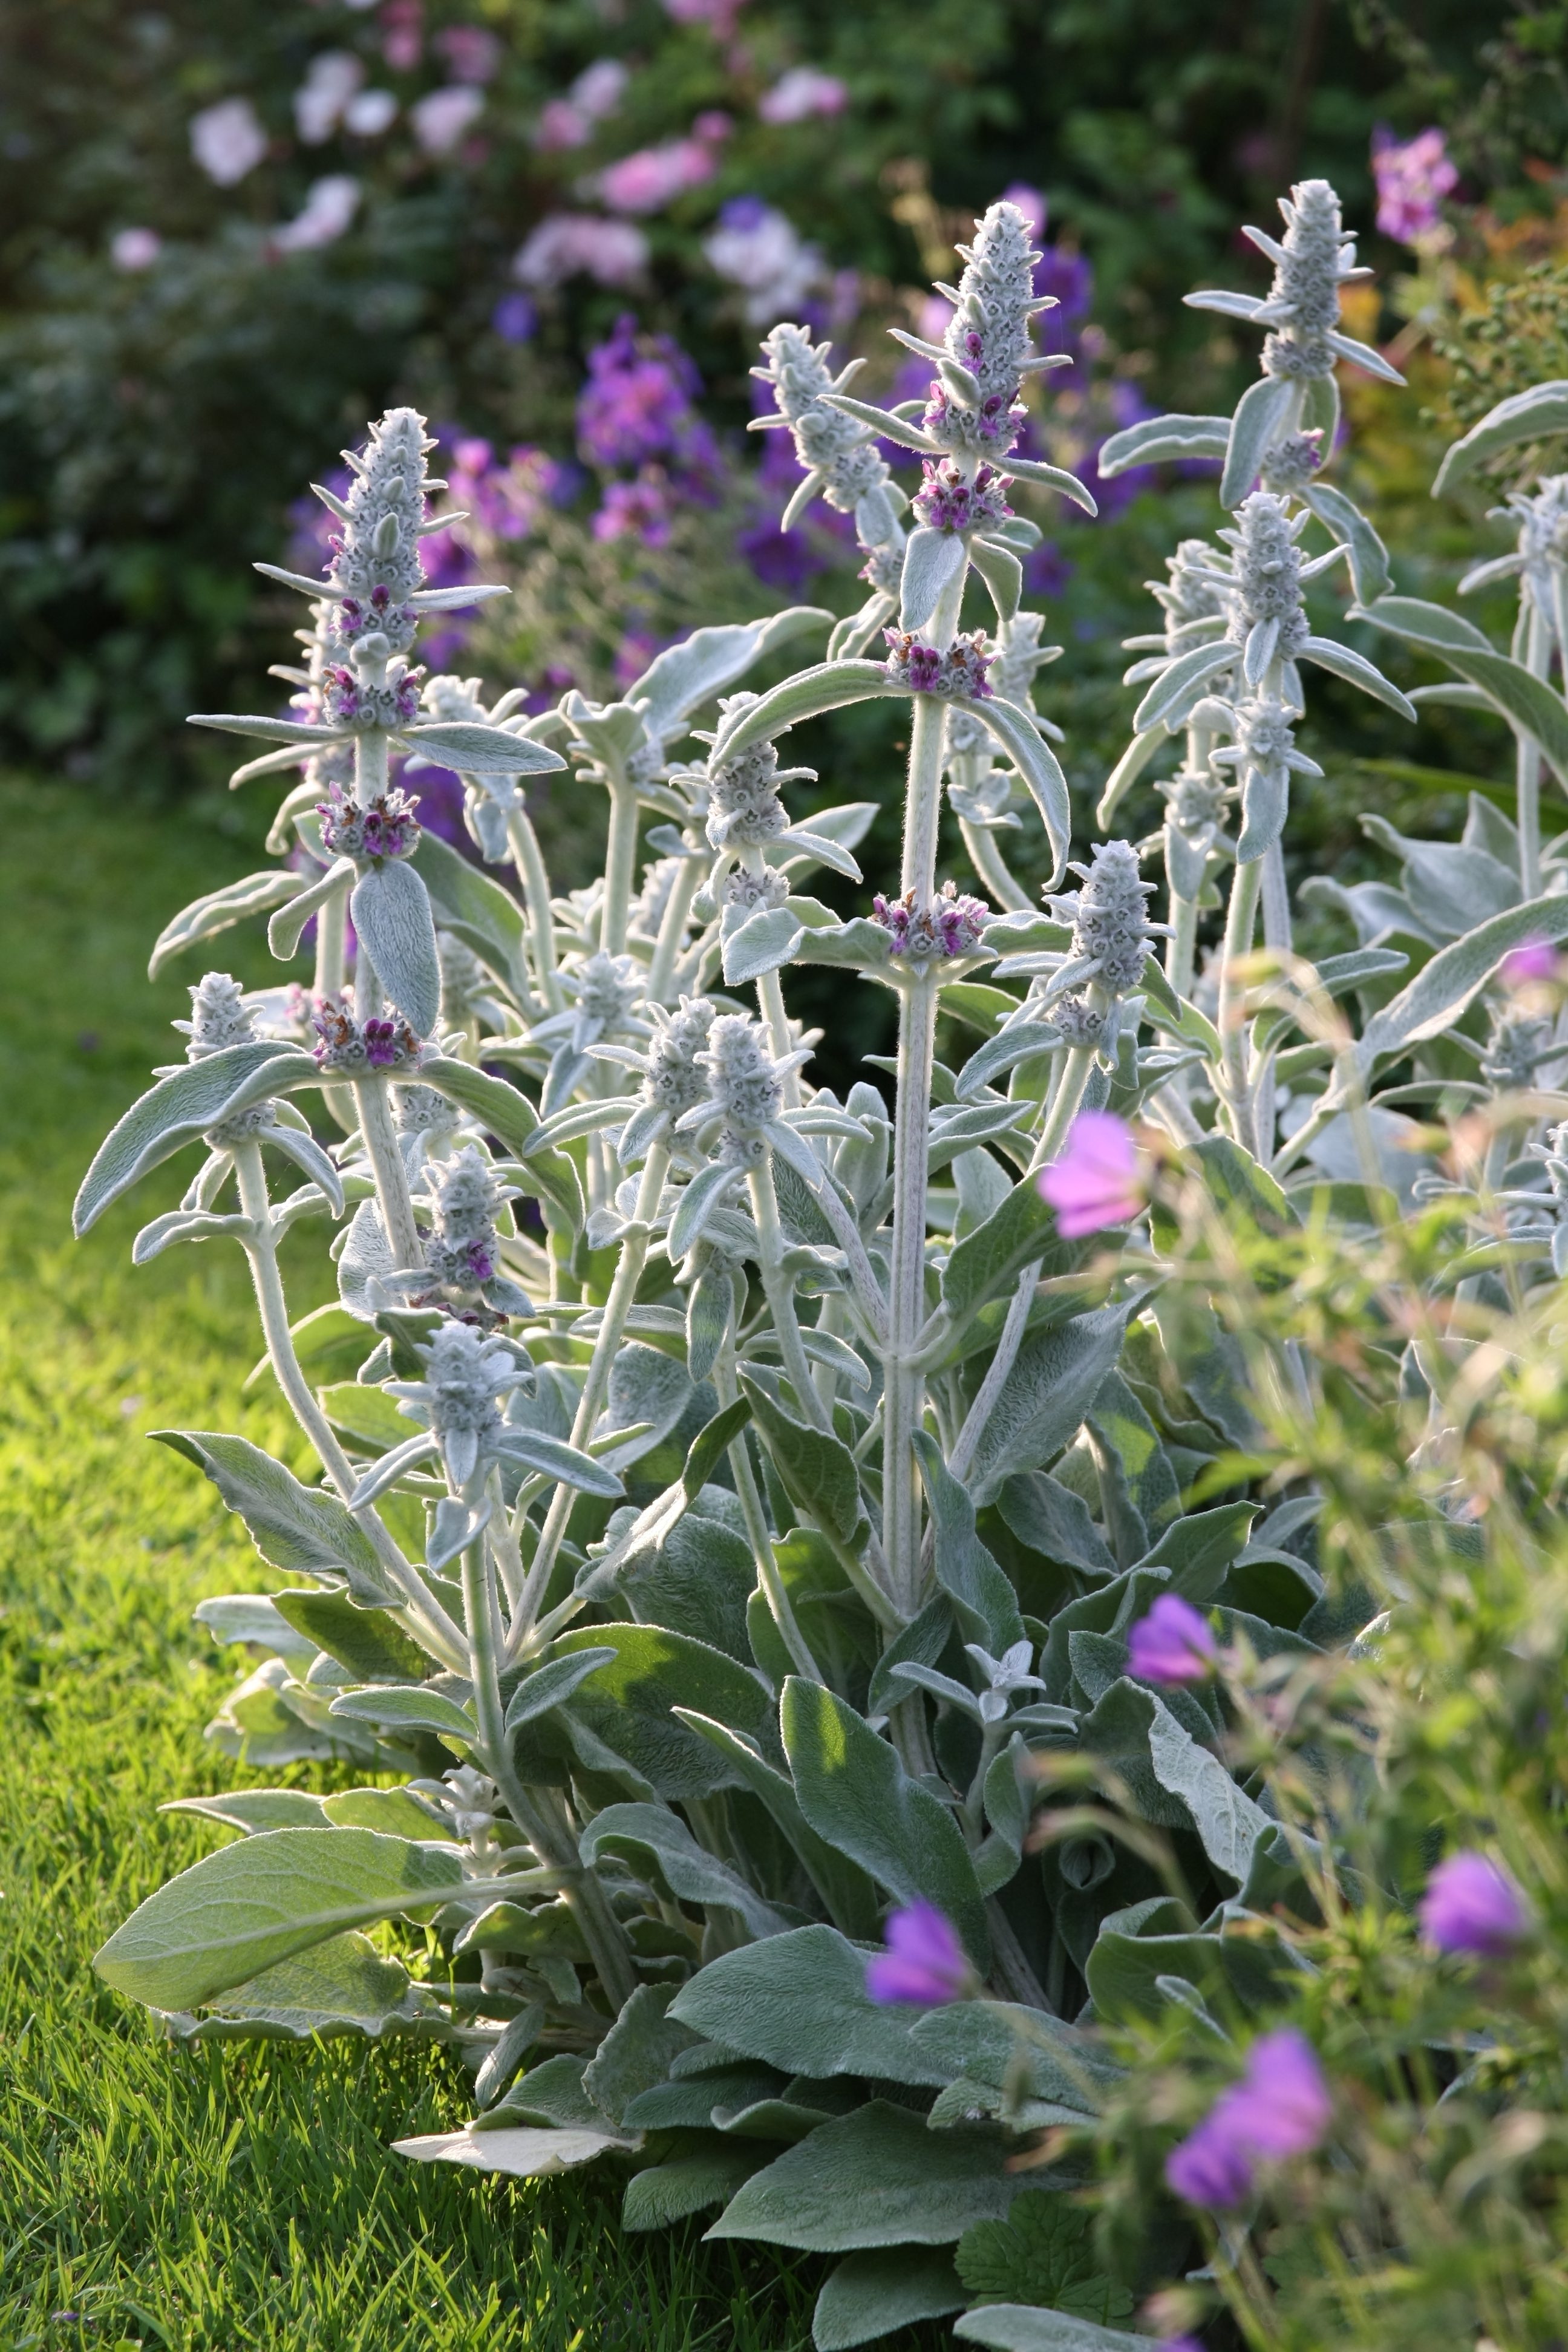 The low rays of the setting sun highlight the plant.
![]() Backlit, the sun’s rays illuminate the petals, creating a very appealing transparency.
Backlit, the sun’s rays illuminate the petals, creating a very appealing transparency.
Finally, avoid the flash! This artificial light, too powerful and direct, concentrates on one spot in the photo, and it looks awful.
4) To ruin your garden photos, nothing beats distracting elements!
The infamous blue tarp covering the neighbour's woodpile, a clothes dryer, an electric pole, the children’s red ball, a concrete wall, a garden hose, an old tin barn... nothing beats these for stealing the spotlight and ruining a photo. Don’t hold back!
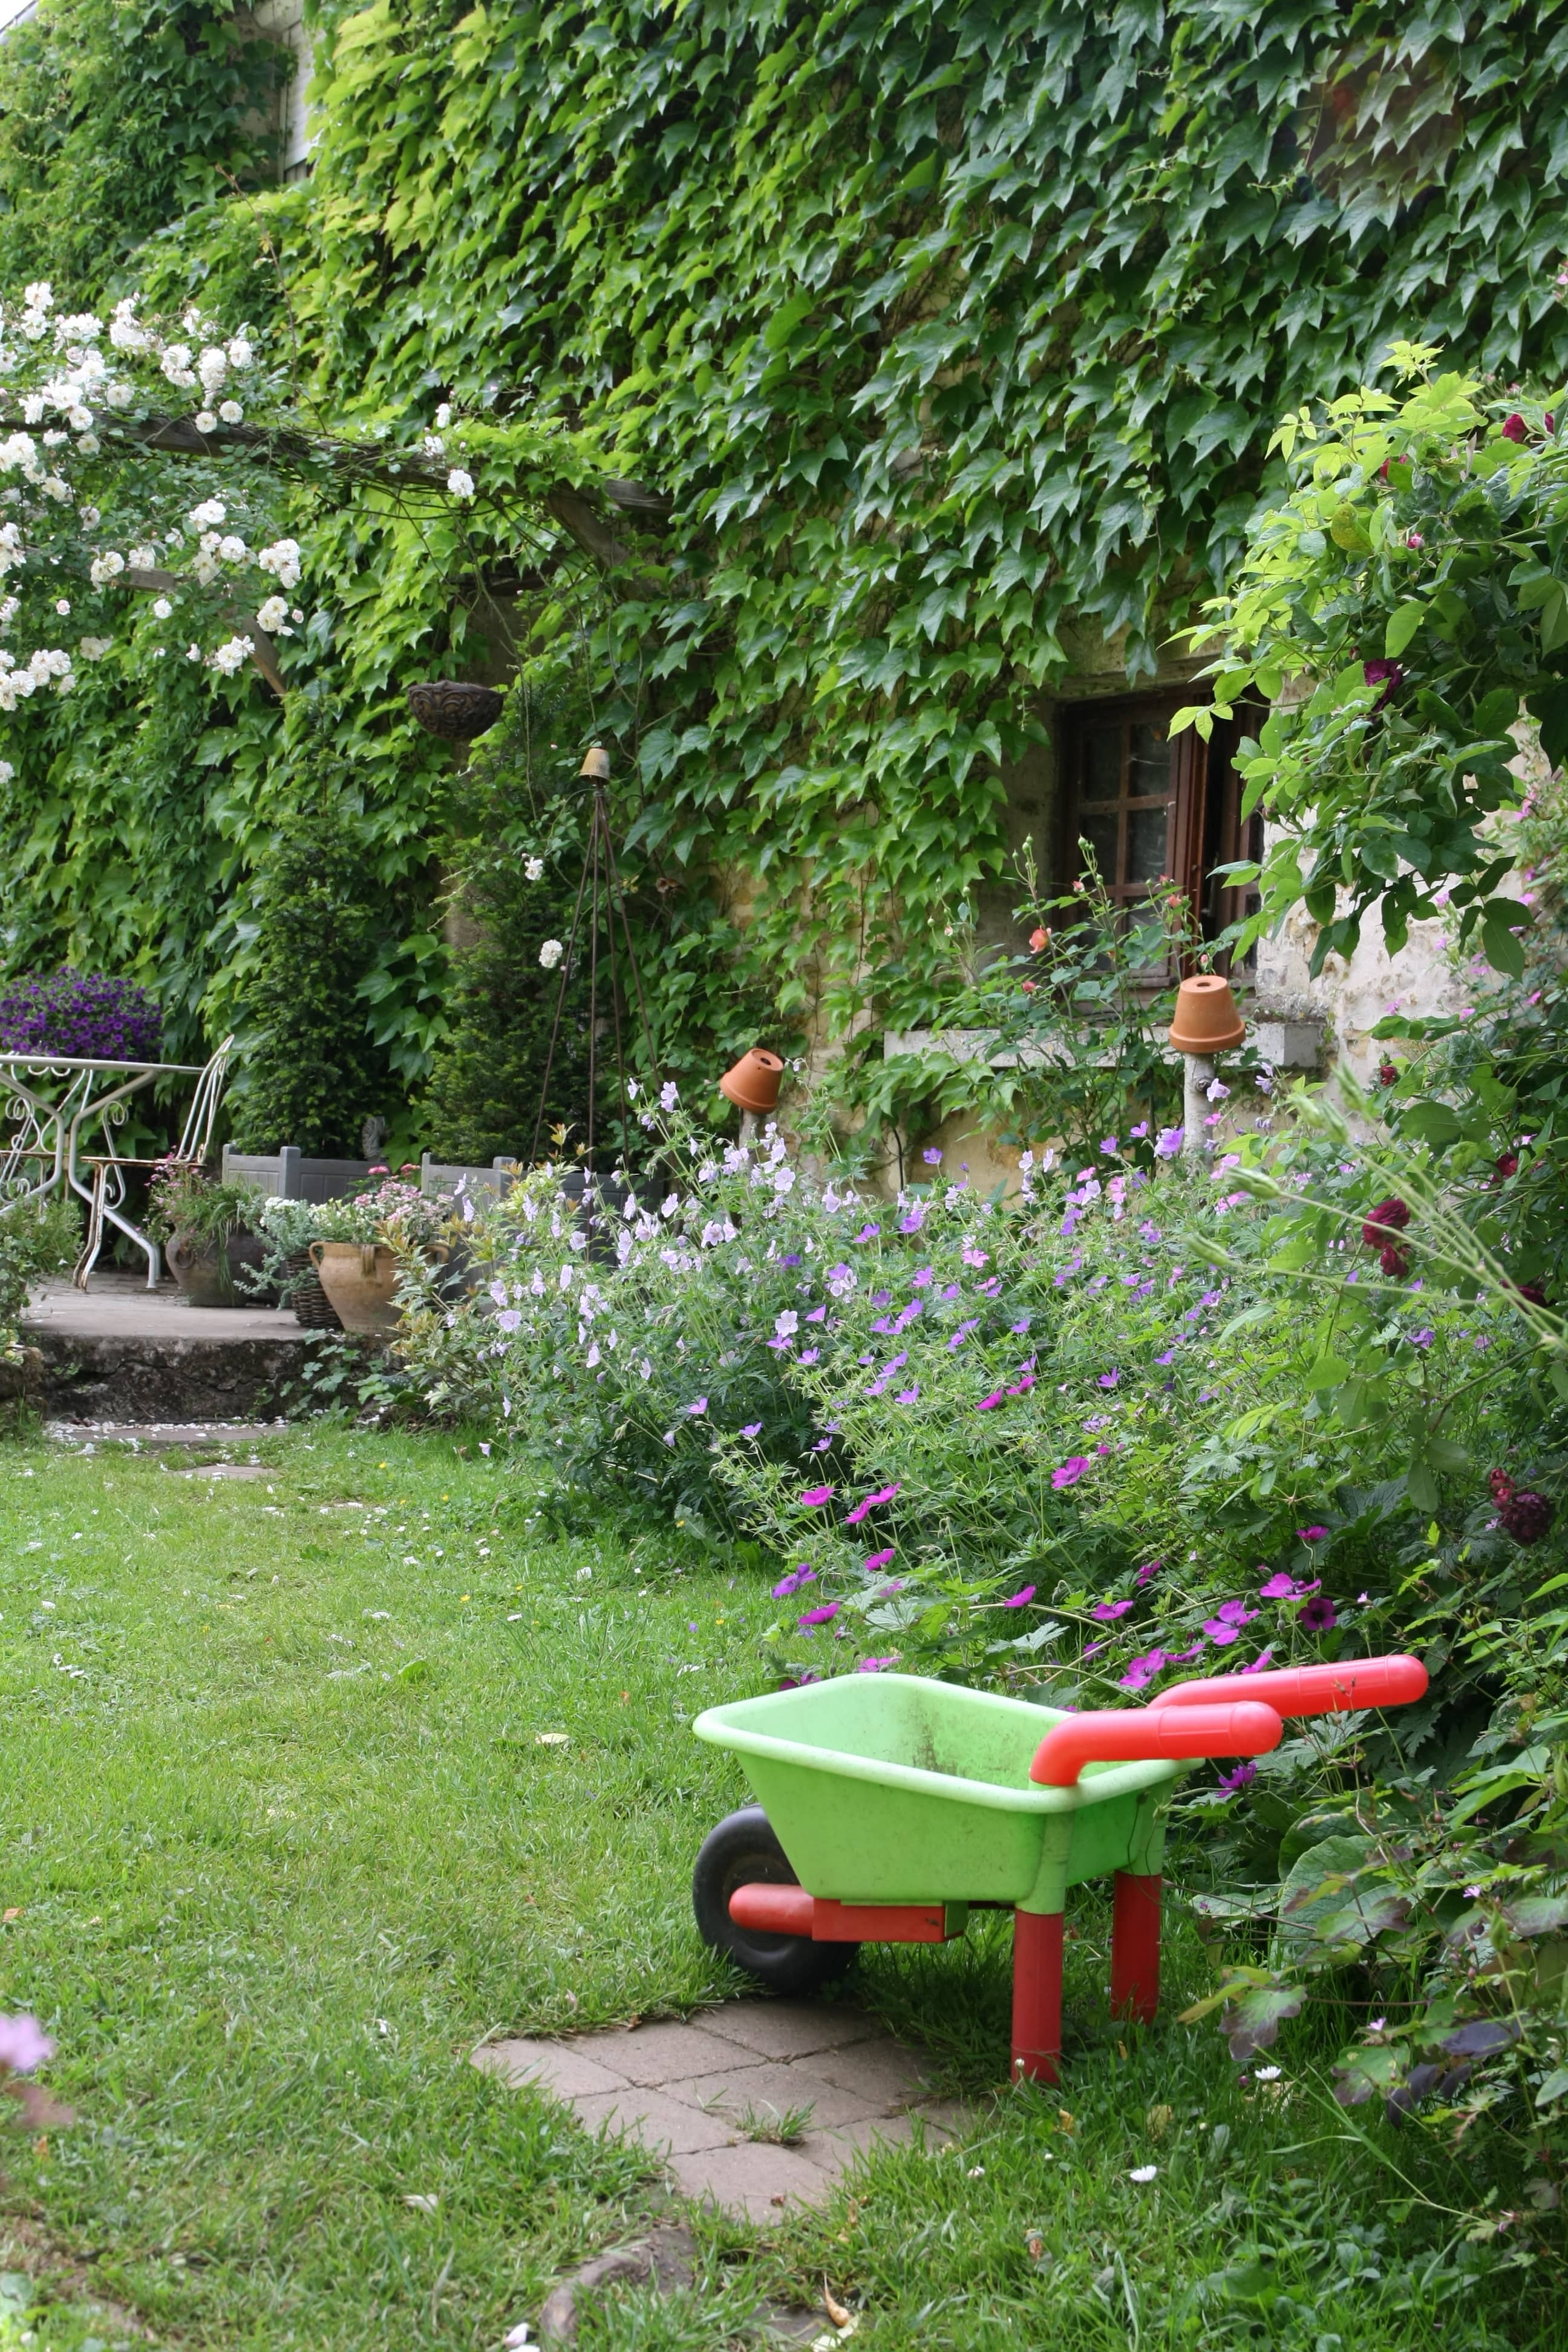 A bit large, but this photo illustrates the point well!
* * *
Remember that to avoid polluting your photos, move what can be moved, shift yourself, orient yourself differently, or crop your image to eliminate unsightly elements.
Some people consider a wilted flower, a stained or damaged leaf, or an insect on a flower to be distracting elements. A bit like a hair sticking out of a model's nose... or a few wrinkles at the corners of the eyes, for purists. In fact, it depends on the rendering you wish to achieve: aesthetic or authentic. It’s a personal choice.
5) To ruin your flower photos, always shoot from above!
Want flatness, boredom, and flowers that look like plates? Treat yourself to close-ups from above... guaranteed feeling of being crushed!
* * *
Photos taken from above are not forbidden: this angle is useful when you want to show the details of a flower. However, it tends to flatten all relief.
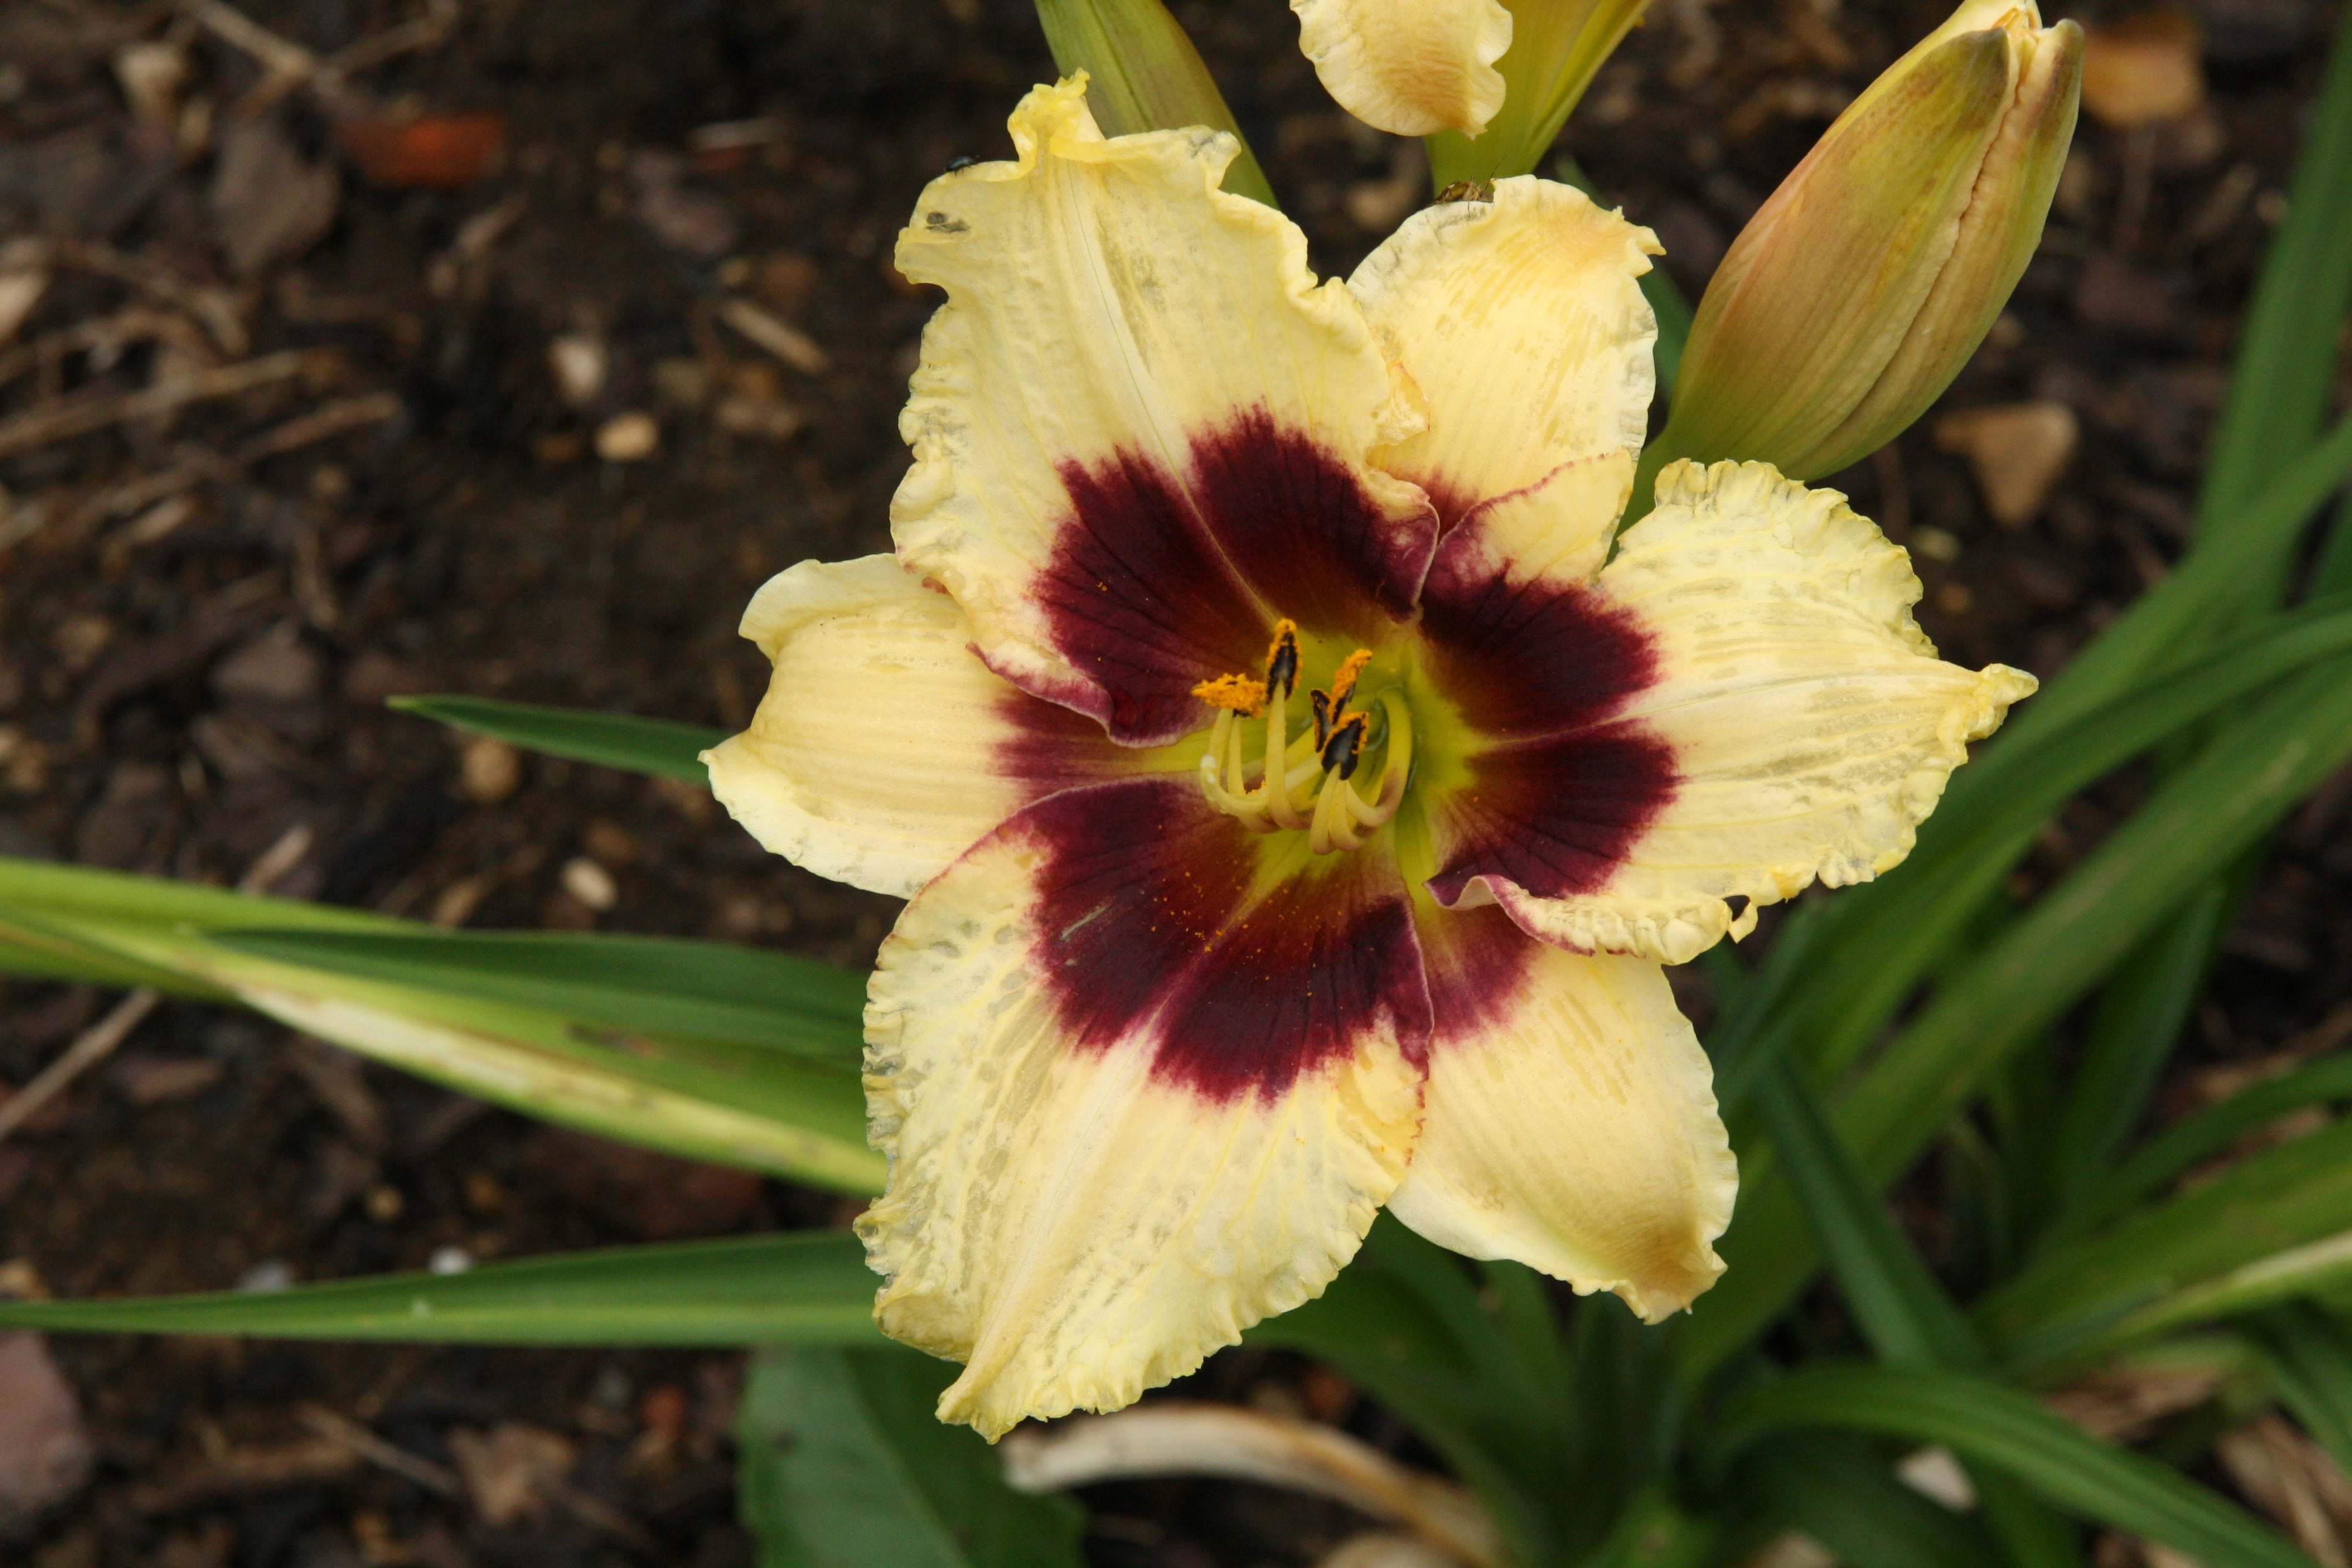 Photo taken from above: the flower is flattened, and the earthy background isn’t great!
Don’t hesitate, transform yourself into a contortionist acrobat photographer! Innovate, take risks, and vary your angles. Dare to use side angles, underneath, low angles, etc.
 Side photo: the petals give an impression of volume and relief.
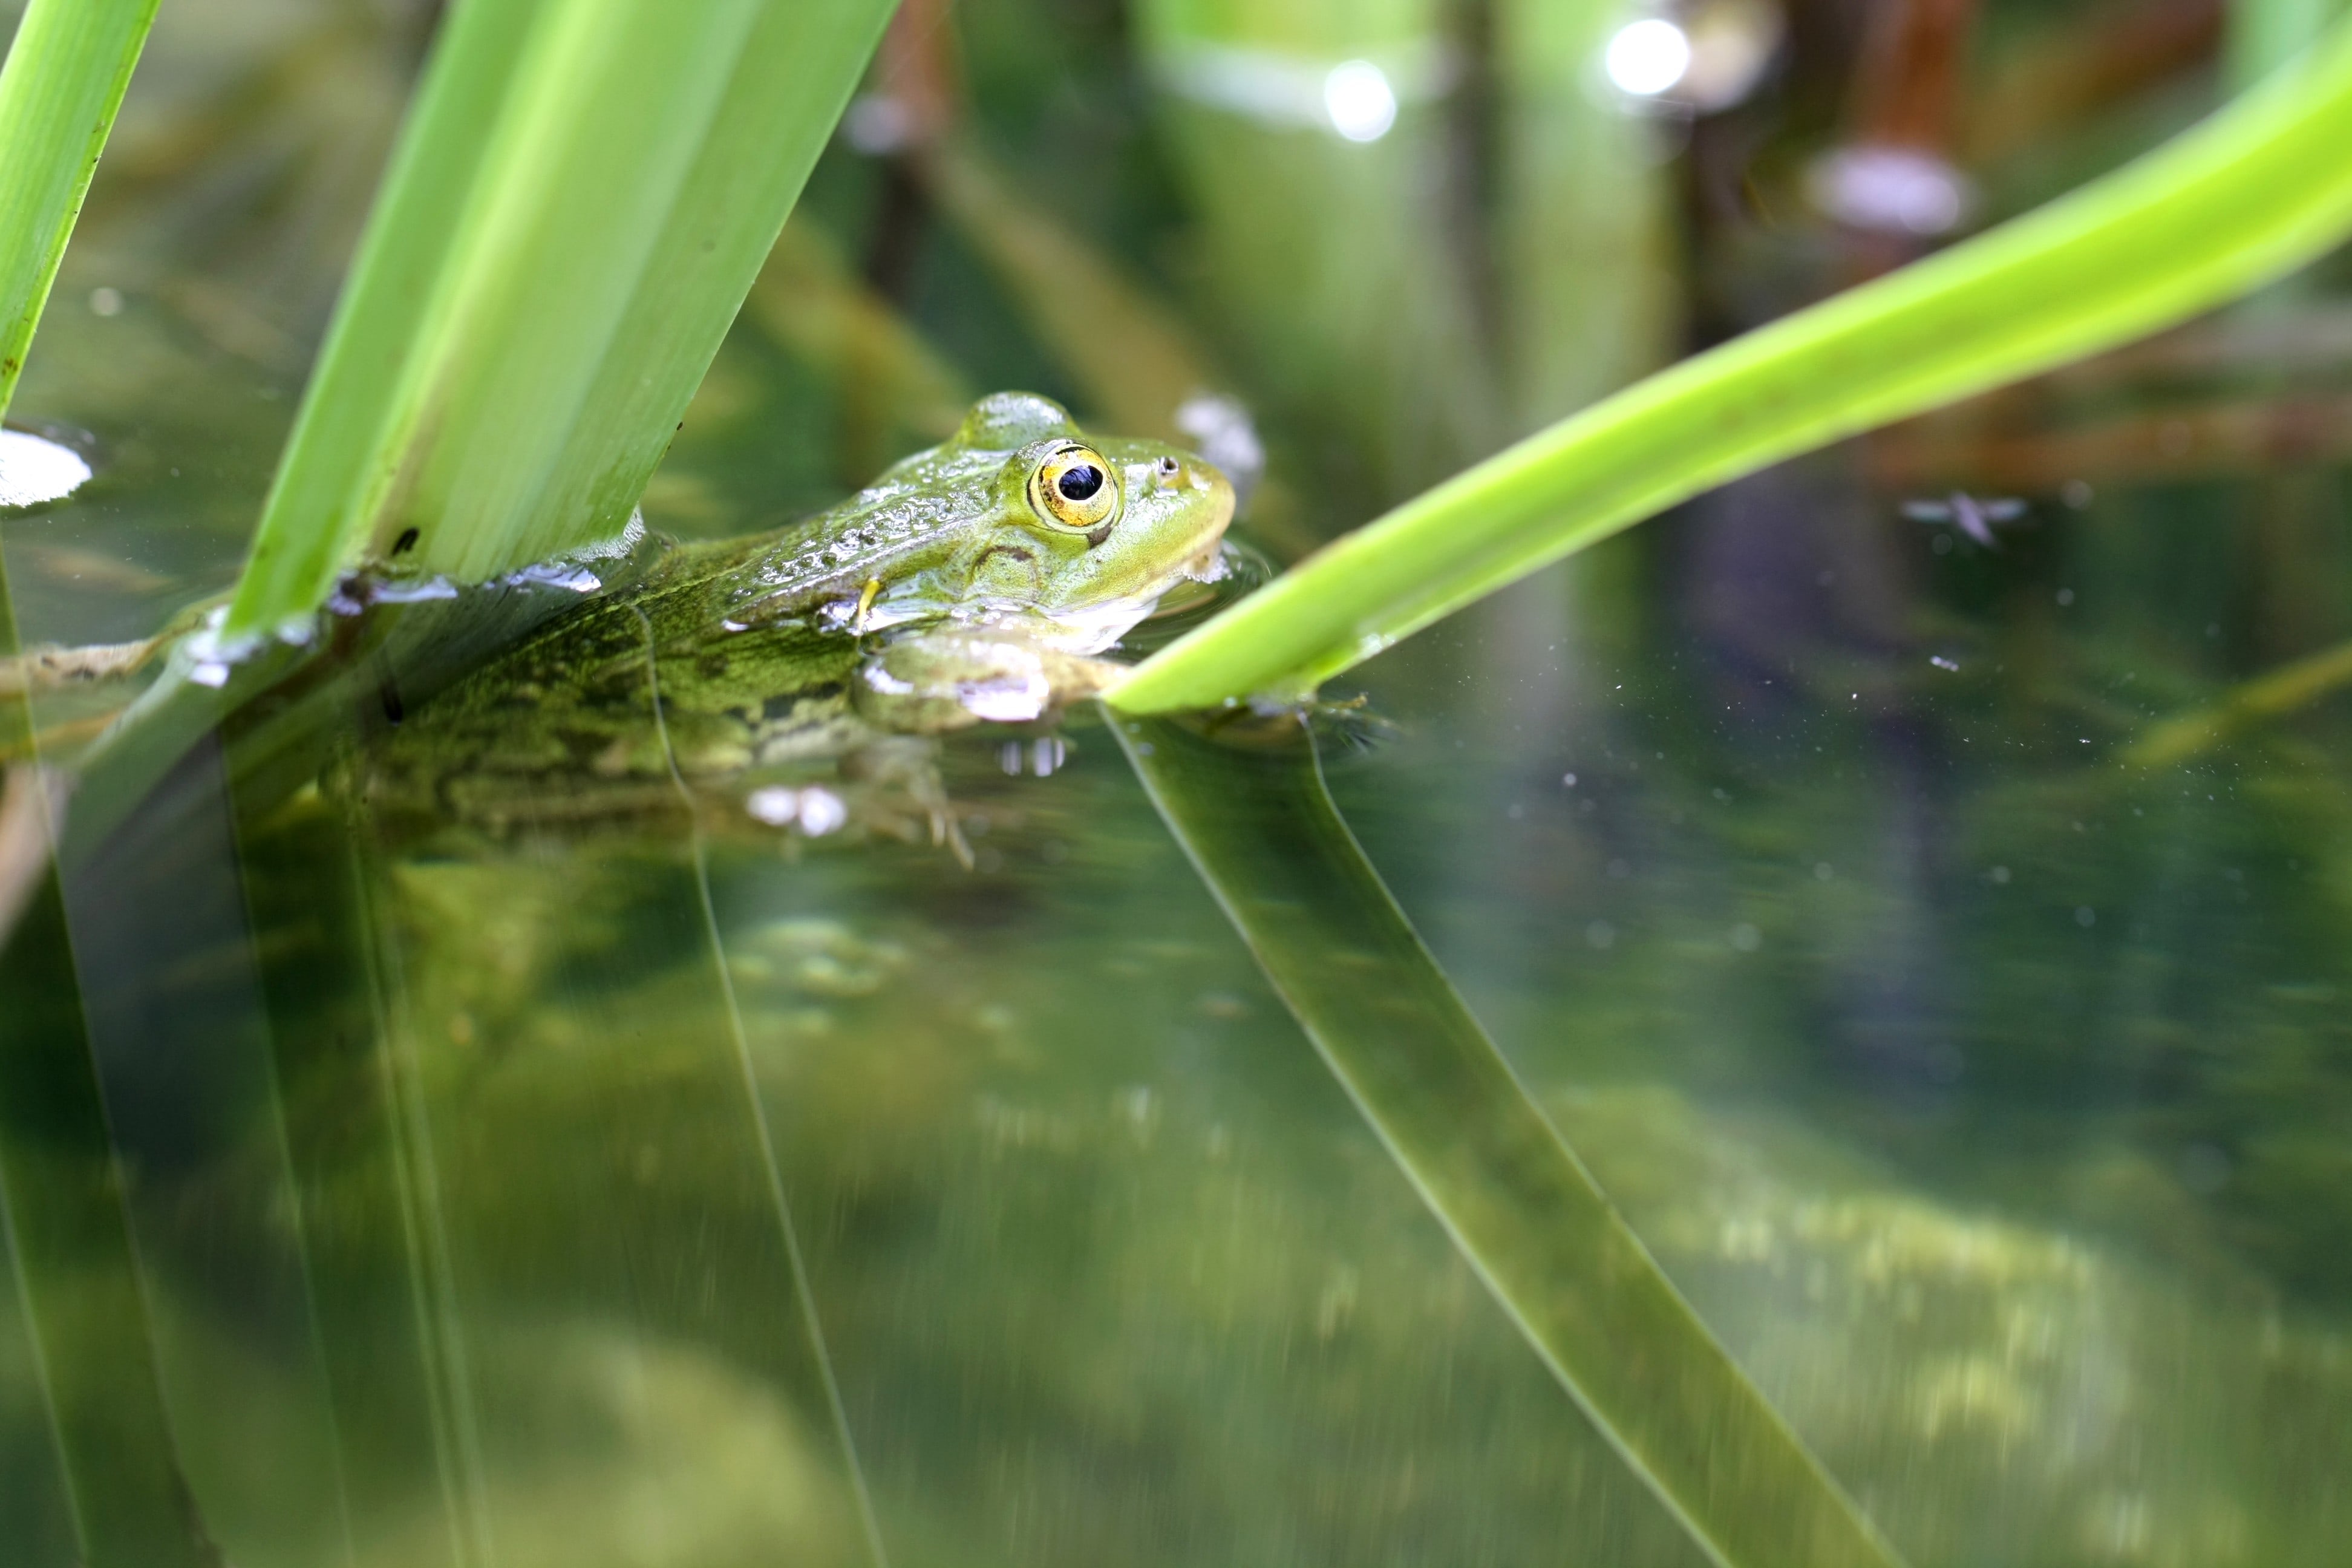
Get down to the plants' level too. The ground is low, yes, but don’t hesitate, crawl, it changes everything, and you’ll get some amused looks from your furry or feathered companions.
 Getting down to their level allows you to appreciate the plant in a different dimension.
6) To ruin your flower photos, drown them in overly vast backgrounds
To have a completely objective and complete view of the subject, photograph your plants in their entirety: flowers and leaves.
* * *
Photographing a flower lost in an ocean of foliage is such a shame! Fill the photo well, tighten the framing, or get as close as possible: these are the rules to truly highlight a subject.
 On the left: the flower is lost in the photo. On the right: the framing is tighter, and the angle gives an impression of volume.
And why not capture just a piece of the flower? You don’t have to photograph the flower in its entirety. However, when taking detail or macro shots, it’s important to have enough light. If necessary, increase the ISO sensitivity.
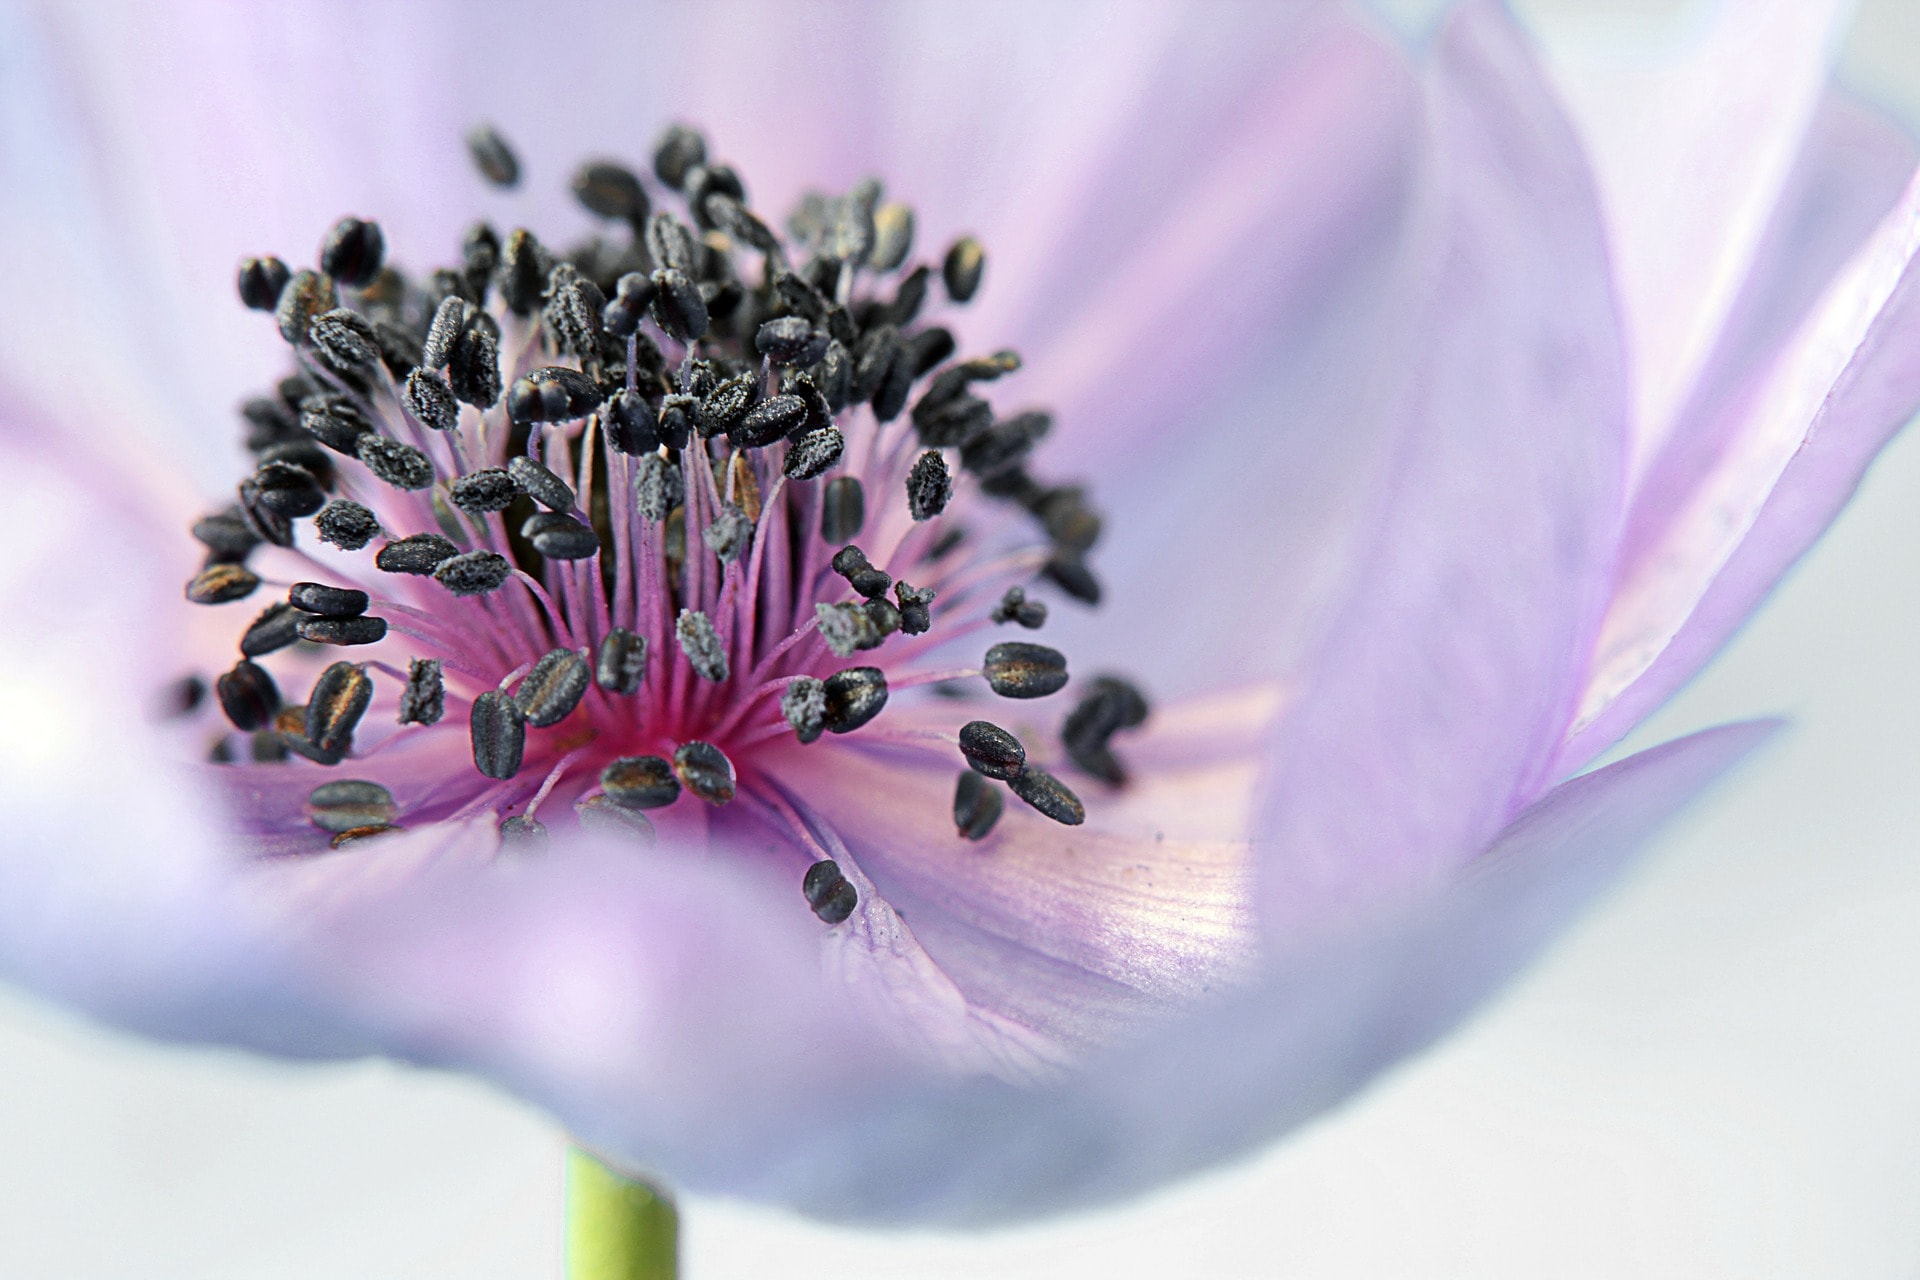 Zoom on an anemone's heart and its stamens.
Like old films: be sensitive. Observe the garden, refine your gaze, and spot scenes that could turn out beautiful, associations of flowers or foliage that please you. And even if the framing isn’t perfect, you can still get lovely photos.
7) To ruin your photos, use automatic mode
Photographing in automatic mode (AUTO), you’ll see, it’s magical: just a slightly grey sky, a somewhat shaded spot, or backlighting, and when it’s time to take the photo, the flash automatically triggers (that’s the principle!) without asking your opinion. Of course, it flattens everything in the process: colours and depths... What does it matter since you won’t have to do anything!
* * *
To take beautiful images without too much effort, use the programmed automatic mode (P). With this, the camera chooses some appropriate settings while still giving you some freedom. The speed/aperture couple is pre-selected, but you have control over these parameters by turning a dial on your camera (to be checked according to models). This allows you to modulate the depth of field, for example. You can also adjust the ISO sensitivity depending on the lighting conditions. And finally, you won’t be bothered by the flash.
8) To ruin your photos, use digital zoom
Why bother getting closer? Using digital zoom is much more convenient because photographing comfortably from your terrace is definitely more comfortable.
* * *
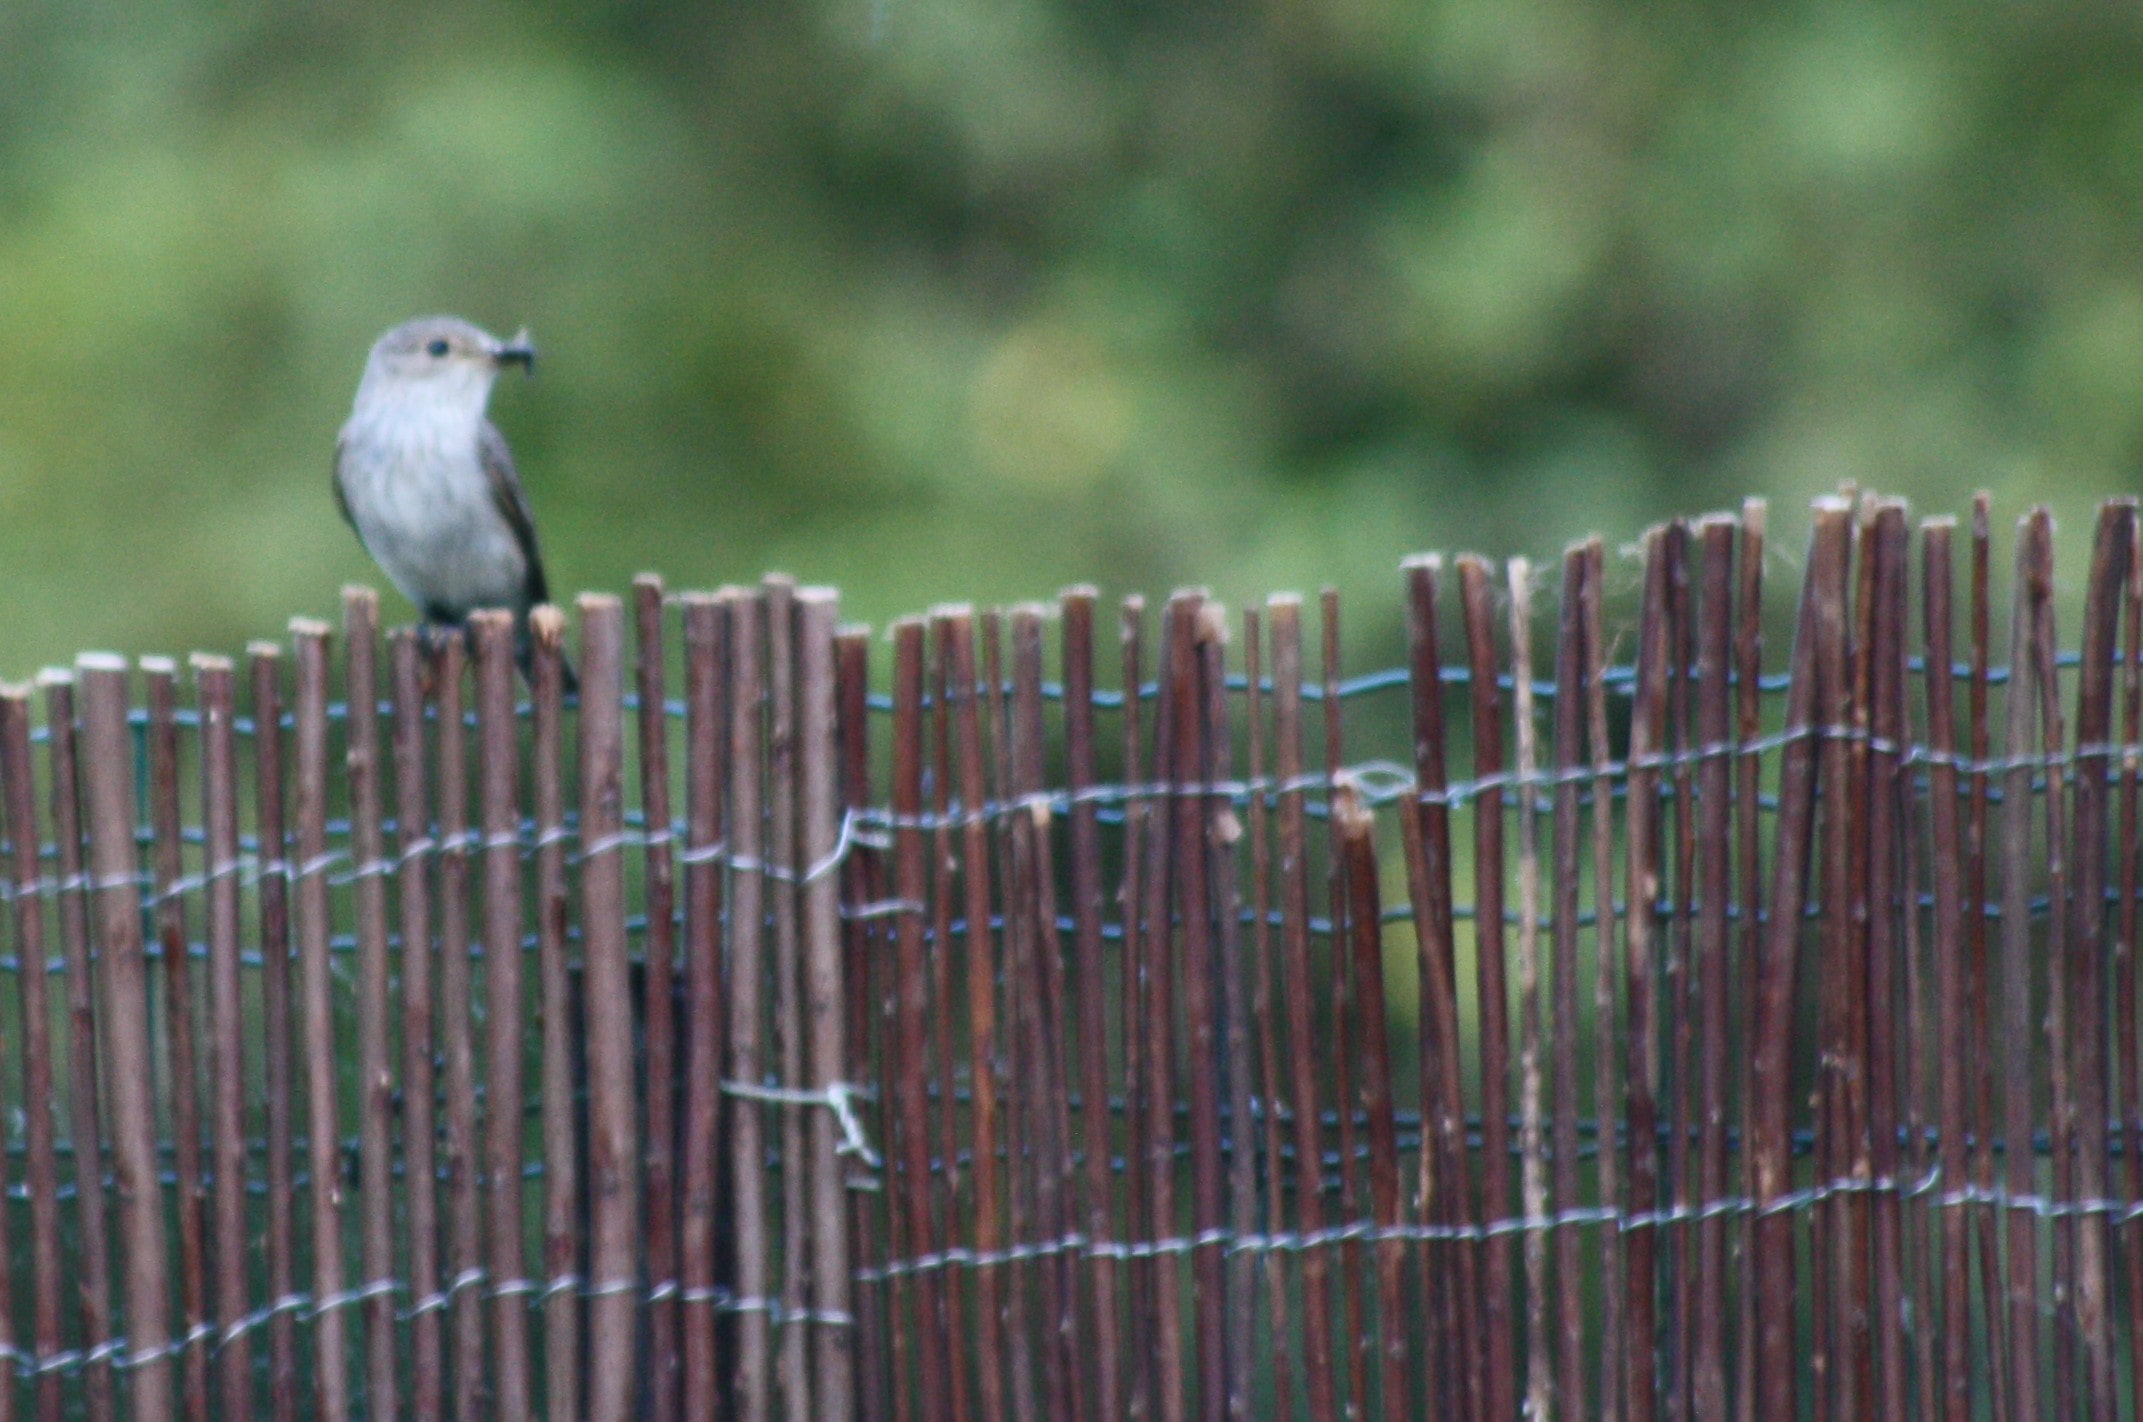
Do you want to photograph a bird, but you’re a bit far away? Instead of pressing the little button to zoom in, get as close to your subject as possible, even if you have to crop later on your computer. Indeed, digital zoom leads to a significant loss of sharpness. The quality becomes quite mediocre.
Another option is to invest in a macro lens. Besides being able to take photos with incredible detail, this accessory also allows you to photograph insects without having to get too close. It’s ideal for not scaring the critter and perfect for those who prefer to admire from a distance! That said, at the slightest wind or tremor, the photo will be blurry. Macro photography requires a bit of dexterity, but you quickly get the hang of it; use a tripod if needed.
9) To mess up your flower photos, drown your subject in a too-busy background!
Don’t choose; make sure everything is sharp and clearly visible, in every detail: the foreground and background. They blend together, and it’s perfect for making the eye lost, not knowing where to focus.
* * *
Depth of field is one of the basics of photography: pay attention to the different planes!
Know that a strong depth of field (f/18 aperture, for example) keeps sharpness in both the foreground and background, which is interesting for general views of the garden. Conversely, a shallow depth of field (f/4, for example) blurs the background and isolates the subject, which is what we seek when photographing a flower.
In practice, select the “aperture priority” mode (Av or A). You’ll just need to adjust the aperture represented as follows: f/number.
 Left photo: 1/15, f/18 and ISO 800 – Right photo: 1/100, f/4 and ISO 200
Whenever possible, try to have a background in shades of green or at least somewhat uniform, or a blue sky to make the subject stand out even more.
10) To ruin your flower photo, ignore the rule of thirds and centre your subject
It’s really very simple: focus and place your flower right in the middle!
* * *
Photography is also an art, and the spectacle is alive! Think of your photo as a stage scene, with its main character and possibly its secondary character(s). The main character should attract the eye, the attention. To do this, place it in front, in a strategic location. This is where the rule of thirds comes into play.
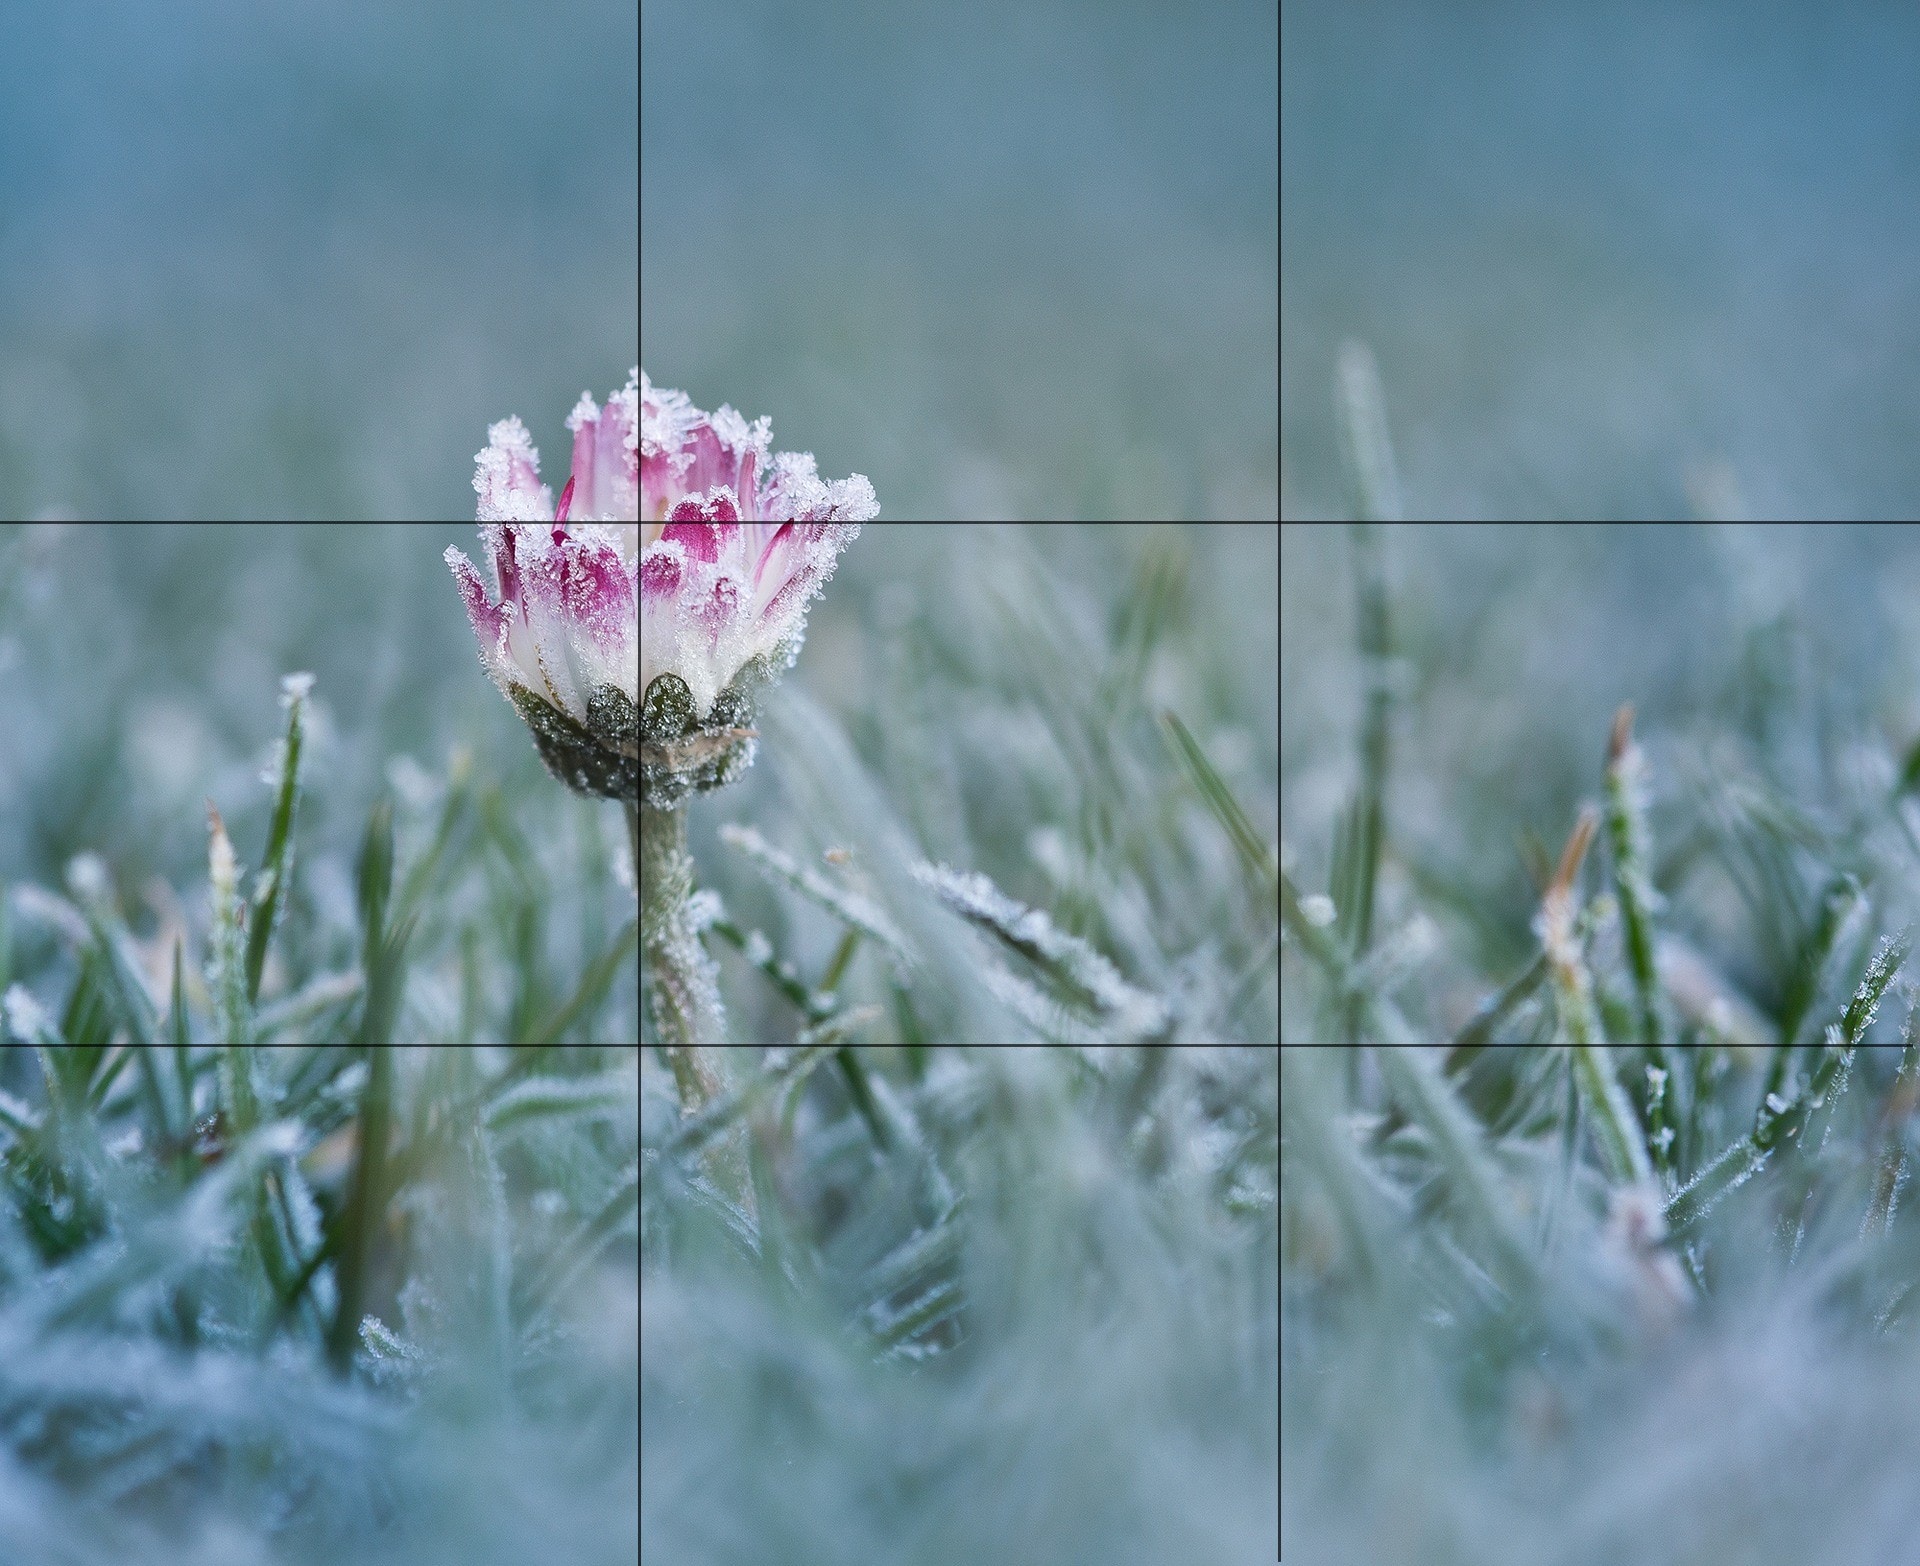
Imagine the image divided into nine equal parts, divided by two horizontal and vertical lines that are equidistant, called the lines of thirds. The important subjects of the photo should be placed along these lines or at their intersections, which constitute strong points.
In conclusion, it is of course possible to take a bit of liberty; some photographers do not hesitate to break the rules and obtain stunning shots, even with a good mobile phone.
But this is often for a specific purpose, and one must first master their camera and the basic rules of photography.
The digital age allows us to take as many shots as we want. Enough to practice and improve. You are now ready to take beautiful photos of your garden! Get your cameras ready and have fun... and don’t hesitate to share your best images on our site, it’s possible!

Comments