


Modified the 4 September 2025 by Sophie
3 min.
Autumn
Difficulty:
Débutant
Halloween is fast approaching, and at this time of year, children and adults alike enjoy decorating house, entrance and windows to play at being scared! Original Halloween pumpkin, the great classic is the traditional pumpkin transformed into a spooky lantern. Follow our step-by-step tutorial to make a Halloween lantern.
Which pumpkins to use for a Halloween lantern?
- Traditionally, the Halloween pumpkin "Jack O'Lantern" is used. This pumpkin is as tasty as it is decorative and is traditionally used to make lanterns
- Variety 'Jack Be Little' produces spherical fruits, flattened at the poles and deeply ribbed, resembling mini pumpkins 5 to 8 cm in diameter: ideal for mini lanterns that are all cuter than the next
- Butternut squashes, the Muscade de Provence squashes or red kuri squashes for example can also be used for original Halloween pumpkins, in a variety of shapes and colours
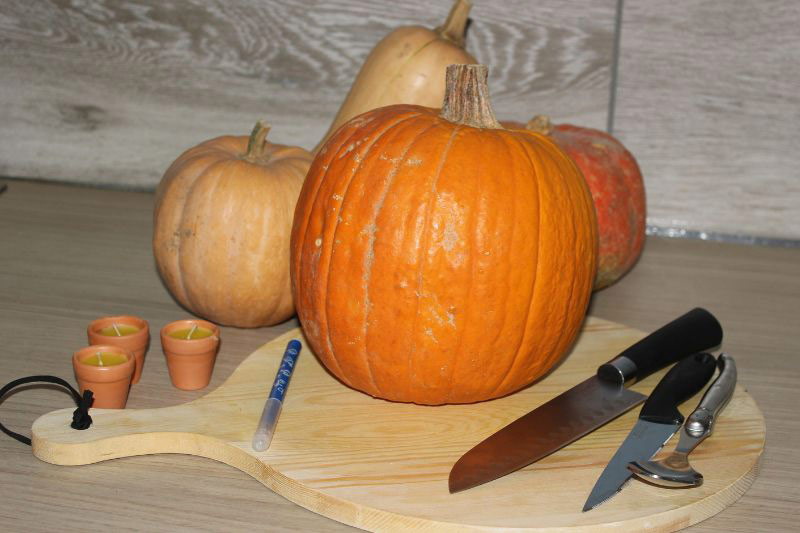
What do I need?
- one or more pumpkins
- a water-washable marker
- a chopping board
- a sharp, pointed paring knife
- a large kitchen knife
- a spoon
- a small candle (tealight or other) or an LED candle
How to make the Halloween lantern?
- Wash the pumpkin
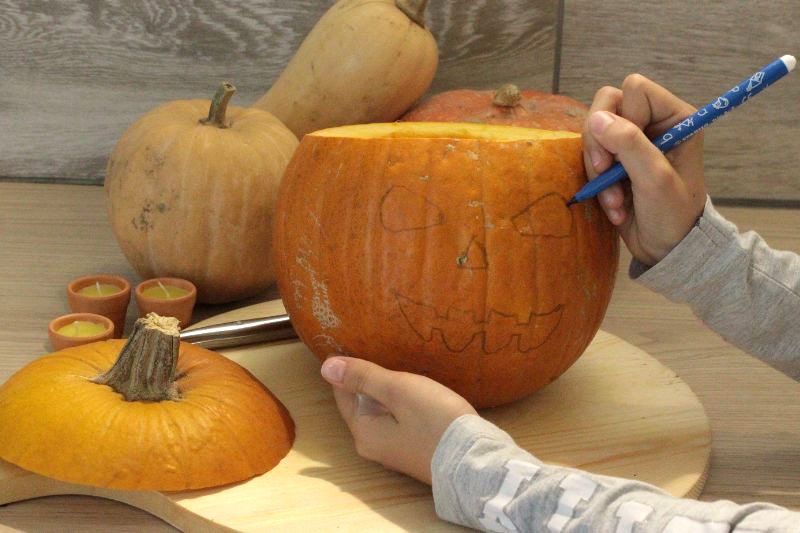
- Cut out the top of the pumpkin using a large kitchen knife and set it aside
- Draw the "face" of your lantern on the pumpkin: eyes, nose and mouth. You can ask a child who will be delighted to do it. Make sure the face is scary, well proportioned and centred on the pumpkin and does not include too many small details, as you will then have to cut out the eyes, nose and mouth with the knife.
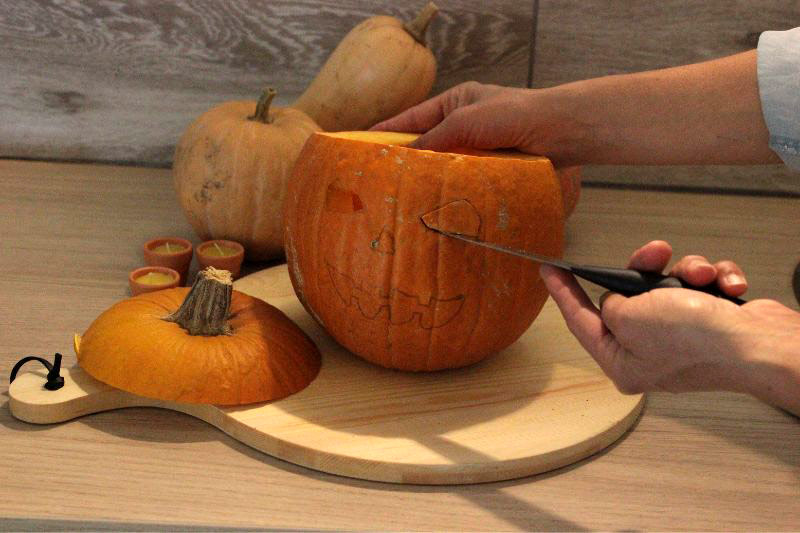
- Scoop out the pumpkin using the knife and the spoon. Put the seeds in the compost (or keep some to re-sow next year). The flesh can of course be kept and cooked (soup, purée...).
- Once the pumpkin is hollowed out, cut out the facial features using the paring knife. Remove the cut pieces by gently pressing them inward and set them aside
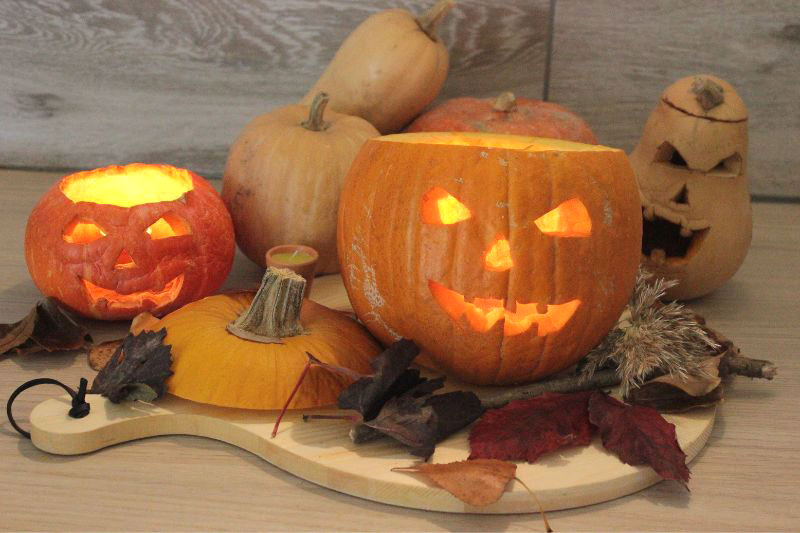
- There you have it — your lantern is finished; it can hold real candles provided you don't replace the lid. Alternatively, you can opt for LED candles, which are safer with children
Tips and advice
- Create a spooky autumn display with your lanterns and colourful autumn leaves!
- Only make your lantern a few days before Halloween; hollowed-out pumpkins don't keep well and will eventually rot.
- Place your lantern on a non-fragile surface such as a plate, saucer or board to avoid moisture or mould stains on furniture


Comments