


How to water your potted plants while you’re on holiday?
Discover our tips and the most effective techniques
Contents
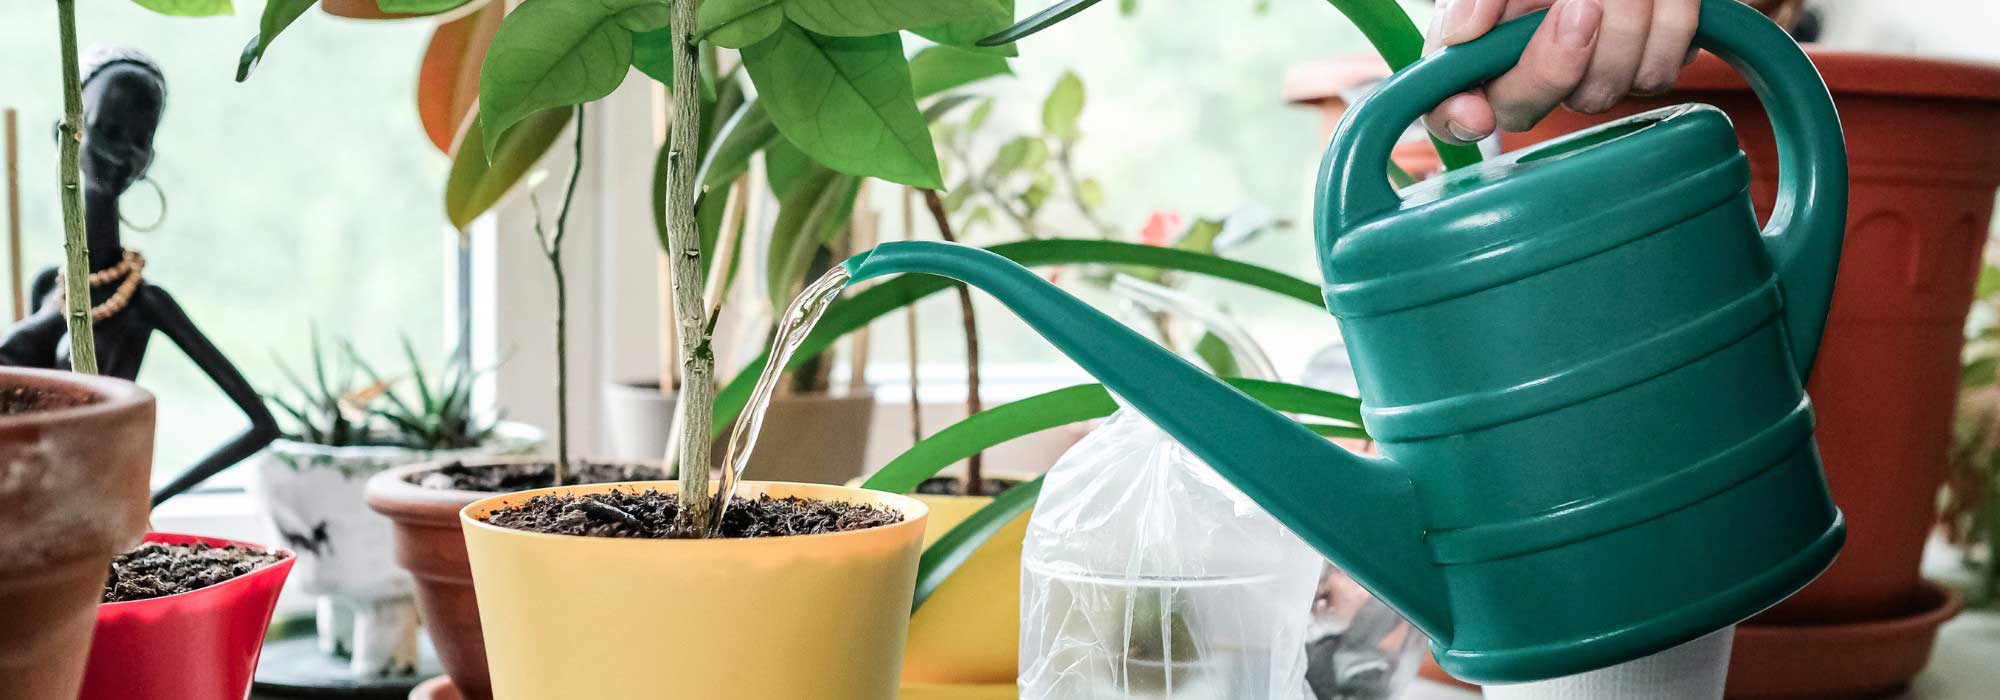
The suitcase is packed, tickets have been bought, and you are ready to enjoy well-deserved holidays. But before you go, one question is nagging at you: how do I water my potted plants when I’m away? Potted plants require special attention, as their growing medium dries out more quickly than soil in the garden. Fortunately, there are simple and effective techniques to prevent them from suffering in the heat and from a lack of water during your absence. Here are our home watering tips so you can set off with peace of mind and return to your plants in good condition on your return!

Choosing the right plants
In pots, the substrate dries out more quickly than in the ground. Potted plants need regular watering, but the frequency and amount of water they require depend on the type of plant, the pot size and the weather conditions. That is why it is essential to understand their needs well. Some thirsty plants will not survive a long spell without watering. Others, however, prove to be water-efficient, more resilient, and can manage with occasional watering. So it’s best to make life easier by avoiding those that require watering every two days during spells of hot weather! Among those that allow you to go away with peace of mind:
- Cacti and succulents :Agaves, Opuntias, Aloes, Mangaves, Sempervivums, Sedums, but also Crassulas, the Echeverias, the Aeoniums… These plants originate from desert regions and have therefore developed mechanisms to store water in their leaves and stems. They are particularly well suited to life in pots and can therefore suffice with occasional watering: typically, they are not watered more than once a month in winter and once a week maximum in summer.
- Herbs: some, such as the thyme, the rosemary, theItalian immortelle, the sage and the savory, are particularly drought-tolerant and can therefore suffice with occasional watering.
- Mediterranean plants : Lavender, Nepeta, Helianthemums…
- Indoor all-terrain plants: the Sansevieria, the Euphorbia acruensis, the Yucca elephantipes and the Cycas revoluta, for example, require little water and are watered only once the substrate is dry (allowing the soil to dry a little between waterings).
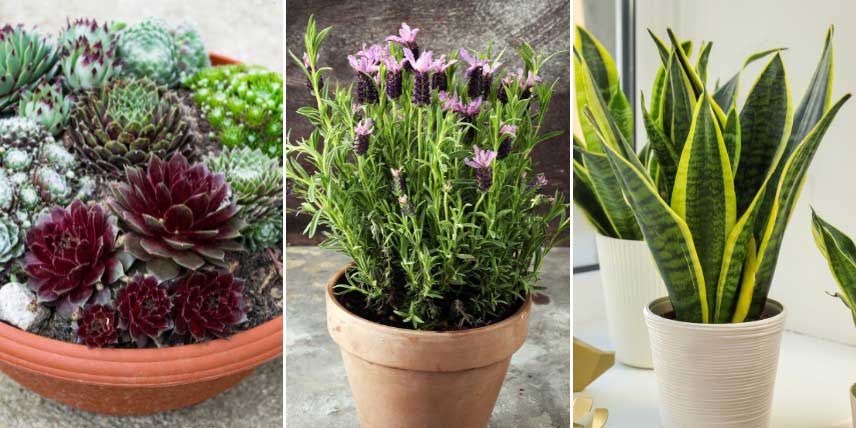
Some plants require very little watering: for example, houseleeks, lavenders and Sansevieria
Read also
Drought-resistant plants to grow in potsInstall watering cones and mini-ollas
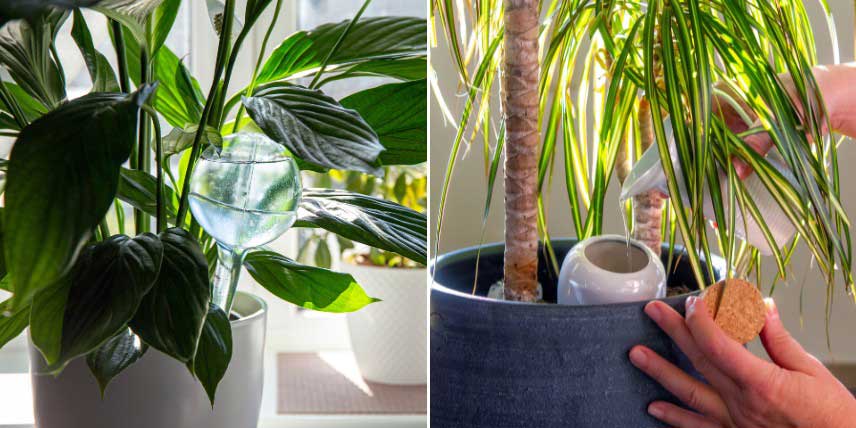
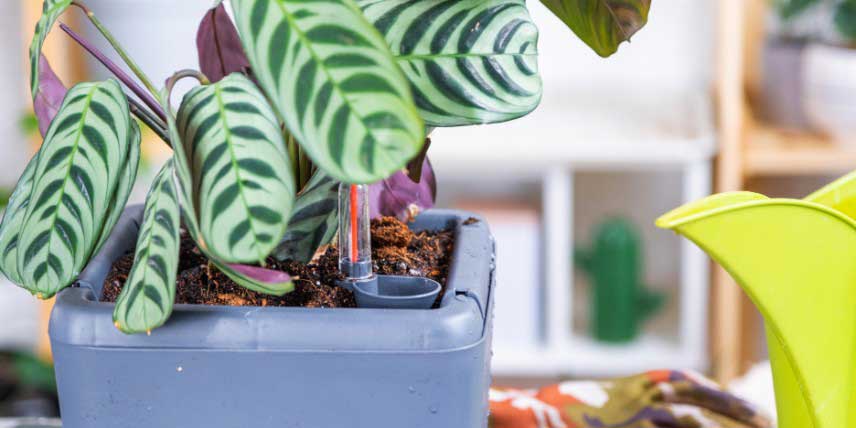
The watering cones and ollas (or oyas) are ingenious solutions for keeping your potted plants hydrated during your holidays. They ensure a slow and continuous diffusion of water, thus avoiding water stress and dehydration. Do not use these systems for plants that do not require much water, such as cacti and succulents.
The watering cones
The watering cones allow optimal water management, preventing both overwatering and underwatering. They are ideal for plants requiring steady, gentle hydration. Often ceramic or plastic, they are practical and economical. Depending on the size of your pots and the length of your absence, choose cones with an appropriate capacity. They come in various sizes and can be filled with water manually or connected to a water bottle for extended autonomy. Simply fill the cone with water. If you use a bottle, secure it firmly to the cone. Some versions also allow adding liquid nutrients to feed your plants at the same time. Insert the cone into the soil near the plant’s roots. Water will slowly seep through the cone, irrigating the roots steadily.
The mini-ollas
The mini-ollas, like their larger sisters, are unglazed terracotta pots that, once buried, release water through porosity. This traditional irrigation method, used for centuries, is particularly effective at keeping the soil evenly moist. The olla technique allows for significant water savings and promotes deep irrigation, beneficial for root development. They are ideal for plants that do not like fluctuations in soil moisture. Choose an olla according to pot size and plant type. Ollas come in several sizes, and the larger the capacity, the longer they can diffuse water. Dig a hole in the pot’s substrate, large enough to bury the olla. Let the olla’s neck protrude slightly to facilitate filling. Once the olla is in place, backfill the hole with soil and gently pack it. Fill the olla, ensuring the water level is high enough to allow continuous diffusion.
→ For everything you need to know about this irrigation method, discover our tip sheet: The ollas or oyas: an efficient and economical watering system
→ Discover our tutorial to make a home-made olla
Different solutions enable water to be stored and gradually released into the substrate
Install home drip irrigation system
Drip irrigation is another way to keep your potted plants hydrated while you’re away. It’s an ideal solution for regular, controlled watering. Drippers are placed on the irrigation hose and release water drip by drip into the soil of your potted plants. You can connect them to an outdoor tap and programme them to operate at defined intervals. They are particularly useful for plants that require regular, precise watering, such as tropical plants or some houseplants. There are several types of drip irrigation systems, ranging from ready-to-use kits to modular systems.
We propose creating a DIY drip irrigation system at home simply by using a plastic bottle. 1–2 litre bottles work well for most potted plants. For large pots or plants that drink more water, use larger-capacity bottles or slightly increase the number of holes. Clean them thoroughly to remove any trace of previous liquid. All you need to do is pierce small holes in the bottle’s cap and place it head down in the pot. Usually two to three holes suffice. Make sure the holes are small enough to allow water to flow slowly. You can also add liquid nutrients to the water if you wish to feed your plants while you’re away.
→ How to install an automatic watering system on a balcony or terrace?
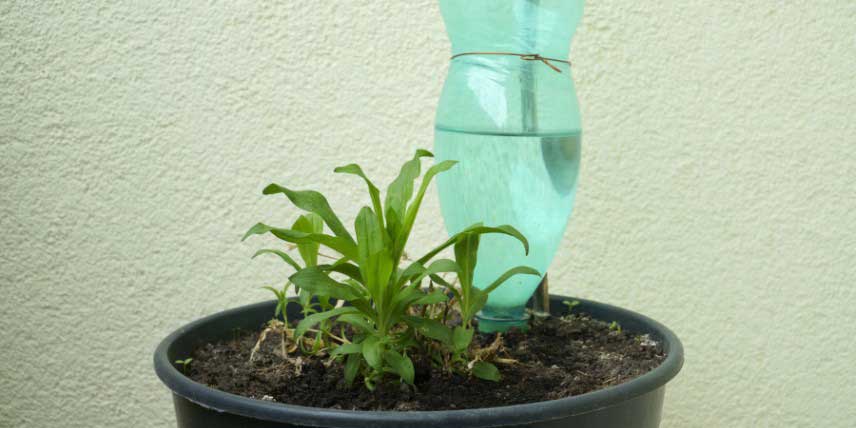
You can simply use a water bottle and pierce its cap
Use pots with built-in water reservoirs
These pots feature a water reservoir located at the base, allowing the plants to draw water as needed, thereby reducing the frequency of watering and minimising the risks of over- or under-watering. They can hold water for several days, or even weeks, which is ideal for extended periods of absence. Water is drawn to the plant roots by capillary action through a wick or a specially designed drainage system. This process ensures a constant and even distribution of water and allows the plants to gradually absorb water, reducing the risks of over-watering or under-watering. Do not use these pots for plants that dislike constant moisture.
A water reservoir pot. This one is even equipped with an indicator showing the water level.
Opt for watering gel
This product, composed mainly of polymerous super absorbent polymers, retains water and releases it gradually into the soil. The watering gel or water-retainer is usually available as granules or crystals. When mixed with water, these polymerous swell and form a gel capable of retaining a large amount of water. Usually, simply mix the granules or crystals with water and let them stand until they swell and form a gel. This gel is then mixed into the soil or placed directly in the pot, where it releases water slowly and regularly according to the plant’s needs. After incorporating the gel, water your plants generously to activate the water release process. It can maintain an adequate level of moisture in the soil for several weeks, depending on the amount of gel used and the plants’ water requirements.
To maximise the gel’s effectiveness, you can combine it with mulching, which reduces evaporation, or use pots with built-in water reserves and place your pots on cachepots or saucers. This helps to collect excess water, which the gel can then reabsorb, maximising the watering efficiency.
→ Also see our advice sheet to learn all about the hydro-retainers.
Place saucers under pots
The aim is to stock up on water before you set off for your thirstiest plants! Saucers retain water that drains from the pots’ drainage holes, thereby preventing rapid evaporation. The water in the saucer wicks back up into the pot by capillary action, keeping the soil moist for longer. Choose saucers of appropriate size for your pots. They should be wide enough to cover the entire base of the pot and deep enough to hold a good amount of water. Place the saucers directly under the pots. Ensure the pots have drainage holes to allow excess water to drain into the saucers. Water your plants generously before you go. Also fill the saucers with water. This will provide an additional water reserve for the plants. However, do not leave your cacti and succulents sitting in water!
Be sure to place saucers under your pots.
Mulching to reduce watering
In the same way you do in the garden, mulch your pots! This surface protection of the substrate by organic or mineral mulch limits direct exposure to the sun’s rays, which reduces water evaporation. The mulch helps keep the soil moist for longer, thereby reducing the frequency of required watering. Water your plants well before applying the mulch. The soil should be moist to maximise the benefits of mulching. Spread a uniform layer of mulch around the base of the plants. Adapt the type of mulch, organic or mineral, to the specific needs of those plants to maximise the water retention benefits.
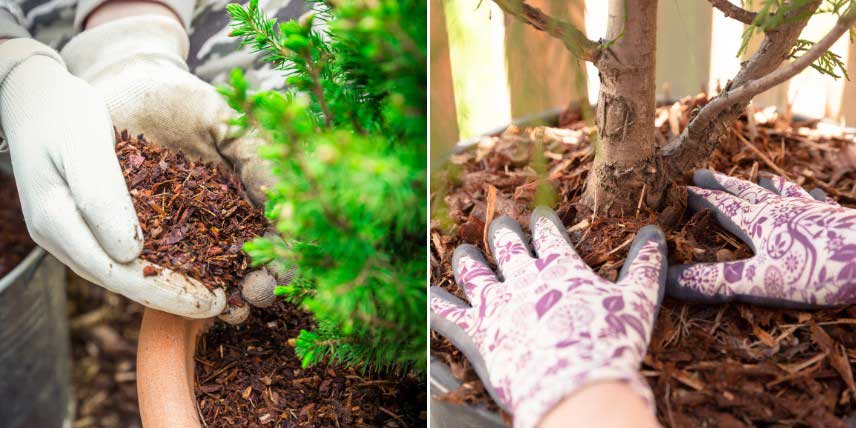
Mulching helps limit water evaporation and keeps the substrate moist for longer.
More tips for hassle-free holidays
- If you’re heading out for a weekend, you can test watering wicks. They are cords or strips of absorbent fabric that irrigate the plant by capillary action. Place one end of the wick in the water reservoir and the other end in the potting compost through the drainage holes. Water will be slowly absorbed by the potting mix.
- A quick “bottom watering” before you go can be helpful: you can place your pots for 10–15 minutes in a shallow bath of water (in a tub, basin, bath or sink). The water will gradually seep into the potting mix through the drainage holes. Then, drain your pots well.
- If you have a trusted neighbour or friend, ask them to water your plants while you’re away. Provide clear instructions on the amount of water and the watering frequency required for each type of plant.
- Temporarily move your potted plants to a shaded area can reduce their water needs. By being sheltered from the sun, the plants will dry out more slowly.
→ Also discover our tips on our blog: Potted plants and watering: managing the heat during your absence.
- Subscribe!
- Contents

Comments