


Autumn is the perfect season to bring a touch of warmth and nature into your home. What better way to do this than by creating your own autumn wreath? Not only will this handmade creation brighten up your home, but it will also allow you to use the treasures you can gather from your garden at this time of year. In this tutorial, we will guide you step by step to craft an autumn wreath, adorned with natural decorations. So, gardeners in search of creativity, follow our tips to add a seasonal note to your decor!
1- What do I need?
Before diving into the creation of your autumn wreath, it is essential to gather all the necessary materials and tools. Here is a sample list of supplies to help you start this creative gardening project.
- A wreath base made of straw or flexible bush branches: you can use soft twigs from willow, hazel, woody climbing stems from vine or wisteria to shape your wreath. A ready-made wreath will also do the trick.
- Pampas grass plumes: the fluffy spikes of grasses, such as pennisetums, Calamagrostis brachytricha, or Cortaderia, add a soft texture and autumnal colour.
- A small pumpkin: Perfect for adding a seasonal touch.
- Dried flowers: Such as hydrangea, Helichrysum, Calendula, or Zinnia, to give your wreath a vintage and natural look.
- Small orange fruits: Such as hips or fruits from dogwood, Pyracantha, or berries from holly to enhance the autumn theme.
- Let your imagination run wild: Why not include beautiful feathers, dried wheat spikes, hazelnuts, chestnuts, or acorns, and a few autumn leaves?
2- Steps to make an autumn wreath
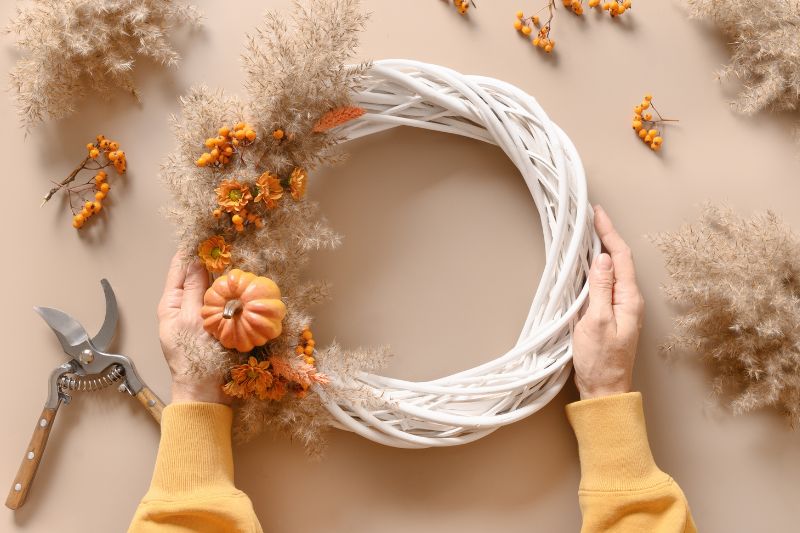
1- Start by choosing the base of your wreath, whether it is ready-made, made of straw, or one you create yourself with flexible branches like willow or wisteria. Secure the branches together using wire if necessary or string.
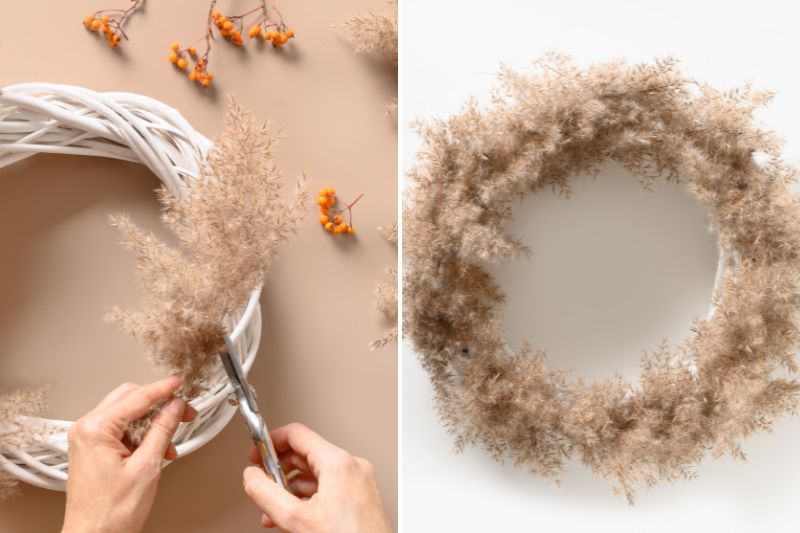
2- Use a pruning shear to cut the grass plumes, small branches, dried flowers, and other natural elements to the desired size. Sort them by type to make assembly easier.
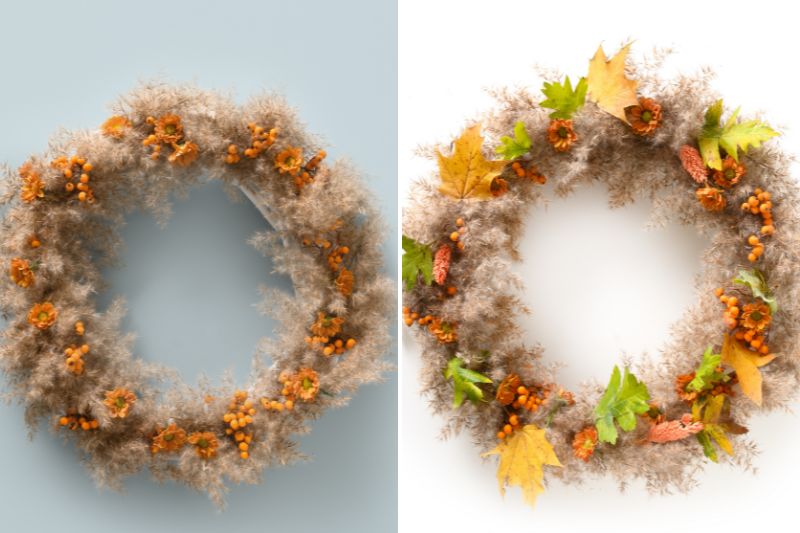
3- Next, attach the base elements, such as the grass plumes or dried leaves. You can go all the way around the wreath or just a quarter for a more contemporary touch.
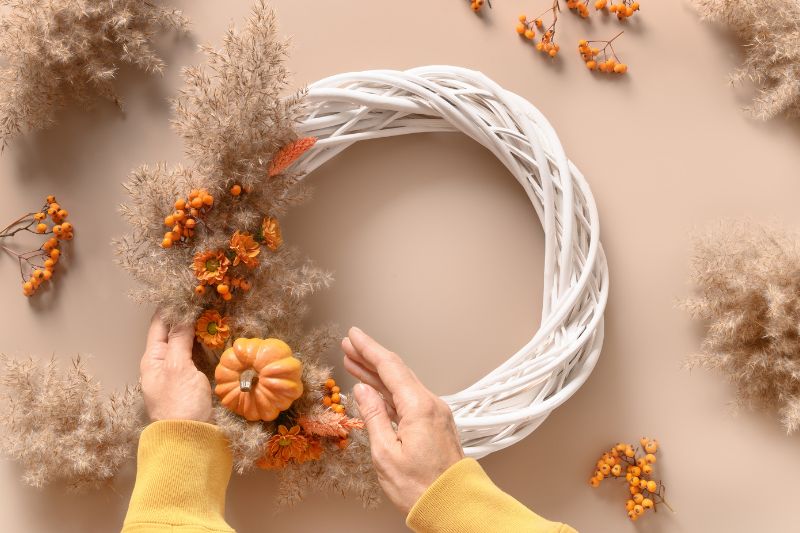
4- Integrate the dried flowers in orange tones and the small fruits aesthetically. A hot glue gun can be particularly useful for this step or a roll of natural string.
5- Place the small pumpkin, pine cones or other bulkier elements on the wreath. Use wire or a hot glue gun to secure them in place.
6- Readjust the elements to your liking, adding feathers, wheat spikes, or berries for final touches.
7- Finally, use a ribbon or natural cord to create a loop at the back of your wreath. This will allow you to hang it easily.
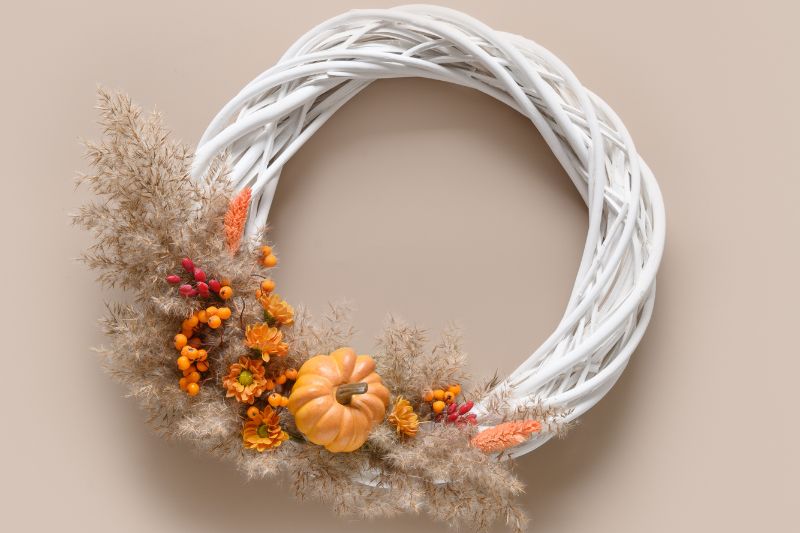
8- Hang your autumn wreath on your door, wall, or fireplace and enjoy the warmth and charm it brings to your home.
Additional tips and advice
- Use different varieties of bushes to create your base wreath, such as the red twigs of blood dogwood.
- This season, consider the berries of Cotoneaster or even ornamental crab apples.
- For dried flowers, gypsophila or statice are also excellent options.
- This autumn wreath can also serve as decoration until the Christmas season.
To Go Further
- Also check out Virginie's tutorial on how to make a natural Christmas wreath.
- Ingrid's tutorial on making a Christmas wreath with hips.
- Discover our tutorial to create an outdoor ice decoration.


Comments