


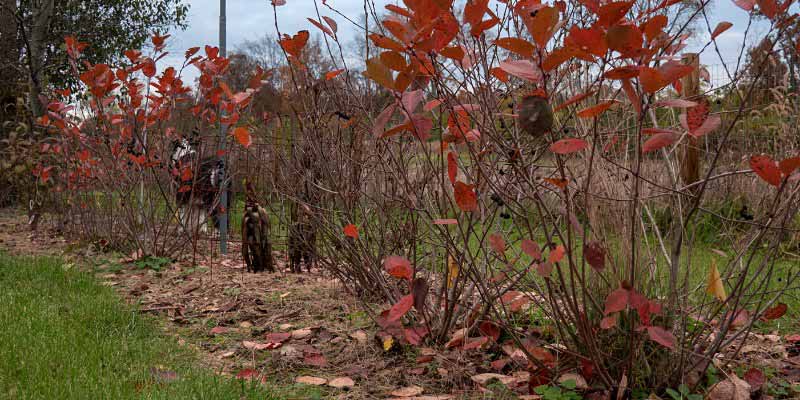
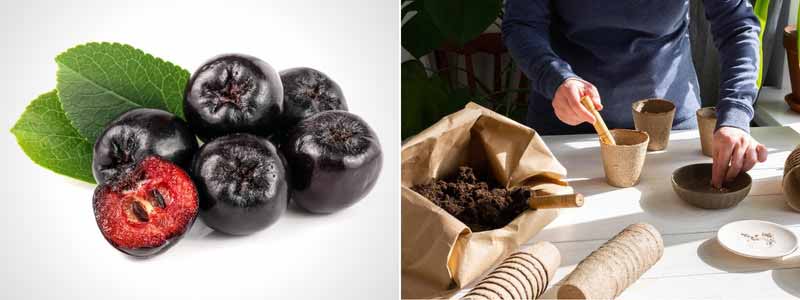
Aronias are bushes native to North America, prized for their edible black or red berries with blackcurrant flavour. They are particularly rich in antioxidants and vitamins. Aronias also produce pretty white flowers in spring. Leaves are deciduous and turn beautiful orange-red in autumn before falling. Plants form bushes 50 cm to 3 m tall, depending on species and variety. In garden, they prefer partial shade or non-scorching sun, in fresh, slightly acidic soil. Fully hardy, they withstand winter temperatures around −30 to −35 °C. This tutorial explains how to multiply them easily by propagation by cuttings, by division or by sowing !
1 - Propagate Aronia by cuttings
When and how to propagate Aronia by cuttings?
Propagation by cuttings of Aronia is carried out in June (herbaceous cuttings) or in September–October (semi-ripe cuttings):
- Using pruning shears, take from Aronia a healthy shoot about 10 cm long
- Remove leaves from lower part of stem, leaving only a few at tip
- Prepare a pot by filling with a light, well-draining substrate, for example a mix of compost and coarse sand, or special compost for sowing and cuttings
- Water compost to moisten it
- Make a hole in substrate with a pencil
- You can dip base of stem in rooting plant hormone
- Plant stem in hole, then firm compost around it to ensure good contact between cutting and compost
- Optionally place top of a plastic bottle over cutting to create confined, humidity-saturated atmosphere (cutting under cover). Ensure stem and leaves do not touch bottle walls. Vent regularly to prevent cutting rotting. Mini-greenhouse can also be used.
- Place pot in bright place but out of direct sun
- Remember to water regularly: substrate must remain slightly cool until rooting occurs

Required equipment
- pruning shears
- pots
- special compost for sowing and cuttings
- watering can
- rooting plant hormone (facultative)
- Plastic bottle or mini-greenhouse, to place cutting under cover (facultative)
2 - Dividing Aronia
Aronia tends to spread gradually by producing suckers (new shoots that develop on a root). It is therefore possible to lift these suckers to multiply the plant.
When and how to divide Aronia?
You can lift suckers in autumn, in October–November.
- Choose beside parent plant a sucker at least 20 cm tall
- Drive spade into ground all around it, then lift it out
- Using pruning shear, sever rootstock that links sucker to parent plant
- Prepare planting hole, or a pot with compost, to receive sucker
- Plant it immediately, in pot or in ground
- Fill in with compost, then firm lightly
- Water generously
Required equipment
- spade
- pruning shears
- Pot and compost, if wishing to plant sucker in pot
3 - Sowing Aronia
When and how to sow Aronia?
Harvest fruit in autumn, then separate seeds from pulp. For germination, seeds need stratification, that is a period of cold which breaks dormancy (this corresponds to winter). Place seeds in refrigerator for at least three months.
Sow Aronia in spring, around April.
- Prepare pots by filling with a mix of compost and coarse sand, or special compost for sowing
- Firm lightly and level surface
- Place seeds on surface
- Cover with compost. Seeds should be buried about 1 cm deep
- Water gently, using fine spray
- Place pot under cover, in bright place out of direct sun
- Remember to water regularly: substrate must remain slightly cool until germination, but avoid excess moisture
- Then wait: Aronia seeds germinate in two to three months
Required equipment
- Aronia seeds
- pots
- special compost for sowing
- watering can
To go further
-
- Discover our complete article: “Aronia: planting, pruning and maintenance”
- Our tutorial: “How to dry Aronia berries”
- Our article: “Propagation by cuttings: everything you need to know about different techniques and our advice”


Comments