


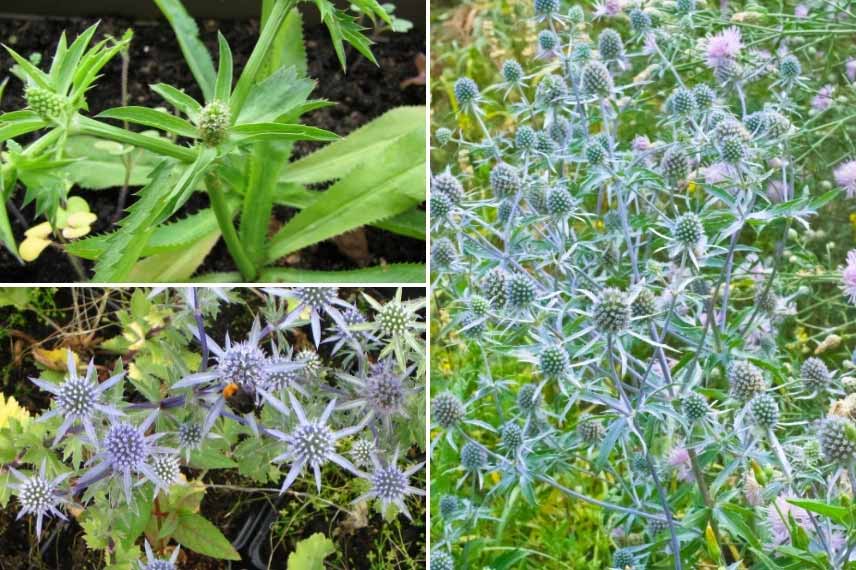
Graphic and resilient, Eryngium, commonly called eryngo or sea holly is an interesting and original perennial. Its scientific name comes from the Greek eryggos, meaning “goat beard”, a reference to its spiky look. It was formerly also called “bread thistle”, because the cooked roots of Eryngium are edible, as are their tender spring leaves.
In the garden, planting Eryngium in borders gives them a strong character, because the graphic appearance of the thistles and their magnificent blue or silvery-white colours stand out among leafy plants, perennials or bushes. From small Eryngium to place at the front of borders to large varieties of 80 cm and above, you can plant them in any region as they are very hardy and undemanding. Enough reason to want to multiply them to enjoy their incomparable blue or silvery flowering. Follow all our advice to propagate and successfully multiply your Eryngium.

Eryngium giganteum
Root cutting: the most appropriate vegetative propagation method for Eryngium
It is possible to multiply your eryngios by sowing. But propagation by cuttings is an alternative and easy technique, allowing you to reproduce them identically. With Eryngium, favour the magic of root cuttings! Every gardener knows that plants can reproduce via their root system: the smallest fragment of a root, such as couch grass or bindweed, can regrow easily. To take root cuttings of your Eryngium, here is how to proceed.
→ To learn more: What is a root cutting? technique, advice and plant choices
When to take cuttings of Eryngium?
Take cuttings ideally in late winter or early spring, when the plant is dormant.
Necessary equipment
- a pot or a tray
- a digging fork
- a pruning shear
- potting compost or soil mixed half with sand
Steps to take root cuttings of Eryngium
- Carefully lift some roots from the Eryngium you have chosen to propagate using a digging fork. Plan to take a few more than the number of cuttings you want, since success is not guaranteed for every cutting.
- Cut pieces of root 5–10 cm long, removing dry stems and leaving rootlets attached to the main root
- Fill the pot or tray with compost or soil, leaving a few centimetres to cover your cuttings. The container should be large enough so the roots are spaced apart. This will prevent the roots of the future young plants from becoming tangled. Moisten the compost well beforehand.
- Place the root pieces flat on the compost, spacing them out
- Cover with a layer of compost about 1 cm
- Place your cuttings in an unheated spot, sheltered from frost and sufficiently bright. Remember to keep them moist regularly
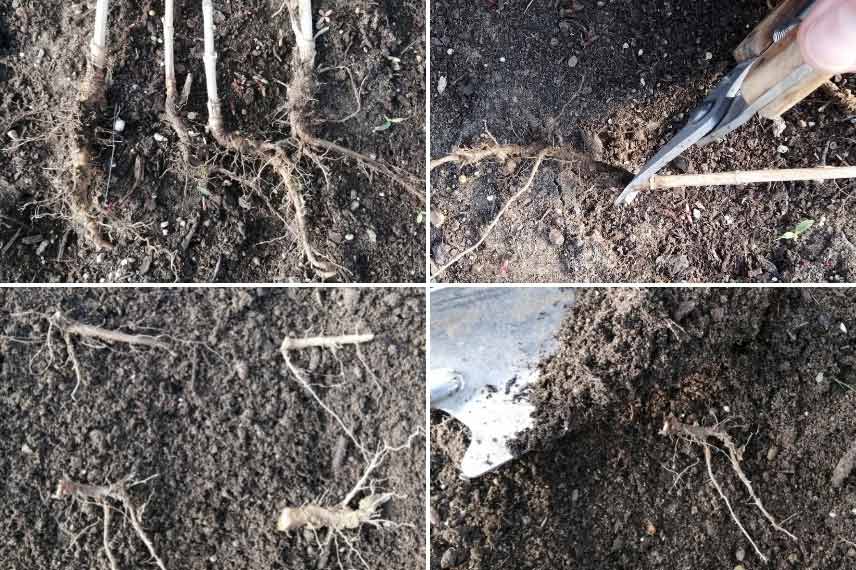
Root pieces are lifted, cut, laid flat and covered with compost
And afterwards?
- Be patient while shoots start to appear. Depending on growing conditions and Eryngium variety, this can take from a few weeks to a few months.
- Repot your young Eryngium plants once sufficiently developed, handling them carefully. Use a light, free-draining substrate. Your young plants will continue to root and grow. Continue to water regularly, allowing the substrate to dry out between waterings.
- In the following spring or autumn, you can proceed to plant your eryngios in the garden. They will appreciate sunny borders in well-drained soil.
Young plants of Eryngiums obtained by cuttings
To go further
- Choose favourite varieties from our Eryngium collection
Discover our advice sheets on thistles:
- Choosing an Eryngium. According to your wishes and situation!
- Eryngium: 6 ideas for successful pairings. To create superb borders!


Comments