


Hedgehogs, whether in town or countryside, are becoming increasingly rare and may even be disappearing. Yet this adorable little animal is essential to biodiversity and is also a great ally for the gardener. This great slug-devourer deserves our help to feel safe and sheltered in our gardens. To help it, offer somewhere to shelter so it can hibernate properly during winter. Discover in our tutorial how to easily build a shelter for garden hedgehogs.

Why build a hedgehog hut?
Hedgehog needs shelter from the cold to hibernate peacefully during winter. In the wild, it easily finds somewhere to settle in an old abandoned burrow, a pile of wood, inside an old stump or under a heap of dead leaves. But today, many gardens offer few areas with a wild look and these materials available for our spiky friends.
When to create the hedgehog shelter?
Although hedgehogs hibernate from October–November until March depending on region, I recommend installing your shelter in spring, which is hedgehog mating season. Indeed, female hedgehog generally looks around April–May for an ideal spot to give birth to her young in safety. They will stay there for a few months, long enough to grow big enough to explore the world. You can also make this shelter in summer or late summer, at the latest by September–October, which gives this little spiny ball time to become familiar with the place.
Steps to build the hedgehog shelter
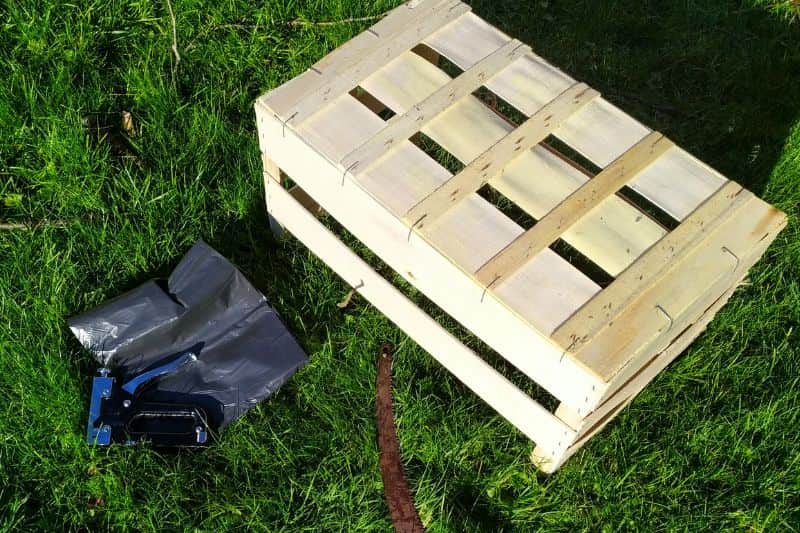
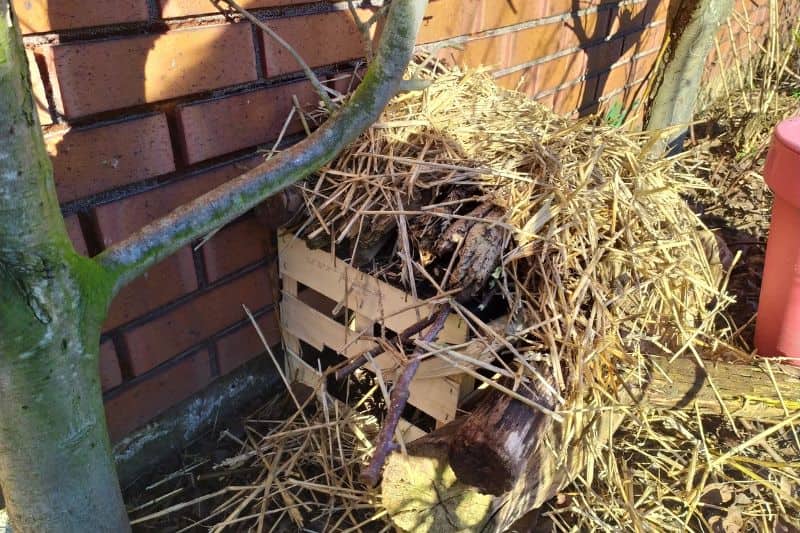
1- Take a crate made of wood measuring at least 40 cm by 60 cm, so there is enough space to host an entire hedgehog family. Then turn it over so the base of the box serves as a roof.
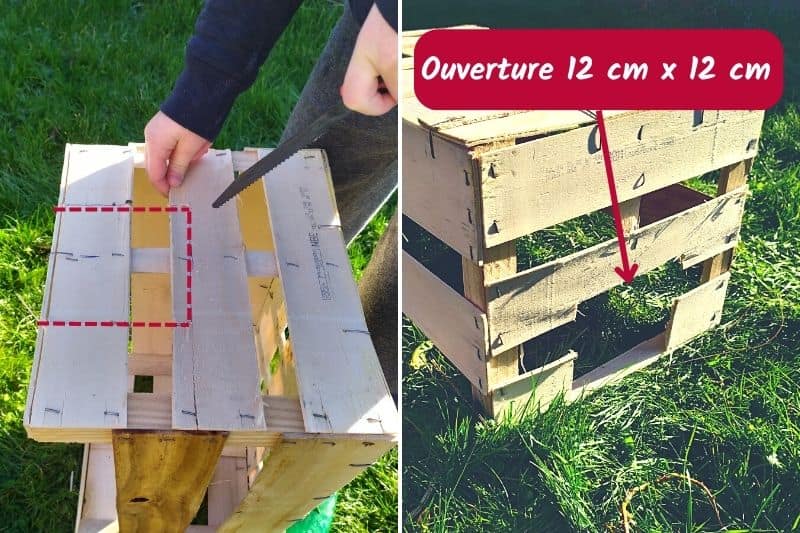
2- On one side of the crate, cut an entrance for the hedgehog by sawing a square 12 cm by 12 cm out of the wood.
Tip: Don’t make the opening too small or too large, otherwise you may end up with opportunistic other occupants. For the record, the overly large opening of my previous hut was much appreciated by my cat!
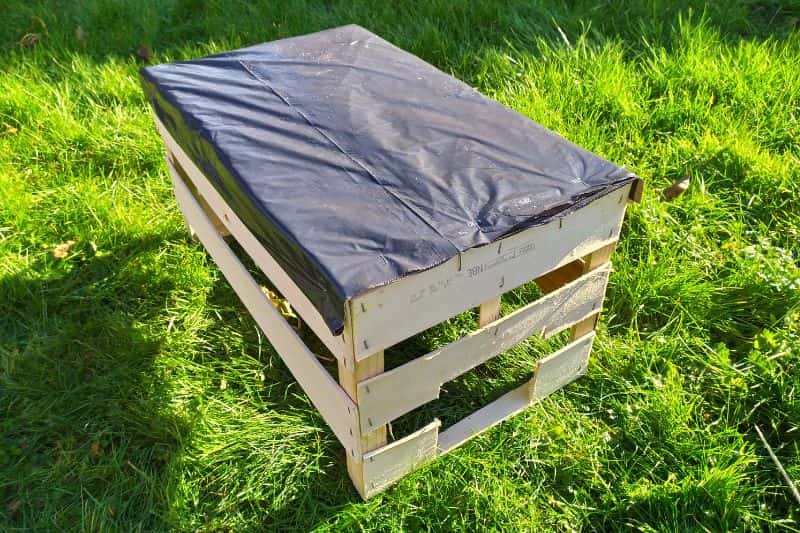
3- Next, take a piece of tarpaulin or any other waterproof material (oilcloth, piece of flooring, etc.) and fix it to the roof of the hut to make it watertight. Here, I attached it with a staple gun.
Note: leave the sides of the hut unsealed to allow good air circulation.
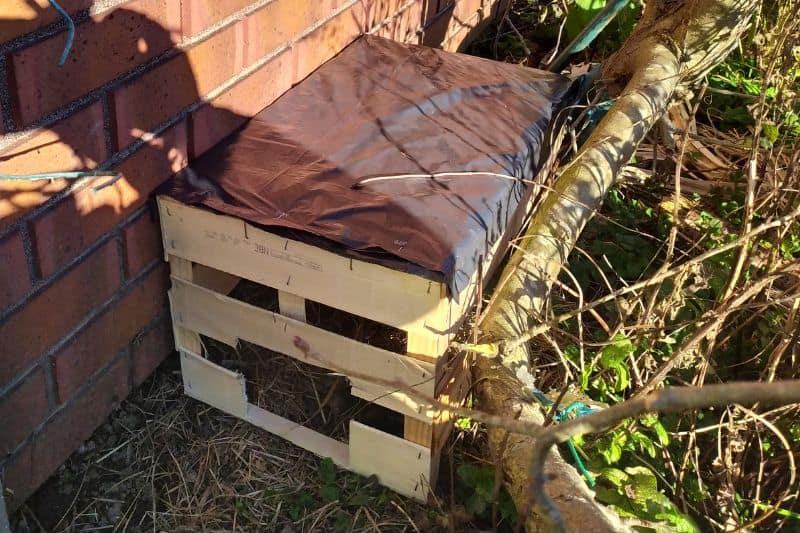
4- Then place the shelter in a quiet corner of the garden, away from paths and in the shade. Ideally, position it protected from wind, for example against a wall, a garden shed, a hedge or a pile of wood.
5- Put dead leaves, hay or straw inside the hut.
6- Then hide the shelter under a heap of branches, dead leaves and straw to recreate the hedgehog’s natural habitat and insulate it from the cold.
Tip: if your garden is exposed to strong winds, don’t hesitate to weigh the hut down by placing a few old logs, a stone or a brick on top.
Some tips
- In spring and summer, hedgehog likes to change shelter regularly for a day or more, so leave a few wild corners or piles of branches in your garden.
- Do not collect a hedgehog from the wild to put it in your garden! It may be a female feeding young and you would then condemn her cubs waiting for her return to the shelter.
- Always allow hedgehogs to move freely through your garden.
To find out more
- Find all our advice to welcome a hedgehog into the garden.
- Discover other tips and shelter ideas on the website of the association "Le hameau du hérisson".

![[Hedgehog Shelter]](https://en.promessedefleurs.eu/blogwp/wp-content/uploads/2023/02/Comment-construire-un-abri-pour-les-herissons-.png "[shortcode title=\"title\" value=\"How to Build a Shelter for Hedgehogs\"]
[shortcode title=\"intro\" value=\"Hedgehogs are adorable creatures that can benefit your garden by eating pests like slugs and snails. Here's how to build a shelter for them:\"]
[shortcode title=\"materials\" value=\"You will need the following materials:\"]
- A wooden box or crate
- Dry leaves or straw
- Twigs and branches
- Soil
[shortcode title=\"steps\" value=\"Follow these steps to build the shelter:\"]
1. Choose a quiet and sheltered spot in your garden.
2. Place the wooden box or crate on the ground.
3. Fill the box with dry leaves or straw to create a cozy bedding.
4. Add twigs and branches to the shelter to provide a natural feel.
5. Cover the shelter with soil to insulate it and make it blend in with the surroundings.
[shortcode title=\"maintenance\" value=\"Remember to check the shelter regularly and replace the bedding if it gets wet. Hedgehogs will appreciate your effort to provide them with a safe place to rest!\"]
[shortcode title=\"outro\" value=\"By building a shelter for hedgehogs, you can help these lovely creatures thrive in your garden while keeping pests at bay. Enjoy watching them roam around and make your garden their home!\"]")
Comments