


How to grow bay laurel in the garden?
How to successfully plant and care for bay laurel in a pot or in the ground
Contents
bay laurel (Laurus nobilis), also known as noble laurel or laurel of Apollo, is an evergreen bush of Mediterranean origin. It is the only edible laurel.
Very aromatic, it offers multiple uses: in cooking for its powerful scent (bouquet garni, stews, sauces, infusions…), in alternative medicine for its medicinal properties (digestive, antiseptic, expectorant, diuretic…) or in cosmetics in making the famous Aleppo soap.
Single to grow and requiring little maintenance, it will thrive both in open ground and in a pot, to beautify balcony or terrace.
Here are our planting tips for successful growing of bay laurel.

When to plant bay laurel?
Planting bay laurel takes place in autumn before first frosts, or in spring when soil begins to warm and any risk of frost has passed.

Read also
Bay laurel in 10 questions and answersWhere to plant bay laurel?
Soil
Bay laurel tolerates most soils, but prefers soil rich in organic matter (humus), light and well drained, not retaining excess water.
If soil is heavy and clayey, add sand before planting to lighten it and avoid waterlogging, especially in winter.
Exposure
Bay laurel originates from the Mediterranean basin, so naturally enjoys warm, sunny positions, or partial shade in the warmest regions of southern France.
Full sun concentrates essential oil content of the bush, enhancing aromatic intensity of its leaves. However avoid exposure to scorching midday sun in summer.
Bay laurel tolerates sea spray and coastal cultivation, but should be protected from the coldest northerly winds, particularly harmful in winter.
Choosing the right location
North of the Loire and in climates with harsh winters, we recommend growing bay laurel in a pot, on balcony, terrace or in garden. It can then be overwintered in shelter during the cold season. Indeed, although hardy, tolerating temperatures of -10°C to -15°C, soil that is too wet or overly exposed windy positions could be fatal.
In southern regions and south of the Loire, it can be grown in open ground.
Choose a fairly spacious spot, the bush easily reaching several metres in height and spread when well established. When happy, its growth can be as much as 1 metre per year. In addition, it produces suckers, which promote multiplication and spread.
Bay laurel can be used either as a specimen, in a mixed border or as an evergreen hedge: it is indeed a good candidate for privacy hedges or for defining an area of garden.
Different stages of planting
Plant bay laurel outdoors
- Soak the rootball in a bucket for half an hour before planting.
- With a spade, dig a hole at least twice, ideally three times the volume of the rootball (about 60–80 cm in diameter and depth).
- Loosen soil and add well-rotted household compost or well‑matured manure, mixed with potting compost. If soil is particularly heavy, add a few handfuls of sand.
- Remove rootball from bucket and let drain for a few minutes.
- Place rootball in centre of hole, cover with fine potting compost and firm down.
- Install a stake at least 1.5 m high to encourage an upright shoot during early growth of the bush. Plant it 30 cm from the trunk, slightly angled to avoid damaging roots. Leave stake in place for 1 to 2 years.
- Tie bay laurel to the stake using a tree tie.
- Water generously to encourage rooting.
Plant bay laurel in a pot
Container size depends on bay laurel height at maturity: if you decide to prune the bush regularly to keep it compact, a 50 cm diameter and depth pot or trough will be sufficient.
Prefer terracotta containers rather than plastic, as they allow substrate (soil) to breathe better and reduce root overheating in summer.
- Place a layer of gravel or clay balls at base of container to improve drainage and avoid asphyxiation or root rot.
- Add substrate made from a mix of potting compost, garden soil and sand.
- Place the rootball in the container, cover with substrate and firm with fingers.
- Water generously to encourage rooting.
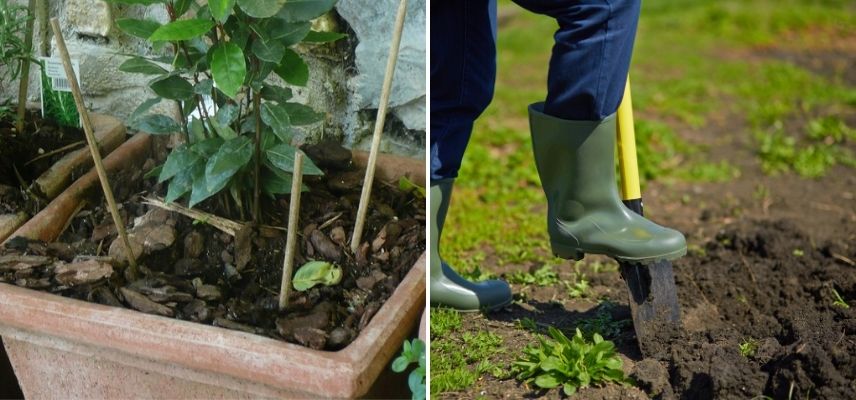
Pour une plantation en pot, préférez un contenant en terre cuite (Photo Cristina Sanvito). La bêche sera nécessaire pour creuser un grand trou
If you want to let the bush develop and grow well, repot every 2 to 3 years in spring or autumn.
Caring for bay laurel
Once well established, bay laurel requires almost no maintenance.
In a pot, it will need slightly more attention while remaining very easy to care for, even for novice gardeners.
Watering
In ground during first months after planting, water regularly, particularly during summer drought. Once well established and except during prolonged, severe drought, watering will no longer be necessary for bay laurel, its roots enabling it to access water deep in the soil.
To keep soil cool, consider mulching around base of the bush.
In a pot, water bay laurel regularly as soon as substrate dries out. The bush tolerates heat but is more sensitive to drought when grown in a pot. In summer, water 2 to 3 times a week; in spring and autumn, water once a week and stop watering in winter (except in unusually mild conditions).
Be sure to empty saucer 15 to 20 minutes after watering, so as not to leave stagnant water.
Feeding
Feeding is not necessary for specimens planted in ground.
For bay laurels in pots, substrate tends to become depleted over time. An application of fertiliser for bushes or a special fertiliser for evergreen hedge plants 2 to 3 times a year, in spring and summer, will stimulate growth by improving and nourishing the soil.
Each year, outside repotting periods, carry out a top-dressing by replacing substrate of top 10 to 15 centimetres with fresh compost-based potting soil, possibly mixed with well-matured household compost.
Pruning
Bay laurel naturally has a conical habit and can reach up to around ten metres in height if not pruned and if left to grow freely.
Pruning is not essential for maintenance of the bush or to stimulate growth, but is often necessary to control spread and keep a harmonious silhouette.
Widely used as decorative hedge, bay laurel can be pruned into pyramid, ball or other topiary shapes such as geometric or animal forms.
In a pot, pruning will maintain desired volume and balance of the bush.
Pruning is carried out twice a year, late spring after flowering and in autumn. Far from weakening the bush, it will in fact make branches more vigorous.
In May or June, remove with pruning shear or with a hedge trimmer dry branches, branches that unbalance overall habit of the bush and overly large branches at about waist height by roughly half.
In September or October, carry out another pruning by shortening young shoots of the year, avoiding leaving naked wood.
To perform precise topiary work, use a boxwood or topiary shear, which allow fine finishing by cutting tender stems cleanly and carefully.
Removing faded flowers as they appear will prevent self-seeding.
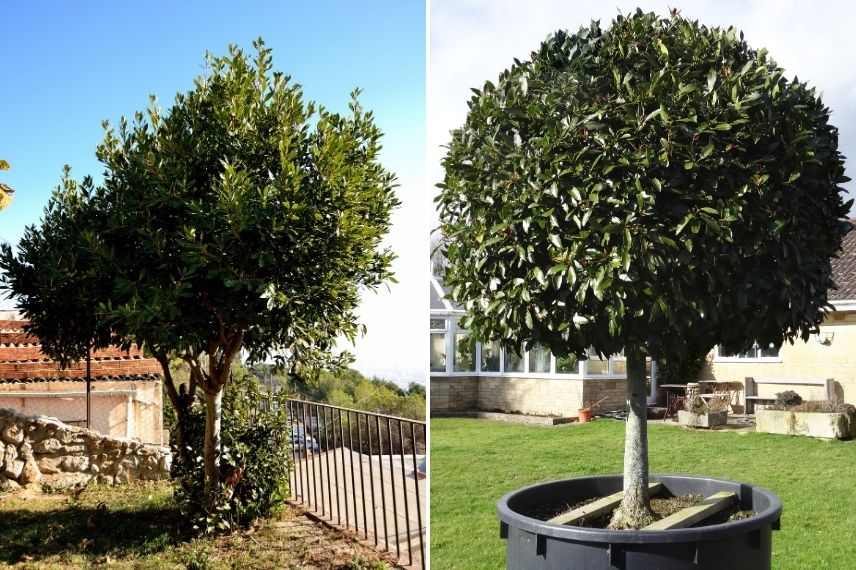
Choose: free habit or trimmed into a ball
If frost occurs, bay laurel can be coppiced or cut back hard, consisting of cutting trunk close to collar, about twenty centimetres from ground. This operation, well tolerated by the bush, will encourage return of new shoots.
Pests and diseases
Bay laurel is generally little susceptible to diseases and parasitic pests, but can sometimes be affected.
In case of scale insect attack, treat locally with a natural insecticide or with a black soap solution (1 teaspoon diluted in one litre of water), to spray in late afternoon.
Against psyllid attacks, sap-sucking insects causing leaf curling and desiccation, avoid adding fertiliser too rich in nitrogen.
To prevent downy mildew and other fungal diseases, always water at base of plant, avoiding wetting foliage, as humidity favours development of fungi.

Left: mealybug, right: bay psyllid (Photos Katja Schulz)
Overwintering
In ground, a mulch of dead leaves will protect base of bay laurel over winter.
If pot remains outdoors during cold season, protect bay laurel with a frost-protection cover in addition to mulching.
Indoors, bay laurel can be overwintered in a bright, unheated room, sheltered from frost.
Harvest of bay leaves
Bay leaves are harvested as needed, from spring until first frosts.
They can be eaten fresh or dried for longer-term storage.
Highly aromatic, bay leaves are particularly appreciated in bouquet garni, court-bouillons, marinades, sauces and stews.
- Subscribe!
- Contents

Comments