


How to obtain or propagate strawberry plants for free?
for future abundant harvests
Contents
Srawberries are easy to grow and to maintain, and they produce small, delicious fruits to nibble or to use in a variety of recipes. Whether you’re starting a kitchen garden or looking to enlarge it, you can obtain strawberry plants for free. Follow us to explore the different ways to acquire strawberry plants for free, including layering, division, sowing, and plant exchanges. We will also provide practical tips and tricks to help ensure a plentiful and tasty harvest over many seasons.

Layering of strawberry plants: a single, effective method of multiplication
Layering is a vegetative propagation technique that allows new plants to be produced from a mother plant without the use of seeds. This method is particularly suitable for strawberry plants, which naturally produce stolons, these creeping stems that can readily root and give rise to new plants.
When to layer strawberry plants?
The best period for layering strawberry plants is in spring or early summer, when the plant is in active growth and conditions are favourable to rooting. Avoid layering during drought or high heat, as this could stress the mother plant and reduce the chances of success.
The steps for layering strawberry plants :
1- Identify the stolons on your strawberry plant, these long stems that grow from the mother plant and bear small leaf rosettes at their tips. Choose a vigorous, healthy stolon, with no signs of disease or parasites.
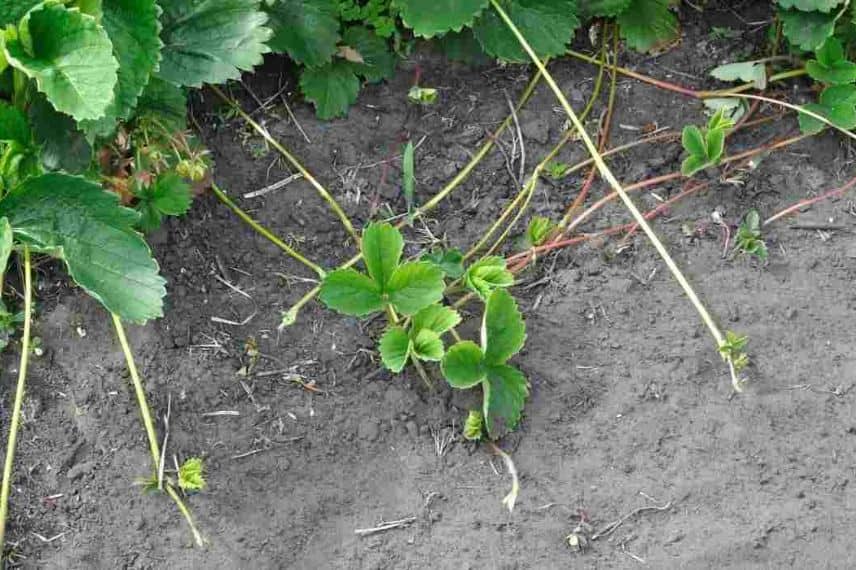
Strawberry stolons
2- Determine how far your stolon extends without detaching it from the mother plant and decide where you will place it. Prepare the soil by weeding and loosening it. If the soil is poor, add well-rotted compost or manure to enrich it.
3- Select a portion of the stolon with a leaf rosette and bury it in the prepared soil, leaving the end of the stolon free. You can use a small weight, such as a stone, to keep the stolon in contact with the soil. Ensure the leaf rosette remains in good contact with the soil.
4- Water the stolon regularly to keep the soil slightly damp and encourage rooting. Avoid overwatering, as this could cause root rot.
5- Wait a few weeks for the stolon to develop roots. You will be able to observe the appearance of new leaves at the place where the stolon was buried.
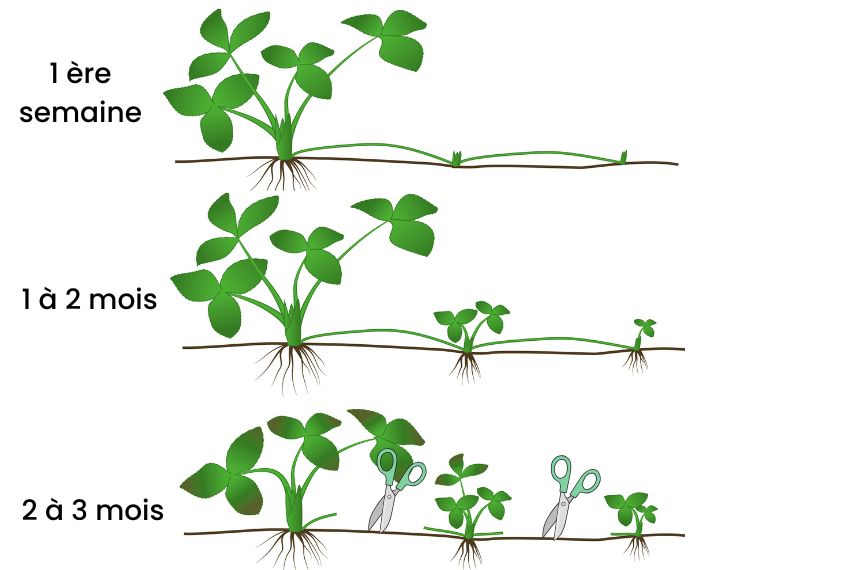
Ddetails of the multiplication of strawberries: top: during the first week ; middle: after 1 to 2 months ; last: after 2 to 3 months’ time
6- Once the new strawberry plant is well rooted and has started to grow, cut the stolon from the mother plant with clean pruning shears.
And there you have a new strawberry plant! You can also transplant it to the desired spot in your garden.
Tips:
- You can also plant your stolon directly in a planter or in a pot, so you can replant it later in another part of the garden or give it to a fellow gardener.
- Feel free to ask your family, friends or neighbours if they would let you layer their strawberry plants.
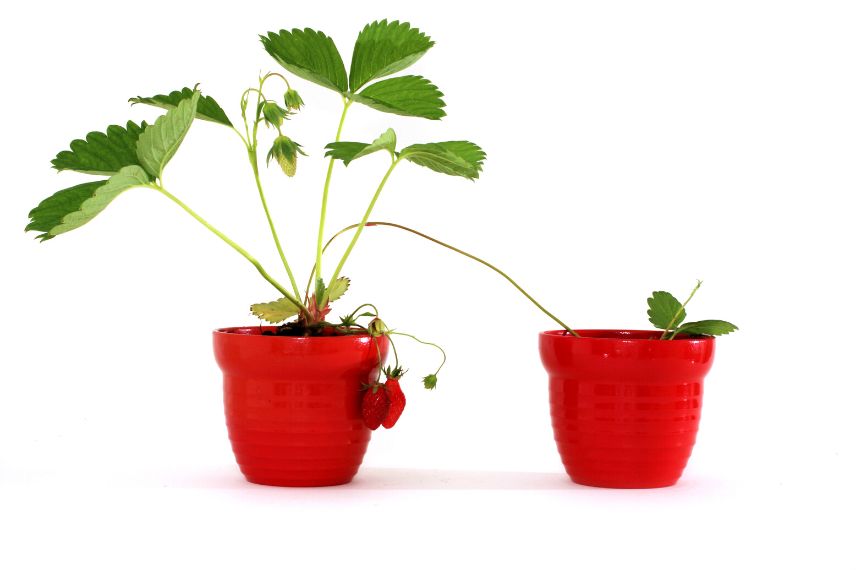
strawberry plant layering in a pot
Read also
Strawberries: planting, growing and careDividing strawberry clumps: a quick method for propagation
Dividing clumps is a propagation technique that involves splitting a mature plant into several sections to create new plants. This method is particularly well-suited to strawberry plants, which naturally form dense clumps over time. By dividing these clumps, you can quickly increase the number of strawberry plants in your garden and rejuvenate older plants.
When should you divide strawberry plants?
The best time to divide strawberry clumps is in early spring or autumn, when the plant is in dormancy or just starting to grow. Avoid dividing clumps during the peak fruiting season, as this could stress the plant and reduce the harvest.
The steps for dividing strawberry plants:
1- Identify a well-developed strawberry clump in your garden. Clumps that are more than two or three years old are generally ready to be divided. Avoid dividing younger plants, as they may not be well established enough to withstand the division.
2- Choose a spot in your garden where you want to plant the new strawberry plants. Prepare the soil by weeding it and loosening it. If the soil is poor, add well-rotted compost or manure to enrich it.
3- Using a spade or a fork, carefully dig around the strawberry clump you wish to divide. Gently lift the clump from the soil, taking care not to damage the roots.
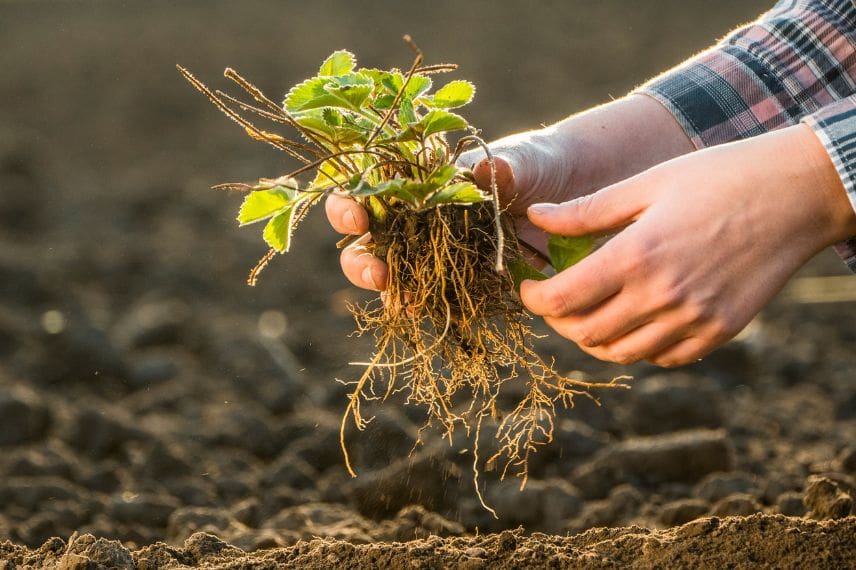
4- With your hands or a clean knife, divide the clump into several sections. You can split the clump into two, three or even four sections, depending on its size and vigour.
5- Plant the new clumps in the soil. Space the clumps at least 30 cm apart to give them enough room to develop.
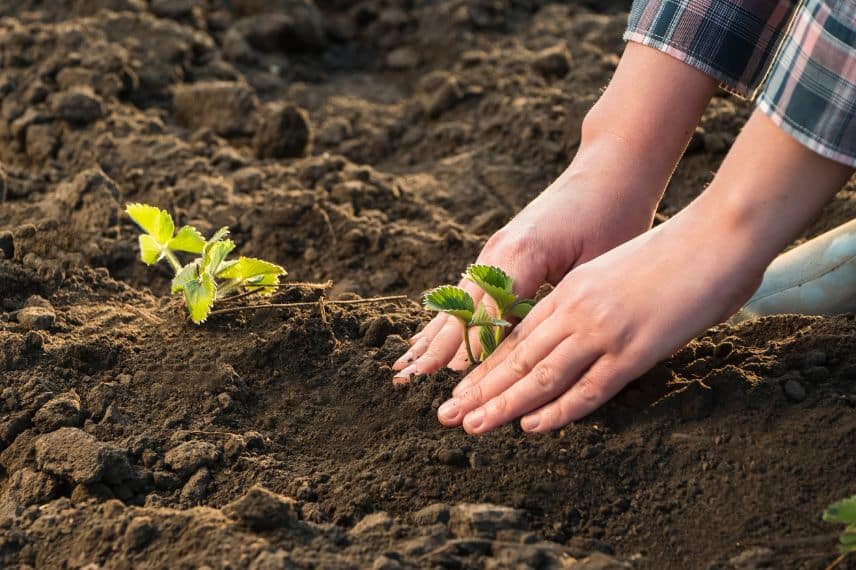
6- Water the new clumps regularly to help them establish themselves.
Strawberry sowing
Strawberry plant multiplication by seed is another method to obtain new young plants. However, it is longer and more complex than other multiplication methods. Furthermore, strawberry plants grown from seed may exhibit characteristics different from the mother plant, especially if the latter is a hybrid variety.
When to sow strawberries?
The best time to sow strawberry seeds is in late winter or early spring, typically between February and April. Sow the seeds indoors to protect them from late frosts and give them a good start.
How to sow strawberries?
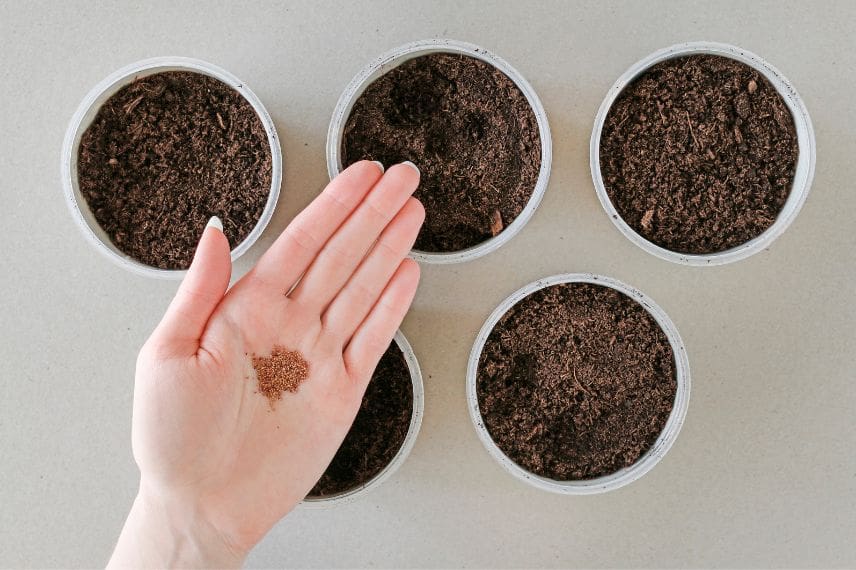
1- Choose ripe, healthy strawberries of the variety you wish to multiply.
2- Crush the strawberries to extract the seeds, then rinse them to remove the pulp. Leave the seeds to dry in the air for a few days.
Tip: some gardeners simply place a piece of strawberry with the seeds on top of seed compost rather than extracting them.
3- Sow the seeds in good quality compost, about 1 cm apart. Cover them lightly with more compost and water gently. Place the container in a warm, bright place, at around 18-20°C, ideally in a greenhouse.
strawberry seed sowing
4- Strawberry seeds generally take 2 to 4 weeks to germinate. Keep the compost moist, but not waterlogged, during this period.
5- When the young plants have developed a few true leaves, transplant them into individual pots. Continue to water them regularly.
6- Before planting the strawberry plants in the open ground, acclimate them gradually to outdoor conditions by taking them outside for a few hours each day for a week.
7- Plant the strawberry plants in your garden, spacing them about 30 cm apart. All that remains is to wait until the following year to start picking your first strawberries.
→ Find our strawberry seeds in our online shop.
Read also
Choosing strawberry plantsPlant swaps
Plant swapping is a friendly practice that allows amateur gardeners to obtain strawberry plants (or other plants) for free in exchange for surplus plants. It’s also an excellent way to enrich your garden while sharing your passion for gardening with other enthusiasts.
To participate in a plant swap, start by identifying the plants you can offer in exchange.
Then join groups of gardeners on social media, gardening forums, or local gardeners’ associations to find swap partners. Also check with your council or with allotment gardens or community gardens.
Offer your plants, specifying that you are looking for strawberry plants and discuss the exchange details with interested parties. Once you have found a partner, arrange a meet-up to swap the plants.
Finally, plant your new strawberry plants in your garden and take care of them to enjoy delicious strawberries next season.
Further reading
- Find all our strawberry varieties.
- For more information, read our full guide on strawberries: planting, growing and care.
- Subscribe!
- Contents

Comments