


Permaculture: the essential tools to have
Our selection of essential tools for practising permaculture in the garden
Contents
Permaculture is attracting more and more gardeners, who want to create a garden that is both productive and environmentally friendly. But to really succeed in this ecological endeavour, you’ll need to be equipped with the right gardening tools! And if you’re accustomed to a traditional kitchen garden, there will probably be a few essential tools that will complement your existing equipment… and others to store away. From the indispensable organic fork to the traditional rake, discover the essential tools for transforming your green space into a permaculture garden and what they’re for.

Biofork: the essential tool to break up compacted soil
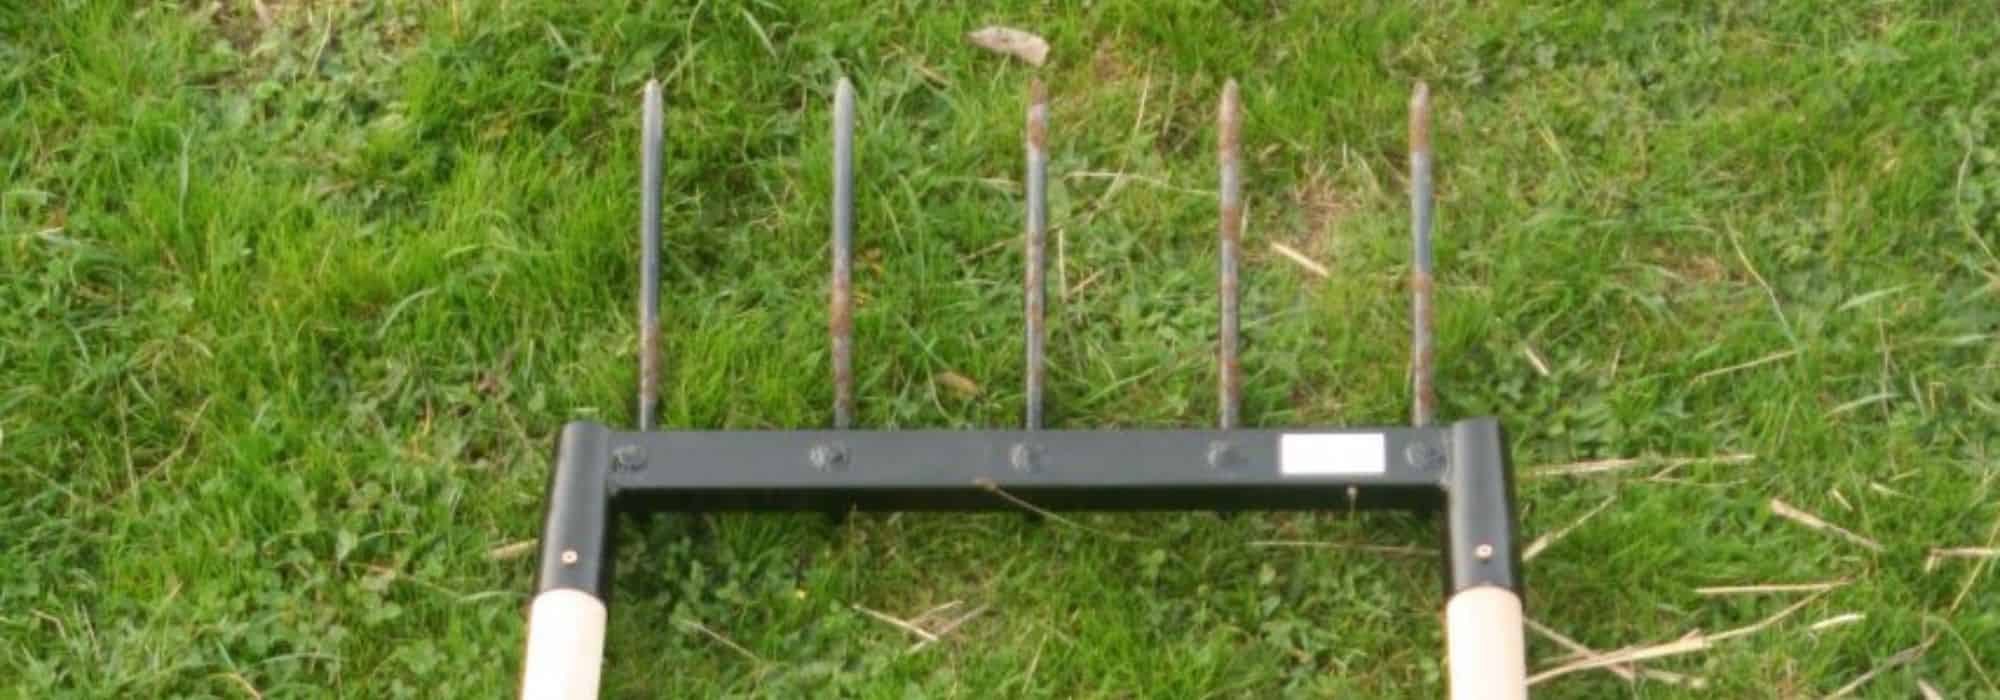
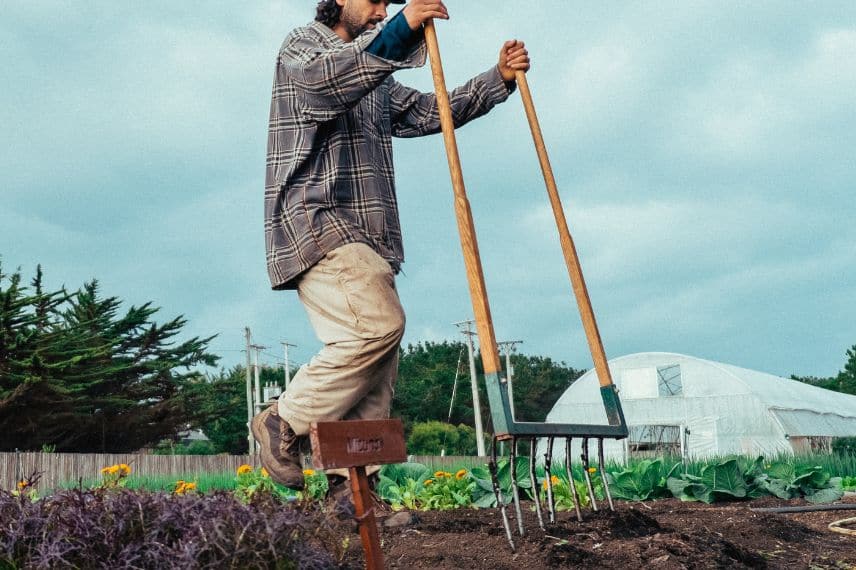
There’s one indispensable tool for a permaculture garden (and even traditional, in my view), and that is it: the biofork! Invented by André Grelin in the 1960s, it is also known as the bio-fork or aeration fork.
Composed of a handle or two (wood or metal) and a bar with several curved steel tines, the biofork is available in different sizes (3, 4, 5 tines, etc.). Choose it according to the size of your garden, your vegetable plot, but also its weight and manoeuvrability. For example, for a small vegetable plot or kitchen garden, a biofork with 3 or 4 tines is ideal; for a large vegetable plot, prefer a biofork with 5 tines or more.
Easy to use: simply push it into the soil with your feet and body weight, then lever it by pulling the handles toward you and/or away from you. It thus replaces the fork more efficiently and is easier to manoeuvre, as you exert less effort with your arms and your upper back.
The biofork enables deep soil aeration and loosening without turning it over in order to preserve soil life and microorganisms. It thus promotes soil biodiversity and preserves its natural fertility. By loosening the soil in this way, it also becomes much easier to work.
Personally, it’s the tool I use for everything in the garden:
- Want to loosen the soil in my vegetable plot before planting? I work with my biofork across the entire surface.
- Want to weed? One or two passes with the biofork and I remove clumps of stubborn weeds with their roots.
- Want to harvest potatoes and other tuberous vegetables? I insert the biofork beside the vegetables, a few back-and-forth motions and the vegetables are lifted from the soil.
- Want to plant a perennial, a bush or transplant a plant? I loosen the soil at the planned planting site, which makes digging easier afterwards.
Moreover, plants establish themselves more quickly when the soil is loose, decompacted and retains its microorganisms. Not to mention earthworms will thank you, and your back will too!
Also read: What is a bio-fork used for?
A large bio-fork for a large vegetable plot
The fork-spade: a complementary tool
The digging fork, smaller than the broadfork and often lighter, proves to be a versatile and highly useful tool in permaculture. Composed of a wooden or metal handle and four steel tines, it enables a wide range of gardening tasks.
To use the digging fork, drive it into the soil with your foot, then use your arms and body weight to lift and tilt the soil. This tool allows you to work efficiently even in heavy, clayey soils.
Like the broadfork, the digging fork helps decompact the soil, remove stubborn roots and aerate the soil without turning it over completely. It thus helps preserve the life of soil micro-organisms and our friendly earthworms. Its smaller size allows it to pass between vegetables, for instance to harvest leeks, carrots and potatoes, without disturbing adjacent plants. It is also ideal for preparing very small plots before planting, moving hay or manure and turning the compost heap.
When choosing a digging fork, opt for those with robust steel and an ergonomic wooden handle for better durability and comfort of use.
Also read: What is a forked spade or digging fork used for?
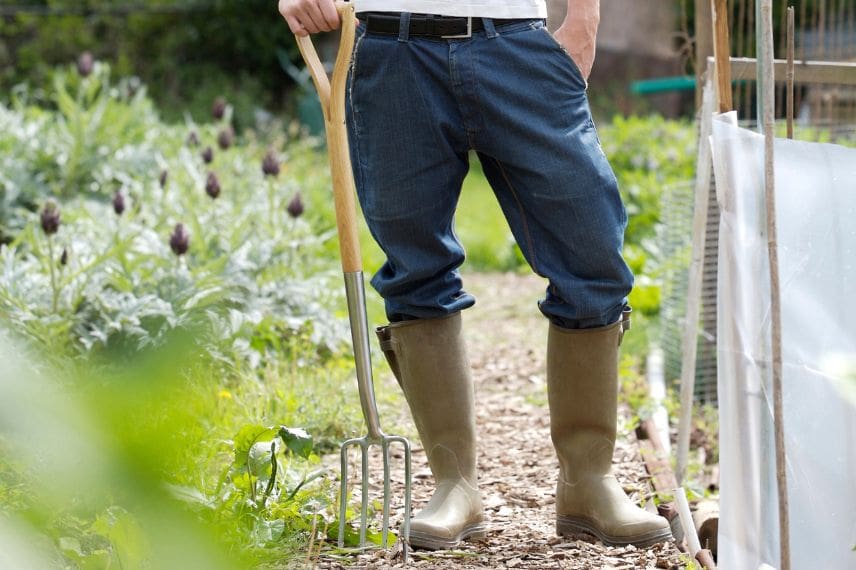
The digging fork
The rake: a classic and versatile tool.
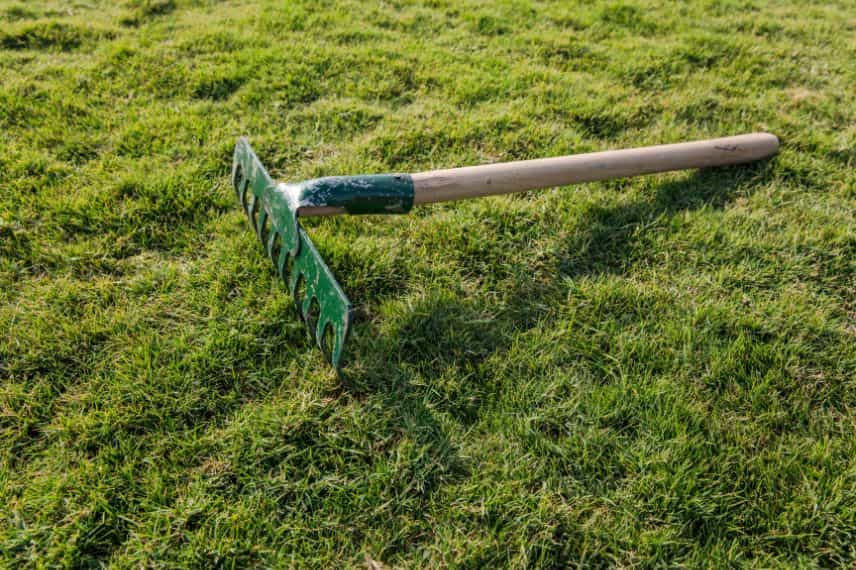
Here’s a more traditional tool: the rake! Certainly a classic, it also has a place in permaculture.
The rake allows the soil to be level before sowing, to refine the soil, to remove debris (stones, dead leaves, pruning wood, etc.), to spread the compost and to incorporate or distribute mulch. It is also useful for surface weeding on the surface, limiting the spread of unwanted weeds naturally. By lightly raking the surface, the rake aerates the soil, promoting the penetration of air and water, beneficial for the roots of plants.
Finally, in permaculture, raised beds are often used to improve drainage and soil fertility. The rake can be used to shape and level these well-known raised beds.
To choose the right rake, opt for a rake with fine-toothed teeth for delicate work and broad-toothed teeth for heavy tasks, such as for raised beds. Prefer metal rakes with a wooden handle, more robust over time and suited to all soil types, including heavy soils.
Also read: What is a rake used for?
Read also
Permaculture: the technique of swalesThe transplanting trowel: small holes all over
The dibber is a small hand tool, very useful in permaculture, for planting, pricking out and transplanting young plants and seedlings. It is usually made with a flat, pointed blade or spoon-shaped blade.
With it, you dig small holes (always small holes, as the song says) in the vegetable plot, in the ornamental garden, in pots, in flower beds and in the tight spaces of the garden. In short, everywhere! It also helps to retrieve well-rotted compost and, at times, to pull up unwanted roots wedged between two plants. It is also used to delicately divide perennial plants or those that spread by rhizomes or stolons.
As permaculture often involves dense planting and crop diversity, this tool enables precise and delicate work between the plants.
When choosing a dibber, opt for those with a stainless-steel blade and a wooden handle for greater durability. Avoid plastic ones (or give them to children) and those from discount stores that won’t last long.
Ingrid’s tip: before using the dibber to make a hole in a cleared area, I loosen the soil with my small hand cultivator or my digging fork to make the task easier.
Also read: Dibber, transplanting trowel: which tool to choose depending on use?
Pruning shears: for pruning and maintenance
Among the essential gardening tools, pruning shears are never far away! Compact and easy to handle, this hand tool is designed to tend your plants, prune, cut stems, fine branches and faded flowers with precision.
With it, you can easily prune shrubs, climbing plants, as well as harvest fruits, herbs and vegetables. The pruning shear makes clean cuts, without harming the plants, which aids their healing and thus reduces the risk of disease. It also allows removing dead or diseased branches, or those that cross, thereby promoting the health and growth of the plants.
The pruning shear is also used for taking cuttings or grafting your plants and shrubs. It is also used to cut green and brown waste into smaller pieces, speeding up their decomposition in compost or mulch.
When choosing a pruning shear, opt for a model with stainless steel blades for better durability and an ergonomic handle for more comfortable use. Prefer pruning shears with a safety lock to prevent them from opening accidentally in your pocket or hand. And for thick branches, there are branch cutters that are more suitable.
Ingrid’s tip: remember to disinfect your pruning shear to prevent the transmission of a disease from one plant to another. And remember to oil the blades regularly to prevent rust and maintain a clean cut.
Also read: Choosing the right pruning shear

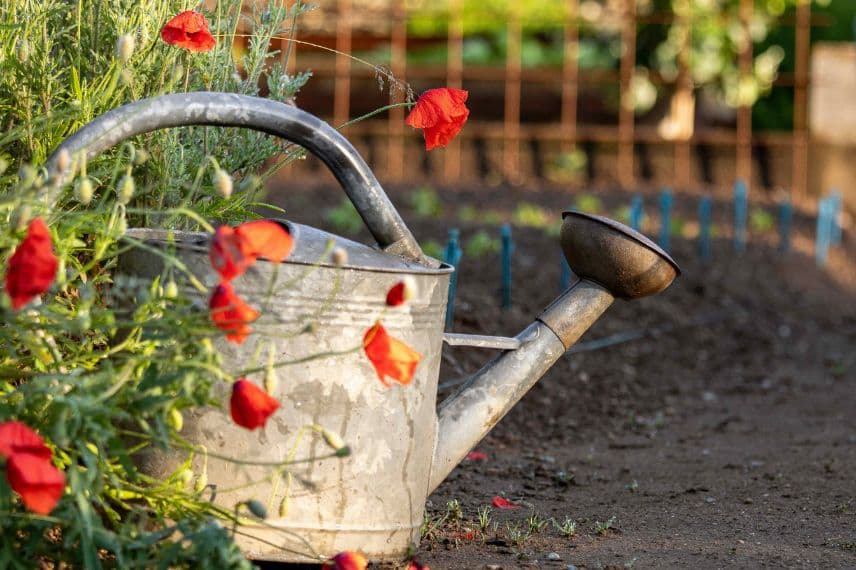
Watering can and irrigation systems
Granted, that may seem obvious, but if there is one thing to have in a permaculture garden, it’s this good old watering can! It will be useful for watering heavily your sowings, young trees and young plants. Especially during planting, during heatwaves or when rainfall is scarce. The watering can can also be used to apply compost tea or other manures and decoctions directly to the soil around the plants.
Choose one with a removable rose and small holes, perfect for sowings. Ideally, install rainwater harvesters at the level of your home’s downpipes, this will help you avoid using potable water.
You can also install oyas : these are terracotta pots buried in the soil, slowly diffusing water directly to the plant roots. Find, on this topic, Marion’s tutorial: Make a homemade olla to water the garden.
Other options: watering hoses with adjustable nozzles or drip irrigation systems. These reduce water waste by delivering water directly to the base of the plants, minimising evaporation.
Ingrid’s tip: Don’t forget to mulch the soil around the base of your plants; this will slow the evaporation of rainwater and keep the soil moist for longer.
Also read:
- Growing a vegetable garden without water: utopia or reality?
- Collecting rainwater: Why and how
- Drip irrigation: is it really the panacea?
And many more
Although we have covered the basic tools, which seem essential in permaculture, there are still many other tools that can make life easier in the garden. Compost bin, spade, weeding hoe, weeding knife, hoe, bulb planter, hand sickle and the like… It’s up to you to decide, depending on your needs, whether you’ll find them useful… or not.
Feel free to leave a comment with the indispensable tools in permaculture according to you and why.
- Subscribe!
- Contents

Comments